Getting Started with WPML
WPML is a translation plugin compatible with a range of KadenceWP products. In this guide, we’ll cover how to translate content built with Kadence using WPML.
Downloading WPML
To get started with WPML, you first need to buy a plan. For most websites, the CMS Multilingual should be sufficient: it includes all WPML features, lets you translate your website to as many languages as you want, and costs just €99 per year.
To get your WPML plan, head over to the WPML website.
Installing and Activating WPML
After purchasing WPML, go to your WPML Account and download the OTGS Installer – a plugin for configuring WPML on your site. Then, in your WordPress admin, go to Plugins → Add new and upload the OTGS Installer.
Once done, go to WPML → Setup Wizard to begin configuring WPML.
Setting up WPML
The WPML setup wizard includes a number of steps to configure WPML on your site.
During this short process, you can choose the languages you want to translate your website into, select a URL format, and provide context about your website.
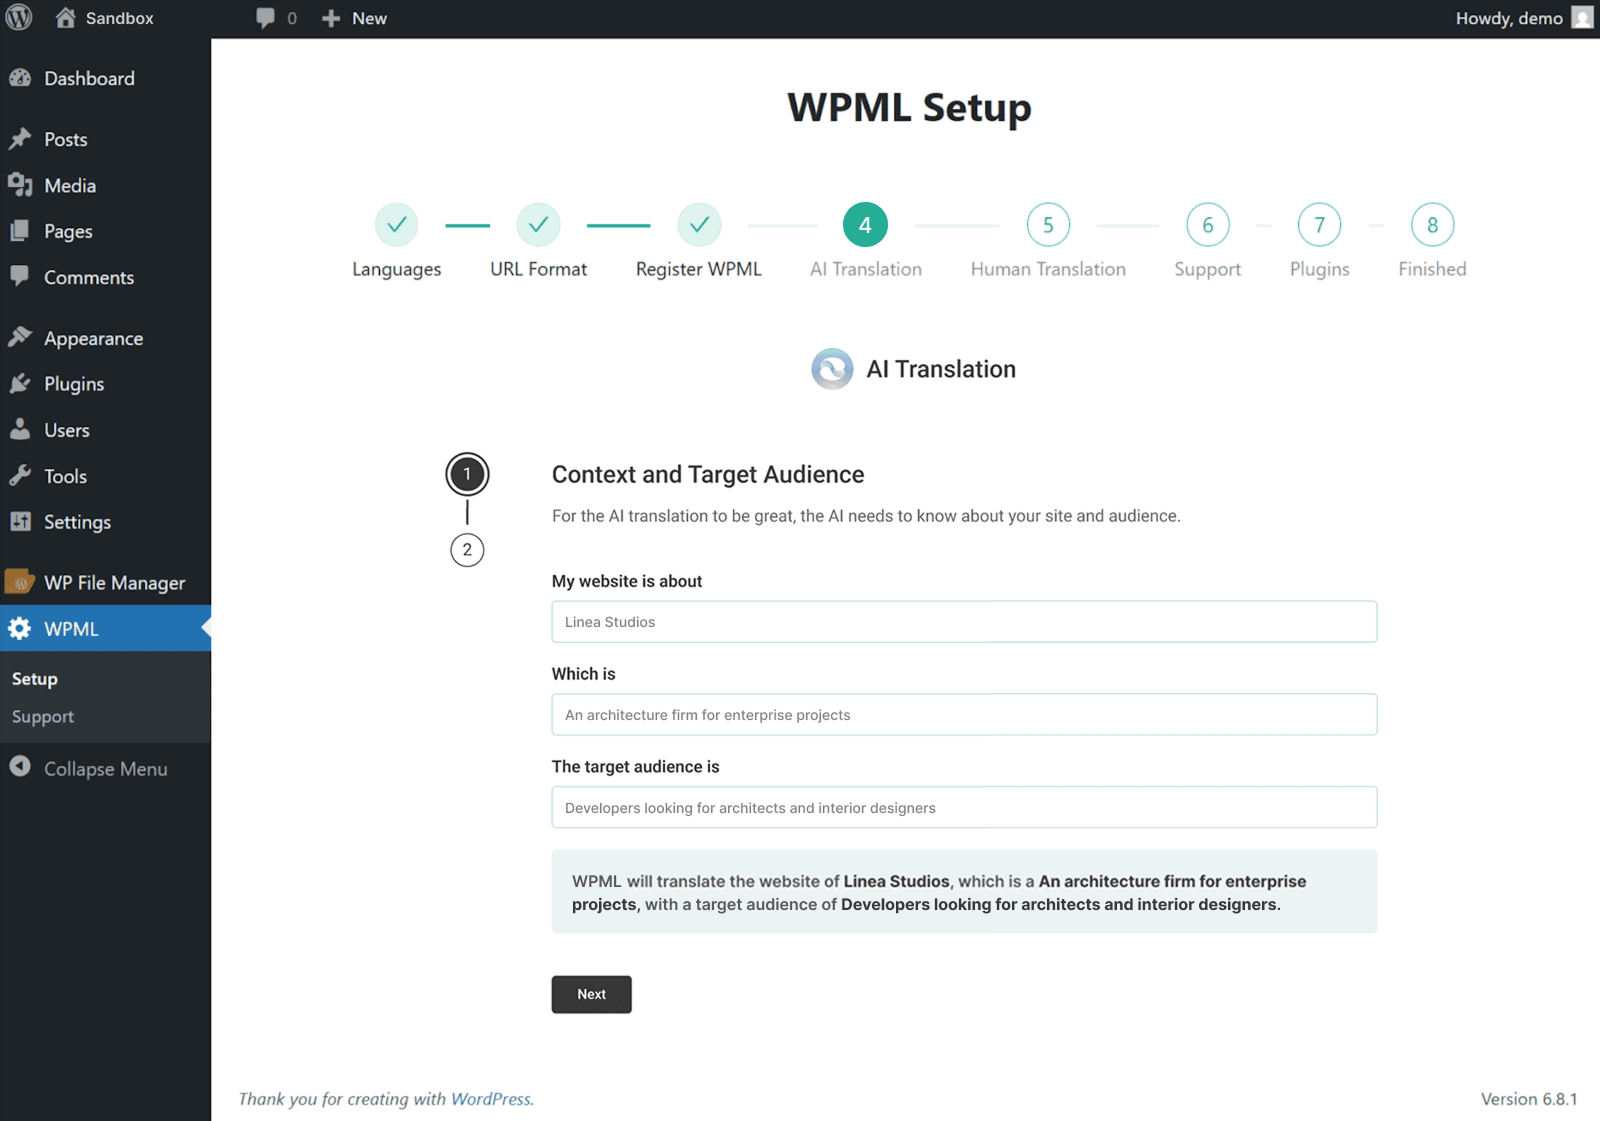
Using the context that you provide, WPML’s most accurate AI translator – Private Translation Cloud (PTC) will create translations that perfectly fit your target audience and industry.
PTC is like your own team of expert translators with a deep understanding of your content and niche. It’s WPML’s proprietary AI technology, and even includes a translation quality guarantee: If you’re not satisfied with PTC’s translations, you’ll get a full refund.
Once you complete the setup wizard, you’re ready to start translating your website.
Translating Kadence with WPML
To translate any Kadence content with WPML, go to WPML → Translation Dashboard and select the content you want to translate.
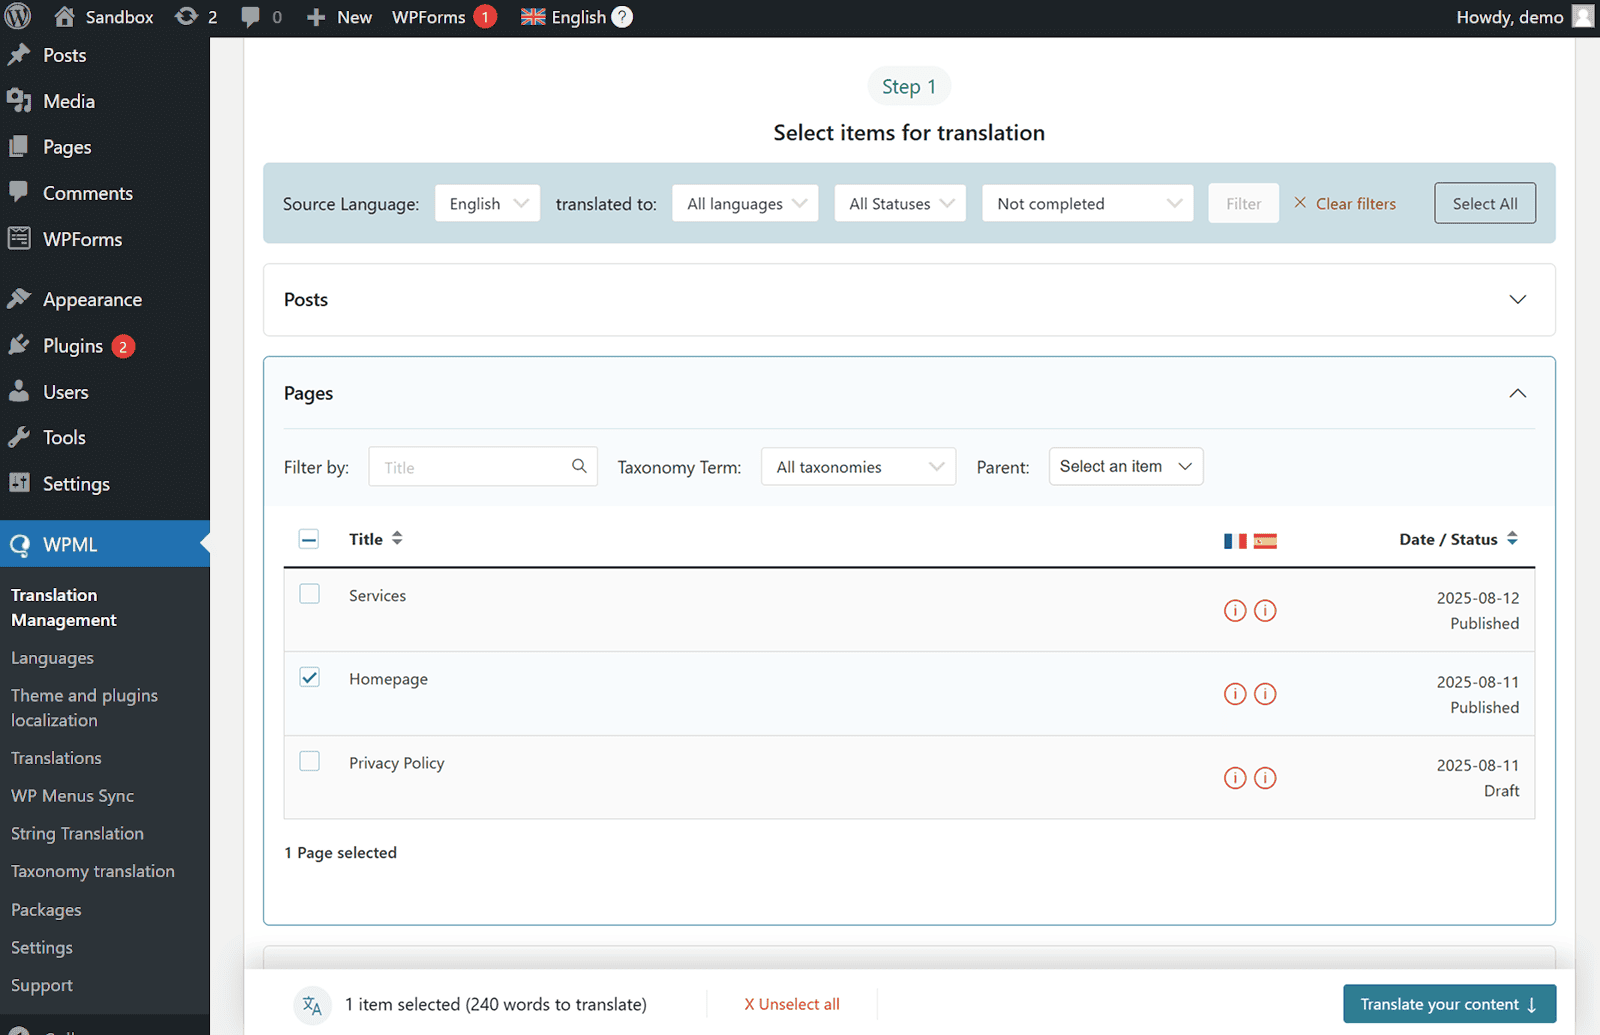
Next, choose your translation method. To get the best translations, we recommend automatically translating your website with PTC. If you look under the table, WPML also shows you how much translating your content costs.
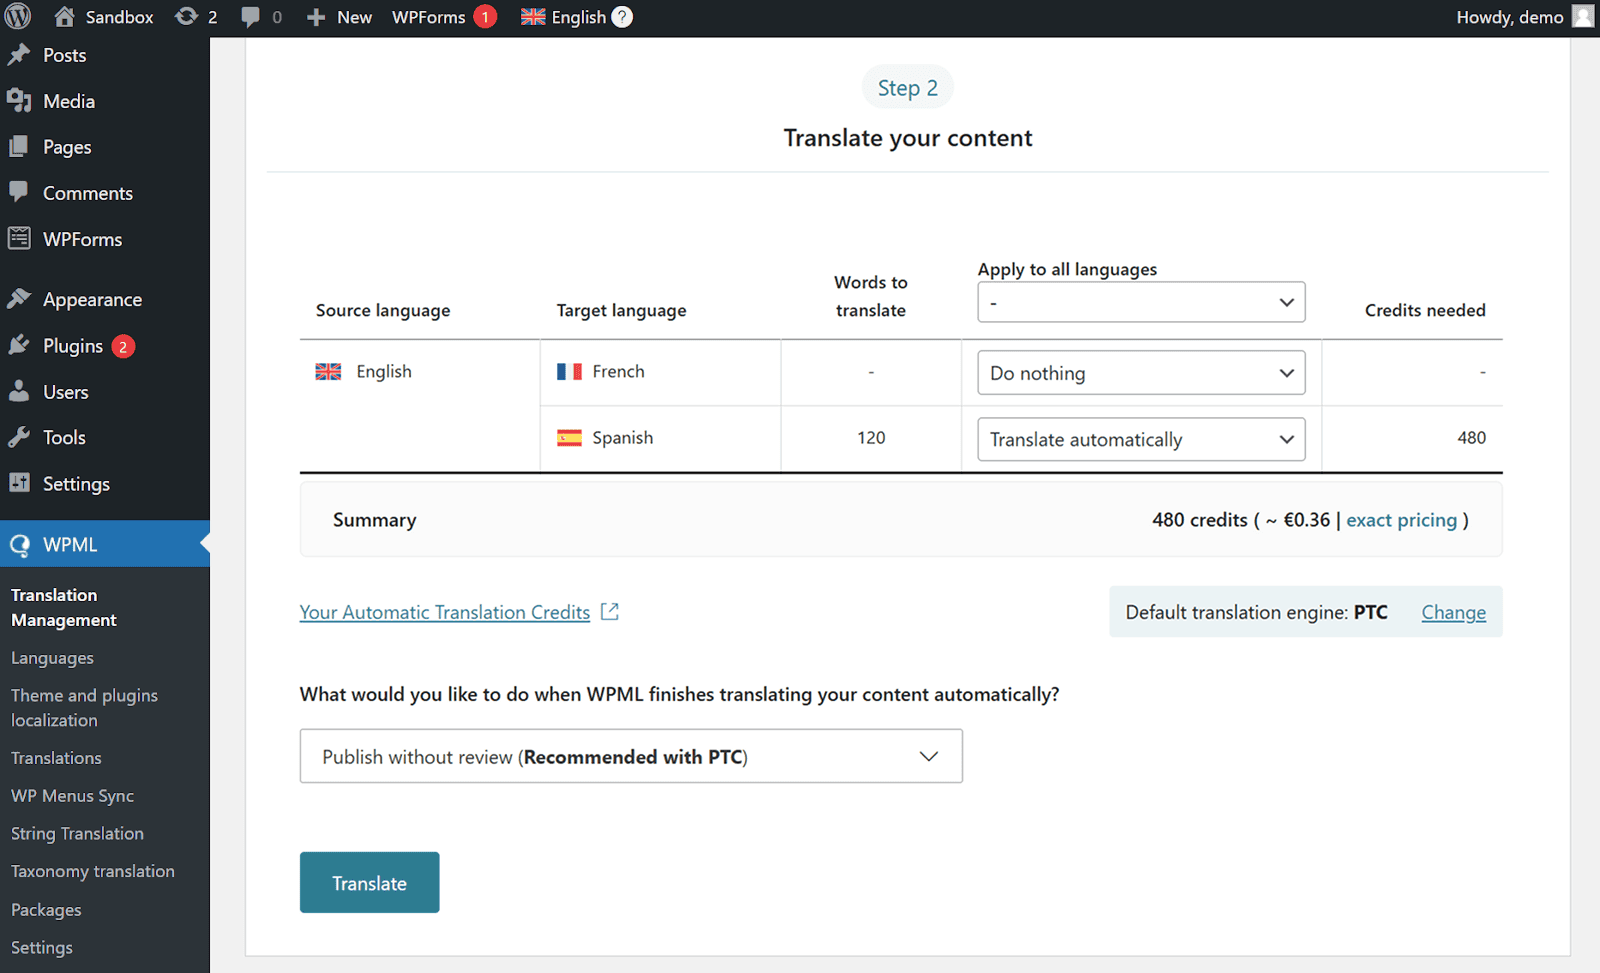
Finally, go to WPML → Translations to review your translations.
Since PTC can translate just as well as human translators, this step is optional, but recommended when automatically translating important content…
Once done, your translations will appear on your website when switching languages.
Can’t Translate Some Texts?
If you can’t translate some texts on your website, go to the Other Texts (Strings) section in the Translation Dashboard to search for them.
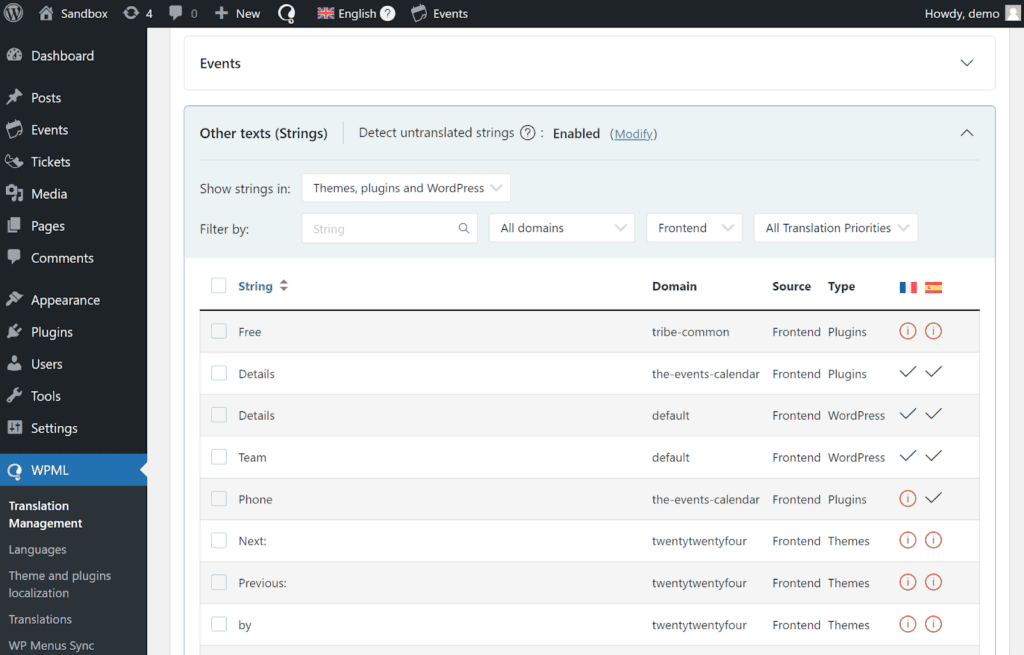
Once you find your texts, follow the same steps as previously covered to translate them.
If you still can’t find some texts, visit the page with your missing texts on the front end and switch languages. As you view the page, WPML will automatically identify your missing texts and populate them in the strings section.
Additional Resources
To learn more about translating your website with WPML, see the following guides:
- Adding a Language Switcher – a short tutorial covering how to add a language switcher to your website.
- Translating WooCommerce – WPML’s official guide for translating your store with WPML Multilingual & Multicurrency for WooCommerce, a free addon by WPML.
Create Your Website With KadenceWP Today!
Written by Hannah
Hannah Ritner is the product expert at KadenceWP. With over 10 years at Kadence, she’s worn many hats, but her main drive has always been helping customers reach their goals. Hannah loves empowering people and has been a key player in building the Kadence Community. She’s all about making a real impact for businesses and their customers.
By Hannah
Hannah Ritner is the product expert at KadenceWP. With over 10 years at Kadence, she’s worn many hats, but her main drive has always been helping customers reach their goals. Hannah loves empowering people and has been a key player in building the Kadence Community. She’s all about making a real impact for businesses and their customers.
Updated September 17, 2025
Create Your Website With Kadence