Best Practices for Image Sizes and Optimization in WordPress
Properly preparing your images before uploading them to WordPress helps create a polished, high-performing website. The right image sizes ensure your visuals look sharp while maintaining fast load times.
In this guide, we’ll explain WordPress’s built-in image handling, recommended image dimensions for different uses, and how to prepare your images for optimal performance. You’ll learn exactly how to size your images correctly before uploading and optimizing them for the web, whether you’re adding new images or working with existing ones.
Why does WordPress have image size limitations?
WordPress image size limitations protect both your site’s performance and your visitors’ experience. Instead of allowing unlimited image sizes that could harm your site, WordPress puts smart restrictions in place to prevent common problems.
These size limitations solve several critical issues:
- Storage capacity affects your hosting costs and site management. Without size limits, your media library could quickly consume all available space.
- Loading speed impacts how visitors interact with your site. Large, unoptimized images force browsers to download unnecessary data.
- Server performance depends on reasonable image sizes. When your server processes image uploads and displays them on pages, smaller files prevent resource drain.
- Backup processes run more efficiently with size-restricted images. Your scheduled backups complete faster and more reliably.
- Mobile browsing works better with properly sized images. Your visitors get a smooth experience regardless of their connection speed.
WordPress image size restrictions
WordPress comes with a set of default image sizes built into the system: thumbnail (150px square), medium (300px), and large (1024px). However, these defaults aren’t restrictions — you can upload images of any size. Here’s what we recommend for the best results:
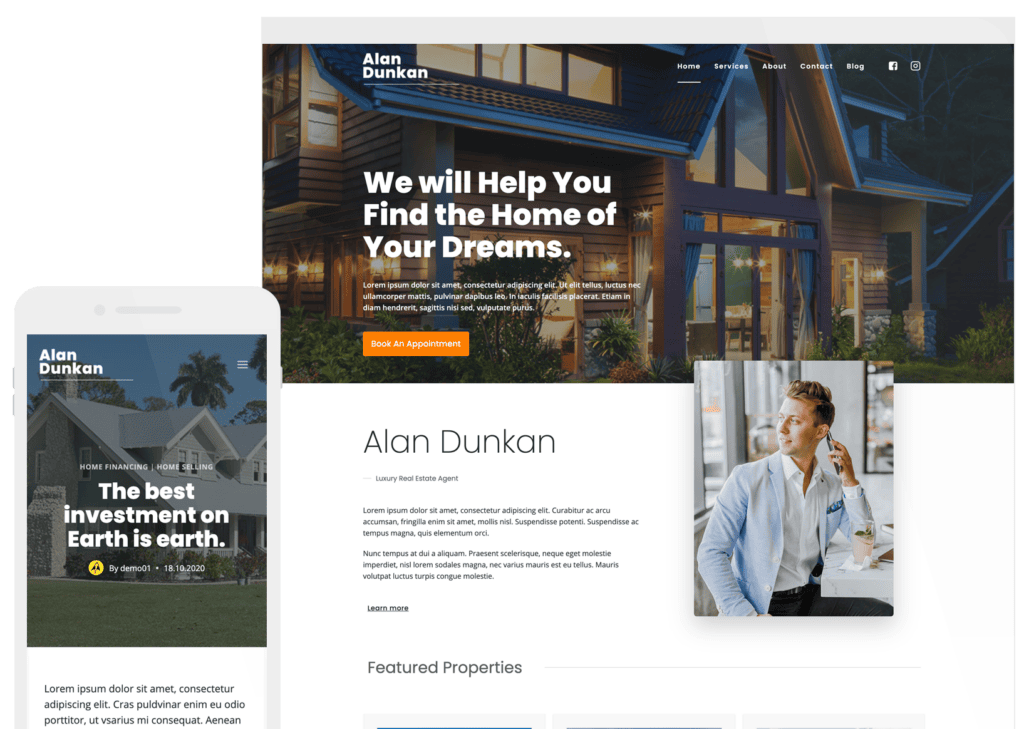
For standard images, aim for dimensions between 1600px x 1600px and 3000px x 3000px. WordPress will automatically create the right version for each visitor’s screen and layout.
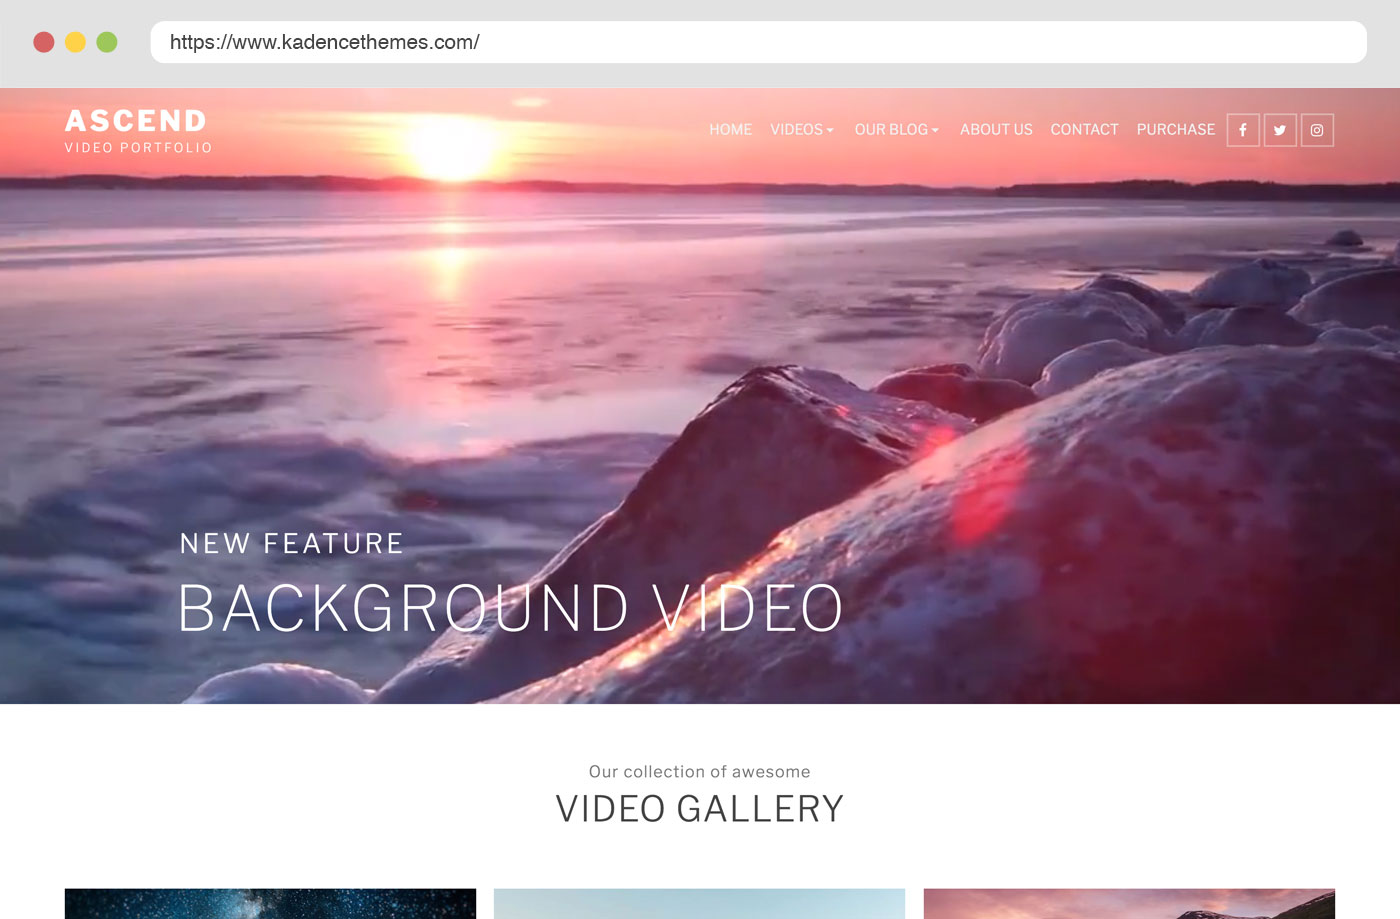
For full-width images, like those in your slider, use 2400px width to ensure crisp display across all screen sizes.
Pro tip: Upload your images at these larger dimensions, but make sure they’re compressed using a compression tool such as TinyPNG. This gives you professional-quality visuals without slowing down your site.
How to adjust WordPress image sizes
1. Find images you want to use
If you’re not much of a photographer, believe it or not, you don’t need to pay for an expensive service to access beautiful, high-resolution images for your site. If you are not aware of Unsplash.com, then you’re in for a treat! This site is used by professional designers and photographers around the world who wish to share their work for the internet to use, completely free of charge. If you’re looking for any particular images, the site is easy to navigate, and you can even create an account to save any images for future use. Check out m For more free image resources here.
2. Crop the image to the desired ratio
If you are limited on tools, you can easily crop images in Mac Preview by clicking and dragging over the part of the image you’d like to crop, then using CMND> K to crop the image. If you’re using a Windows device, you can crop an image within Paint. Those of you who have access to more advanced photo editors, such as Photoshop, should easily be able to crop the image within the application.
3. Resize and compress images
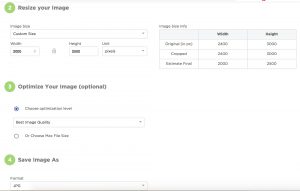
Again, if you do not have access to an advanced photo editor like Photoshop, you can use Mac Preview or Windows Paint to change the pixel dimensions. Navigate to Tools > Adjust, and there you can select your pixel dimensions and save. *Remember that your image sizes should be around 1600x1600px but not larger than 3000x3000px.
Another tool that we have come to love is imageresize.org. With it, you can upload your images in bulk and re-size and compress them all equally, and all from the same place! Click on “Bulk Resize” in the header, then upload your images.

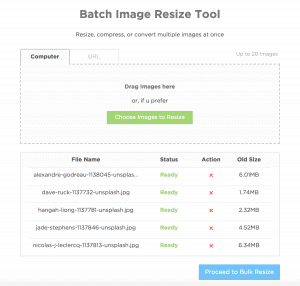
Next, you can re-size, optimize, and save. Just a few seconds later your newly sized and compressed images will be ready to download!
4. Upload your images
After downloading your compressed image or images, upload images to your site in the desired area.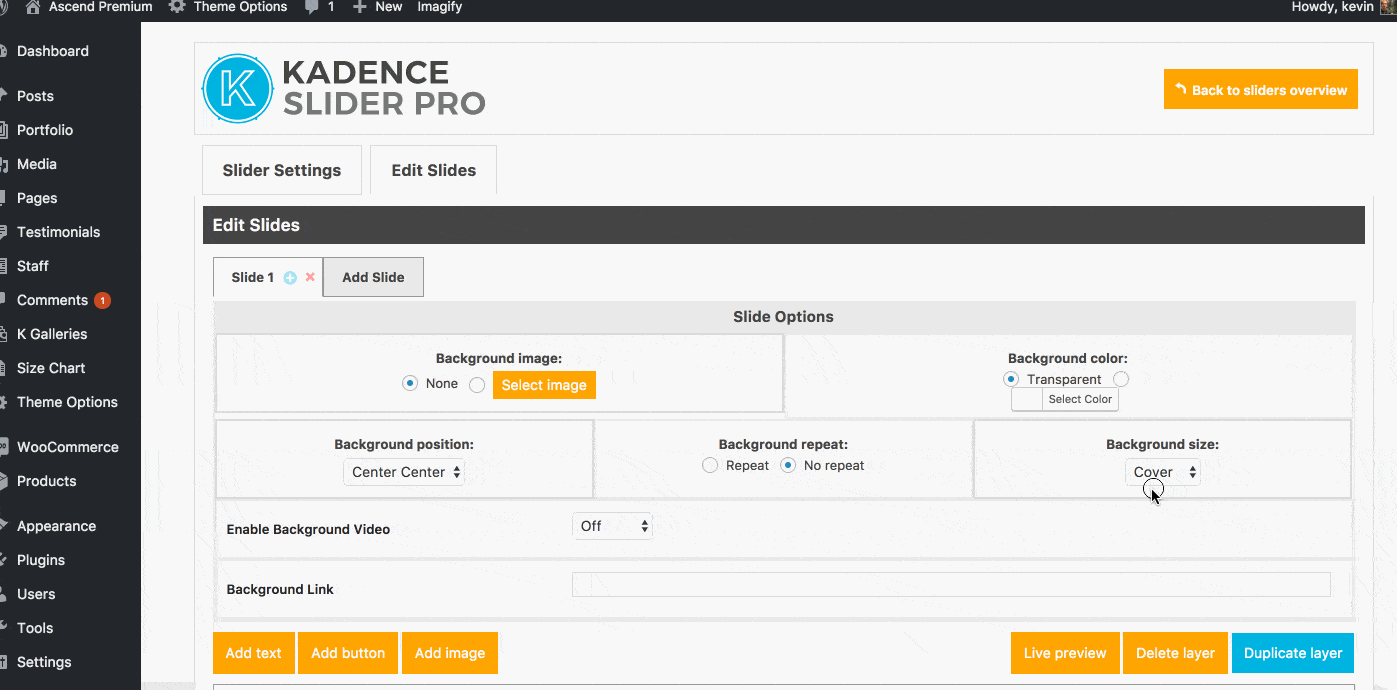
On-site optimization
If you have already uploaded images without doing the above steps, this can make a huge difference to your site speed and will save you from having to re-upload all your images. However, even if you have compressed prior to uploading, it is still valuable to install and use one of these plugins because they can optimize every version of your image that WordPress creates. When you upload an image, WordPress creates smaller versions of that image, and while these are all small, they all don’t have lossless compression applied. Using one of these plugins will help to find the smallest versions of each image and compress them for the web.
We recommend using Imagify or ShortPixel Image Optimizer. Both plugins require that you create a profile and add an API to your site. Both have free features to a specific point, so for larger sites with a lot of images, you will have to assess if it is worth it to you to pay more. For this tutorial, we’ll outline ShortPixel.
Configuring each plugin is quite simple. The first step for properly configuring either plugin is to first visit their respective websites, and register with a new account.
Once registered, find the API-Integration area in the drop-down menu, and copy the API:
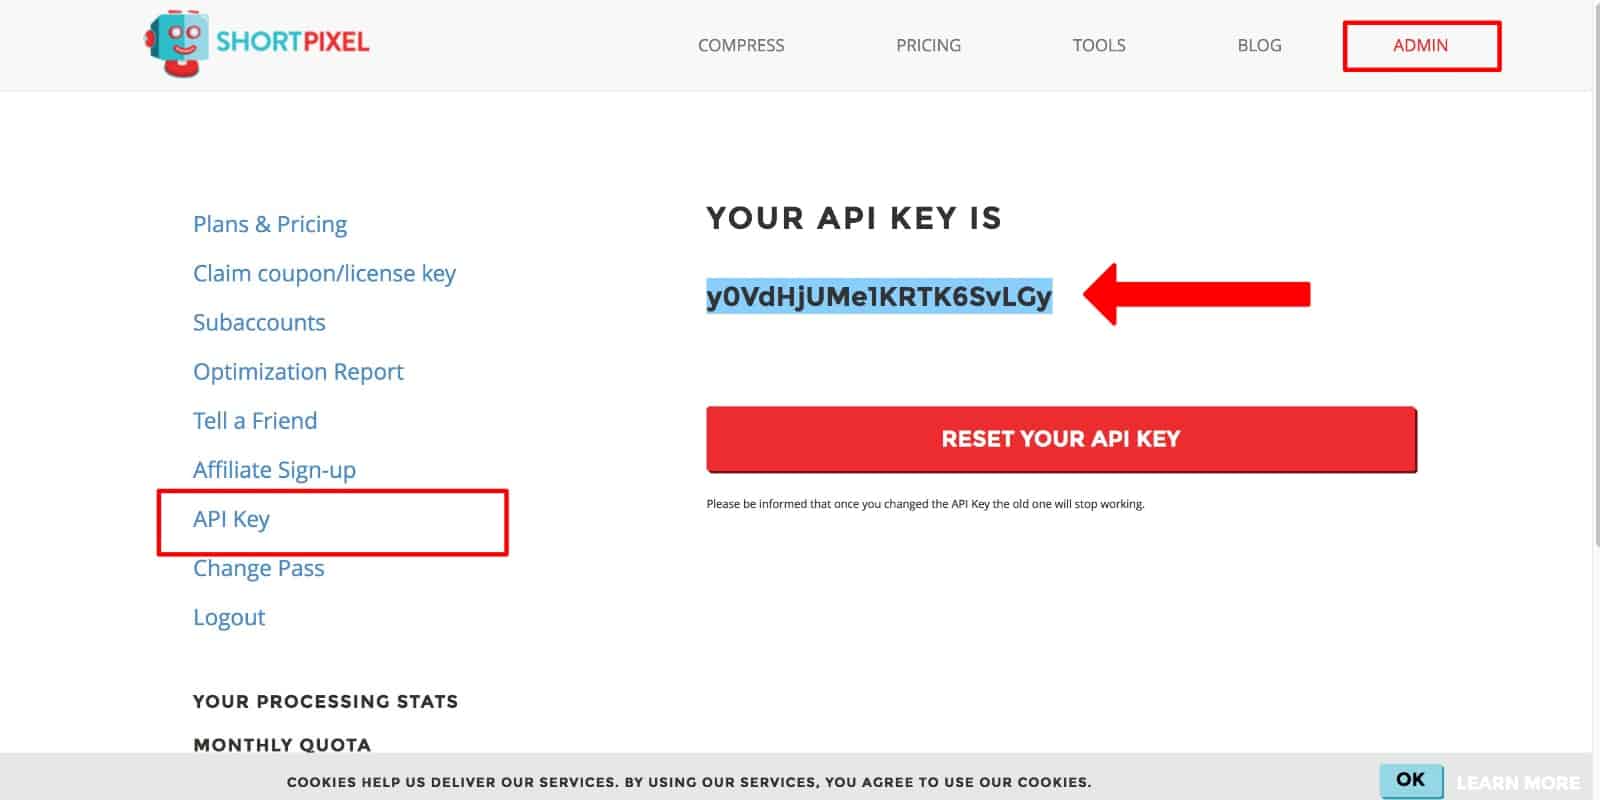
With the API key copied to your clipboard, return to your WordPress Admin, and place the API in ShortPixel:
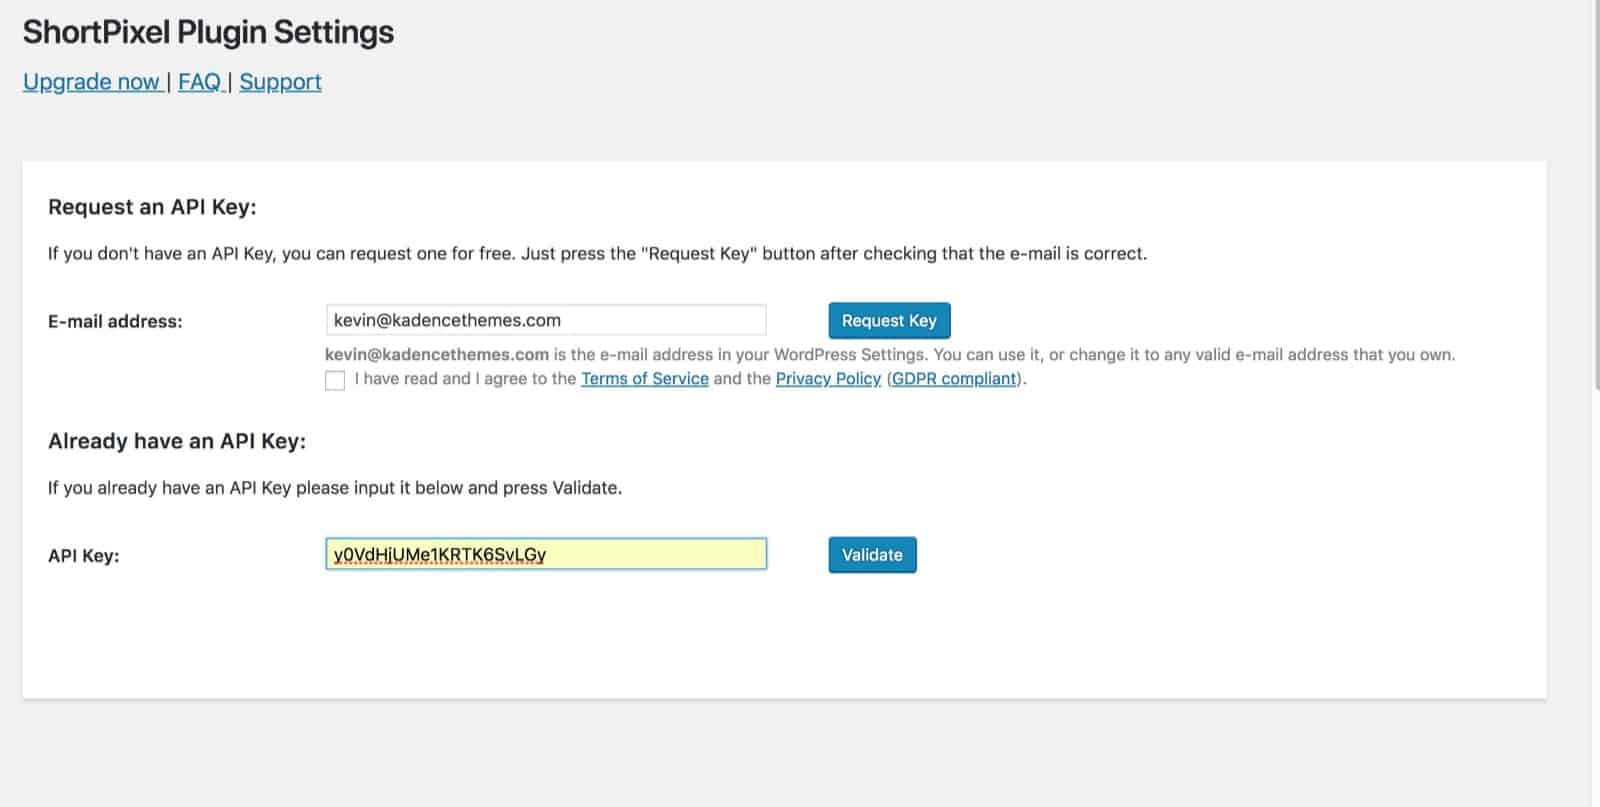
Once you have input the API for the respective plugin, then you need to get your site defaults set up. Fortunately, each plugin has a wizard that will walk you through the process of properly configuring your image settings. Among other options, you’ll have the ability to control the amount of compression the plugin will do to your thumbnails.
Both plugins have a bulk optimizer that will automatically optimize all the images on your site. In ShortPixel, find the Bulk Optimizer under the media in your admin area.

Once inside, set your Bulk Optimization settings, and click the “Start Optimizing” button. The Bulk Optimizer will do its work, and your images will be fully optimized!
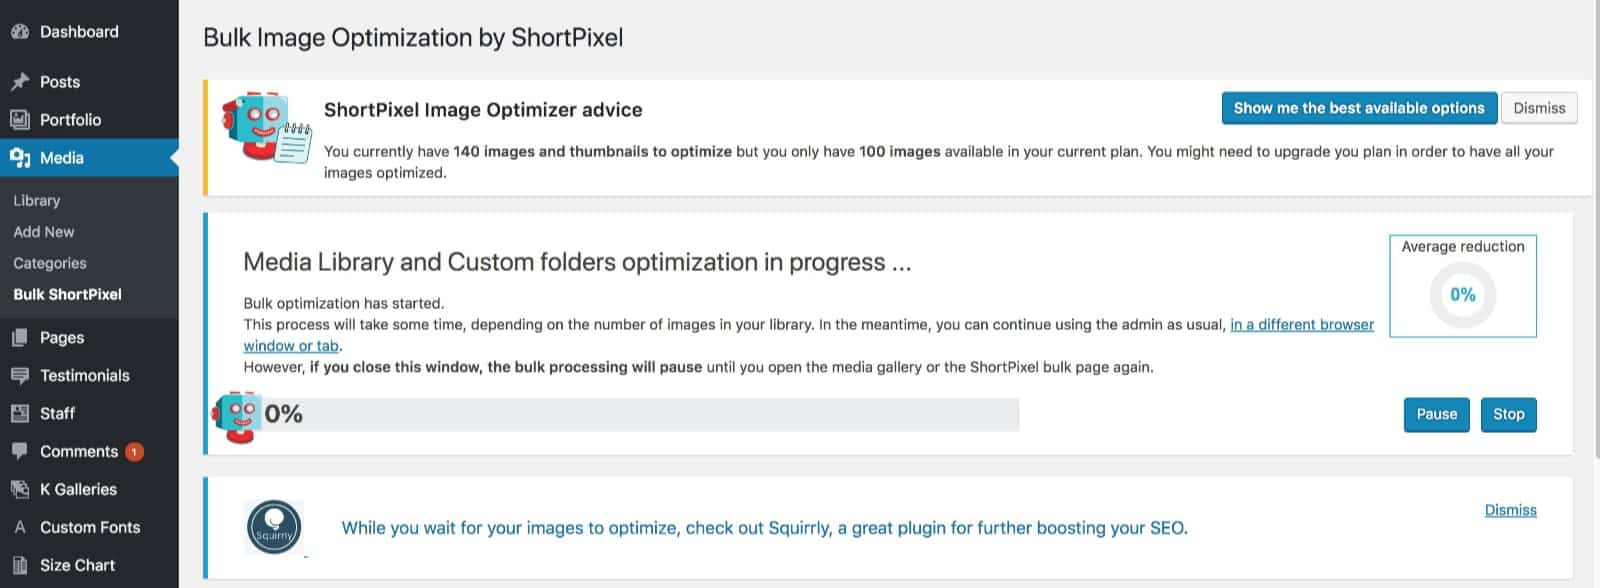
And just like that, your images are optimized! The image optimization will take a few minutes, so don’t be alarmed if the process isn’t finished instantly.
Enhance your images with Kadence Advanced Image Block
While proper sizing is essential, the Kadence Advanced Image Block helps you take your images further. Available in the free Kadence Blocks plugin, this tool lets you:
- Add animations that trigger on scroll.
- Apply shadows and masks for visual interest.
- Use filters to adjust image appearance.
- Control spacing and borders without code.
- Customize how images display on different devices.
Simply install the Kadence Blocks plugin, and you’ll find the Advanced Image Block in your block editor whenever you’re ready to enhance your images.
Transform your WordPress site with optimized images
Your site’s image quality directly impacts how visitors perceive your brand. Properly sized images load faster, look sharper, and create a more professional experience for every visitor.
By following these image size guidelines — 1600px x 1600px to 3000px x 3000px for standard images and 2400px width for full-width sliders — and combining them with compression, you’ll create the perfect balance of quality and performance.
Ready to take your WordPress site to the next level? Pair your optimized images with Kadence’s lightning-fast theme and blocks. Our performance-optimized tools work seamlessly with properly sized images to create websites that look amazing and load incredibly fast.
Create Your Website With KadenceWP Today!
Written by Hannah
Hannah Ritner is the product expert at KadenceWP. With over 10 years at Kadence, she’s worn many hats, but her main drive has always been helping customers reach their goals. Hannah loves empowering people and has been a key player in building the Kadence Community. She’s all about making a real impact for businesses and their customers.
By Hannah
Hannah Ritner is the product expert at KadenceWP. With over 10 years at Kadence, she’s worn many hats, but her main drive has always been helping customers reach their goals. Hannah loves empowering people and has been a key player in building the Kadence Community. She’s all about making a real impact for businesses and their customers.
Updated March 6, 2025
Create Your Website With Kadence