Virtue Premium Header Styles
Creating a site often starts with the header and with Virtue there are several built-in options for having different header styles.
Header Styles
Standard Style

Standard Style with a secondary menu

Standard Style with widget area

Standard with Center Logo and menu below

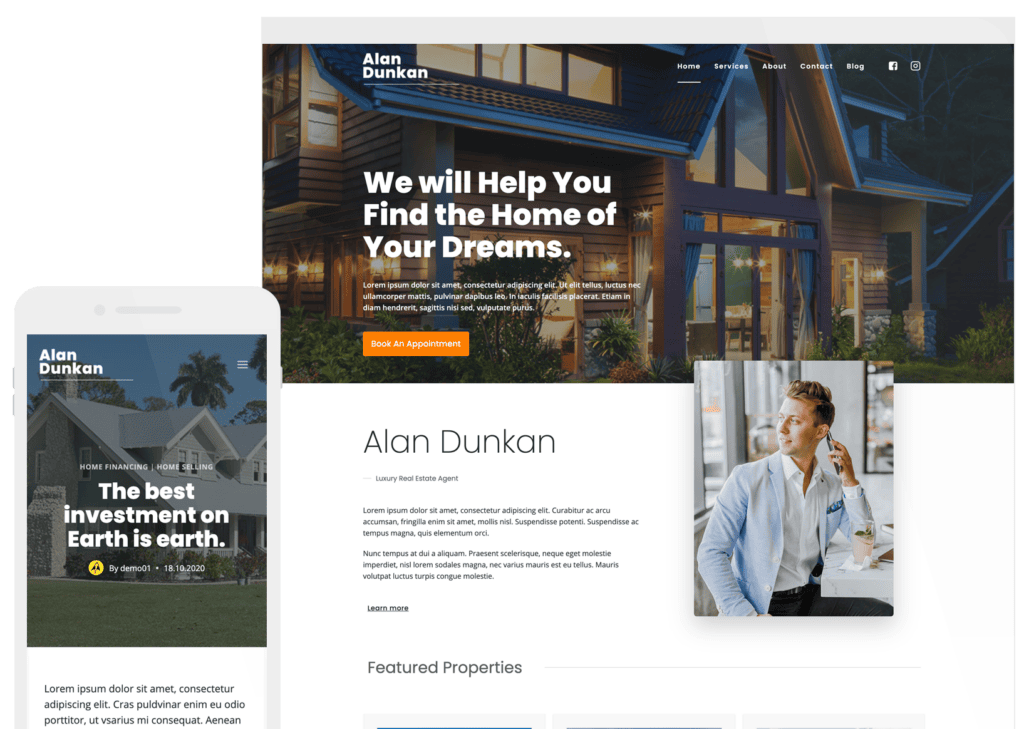
Basic Style with shrink

When you scroll down turns to

* This style doesn’t have a secondary menu option.
* With this style the topbar is optional.
Center Logo Style Menu Items Beside
* Note the left menu is the primary menu and the right menu is the secondary menu. The header is set with two menus.
* With this style the topbar is optional.
Changing the options
Setting the header style
From within the admin go to theme options > main settings. Scroll down till you see “Header Style” there you can “Choose a Header Style” and enable options like a sticky header.
Adding a logo
From within the admin go to theme options > main settings. There scroll down till you see “Logo Options”.
There you can control the logo layout (*if using the standard header style).
Next you can upload a logo one standard and one retina image (image should be twice as large as your standard logo).
If you do not have a logo the theme will automatically use your sites name. (set in the settings > general).
You can style the site name in your theme options > main settings > “Sitename Logo Font”.
Spacing around your logo is controlled just a little further down the page.
Adding a tagline
*Note this is only for standard header style.
From within the admin go to theme options > main settings. There scroll down till you see “Site Tagline – Below Logo”. You can add a tagline there and right below style the font you would like to use.
Adjusting the Logo Layout
*Note this is only for the standard header.
In your theme options > main settings, scrolling down to the logo options you can use one of the four options you can determine where your logo is placed as well as the menu.
Adding a menu
For a tutorial about adding a menu and the menu options see this post.
Create Your Website With KadenceWP Today!
Written by Hannah
Hannah Ritner is the product expert at KadenceWP. With over 10 years at Kadence, she’s worn many hats, but her main drive has always been helping customers reach their goals. Hannah loves empowering people and has been a key player in building the Kadence Community. She’s all about making a real impact for businesses and their customers.
By Hannah
Hannah Ritner is the product expert at KadenceWP. With over 10 years at Kadence, she’s worn many hats, but her main drive has always been helping customers reach their goals. Hannah loves empowering people and has been a key player in building the Kadence Community. She’s all about making a real impact for businesses and their customers.
Updated July 22, 2024
Create Your Website With Kadence