All of the Kadence Plans give you access to the Kadence Custom Fonts Plugin. You can upload custom font files to your website or import your Adobe Type Kit Project fonts directly to your Kadence website with ease. The Custom Fonts plugin is available in the Express Plan and greater. You can click here to view our plan pricing.
Kadence includes built-in support for Google Fonts in both the free Kadence Theme and the free Kadence Blocks plugin. The Kadence Custom Fonts solution is for fonts that are not included in Google Fonts.
Get the Kadence Custom Fonts plugin
- You can download the Kadence Custom Fonts plugin by logging into your Kadence Account and navigating to your Product Downloads page.

- From your WordPress Dashboard, navigate to Plugins → Add New → Upload Plugin.
- Find the Custom Fonts ZIP file, install it, and then activate it.
Upload Your Font
To upload your font, go to Dashboard → Appearance → Kadence → Custom Fonts and click the Add A New Custom Font button.
The Custom Fonts plugin allows you to upload variable fonts, but they will be treated as static fonts. You must select a single weight when uploading, and only that weight will be available for use. To use multiple weights, you can create separate custom fonts for each, but they will not function as a variable font.
Ensure the font you want to use is downloaded and ready.
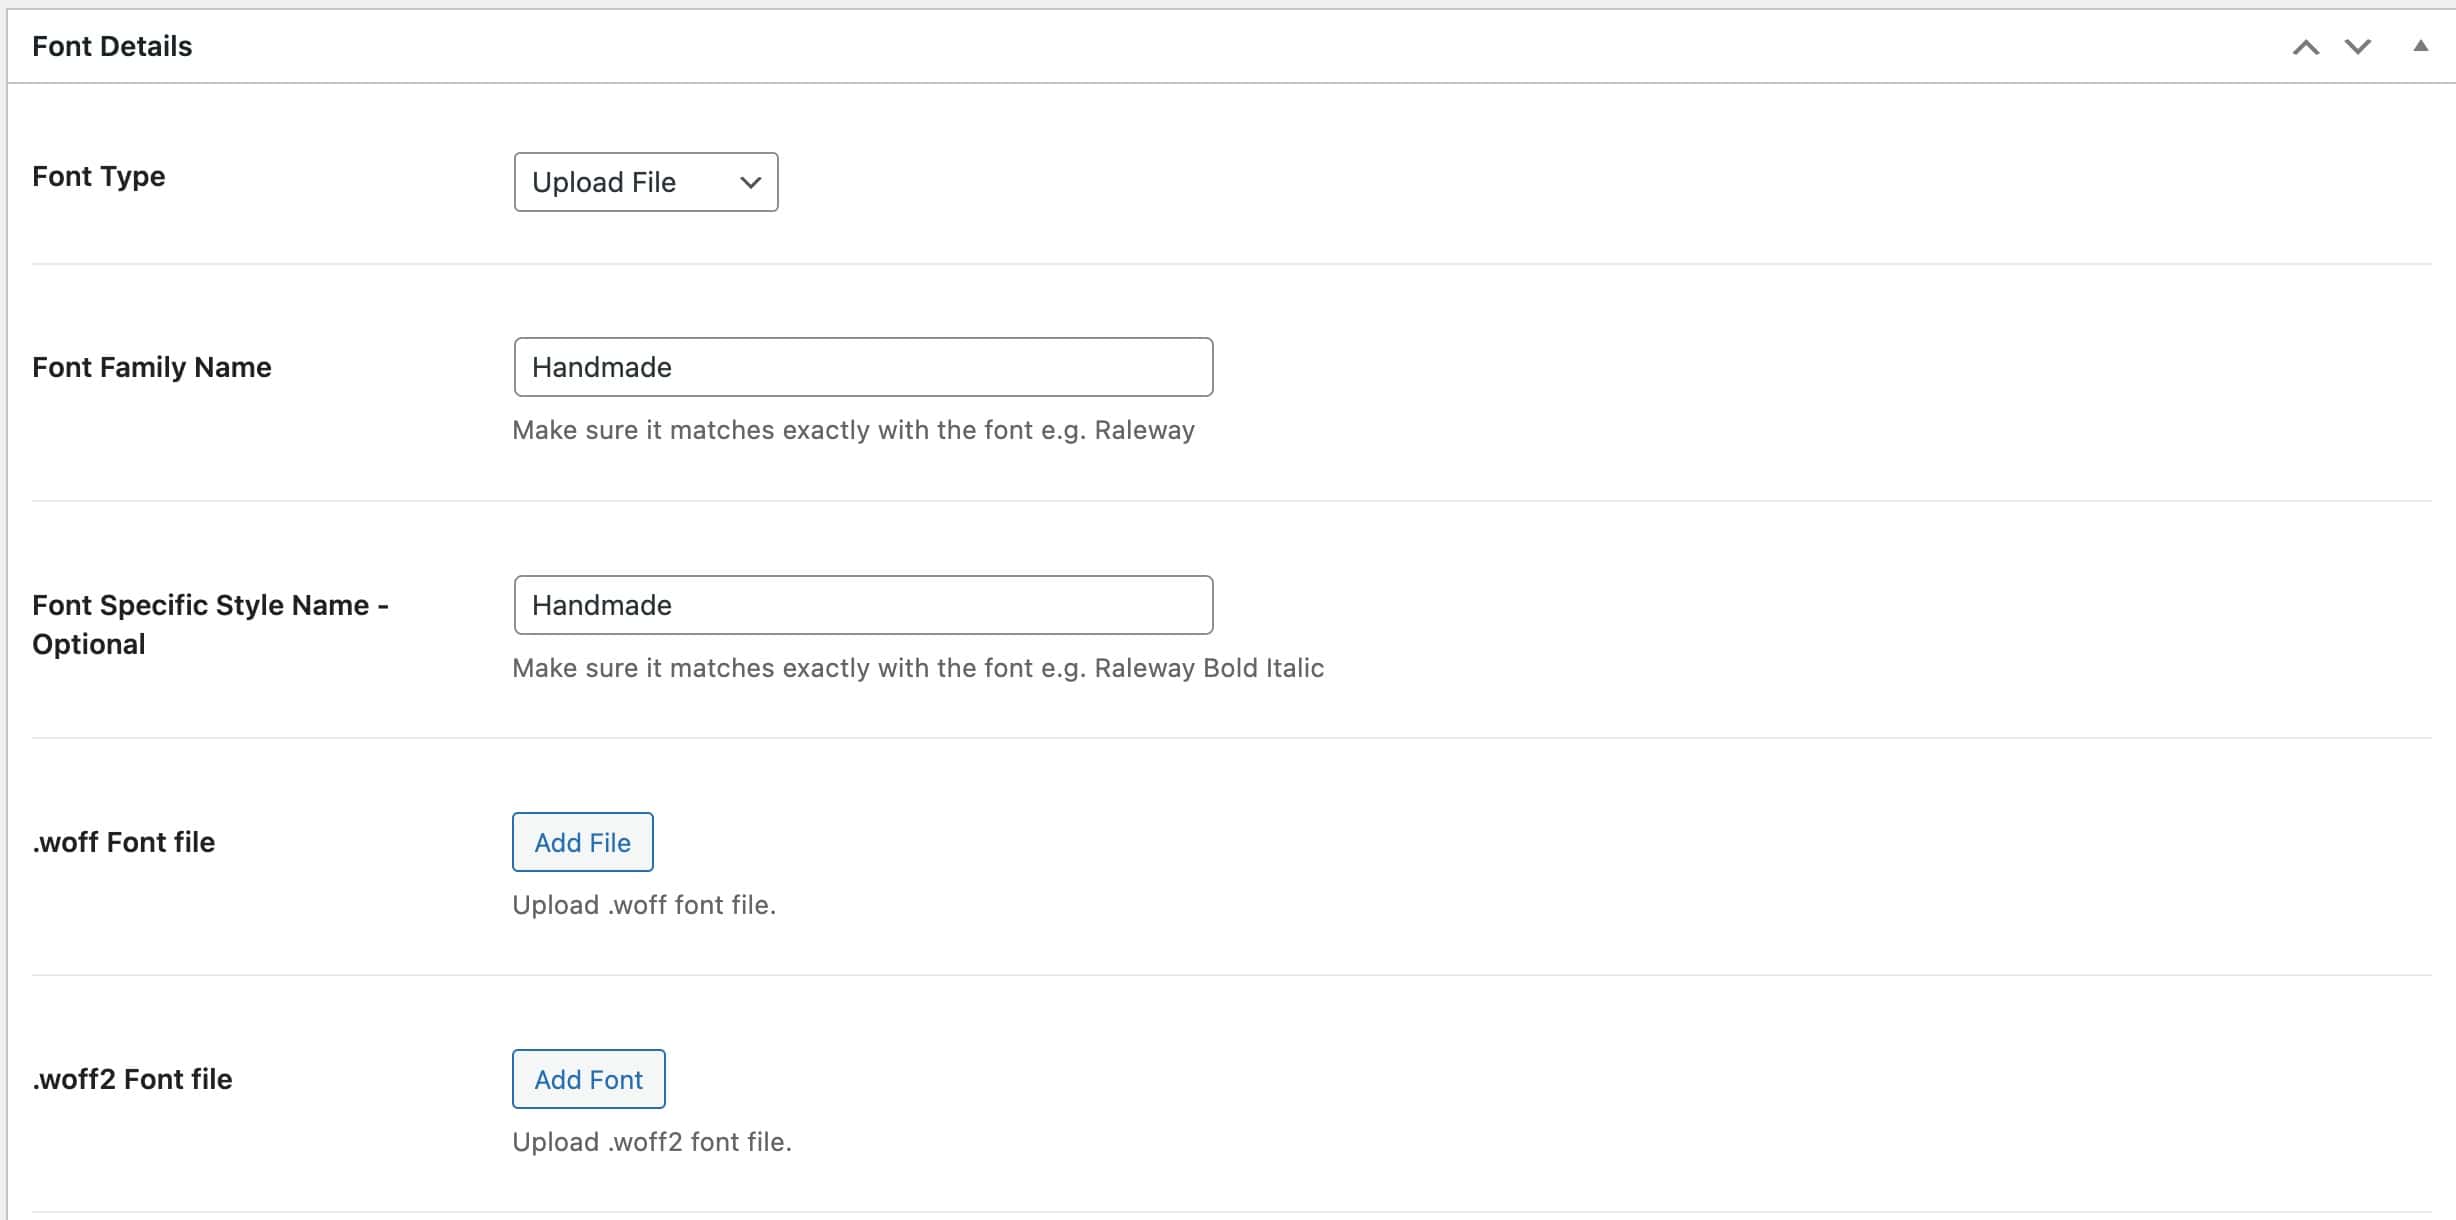
Font Type: Select Upload File.
Font Family Name: Specify the name of the font.
Font Specific Style Name: (Optional) If you do not know what this is, you can leave it blank.
Add files: upload the .woff and .woff2 font files.
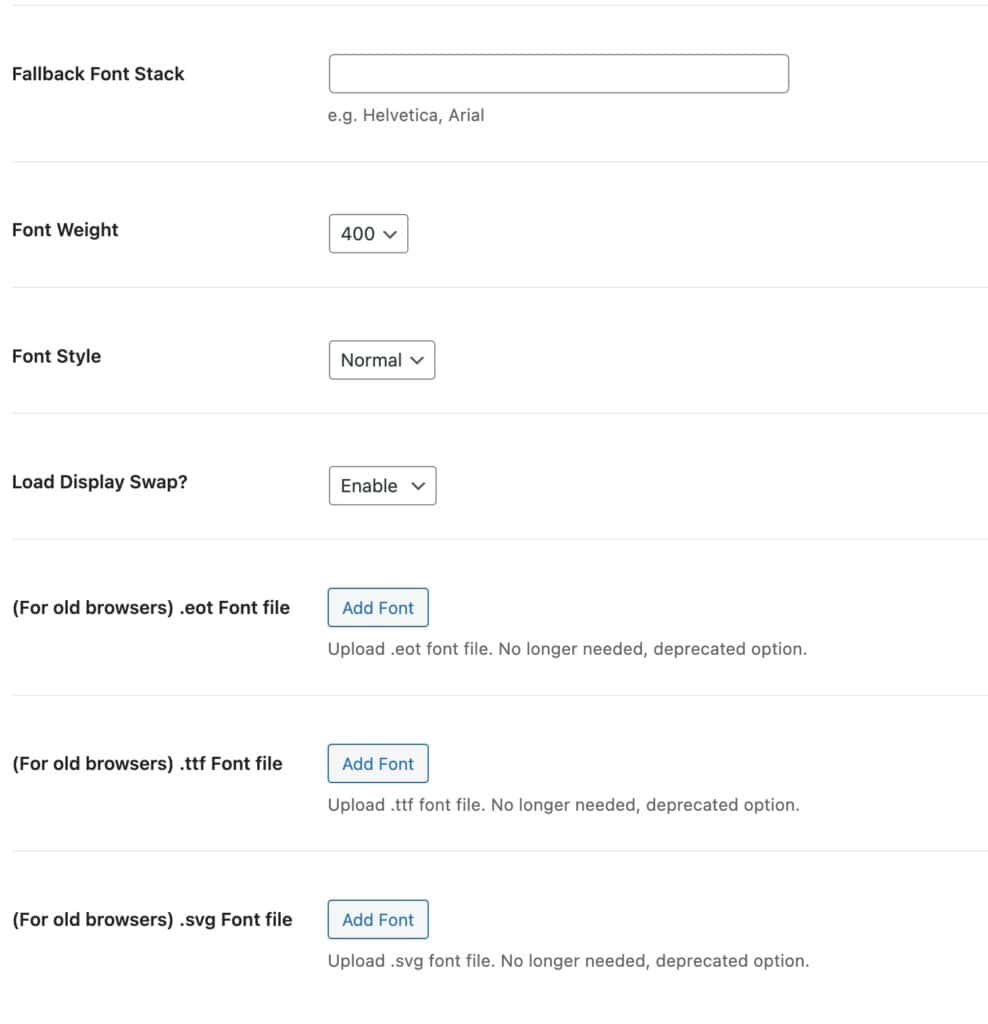
Fallback Font Stack: Setting a fallback font is recommended. You can use serif, sans-serif and/or common fonts such as Helvetica or Arial. Separate multiple fonts with a comma.
Note: if you are going to use a fallback font with spaces and numbers in its name, wrap the name in quotes (e.g., ‘Source Serif 4’)
Font Weight: Set the weight for your font (i.e. 400, 600, etc…)
Font Style: Set the font style (i.e. normal or italic)
Load Display Swap?: Enable to use the fallback font to display text until the custom font has fully downloaded (recommended).
OPTIONAL: you can upload the EOT, TTF, and/or SVG versions of the font.
Once you publish your new font, it will be available in your Kadence theme and block settings.
Adobe TypeKit Fonts
To use Adobe Fonts in Kadence Pro, you must have an active Adobe Creative Cloud subscription (see Adobe Creative Cloud).
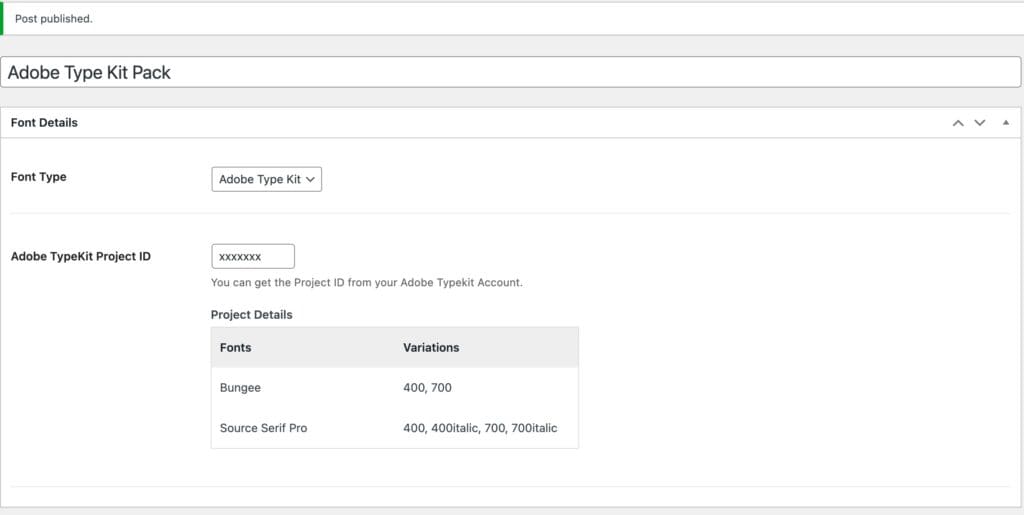
To add your Adobe Web Fonts, go to Dashboard → Appearance → Kadence → Custom Fonts and click Add New Custom Font. When adding a new custom font, the first option is Font Type. From the dropdown menu, select Adobe Type Kit. You can learn more about adding fonts to your website using Adobe TypeKit here.
Next, you’ll be prompted to enter your Adobe TypeKit Project ID.

You can find your Project ID on the Adobe Web Fonts website. Your web project, and all the fonts you’ve added to it, will be listed under Manage Fonts. Locate your project and click the Edit Project button. You should see the Project ID listed along the top next to the project name.

Once you’ve added the Project ID, publish the new custom font. The Custom Fonts Plugin will import all of the fonts and variations included in the Adobe web project.
Your Adobe Web Fonts can now be used in your Kadence theme and block settings.
Note: When using Typekit (Adobe Fonts) with Kadence Custom Fonts, variable fonts are treated as static. Only the weights and basic styles (like regular, bold, or italic) are recognized. Other axes, such as width or slant, are not imported and cannot be adjusted.
East Asian or CJK (Chinese, Japanese, Korean) TypeKit fonts
If you are using Custom Fonts for Chinese, Japanese, or Korean (CJK) languages, you may find that the fonts do not display correctly on your site. This is often because CJK fonts require a specific language-related script to render properly.
Currently, the Kadence Custom Fonts plugin does not automatically add this script. To ensure your CJK fonts work as expected, you will need to add the following script to your site.
In your Adobe Fonts project, there is an additional script to add for your CJK fonts:

How to Add the Required CJK Script
First, copy the script from your Adobe Fonts account.
Add this script using the Kadence Theme Kit Pro’s Custom Scripts feature. Add it to the “Add scripts into your footer” option.
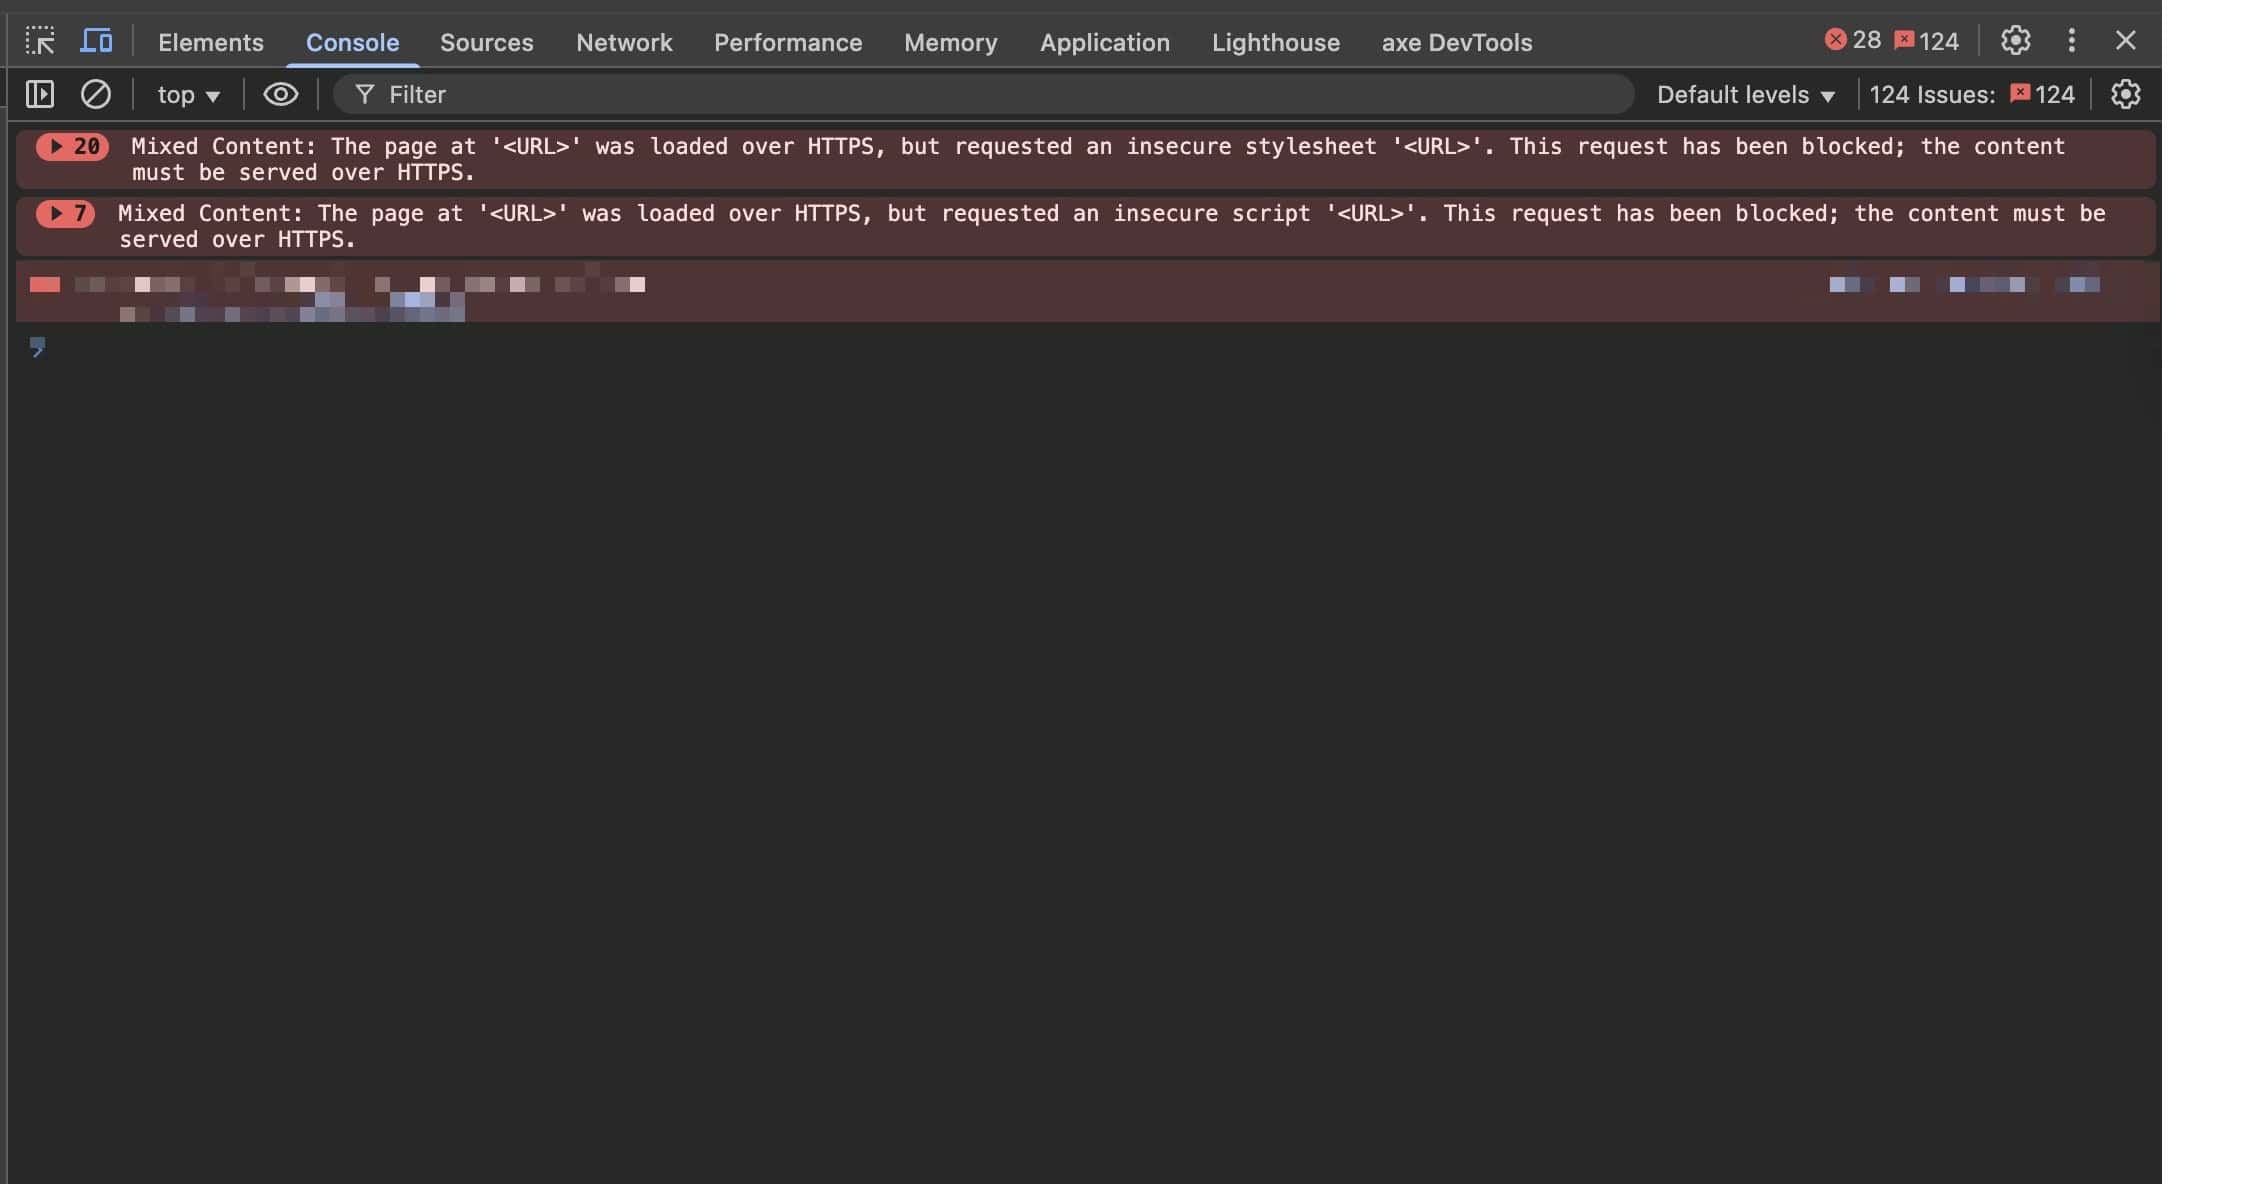
Fixing Mixed Content Errors
In rare cases, you may run into Mixed Content Errors. If you run into a mixed-content-related error, refer to the Fixing Mixed Content Errors in WordPress document.