
Kadence Shop Kit adds a checkout manager to WooCommerce. If you wish to add any custom fields to your checkout page, this plugin makes it a breeze.
To get started, be sure that you’ve purchased a Plan with access to Kadence Shop Kit, or have purchased the plugin separately here: Kadence Shop Kit.
Note: WooCommerce checkout pages can use the Checkout block for Gutenberg or the [woocommerce_checkout] shortcode. Custom fields created with Kadence Shop Kit will not appear when using the Checkout block. You must add your checkout using the shortcode to see the custom fields you create.
1. Navigate to Dashboard > Shop Kit and click Checkout Editor.

2. Enable the Checkout Fields Editor:

3. Navigate to WooCommerce> Checkout Manager

4. Choose the field set that fits your needs. The options available are Billing Fields, Shipping Fields, and/or Extra Fields.

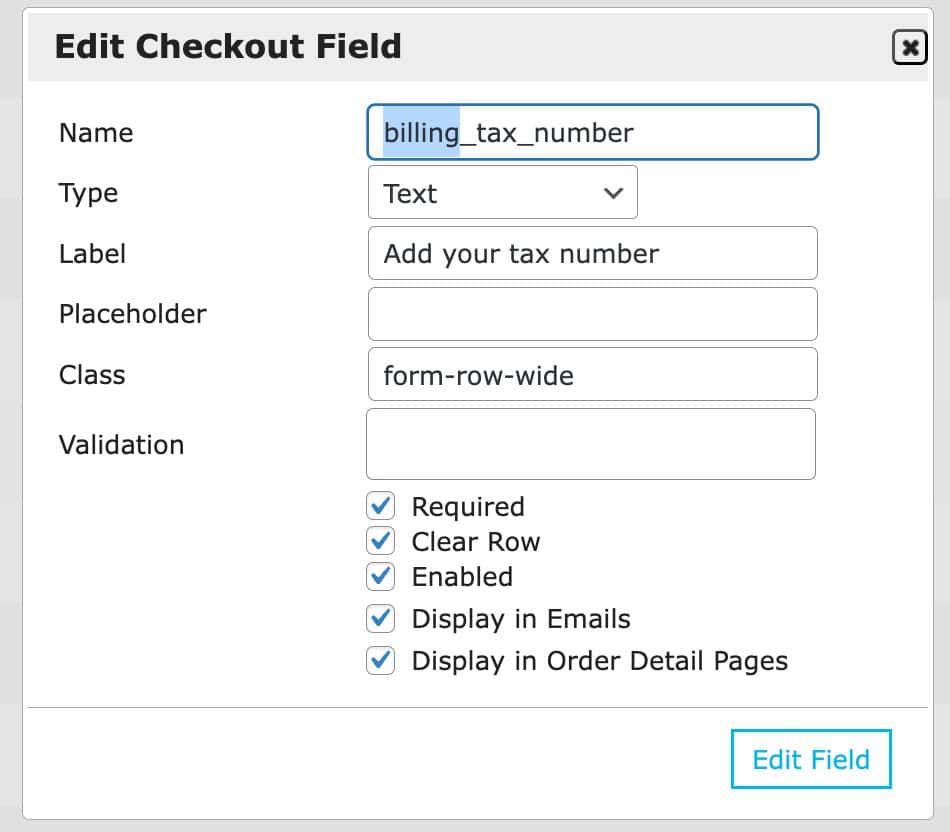
5. Then, click on the +Add field button to add new fields to the list. The available field types consist of: Text, Password, Text Area, Checkbox, Radio, and Select field types.
For this example, I’m just going to add a simple “Where you heard about us” box with a few options:

6. Save the changes:

7. View your checkout page:

Naming Guidelines for Custom Checkout Fields
When adding custom fields in Checkout Manager, always include a prefix to ensure proper integration with the checkout system. Use one of the following as a prefix depending on the type of field:
- billing_ for billing information (e.g., billing_tax_number)
- shipping_ for shipping information (e.g., shipping_instructions)
- additional_ for any extra fields (e.g., additional_notes)
If you do not use the correct prefix, your custom fields may not appear correctly in the checkout, order details, or emails. This can lead to missing or duplicated information, so always follow the prefix naming convention.
