
When managing a WooCommerce store with multiple suppliers, you may want to group and showcase products by brand. Kadence Shop Kit (formerly WooExtras) includes a Product Brands feature that allows you to display branded products and create dedicated Brand Archive Pages for customers to explore.

Getting Started
To get started with brands in Kadence Shop Kit, first make sure the Kadence Shop Kit plugin is installed and active. Once installed and activated, navigate to Kadence Shop Kit -> Product Brands page.
Note: WooCommerce introduced its own built-in Brands taxonomy in WooCommerce 9.4 (October 21, 2024).
The Kadence Shop Kit Product Brands feature is a separate and independent taxonomy. By default, you’ll see our brand’s taxonomy name as “Product Brands“, while WooCommerce’s is named “Brands“.
To avoid confusion, it’s best to choose one system for managing brands in your store.
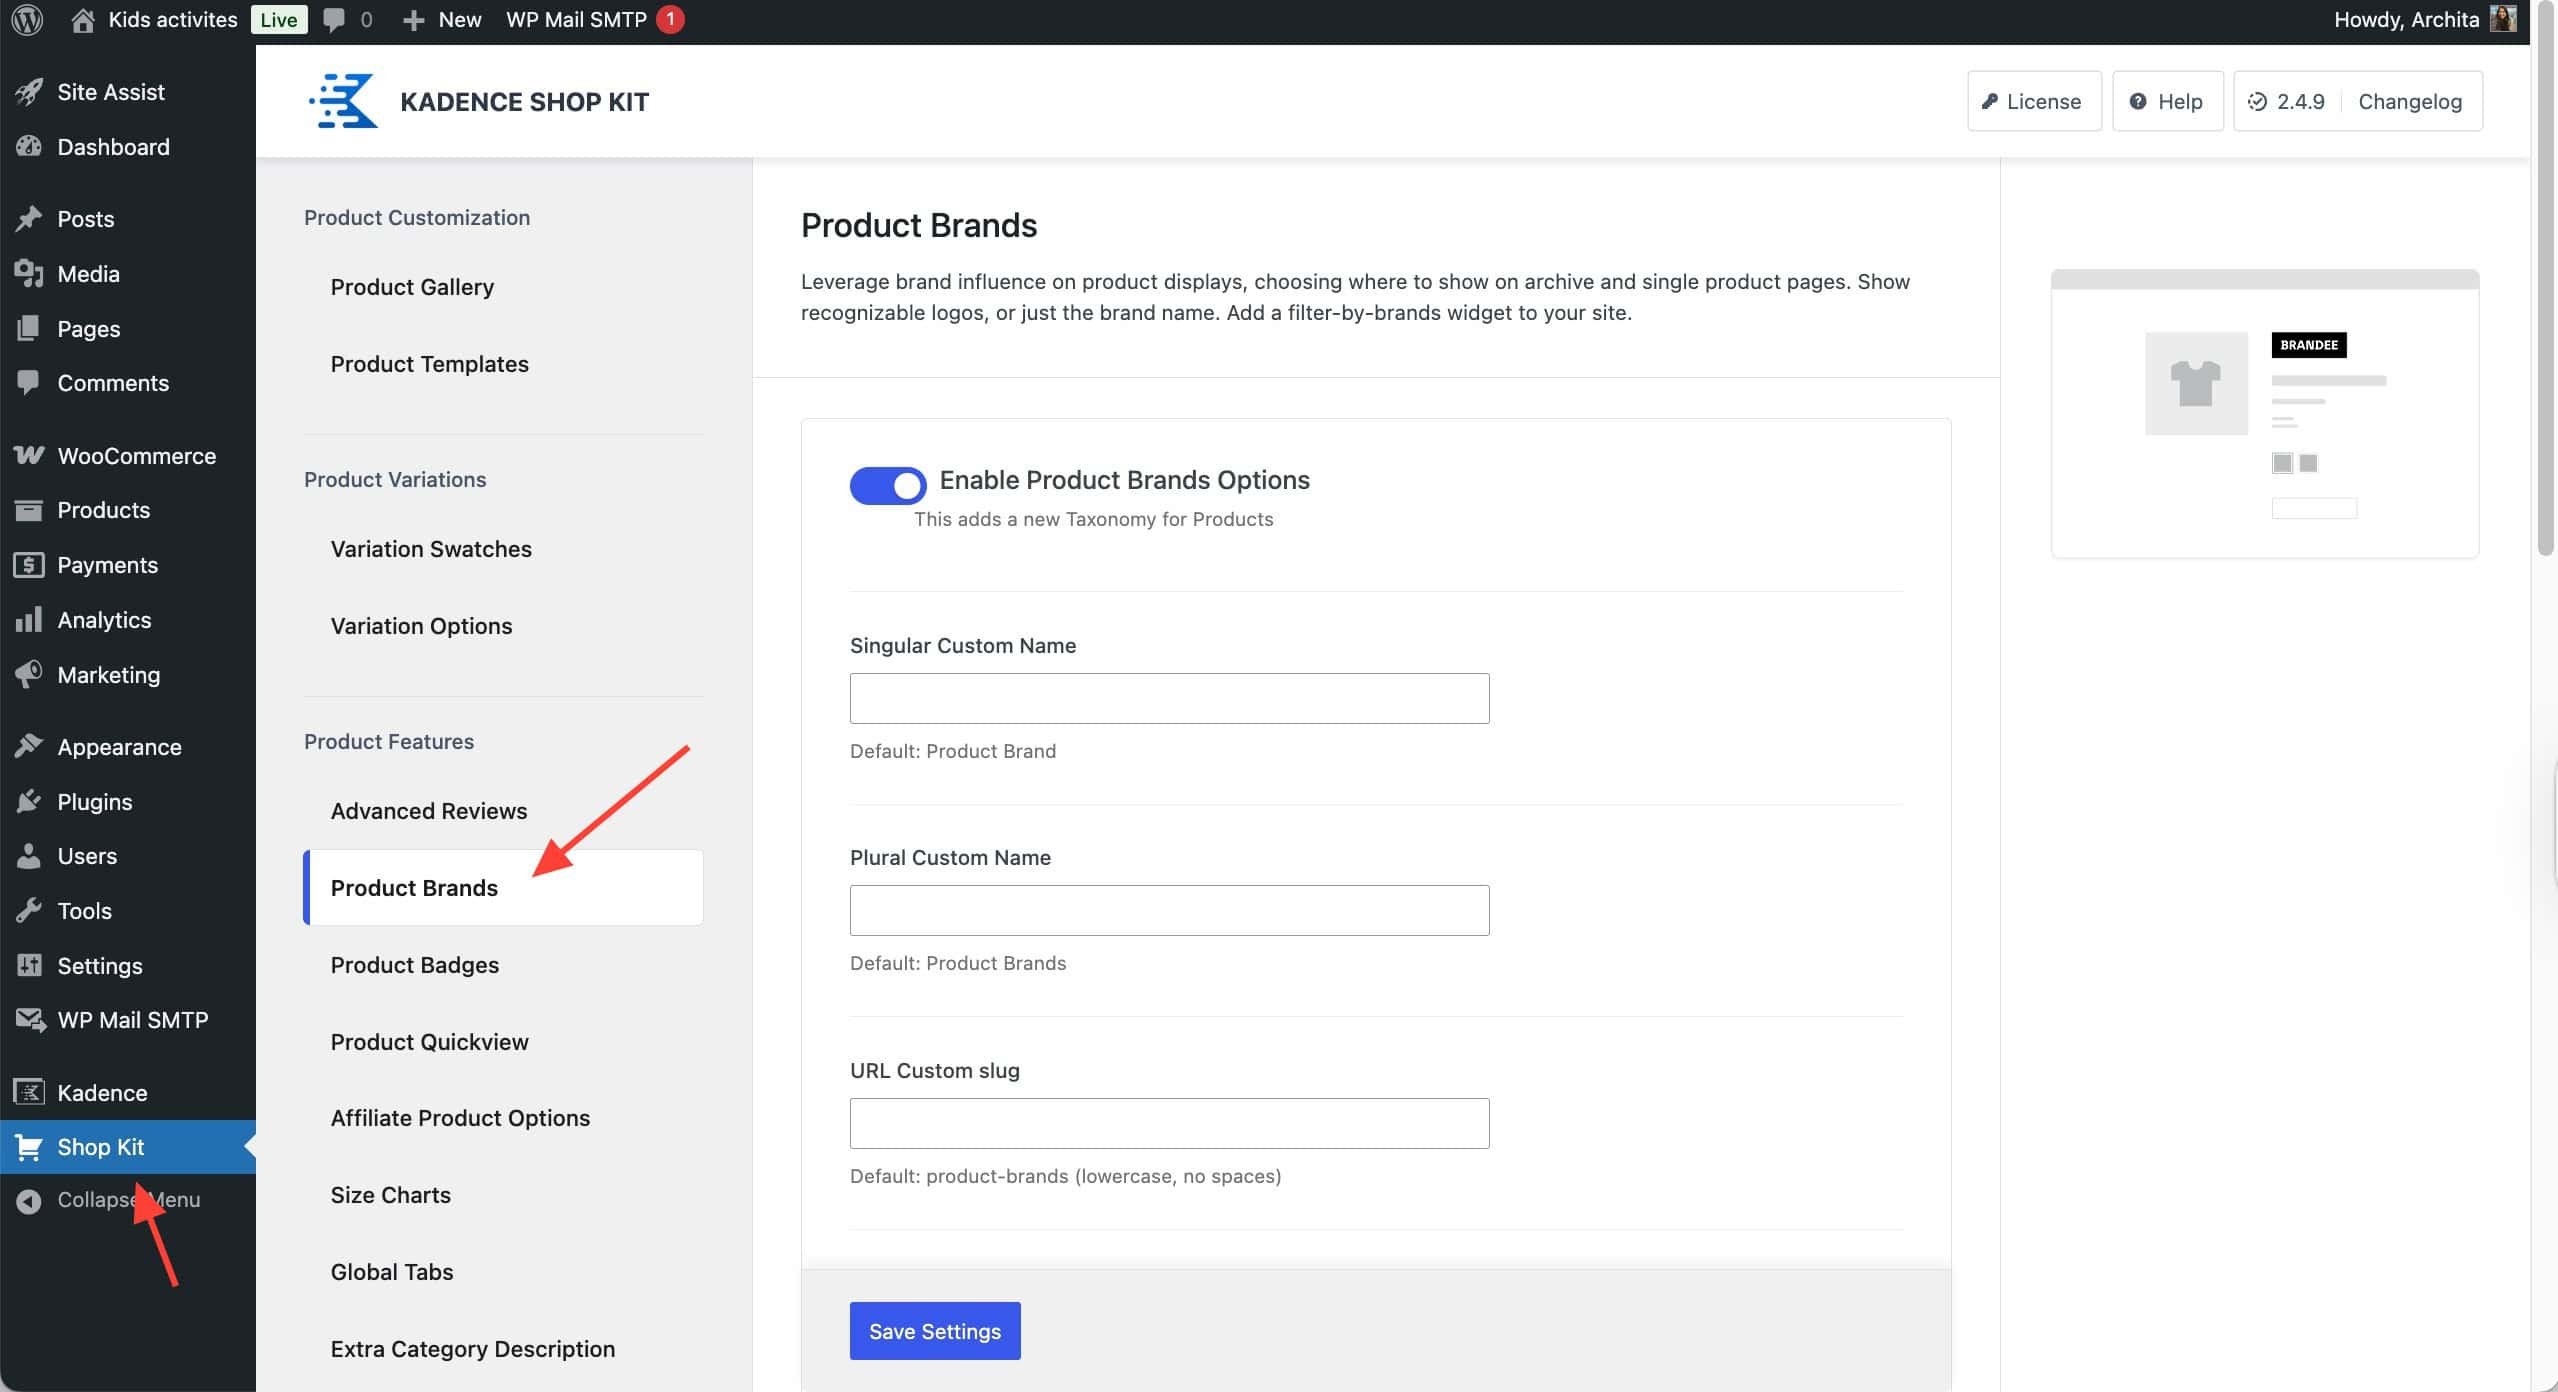
In your Kadence Shop Kit settings, you can activate the product brand options and set up the options for your custom brands.
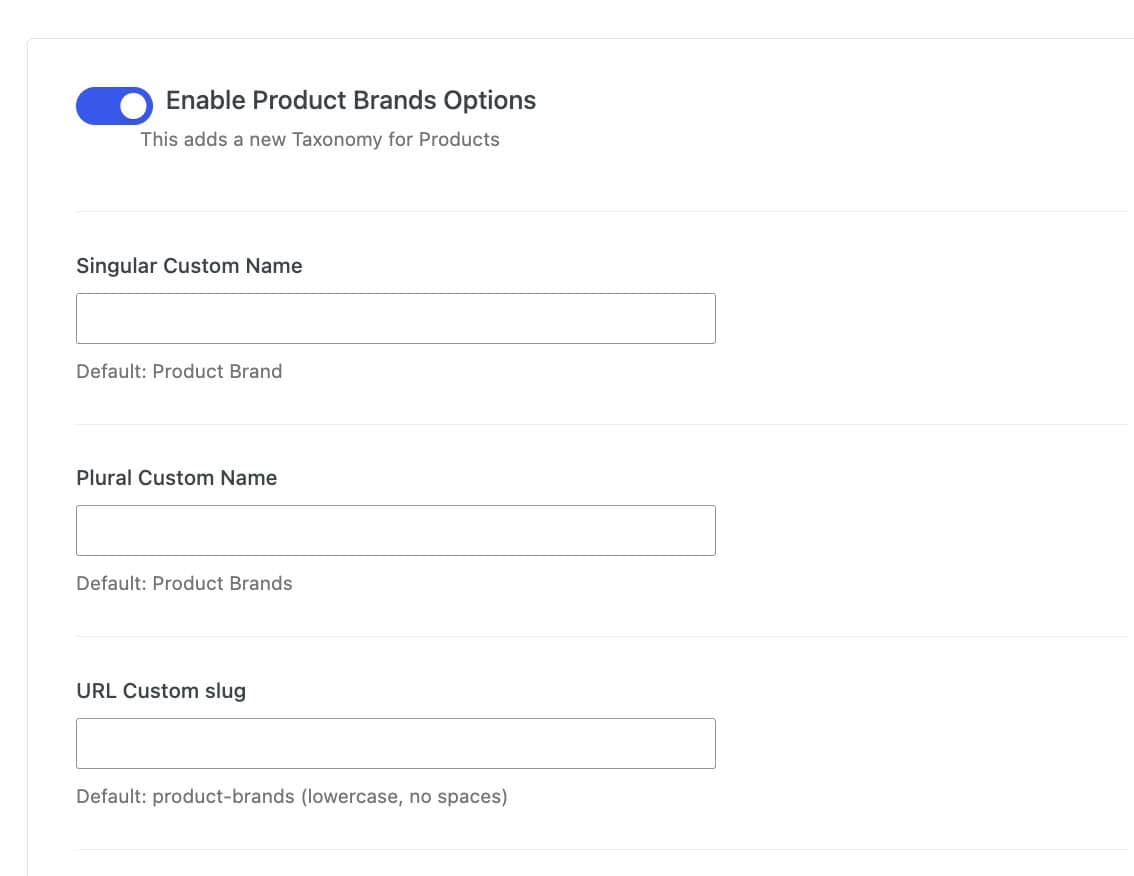
Enable Product Brands Options: Toggle this on to enable Product Brands.
Singular Custom Name: Set a display name for a single Product Brand. The default will revert to Product Brand.
Plural Custom Name: Set a custom display name for multiple Product Brands.
URL Custom Slug: The default slug is /product-brands/: You can customize this as needed.
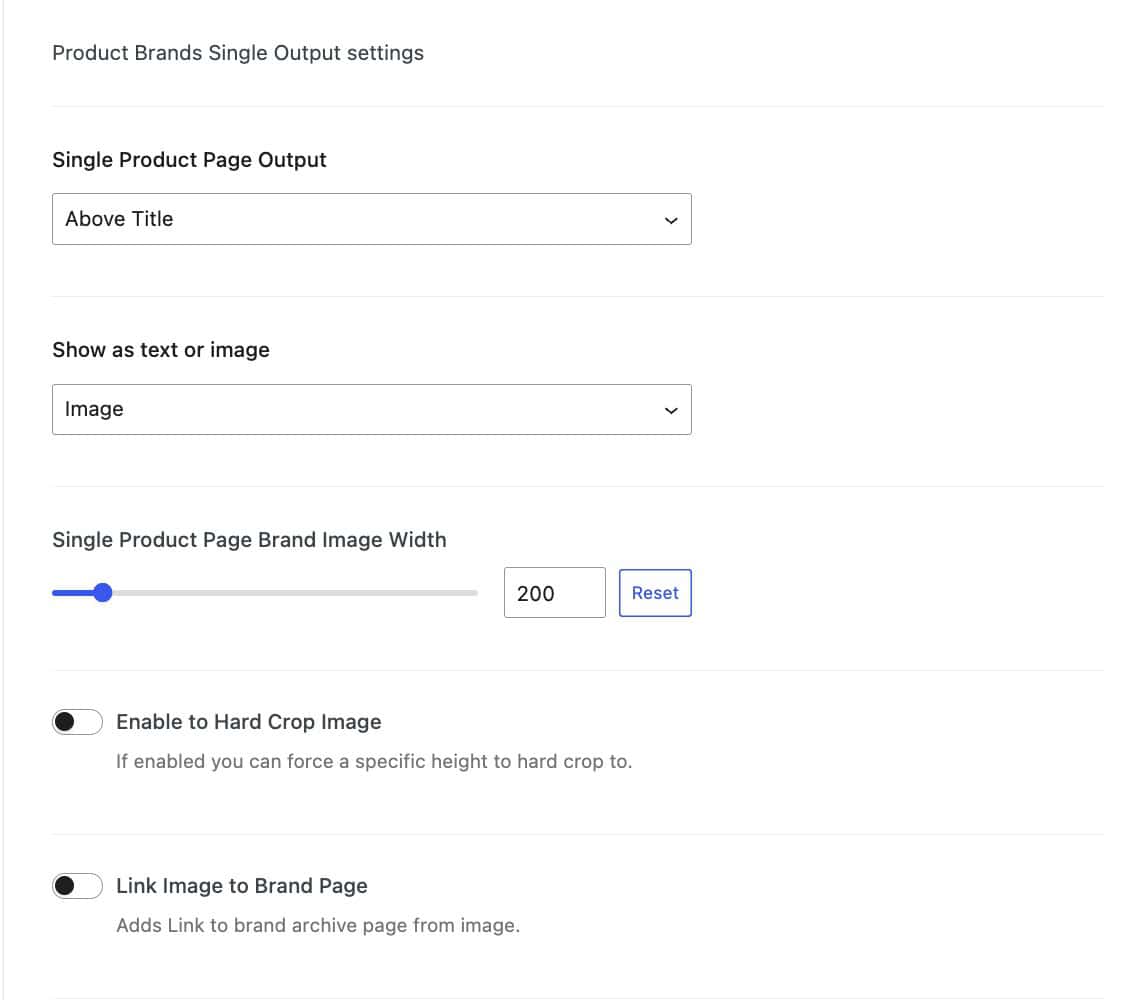
Single Product Page Output: Set the output where the brand’s image or text will show on the single product page.
Available options include:
- Above Title,
- Below Title, Above Price
- Below Price, Above Short Description
- Below Short Description, Above Add to Cart
- Below Add to Cart, Above Meta Content
- Below Meta Content.
Show as text or image: Determine if the Product Brand text or image will be shown.
Single Product Page Brand Image Width: Determine the image width of the Product Brand Logo Image, if applicable.
Enable to Hard Crop Image: If enabled, you can force a specific height for a hard crop.
Link Image to Brand Page: Links the Product Brand Image to the Product Brand Archive.
Depending on your settings, the product brand should appear on your single product like this (for this example, the brand is the Kadence Logo):

Important: After enabling and configuring Product Brands, you should go to Settings > Permalinks and click Save Changes to refresh your permalinks.
The next step is to configure the product brand archive settings for your store.
Archive Page Output: Set the output where the brand’s image or text will show on archive pages. Available options include:
- Above Image
- Below Image, Above Title
- Below Title, Above Excerpt
- Below Excerpt, Above Price
- Below Price, Above Add to Cart
- Below Add to Cart.
Show as text or image: Determine if the Product Brand text or image will be shown.
Archive Brand Image Width: Determine the image width of the Product Brand Logo Image, if applicable.
Enable to Hard Crop Image: If enabled, you can force a specific height for a hard crop.
Link Image to Brand Page: Links the Product Brand Image to the Product Brand Archive.

Setting the brand logo to appear in your archive will add the logo or text to products in your archive, differentiating them from your other products:

Important: After enabling and configuring Product Brands, you should go to Settings > Permalinks and click Save Changes to refresh your permalinks.
Creating and Using Product Brands
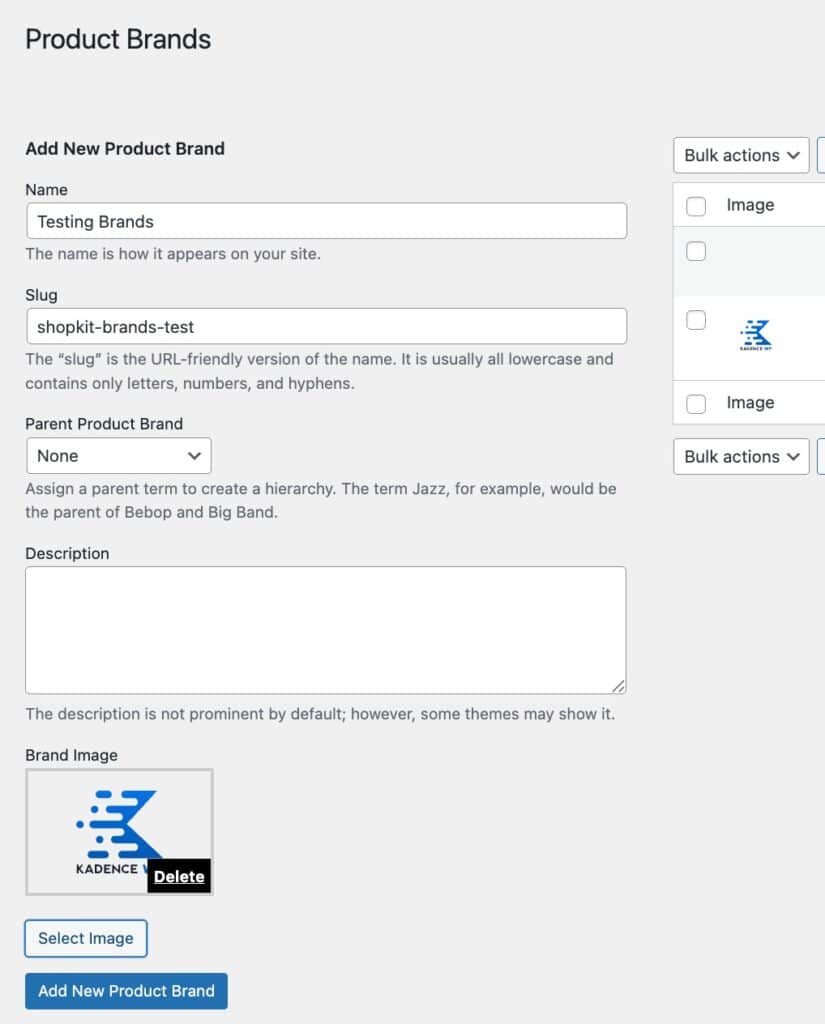
Once you’ve configured your overall brand settings, you can begin setting up your individual product brands. To do this, navigate to Products > Product Brands in your WordPress dashboard.

The Product Brands feature functions like any other taxonomy in WooCommerce, such as Product Categories.
When creating or editing a brand, you can:
- Add a Brand Name
- Set a Slug (URL-friendly version of the name)
- Assign Parent Brands to create brand hierarchies
- Add a Description
- Upload a Brand Image or Logo
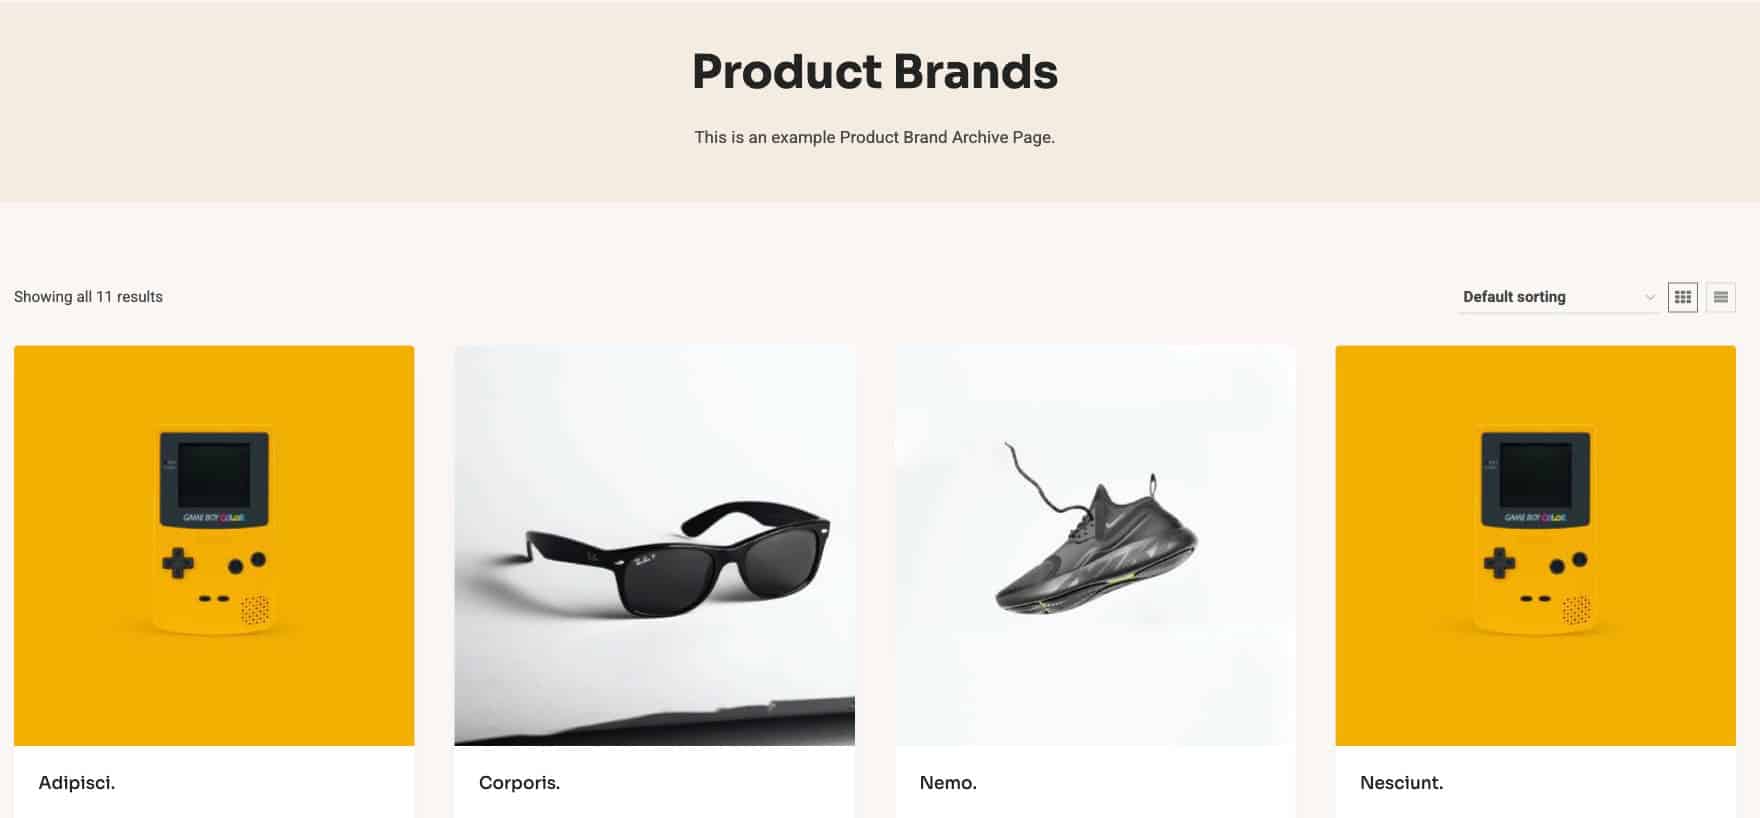
Each brand automatically generates its own Brand Archive Page, which displays a loop of all products assigned to that brand.
This makes it easy for customers to browse products by their favorite brands directly from your store.
To assign a product brand to an individual product, edit the product, locate the Product Brands box in the sidebar, and select the appropriate brand or brands for that product.
If you don’t see the product brand selection box, be sure that it is enabled at the top of the page under Screen Options.
Once you have assigned all of your products to their brand, you should now be able to see them in the product brand archive.
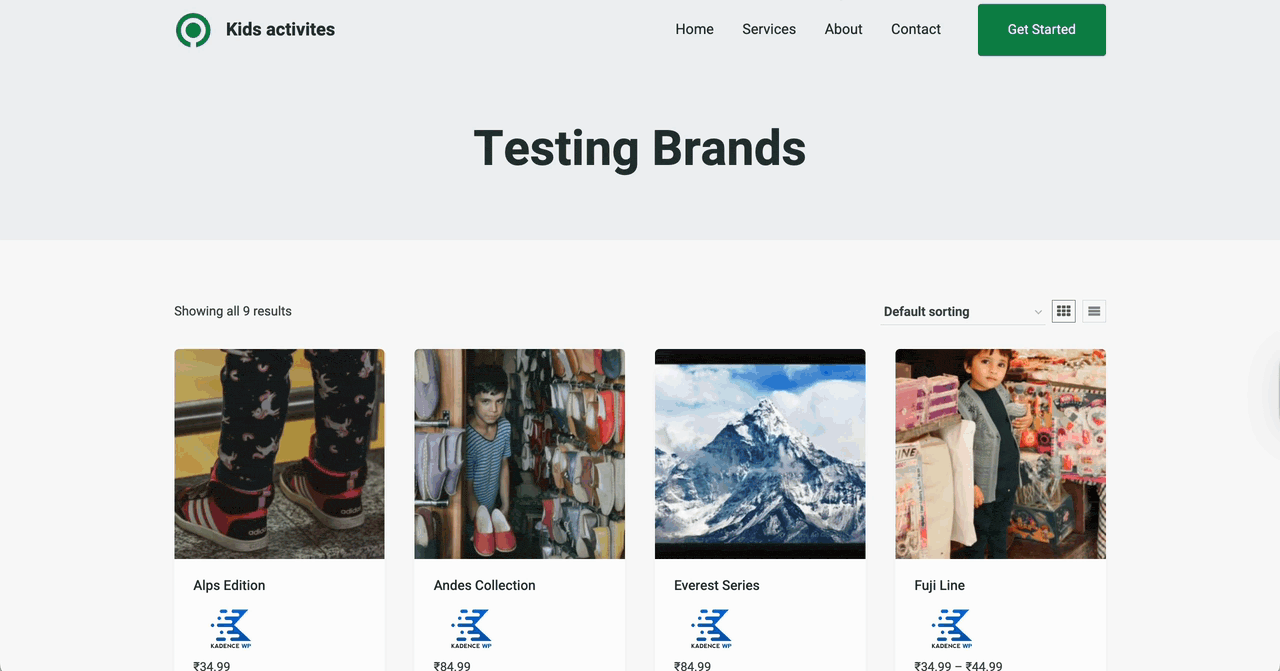
You can view any of your Brand Archive Pages by navigating to Products > Product Brands in your WordPress dashboard. Hover over a brand name, then click View to open its Brand Archive Page.
Product Brand Block
Kadence includes a Product Brand Block that allows you to display product brand information within WooTemplates and Advanced Query Loop Cards. You can learn more about using this block here.
