
When working with WordPress, you may find yourself needing more than just the default posts and pages. That’s where Custom Fields and Custom Post Types come in. They let you structure and organize content in ways that fit your specific project. If you’re using the Kadence Theme, along with Theme Kit Pro and Kadence Blocks Pro, you have full control over how these custom fields and post types are displayed on the front end.
This is made possible through a powerful combination of Hooked Elements and Dynamic Content. Kadence Dynamic Content integrates with standard custom field plugins. It has official support for Advanced Custom Fields (ACF) and MetaBox, but in many cases, it can also detect and use fields from other popular plugins that follow similar standards.
This guide will overview the following:
- How to create a Custom Post Type. (ACF)
- How to add Custom Fields to that post type. (ACF)
- How to use Template Hooked Elements + Dynamic Content to dynamically display the information on your site.
Installing the Required Plugins
To get started, there are a few required plugins. For access to the required premium Kadence products, you will need access to the Plus Plan or greater. (Click here to view our pricing.) You will also need a 3rd party plugin for adding custom post types and fields.
The following plugins are needed at a minimum to get started with this process:
- The free Kadence Theme.
- The free Kadence Blocks Plugin.
- The premium Kadence Theme Kit Pro Plugin (For Hooked Elements).
- The Premium Kadence Blocks Pro Plugin (For Dynamic Content).
- A plugin/solution for registering custom post types and/or fields, such as:
Creating Custom Posts, Fields, and Taxonomies
This guide uses Advanced Custom Fields (ACF) to handle custom post types, fields, and taxonomies. You’re not limited to ACF; other plugins like Meta Box or CPT UI will work similarly, but ACF keeps everything in one place, which makes it a clean choice for getting started.
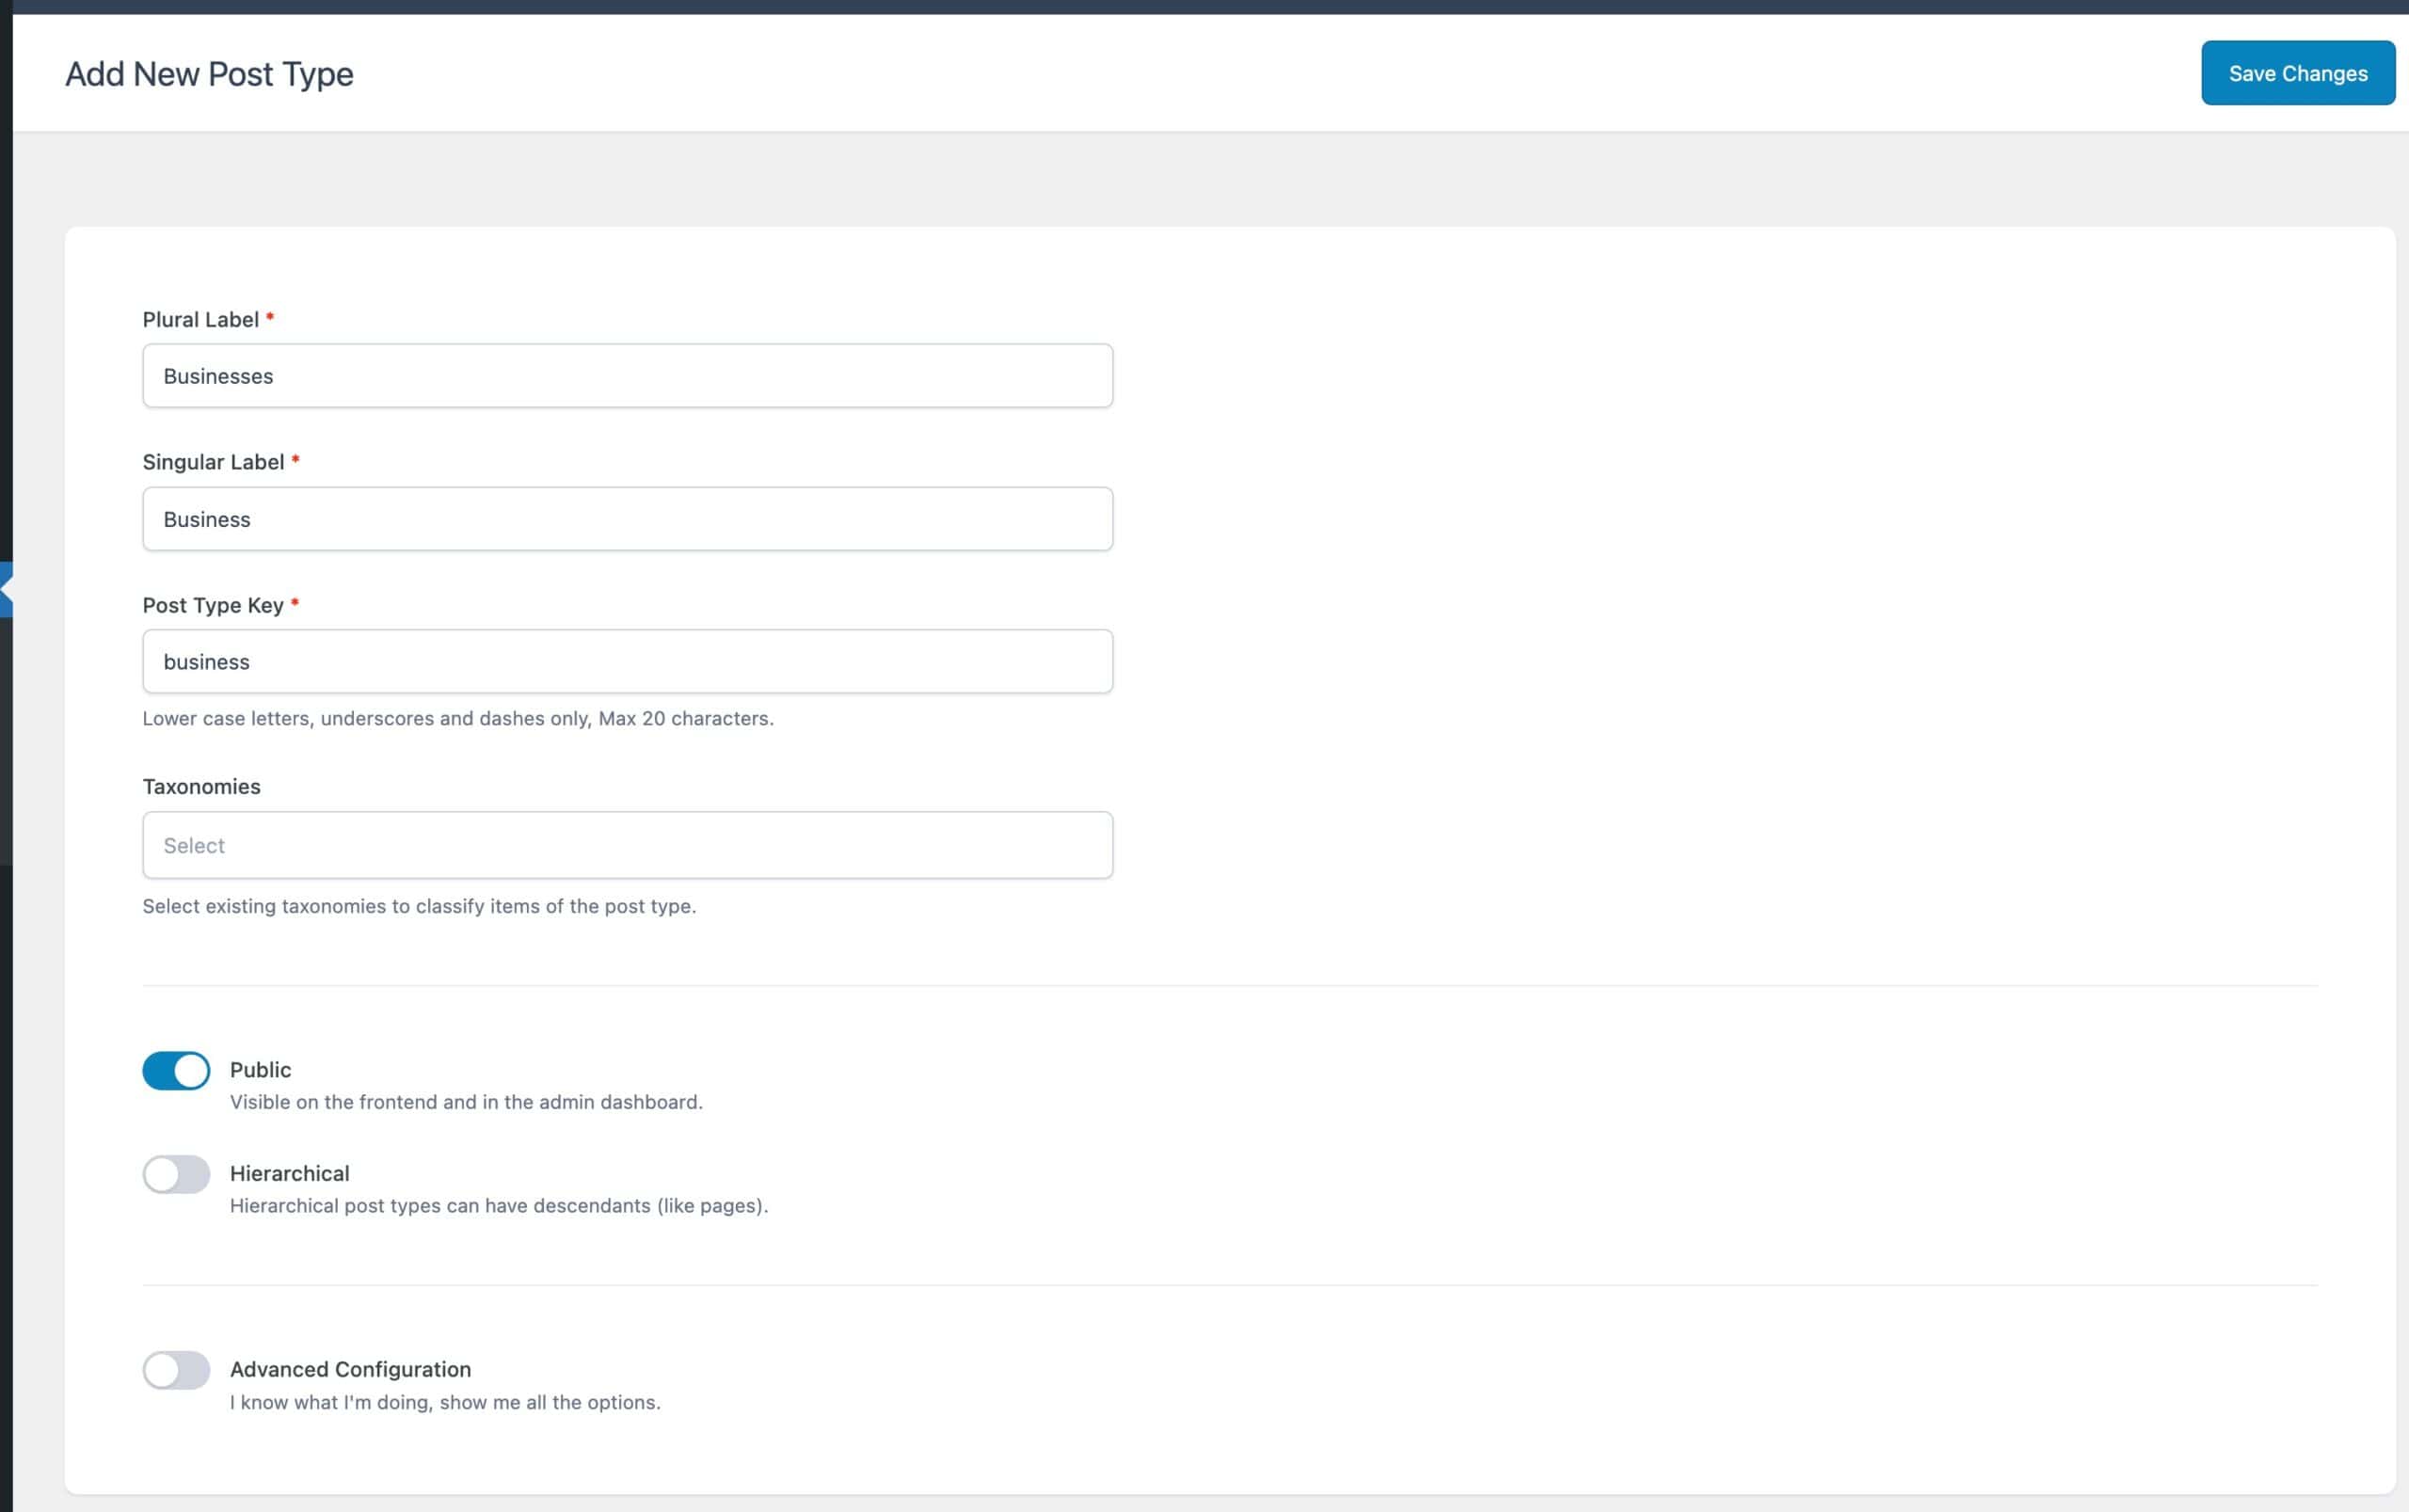
With ACF installed and active, head into your WordPress dashboard and navigate to ACF → Post Types. From here, you can create a brand-new custom post type.
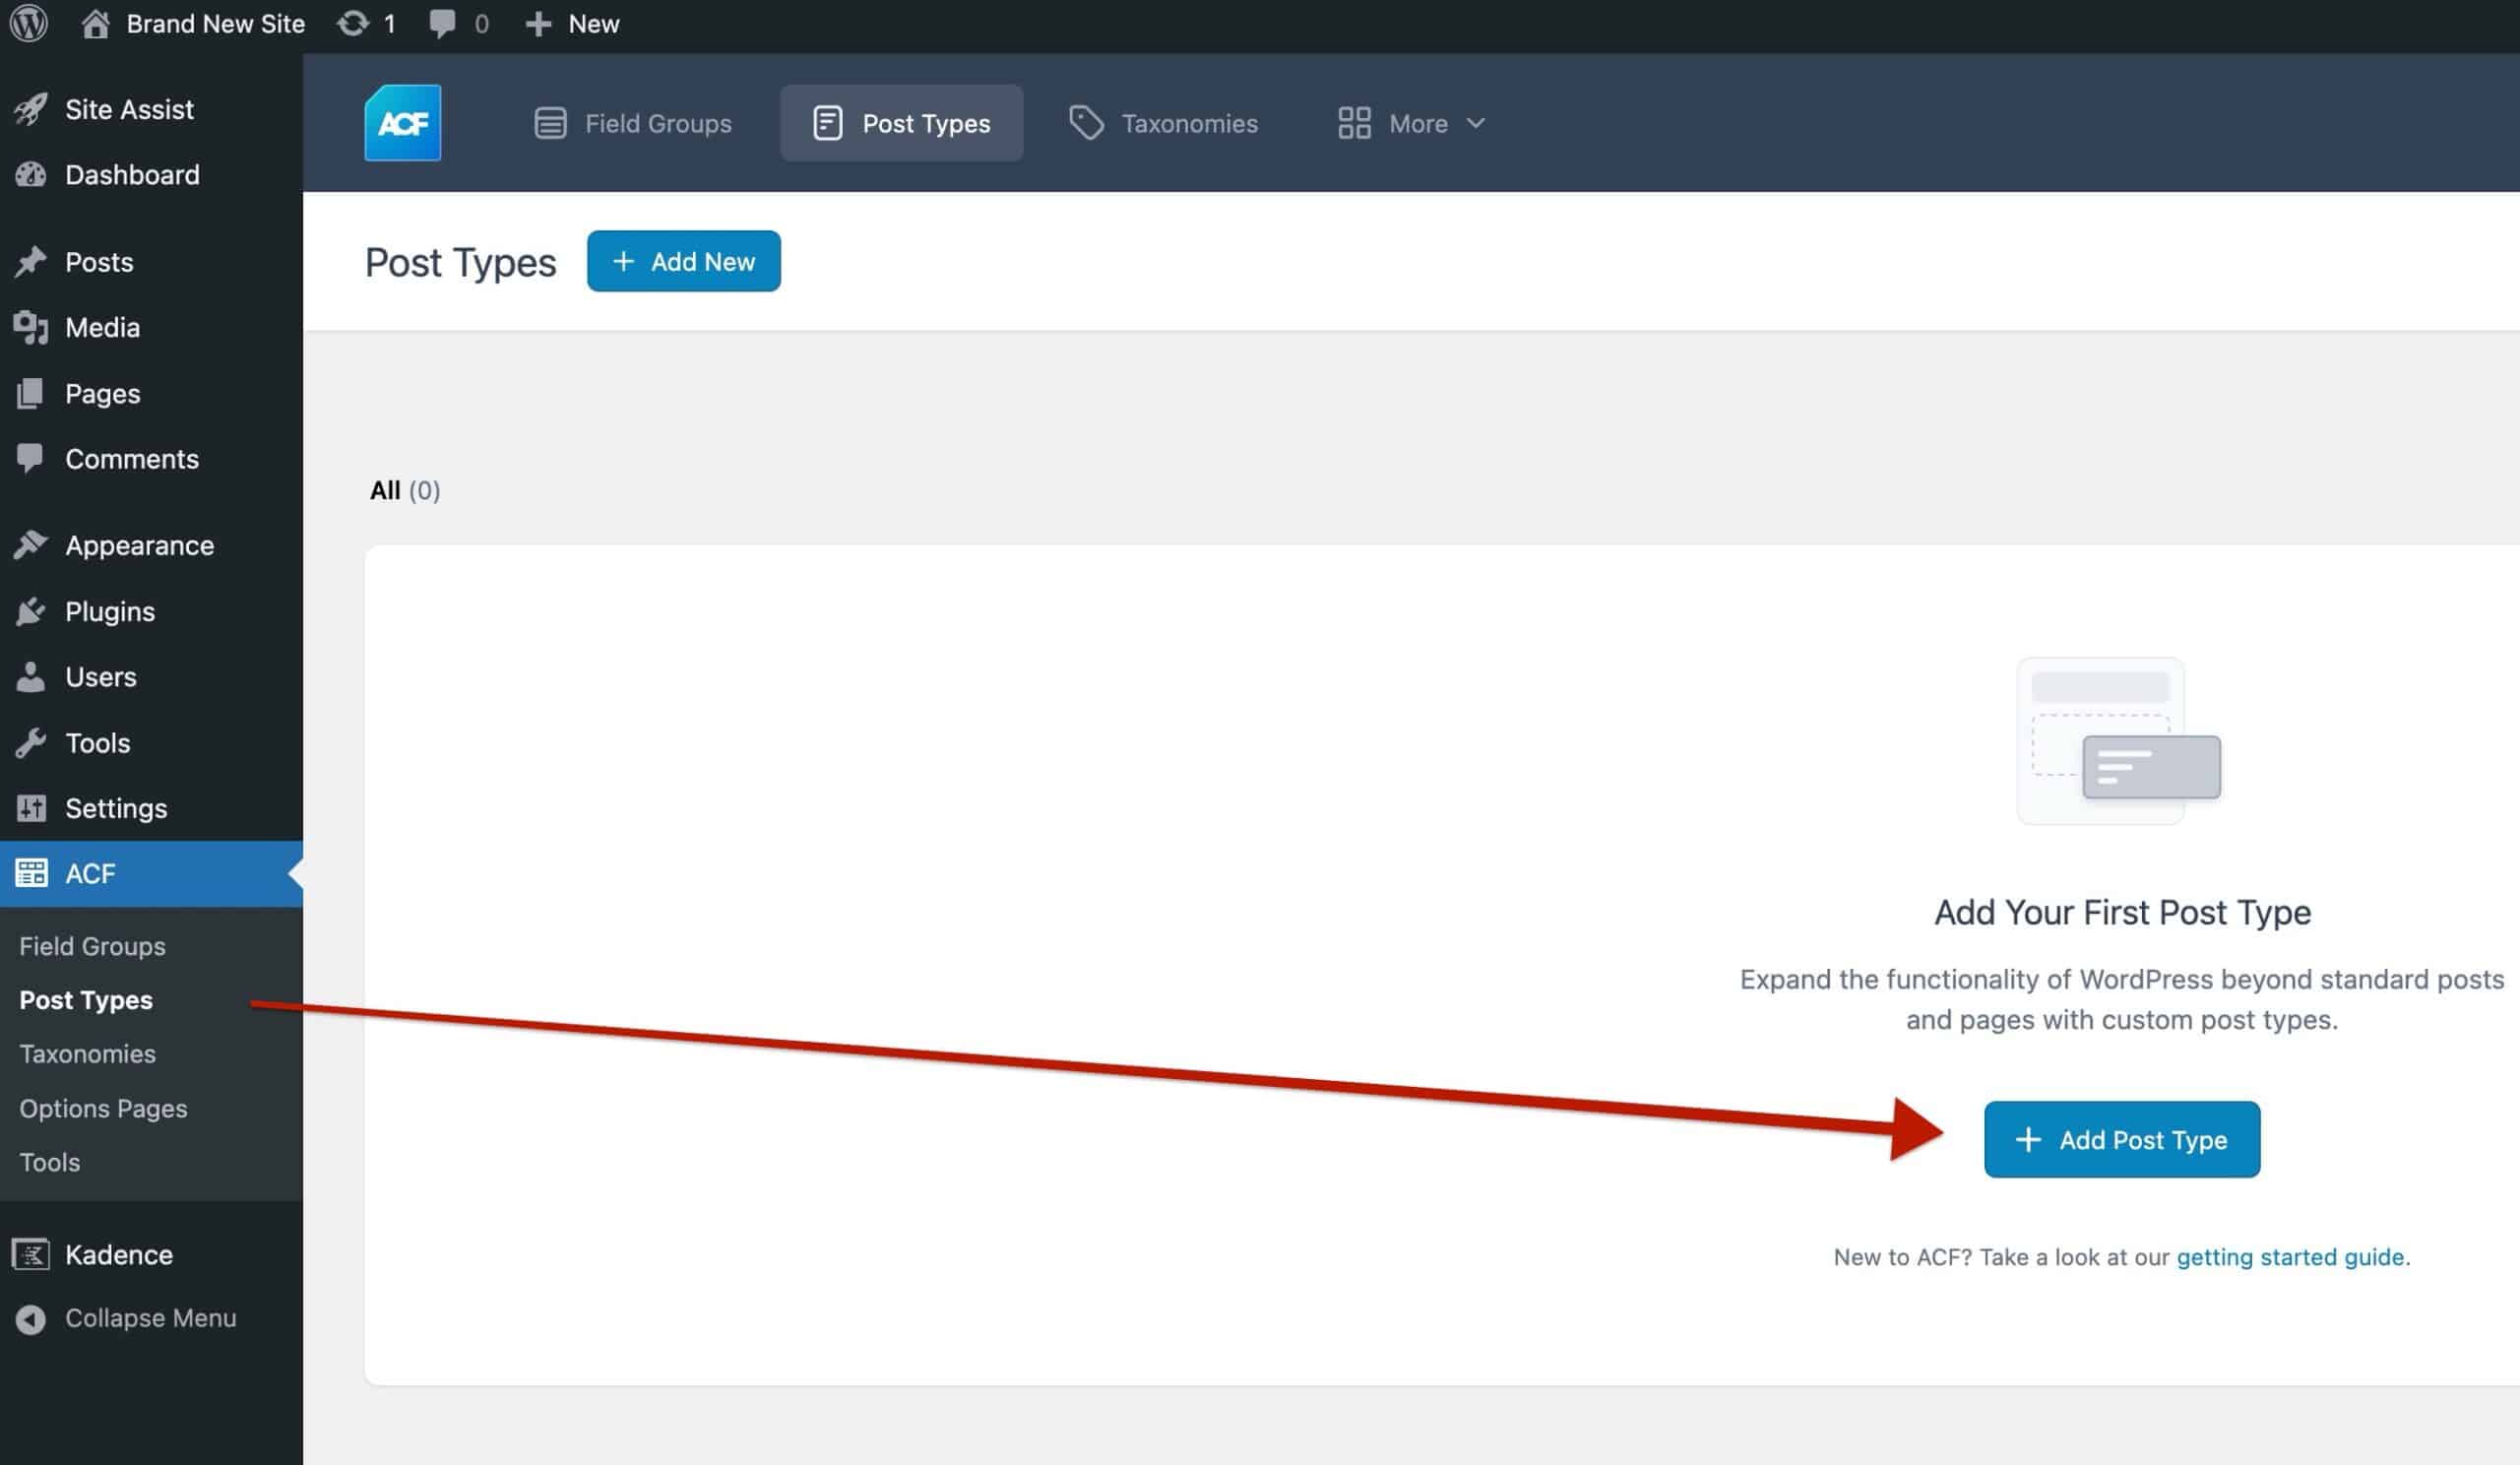
Once you click Add New, give your post type a plural and singular name (for example, “Businesses” and “Business”). You can also choose an icon for your menu and adjust other options if you’d like, but the defaults work fine for most cases. After saving, your new post type will show up in the WordPress sidebar, ready for use
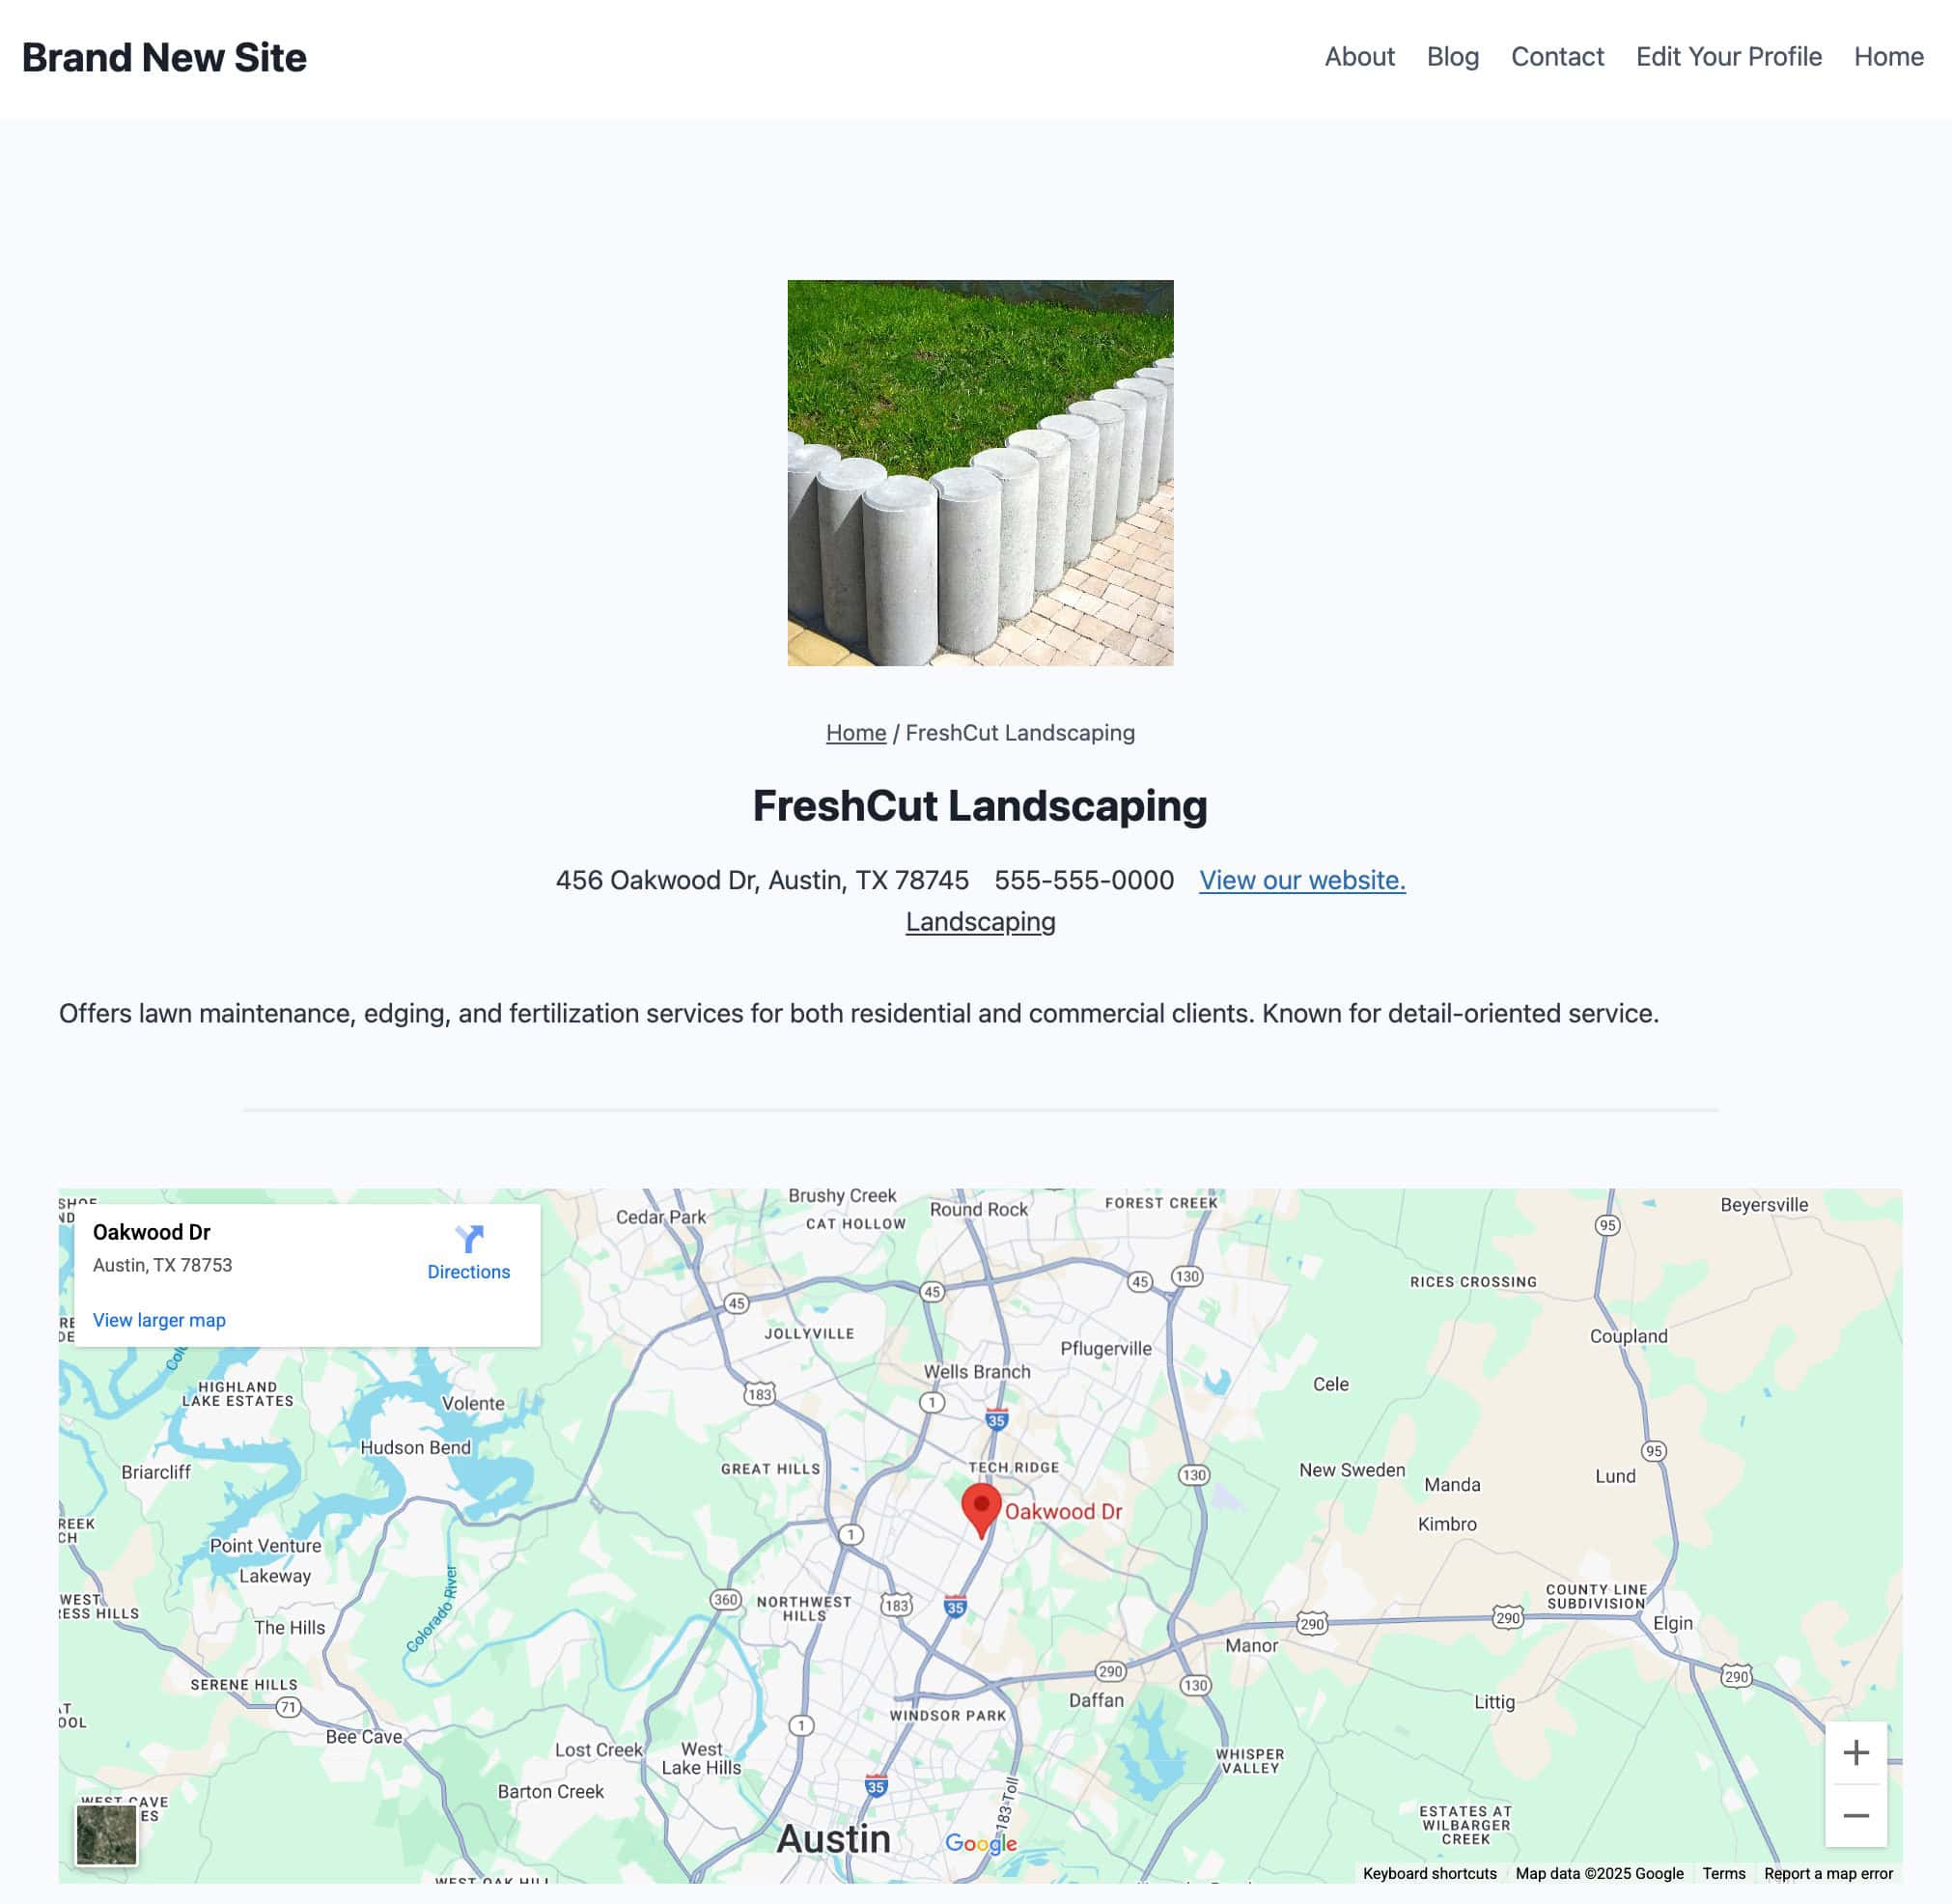
(For this example, we’ll set up a post type called Businesses. This will let us store and display different businesses, each with its own set of details such as phone number and address.)
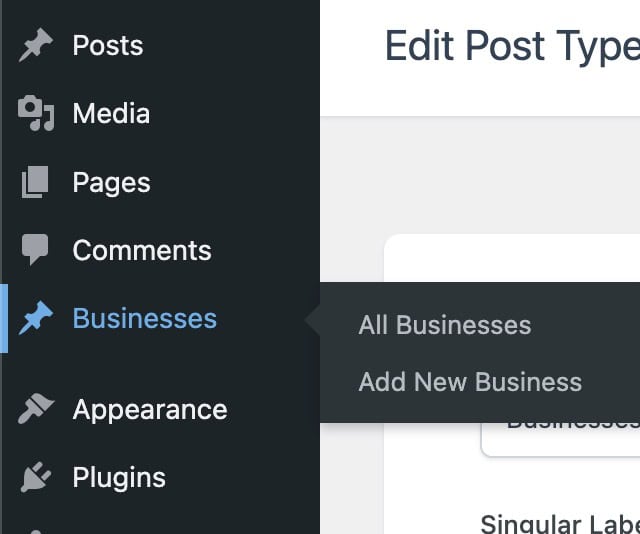
Once your custom post type is created, you’ll notice it appears in the WordPress sidebar right alongside your standard Posts and Pages. From here, you can start adding new entries or browsing the list of existing ones.
But before we dive into adding real content, it’s worth taking a step back. A custom post type by itself is just a container. What really makes it powerful are the custom fields and taxonomies you attach to it. Fields let you capture unique details (like a business’s phone number or opening hours), while taxonomies help you organize everything into groups (such as categories or sectors).
In the next section, we’ll set up those custom fields and taxonomies so your new post type isn’t just a name in the menu, but a flexible structure ready to handle exactly the kind of content you want to display.
Creating Custom Fields
With your post type in place, the next step is giving it some structure with custom fields. Think of fields as the little pieces of information relevant to each post, like a business’s phone number, address, or website link.
To get started, head over to ACF → Field Groups in your WordPress dashboard and create a new Field Group. A field group is simply a collection of fields bundled together.
For our example, we’ll add fields like:
- Business Address (Text Field)
- Phone Number (Text Field)
- Custom Field plugins typically support number fields. However, they do not support parentheses or dashes, which may mess up a standard phone number format. In this case, we will use a text field.
- Website Link (URL Field)
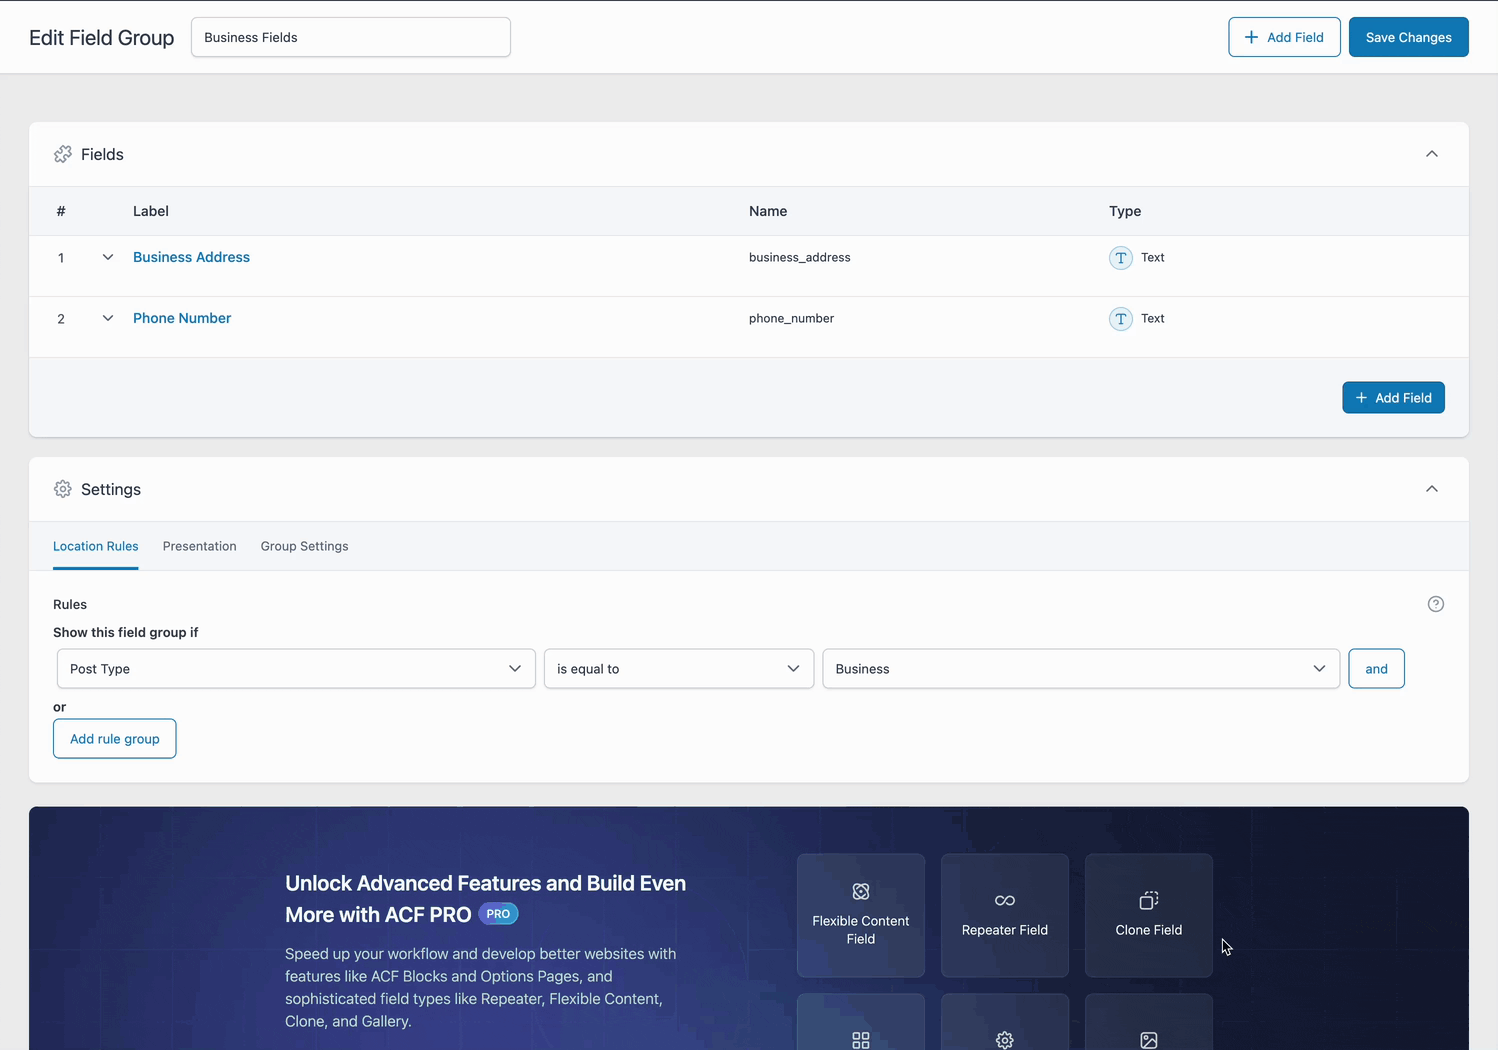
Once you’ve added your fields, you’ll need to tell ACF where those fields should appear. This happens in the Location Rules section at the bottom of the Field Group editor.
By default, ACF sets the rule to “Show on all posts”, meaning the fields would show up on regular blog posts. That’s not what we want here. From the dropdown that says Posts, switch it to your custom post type (in our case, Businesses). This links the field group directly to that post type, so every time you create or edit a Business, you’ll see the fields you just created.
This small step is easy to overlook, but it’s what makes your custom fields actually show up in the right place.
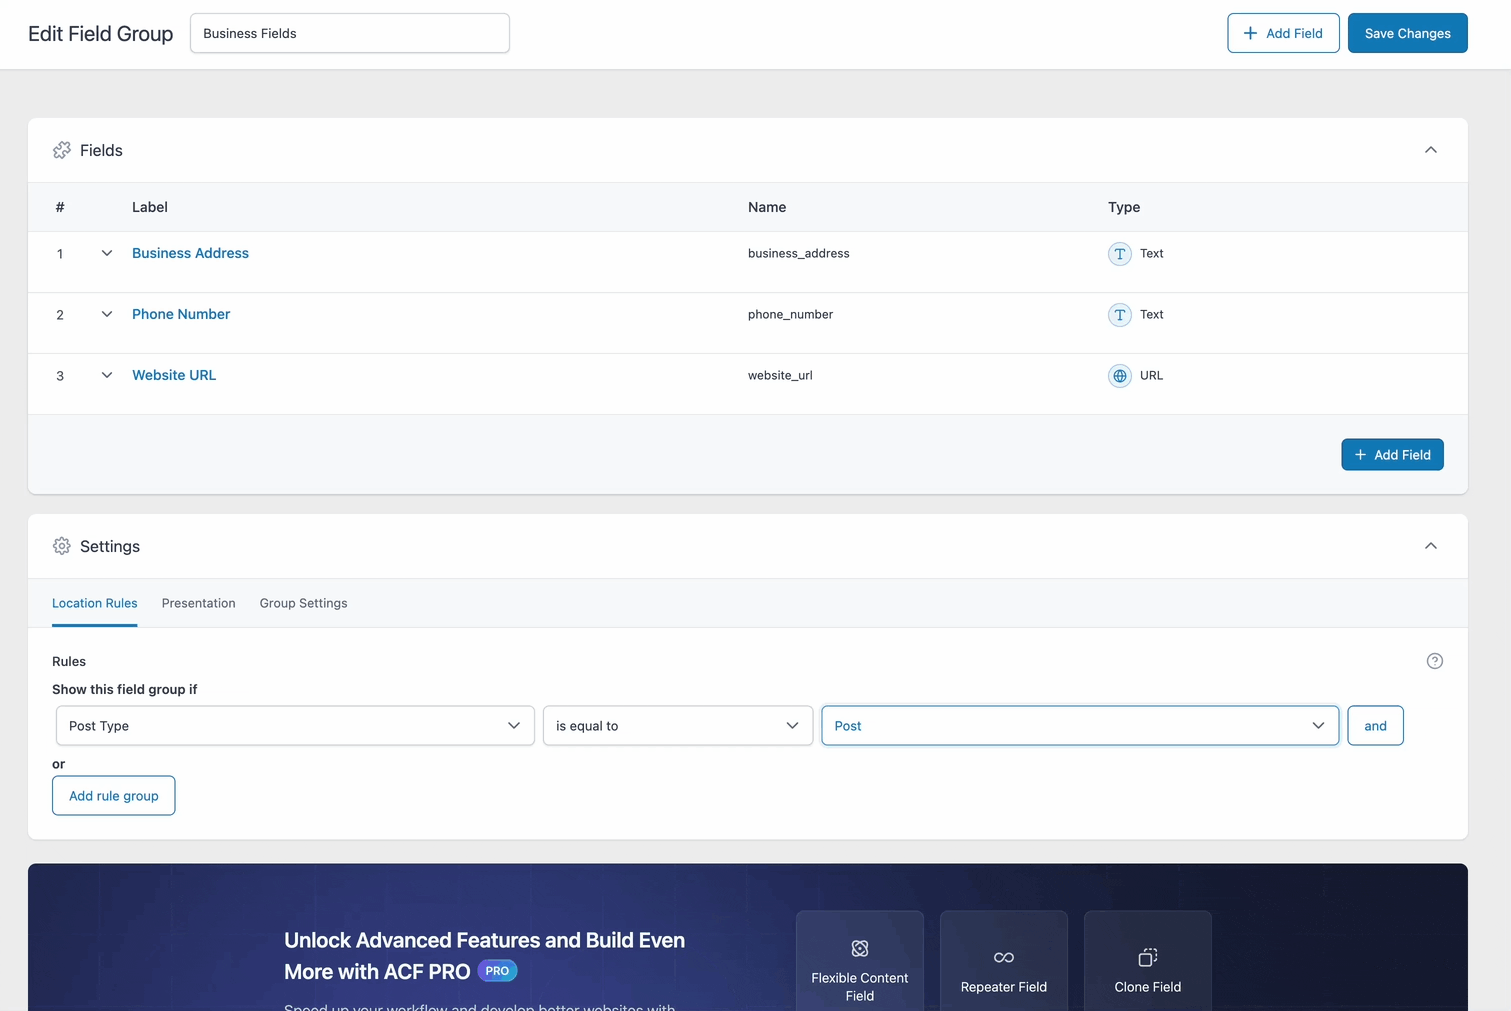
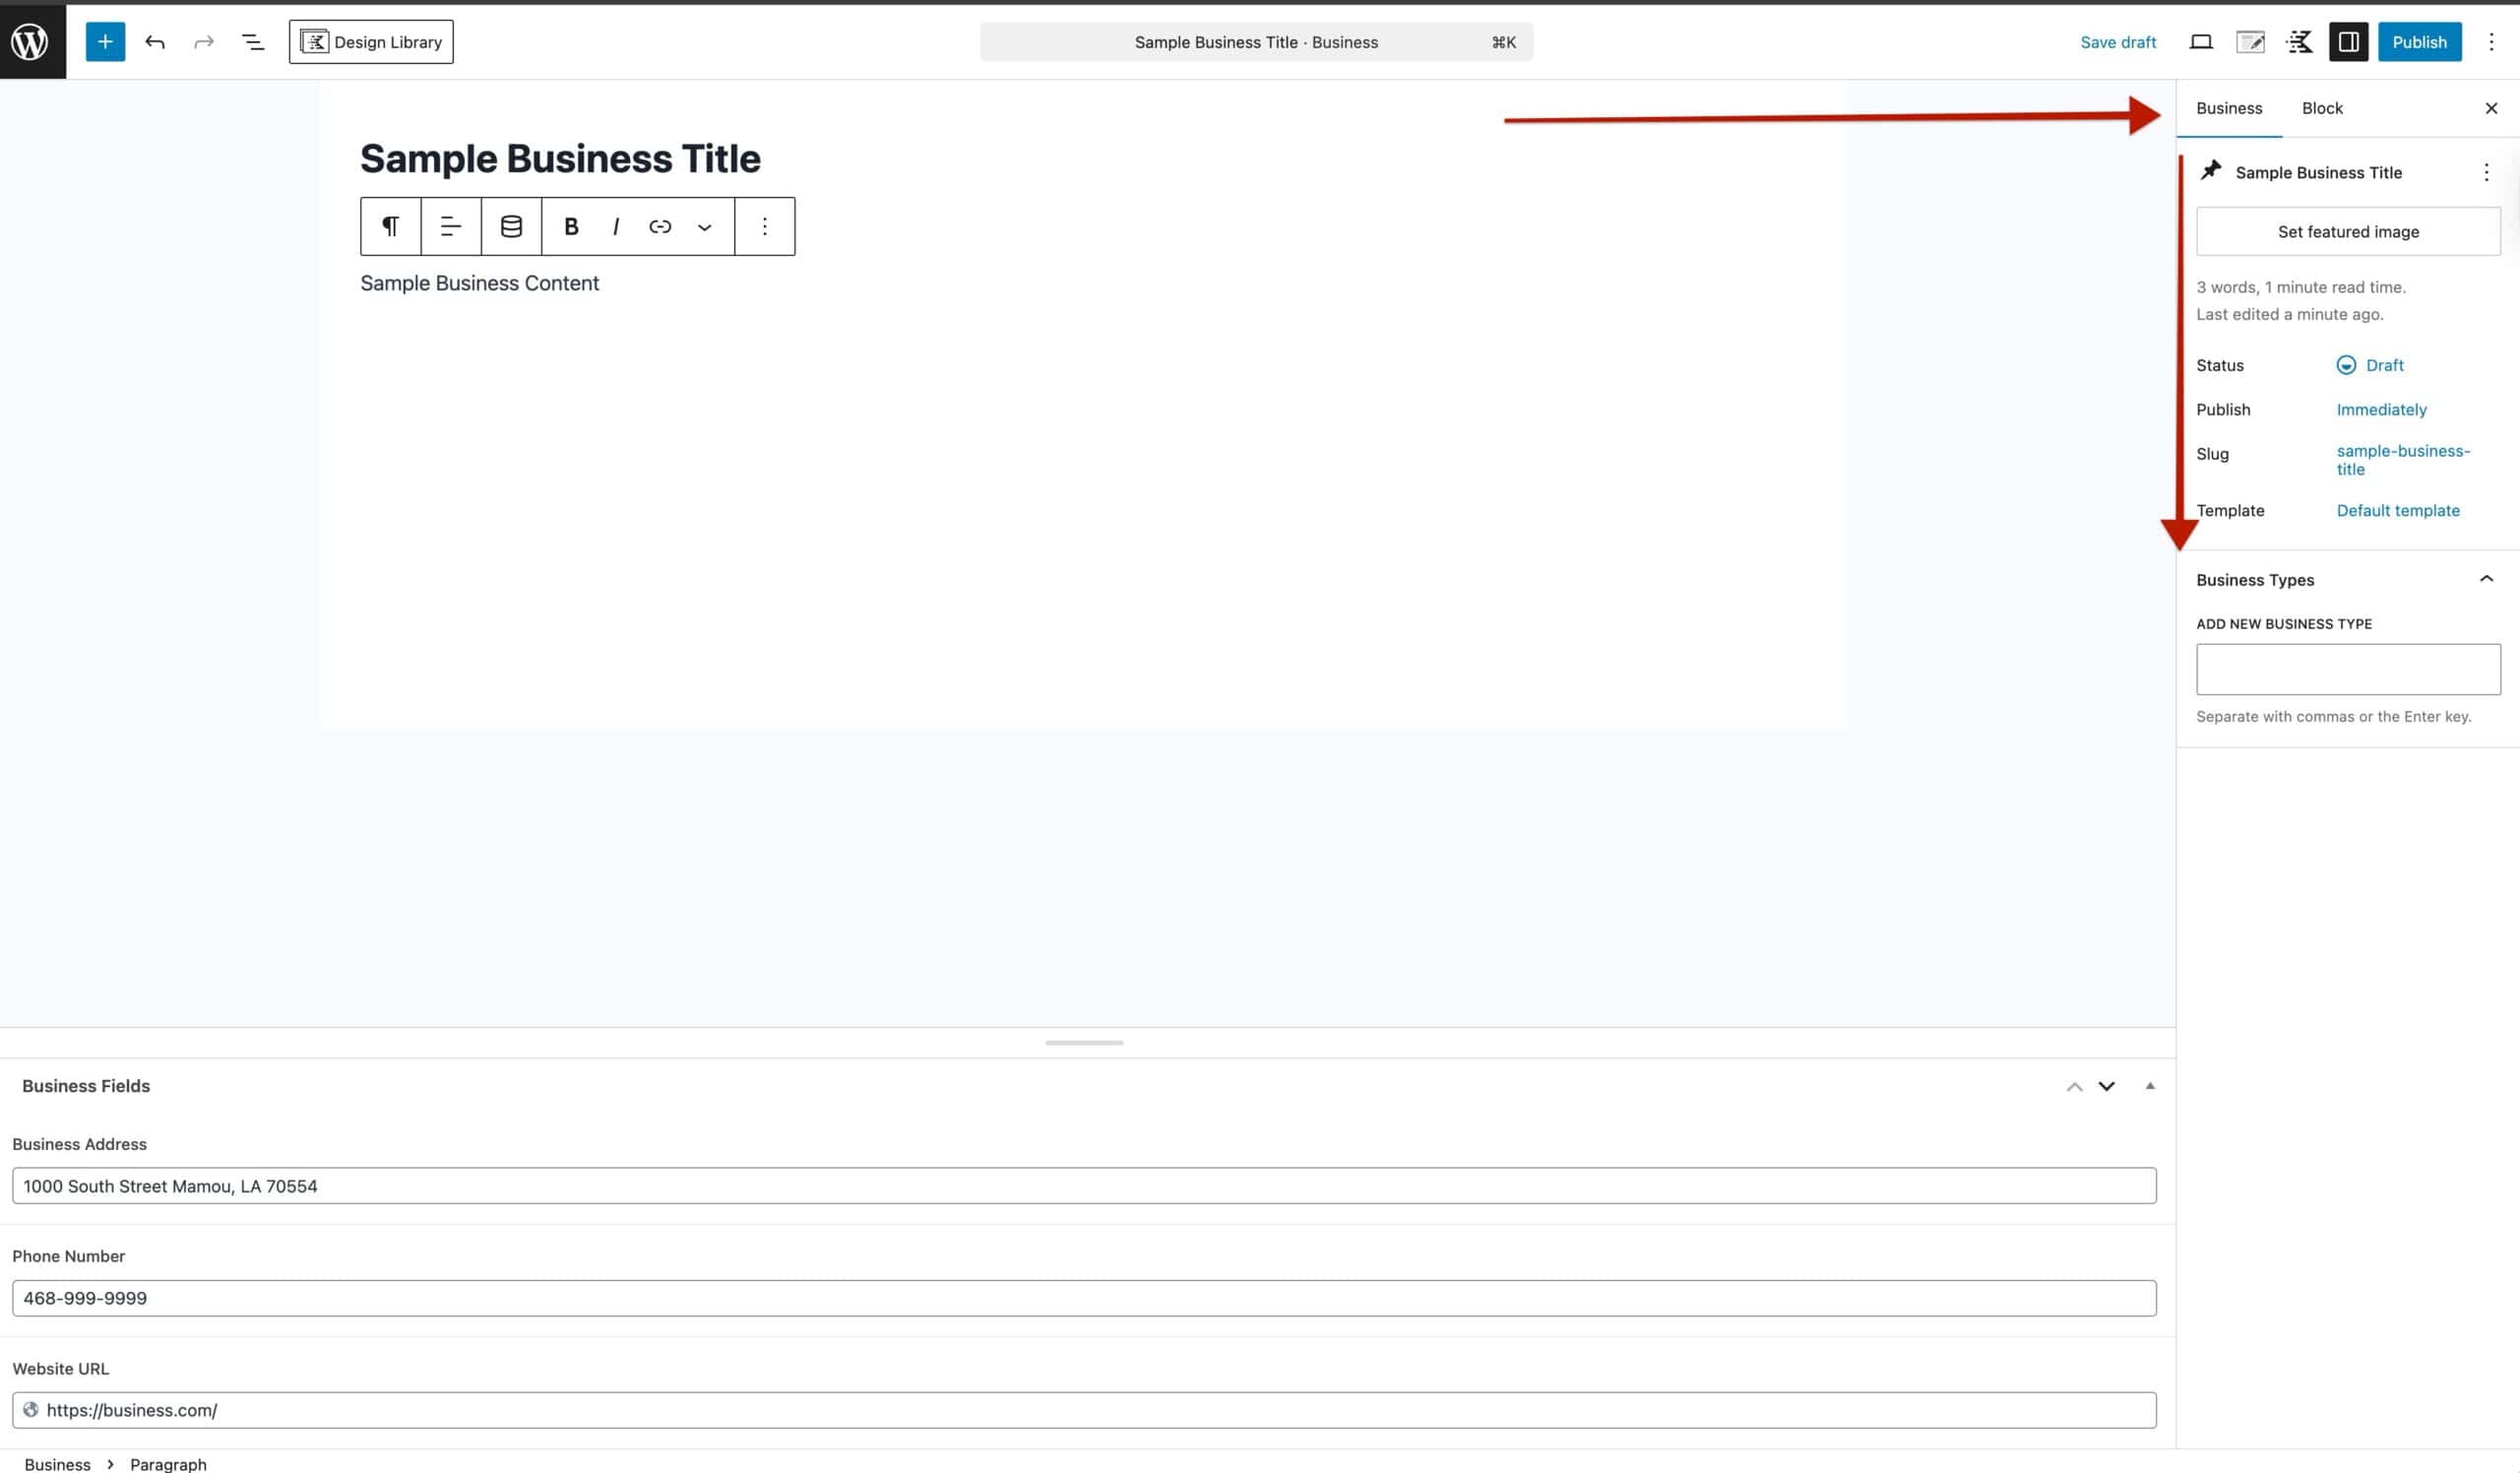
When you’re happy with your field setup, give your Field Group a clear name (something like Business Fields) and click Save.
From here, any time you add or edit a post under your custom post type, you’ll see the new fields ready to be filled out. Entering this information unlocks the ability to display those values dynamically on the front end using Kadence Blocks Pro + Theme Kit Pro Hooked Elements.
Creating Custom Taxonomies
To make your custom post type easier to organize, you’ll want to set up a Custom Taxonomy. A taxonomy works just like WordPress categories or tags, but it’s designed specifically for your custom content.
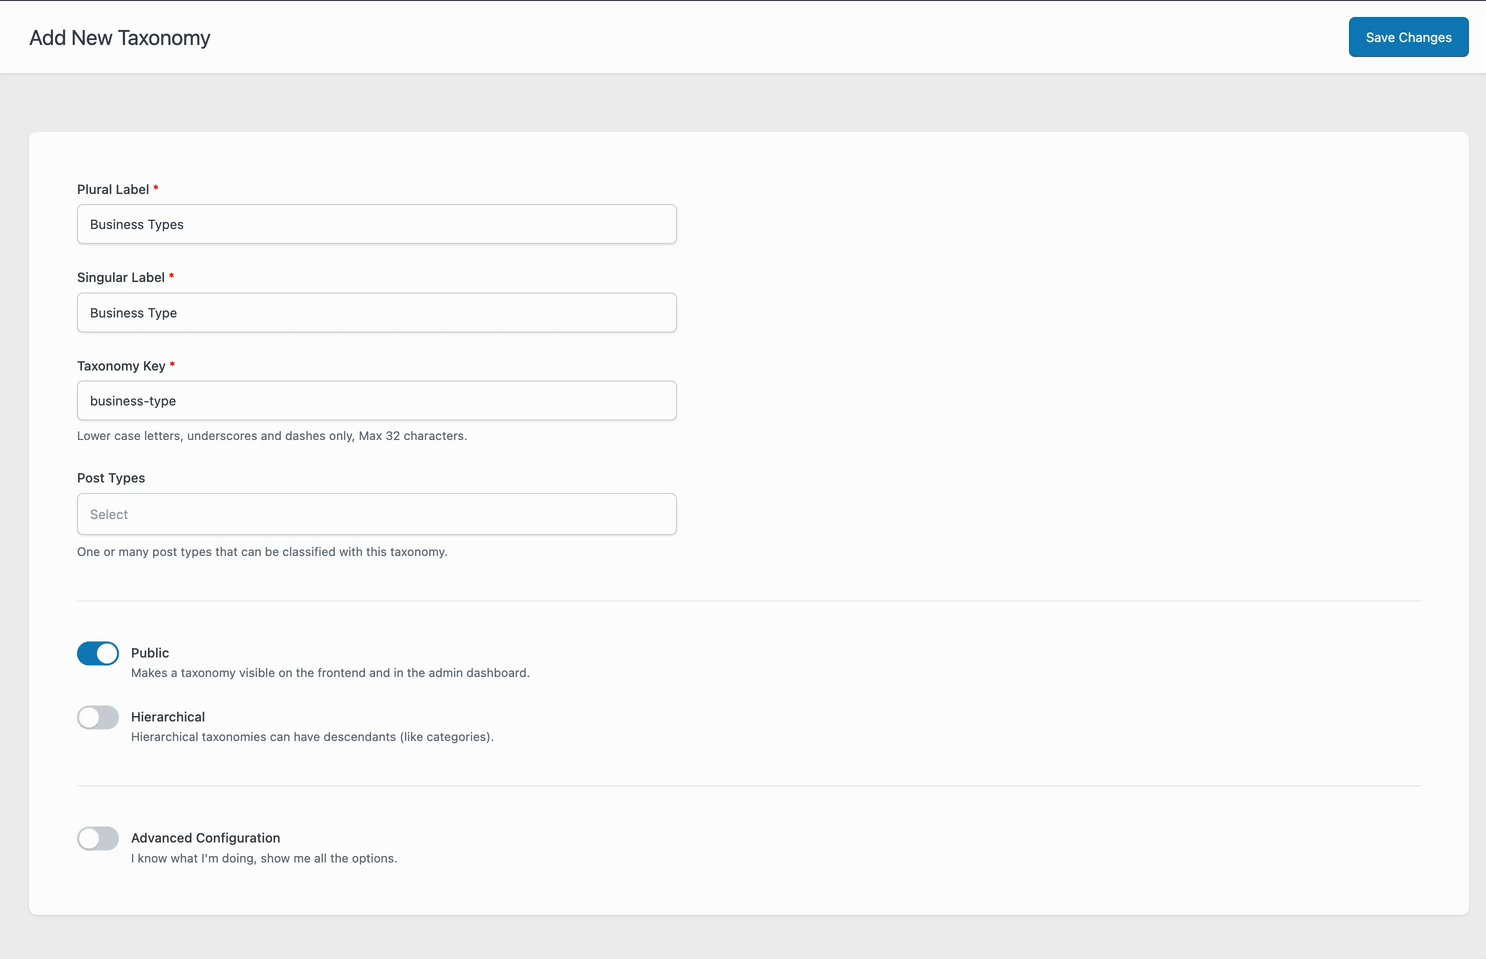
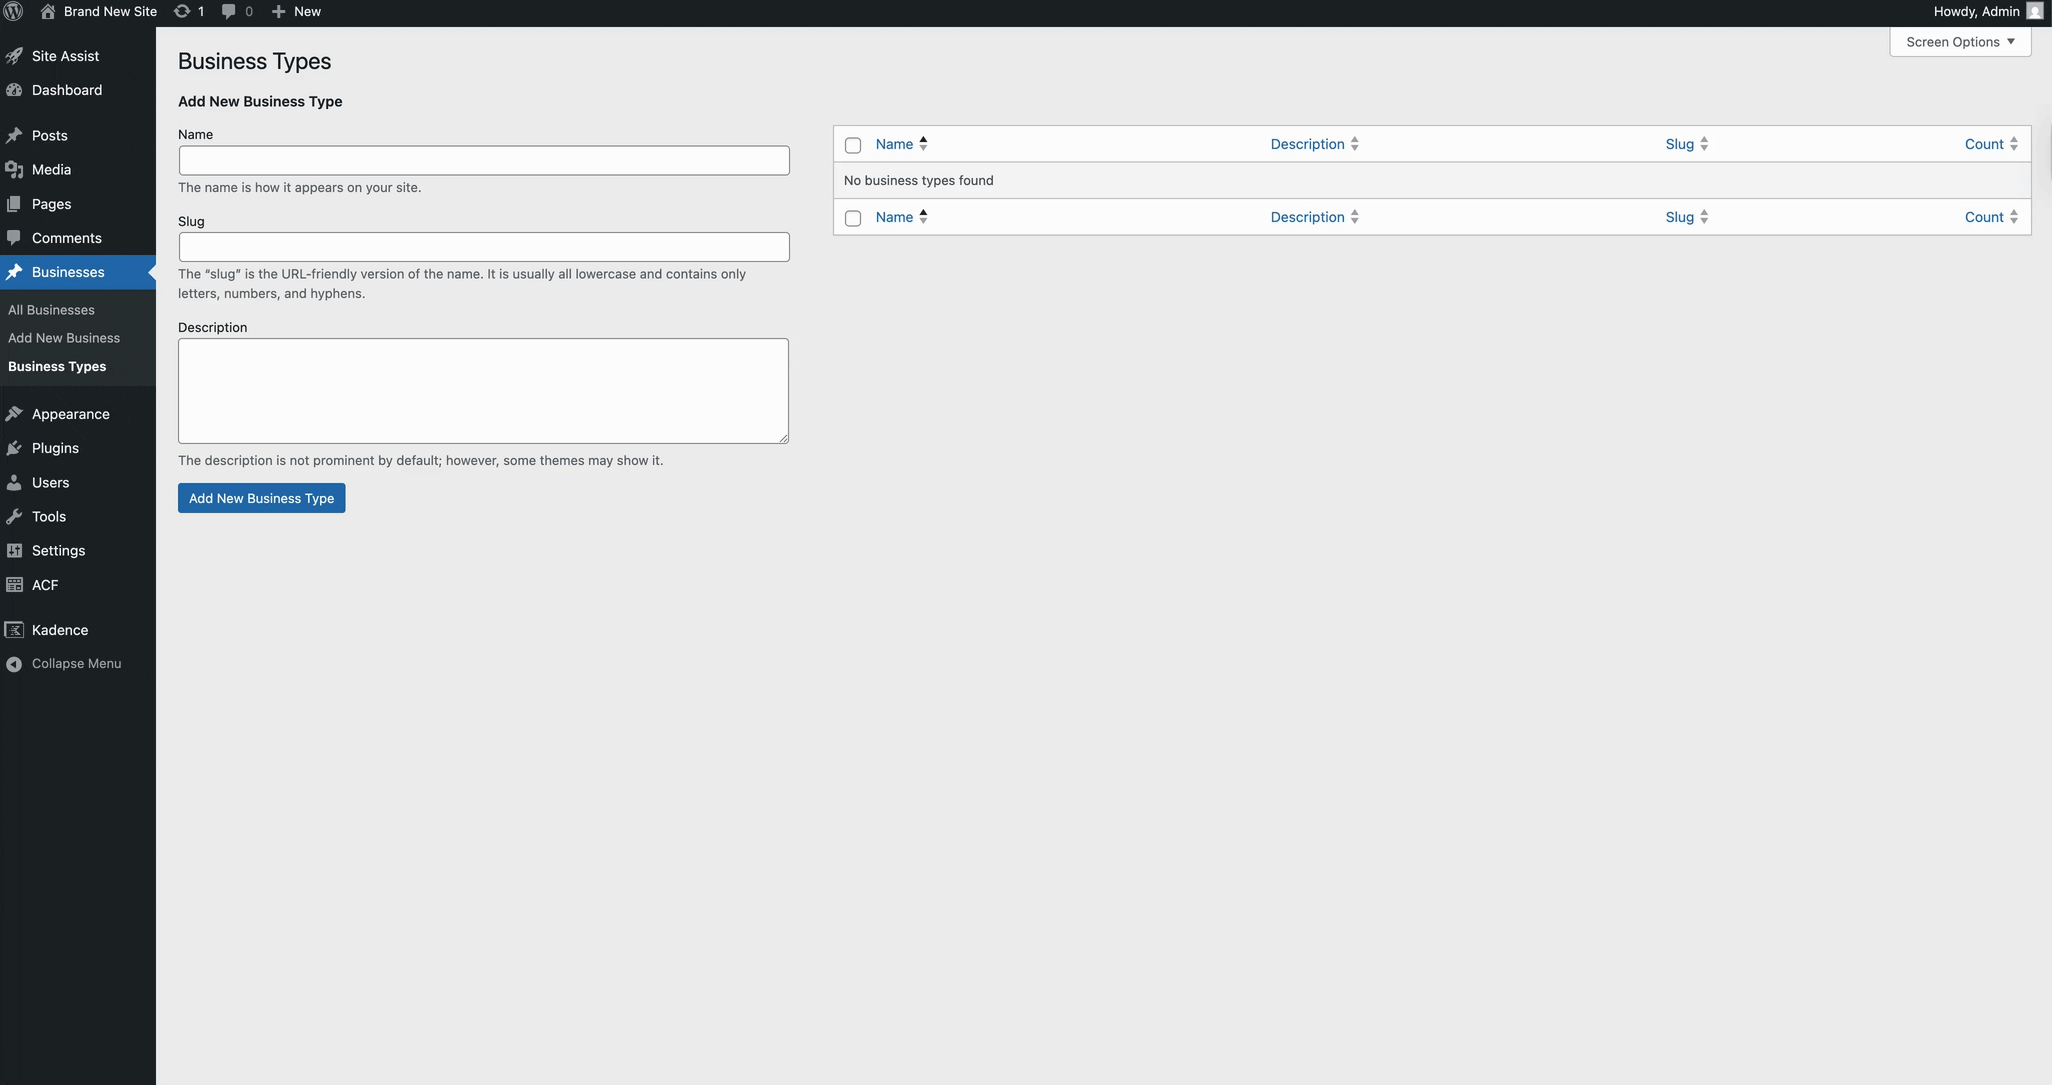
With ACF, you can create one by going to ACF → Taxonomies in your dashboard. In this guide, we’ll add a taxonomy called Business Types. This will let us group businesses by type.
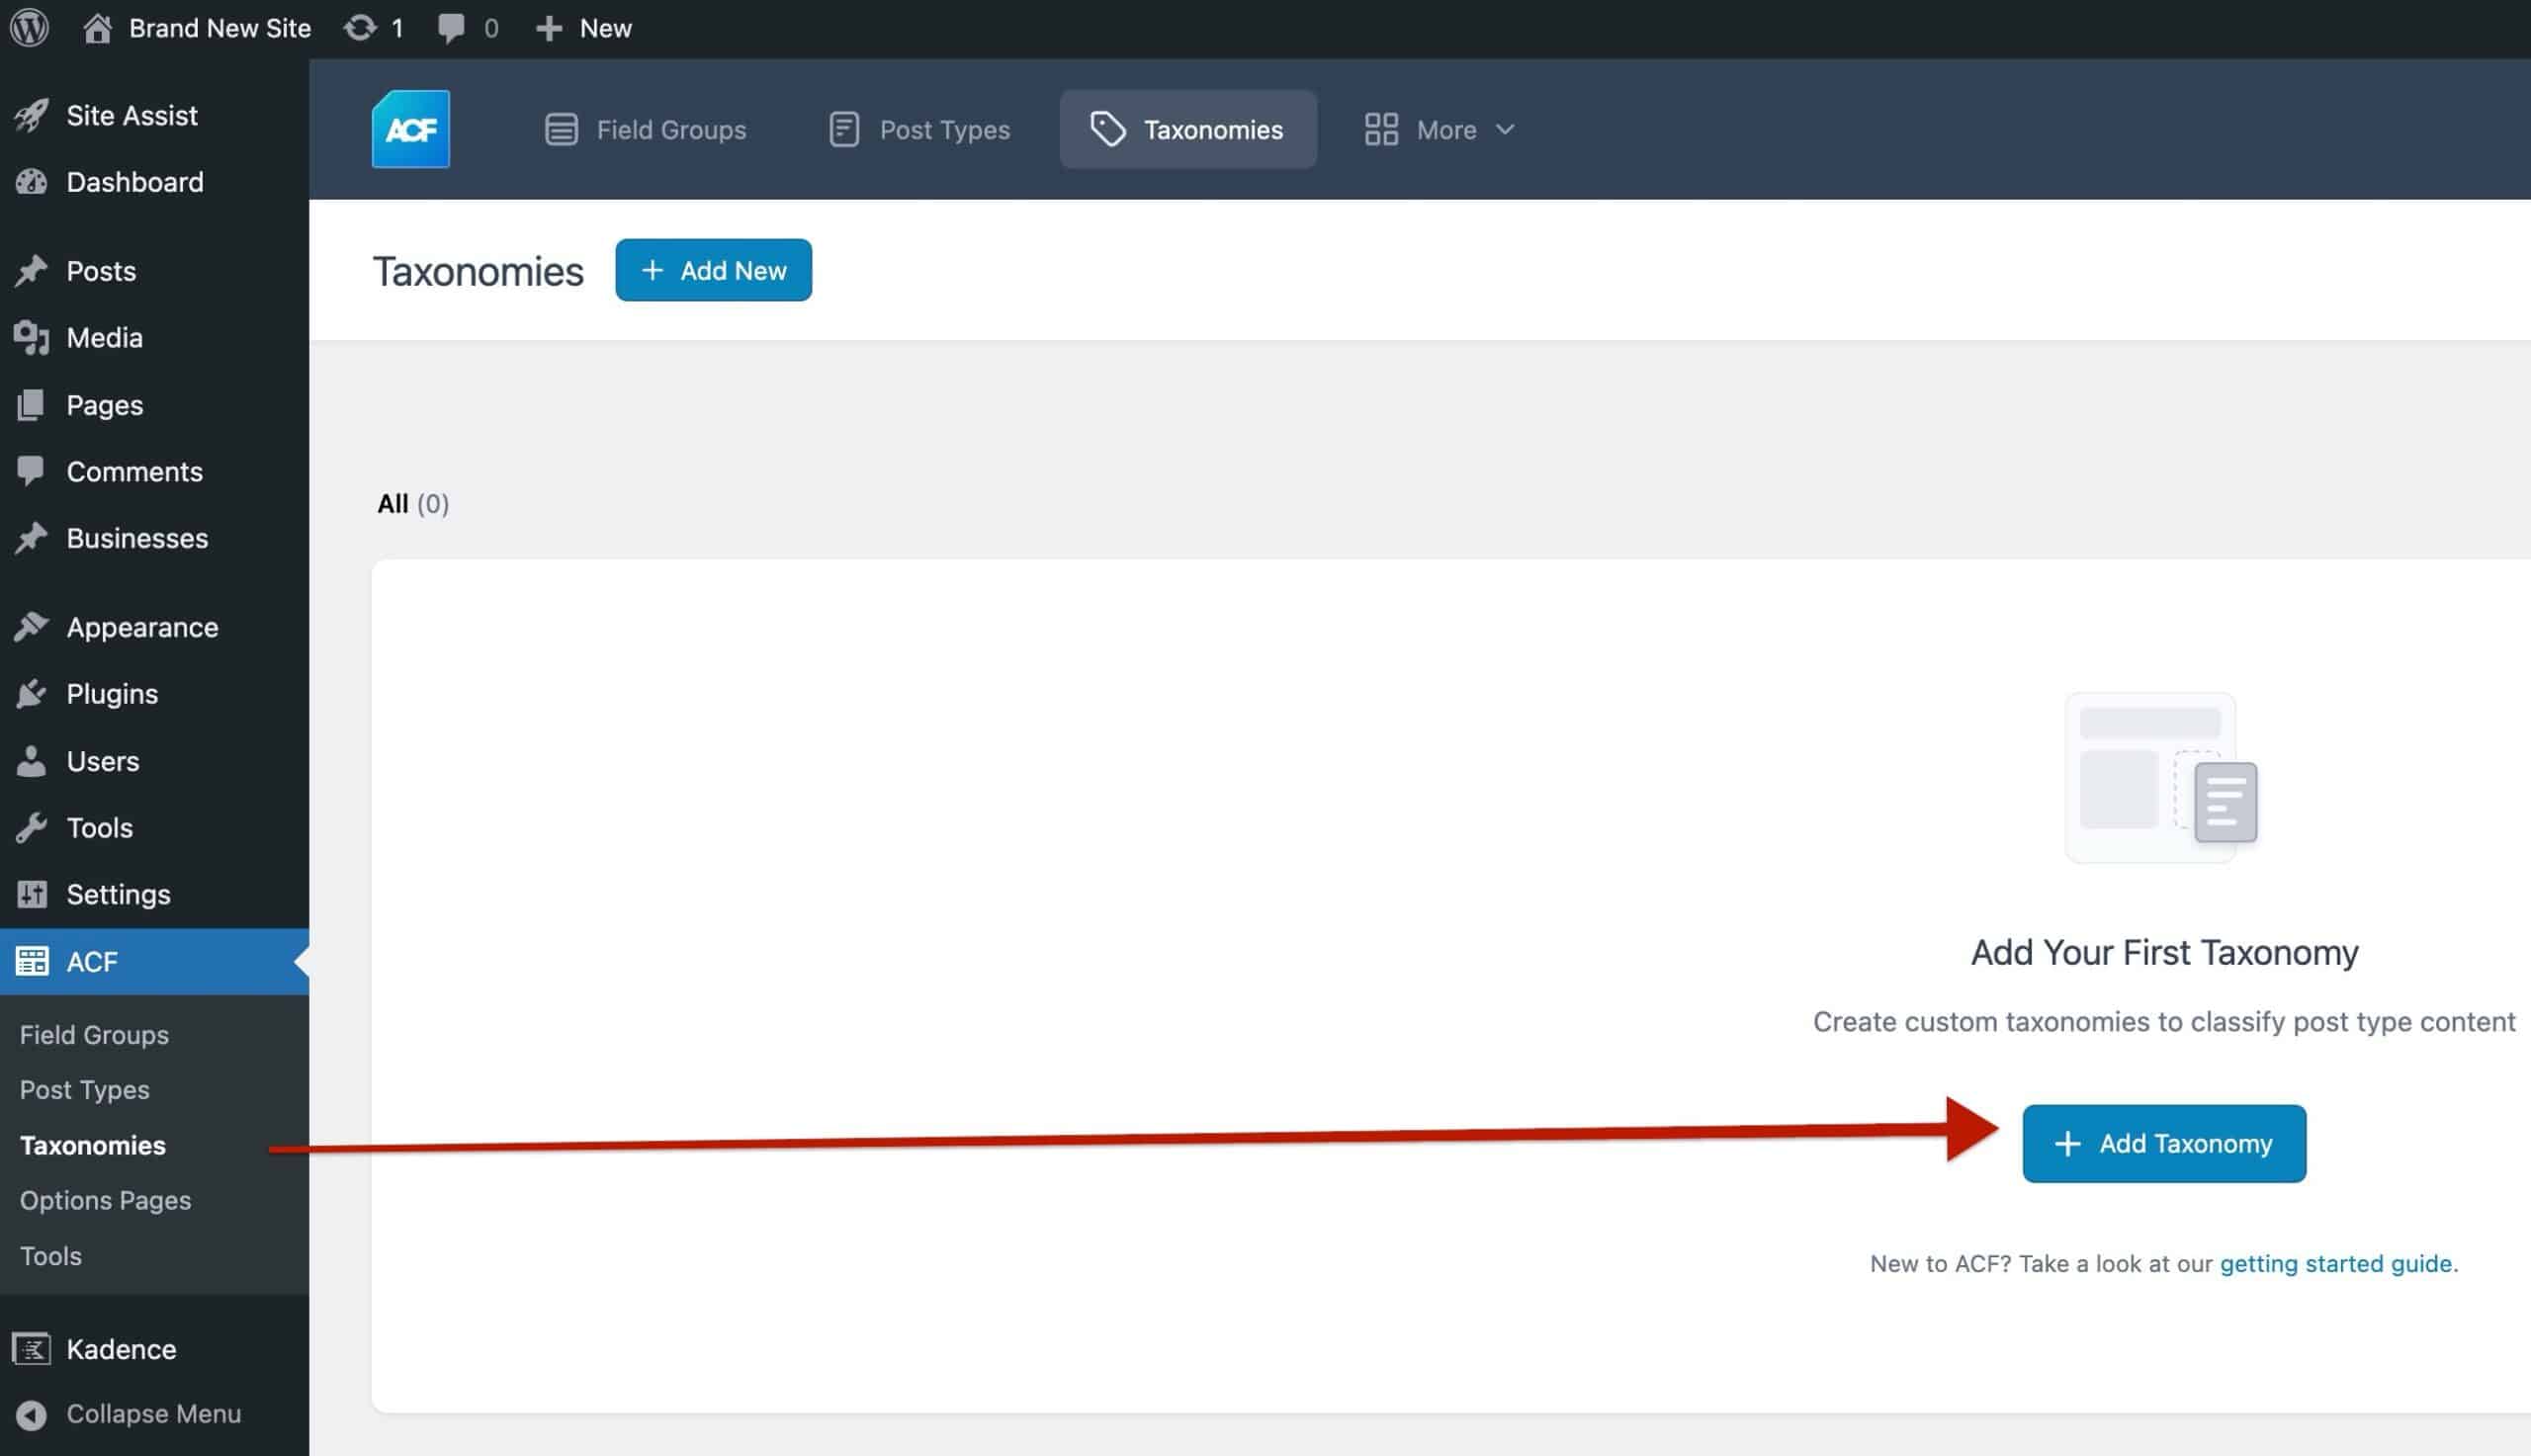
The setup process feels a lot like adding custom fields. You’ll give it a name, define how it behaves, and decide which post type it belongs to.
After your custom taxonomy is created and assigned to your post type, you’ll notice it gets its own menu item under your custom post type in the WordPress dashboard.
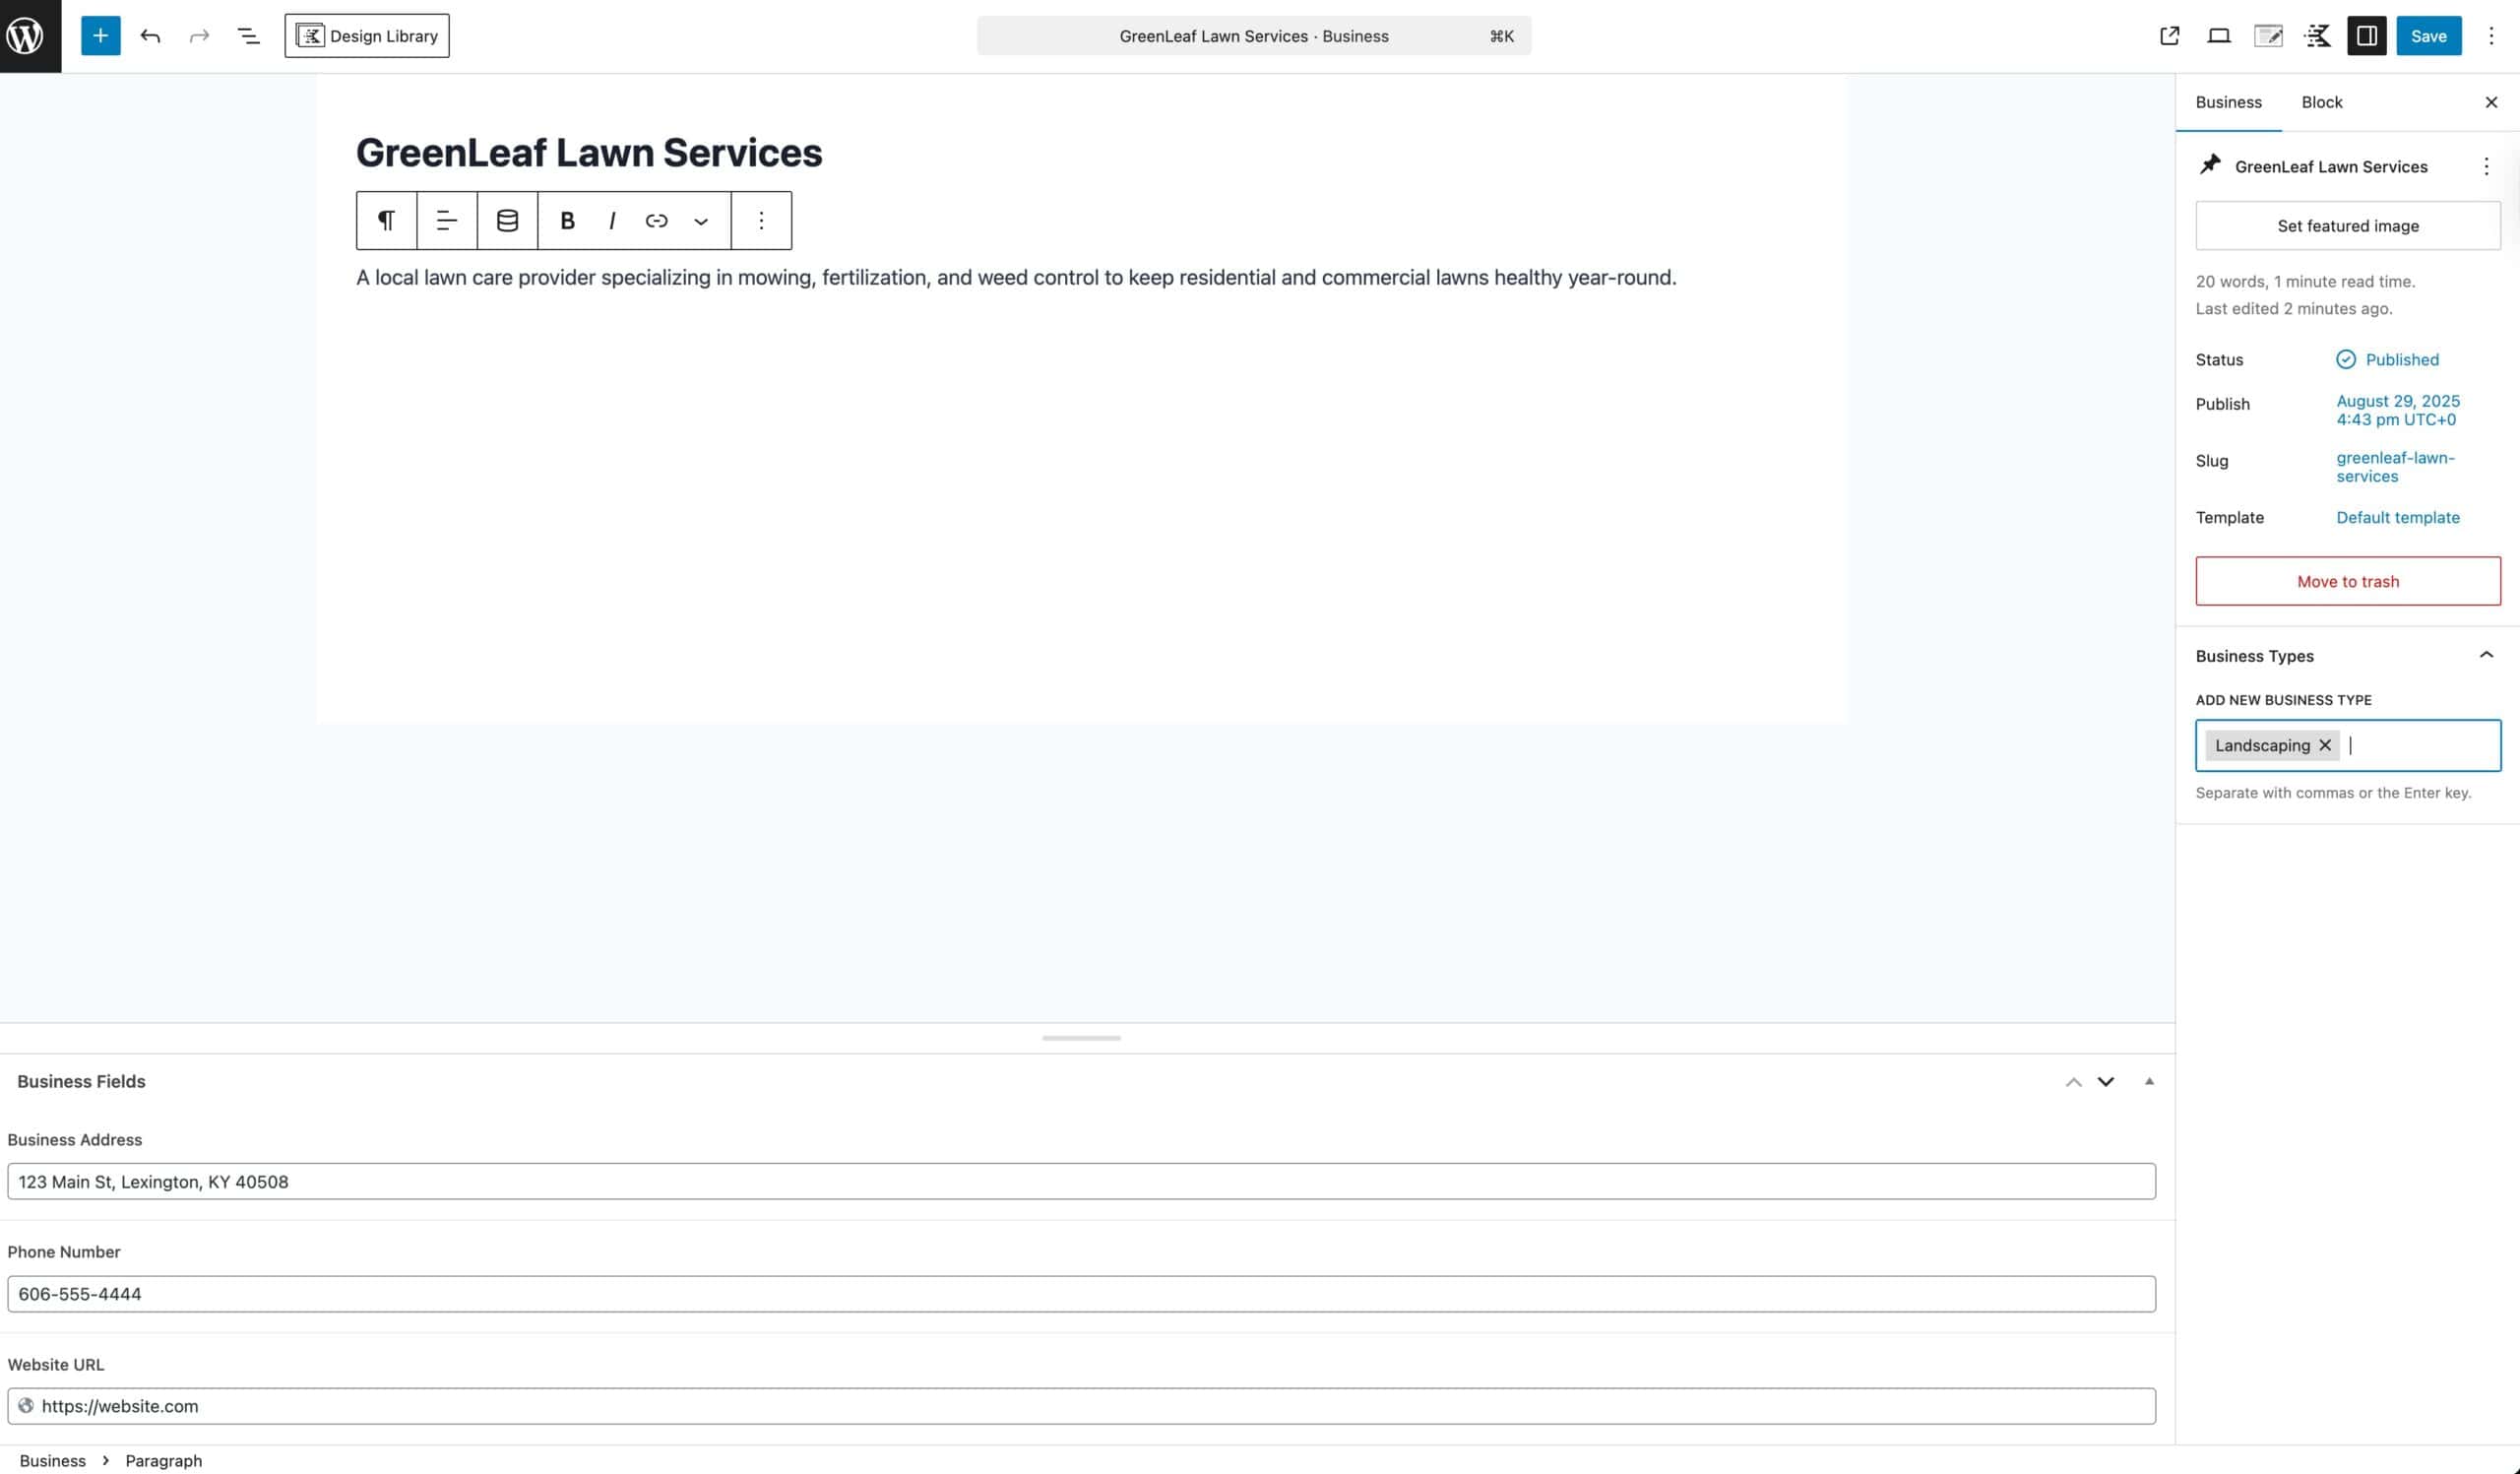
For example, under Businesses, you’ll now see Business Types. From there, you can start adding taxonomy terms, like Landscaping and Medical. These terms act just like categories, giving you an easy way to organize and later filter your custom posts.
With your taxonomy terms created, the final step is assigning them to your custom posts. This works just like adding categories or tags to a regular WordPress post.
When you’re creating or editing a post under your custom post type, you’ll see the taxonomy box in the post settings sidebar. From there, you can check off existing terms or create new ones on the fly.
This way, every custom post can be neatly organized into the right group, making it easier to filter, query, and display your content later with Kadence.
Now that your custom post type, fields, and taxonomies are set up, it’s time to add some content. Learn about creating Custom Posts below.
Creating Single Custom Posts
Custom posts behave much like regular WordPress posts. You can view them, add new ones, edit existing entries, and assign taxonomy terms. The difference is that you also have the option to include additional details through custom fields and taxonomies.
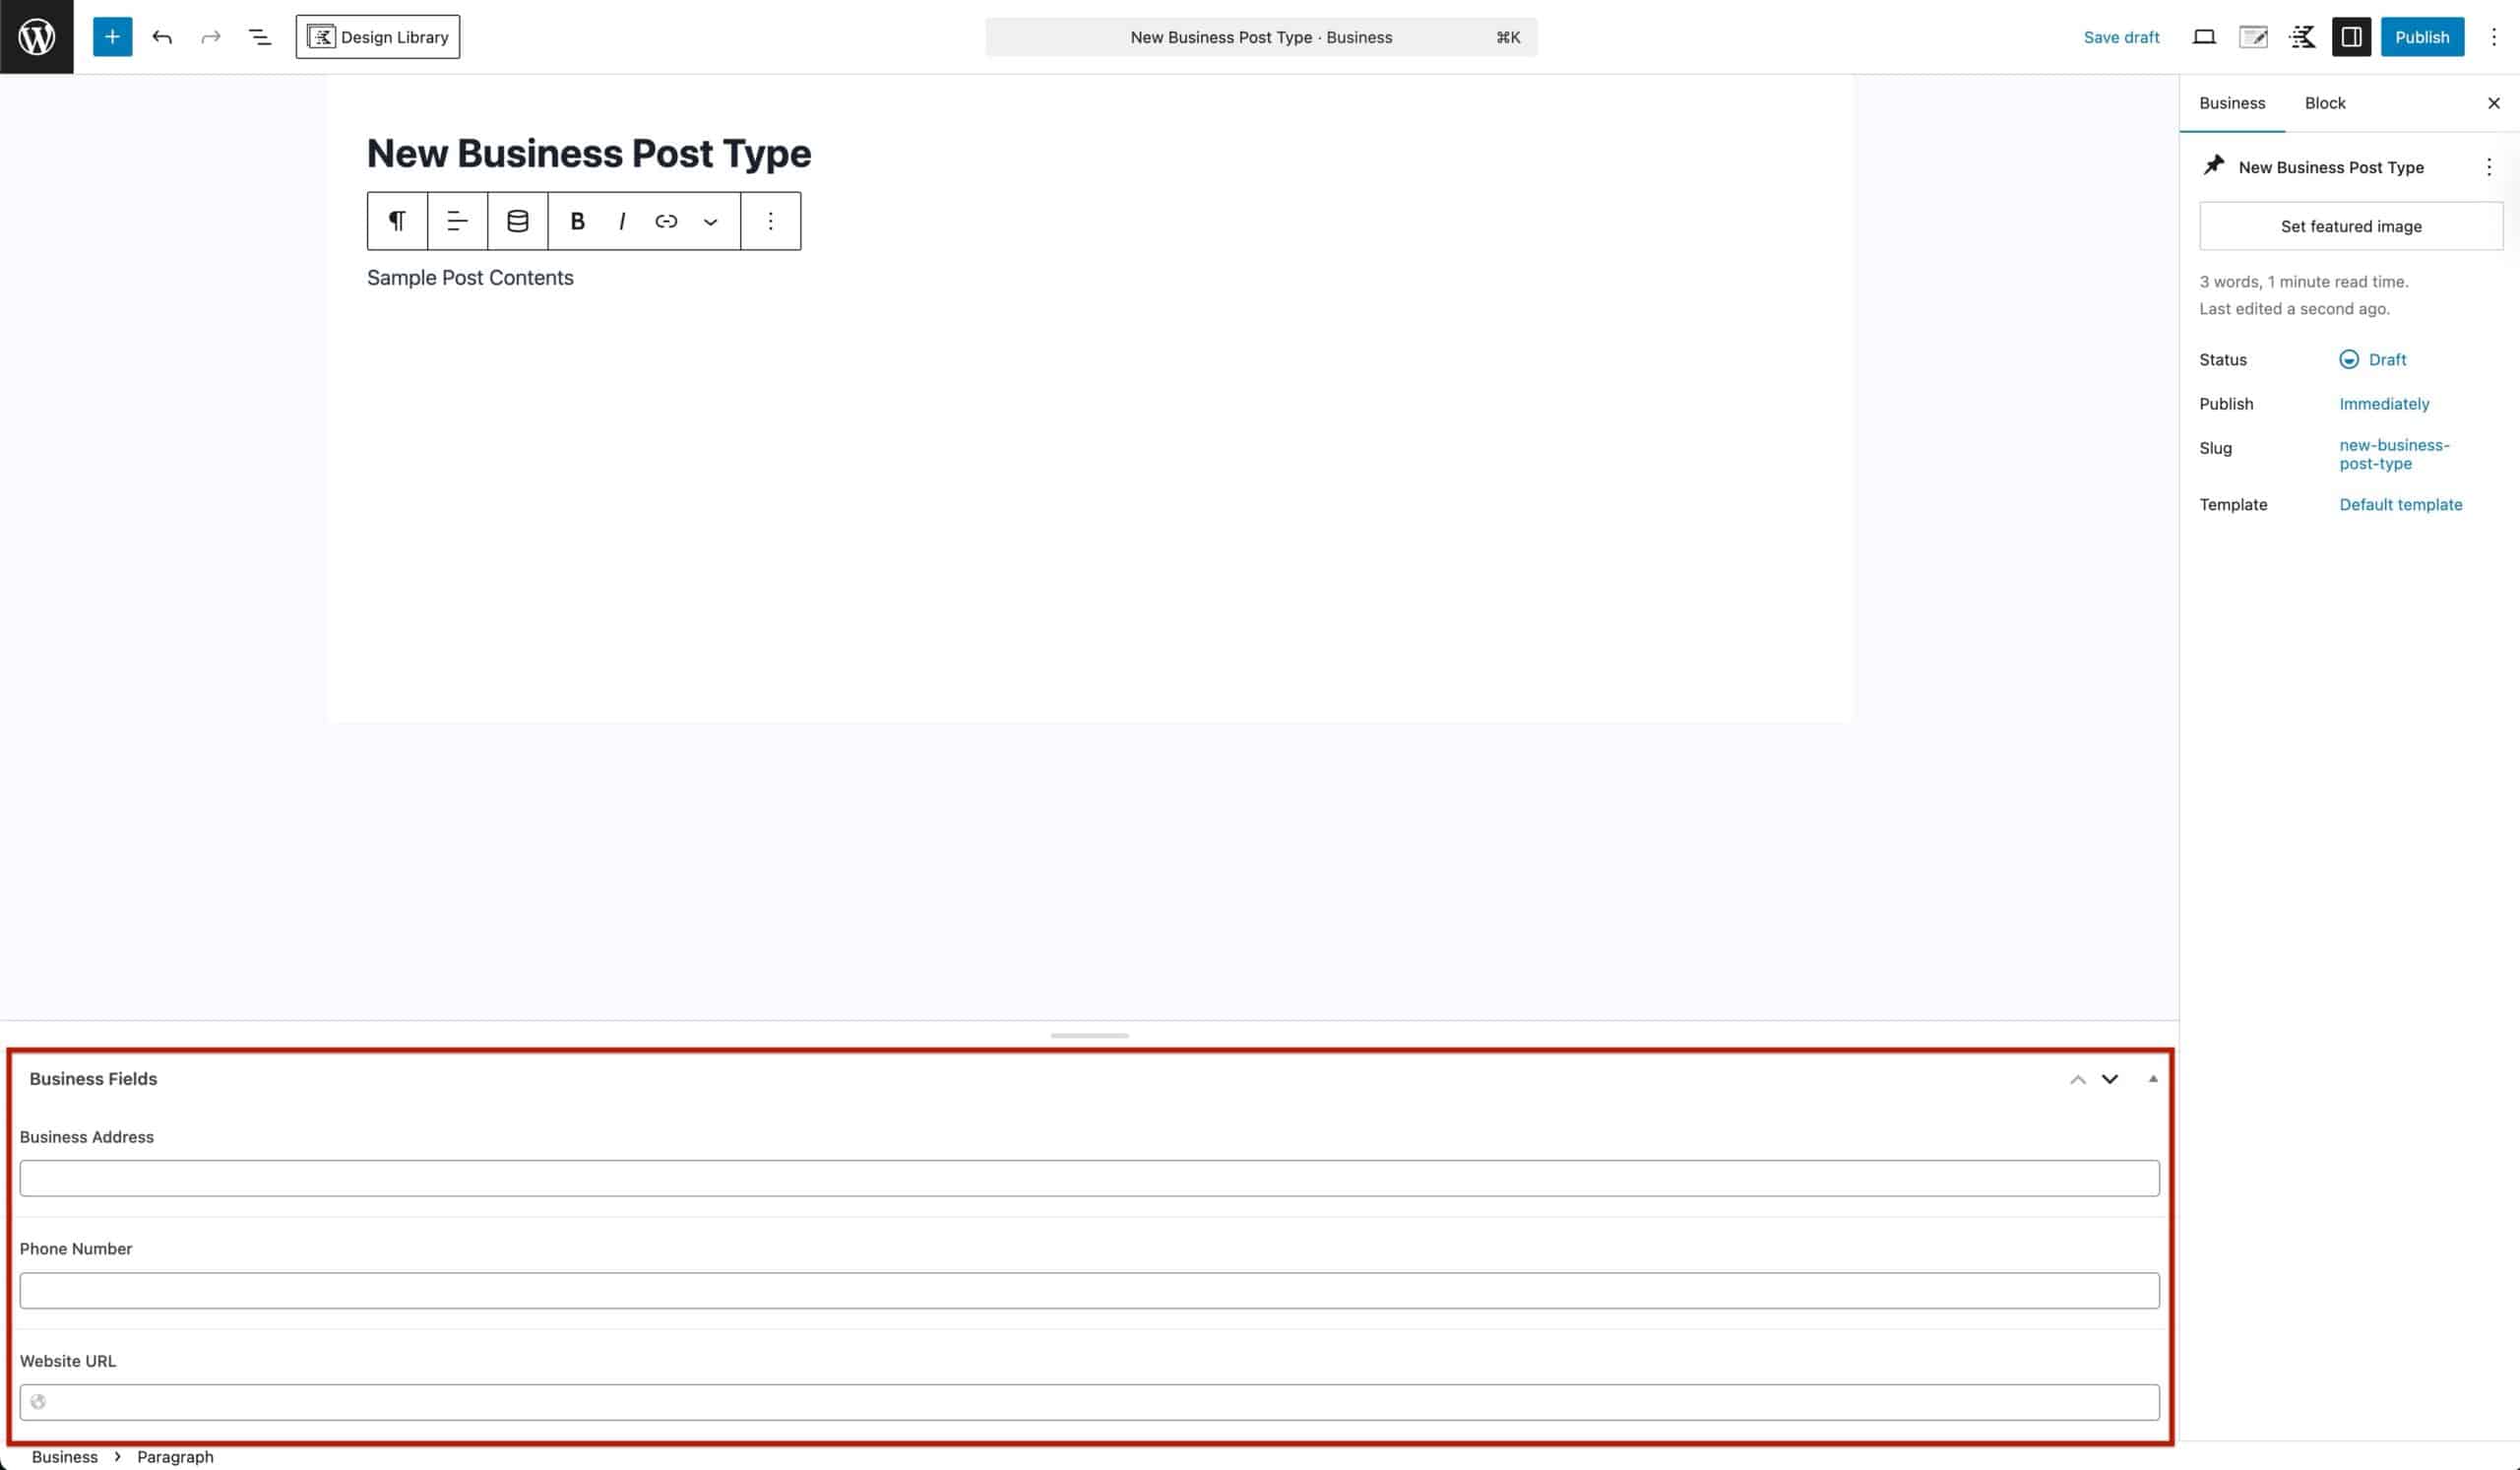
To create a new custom post, head to your WordPress dashboard, find your Custom Post Type in the sidebar, hover over it, and click ‘Add New.’
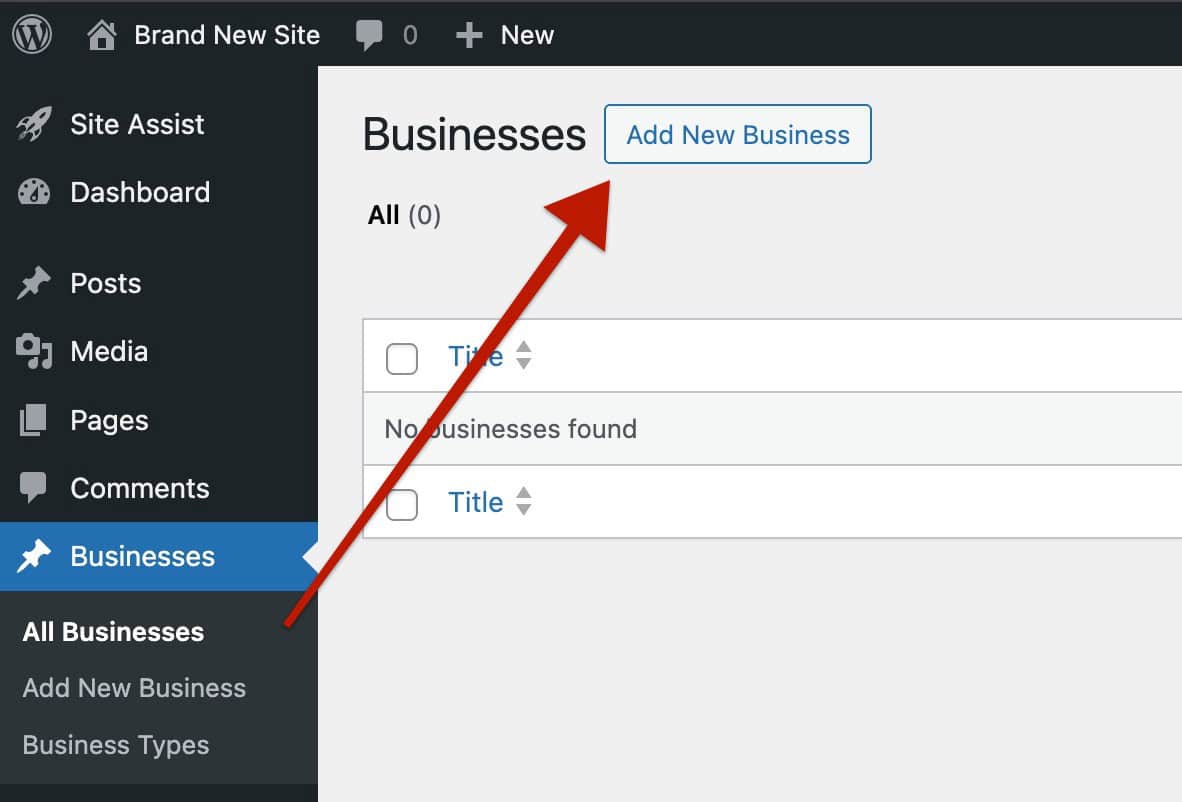
Here, you can add a standard post title and the main post content. Below the content area, you’ll see your Custom Fields ready to be populated. You can also assign taxonomy terms, including your custom ones, using the Post Settings.
Once finished, whenever you view the Custom Post Type, it will look like a standard post.

By default, Custom Fields won’t appear on your posts. Custom Post Types don’t automatically display this information. To show them, we’ll use a Kadence Template Hooked Element. This allows you to take over the entire content area of your Custom Post and replace it with blocks using Kadence + Dynamic Content. You’ll get full control over what shows up, how it looks, and exactly where it appears.
Creating a CPT Hooked Element
Kadence Theme Kit Pro gives you access to Hooked Elements, which let you take full control of your post layouts. To enable them, go to your WordPress dashboard and navigate to Appearance → Kadence. Locate the Hooked Elements section and enable them.
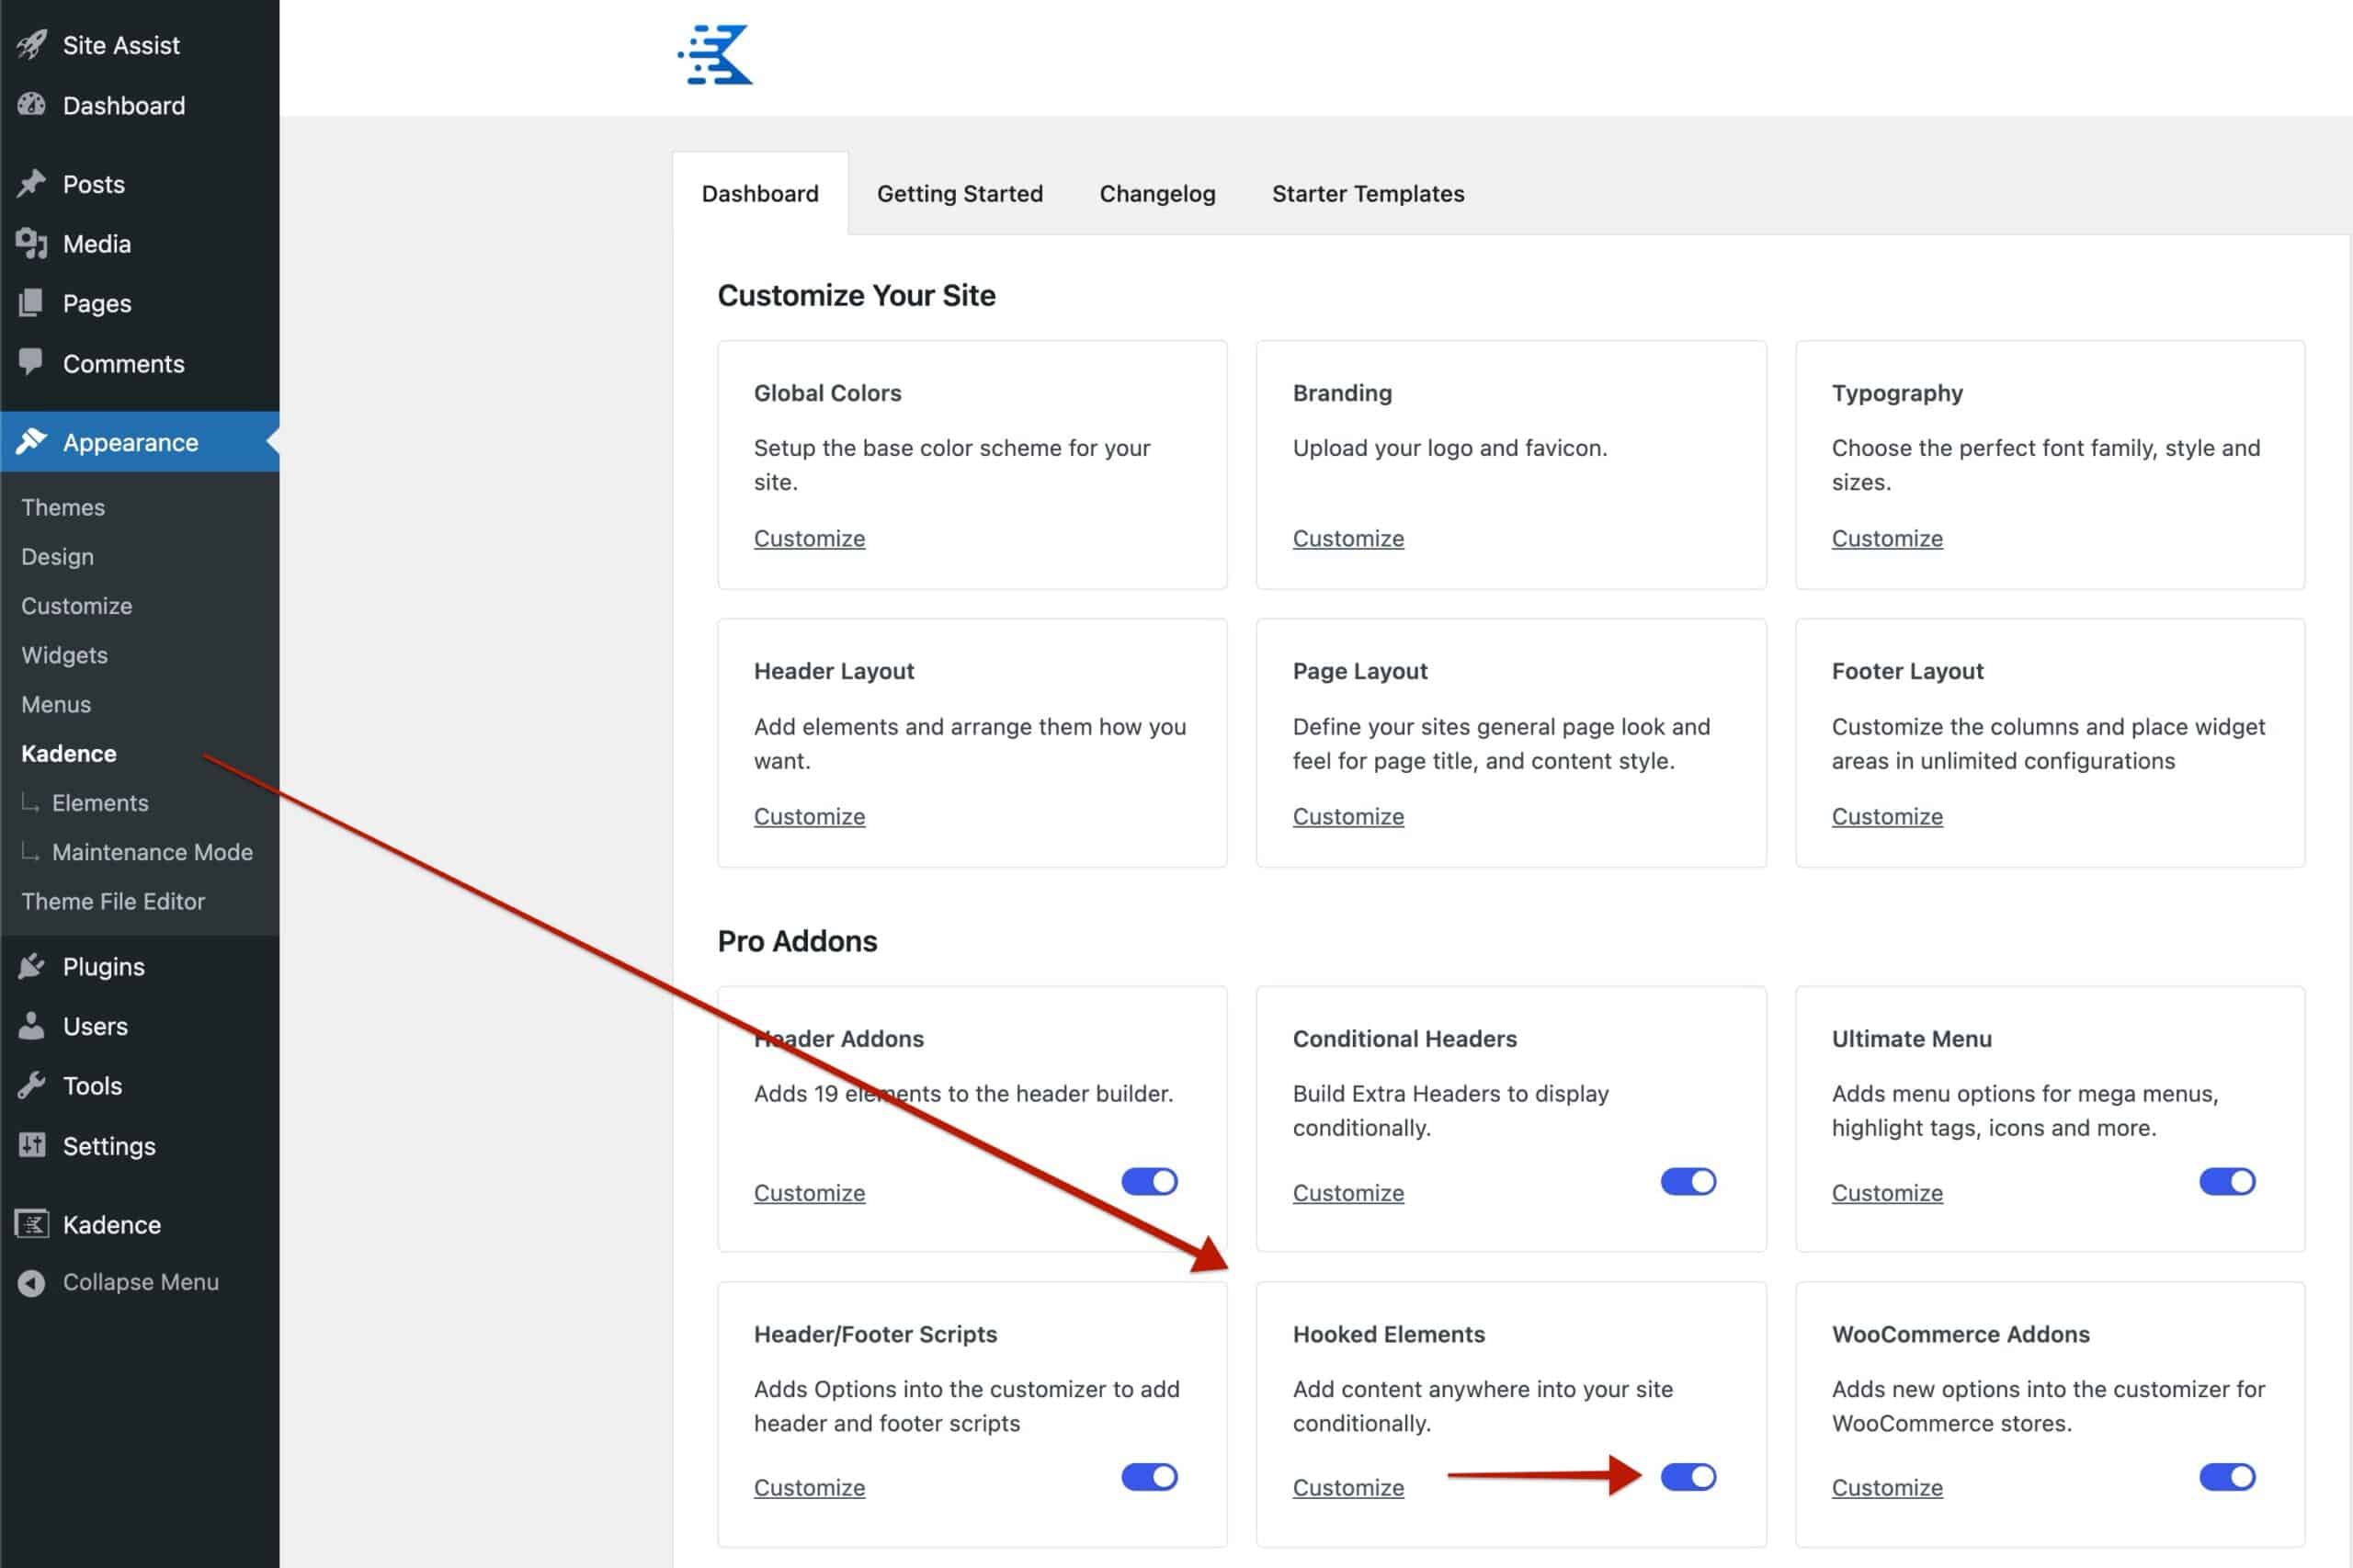
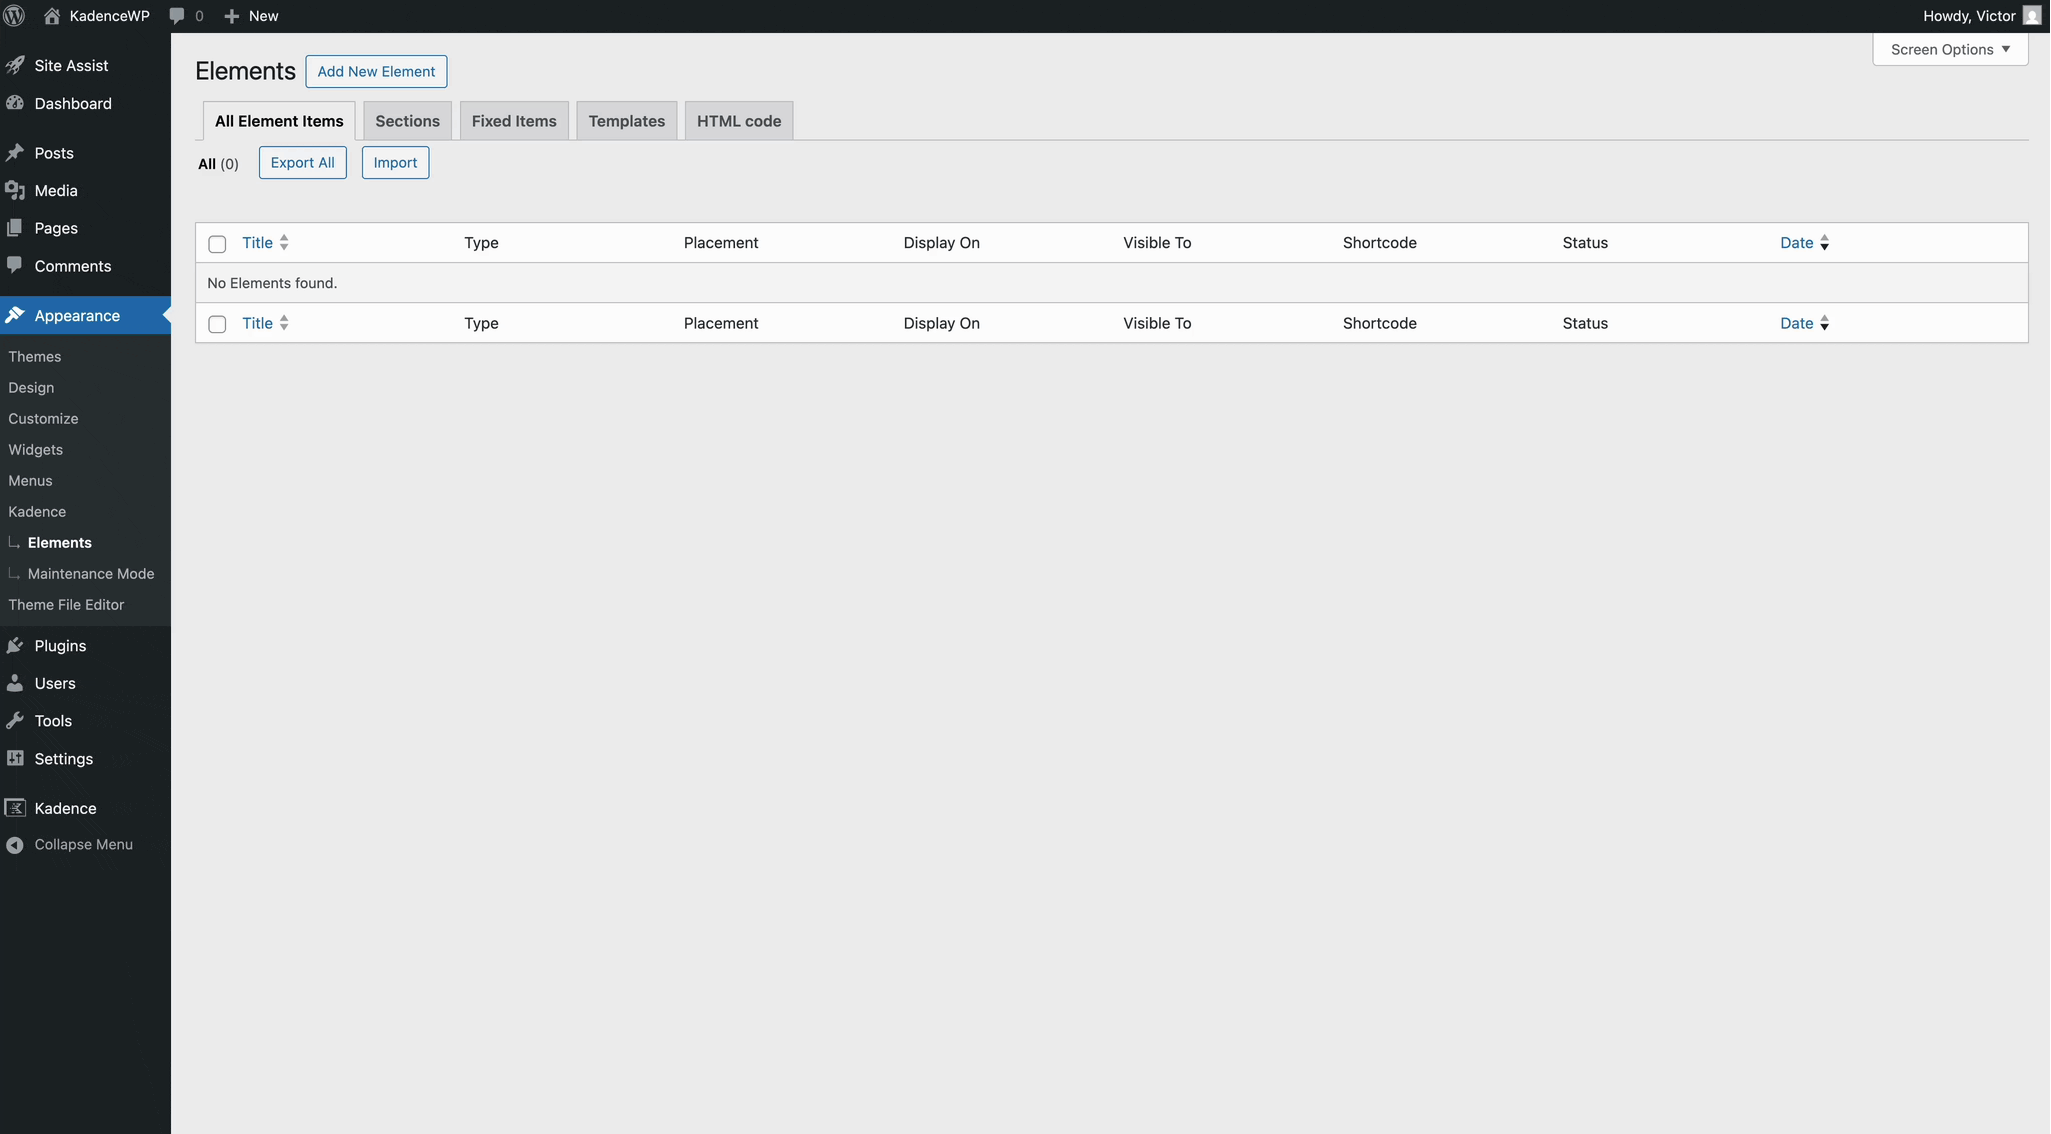
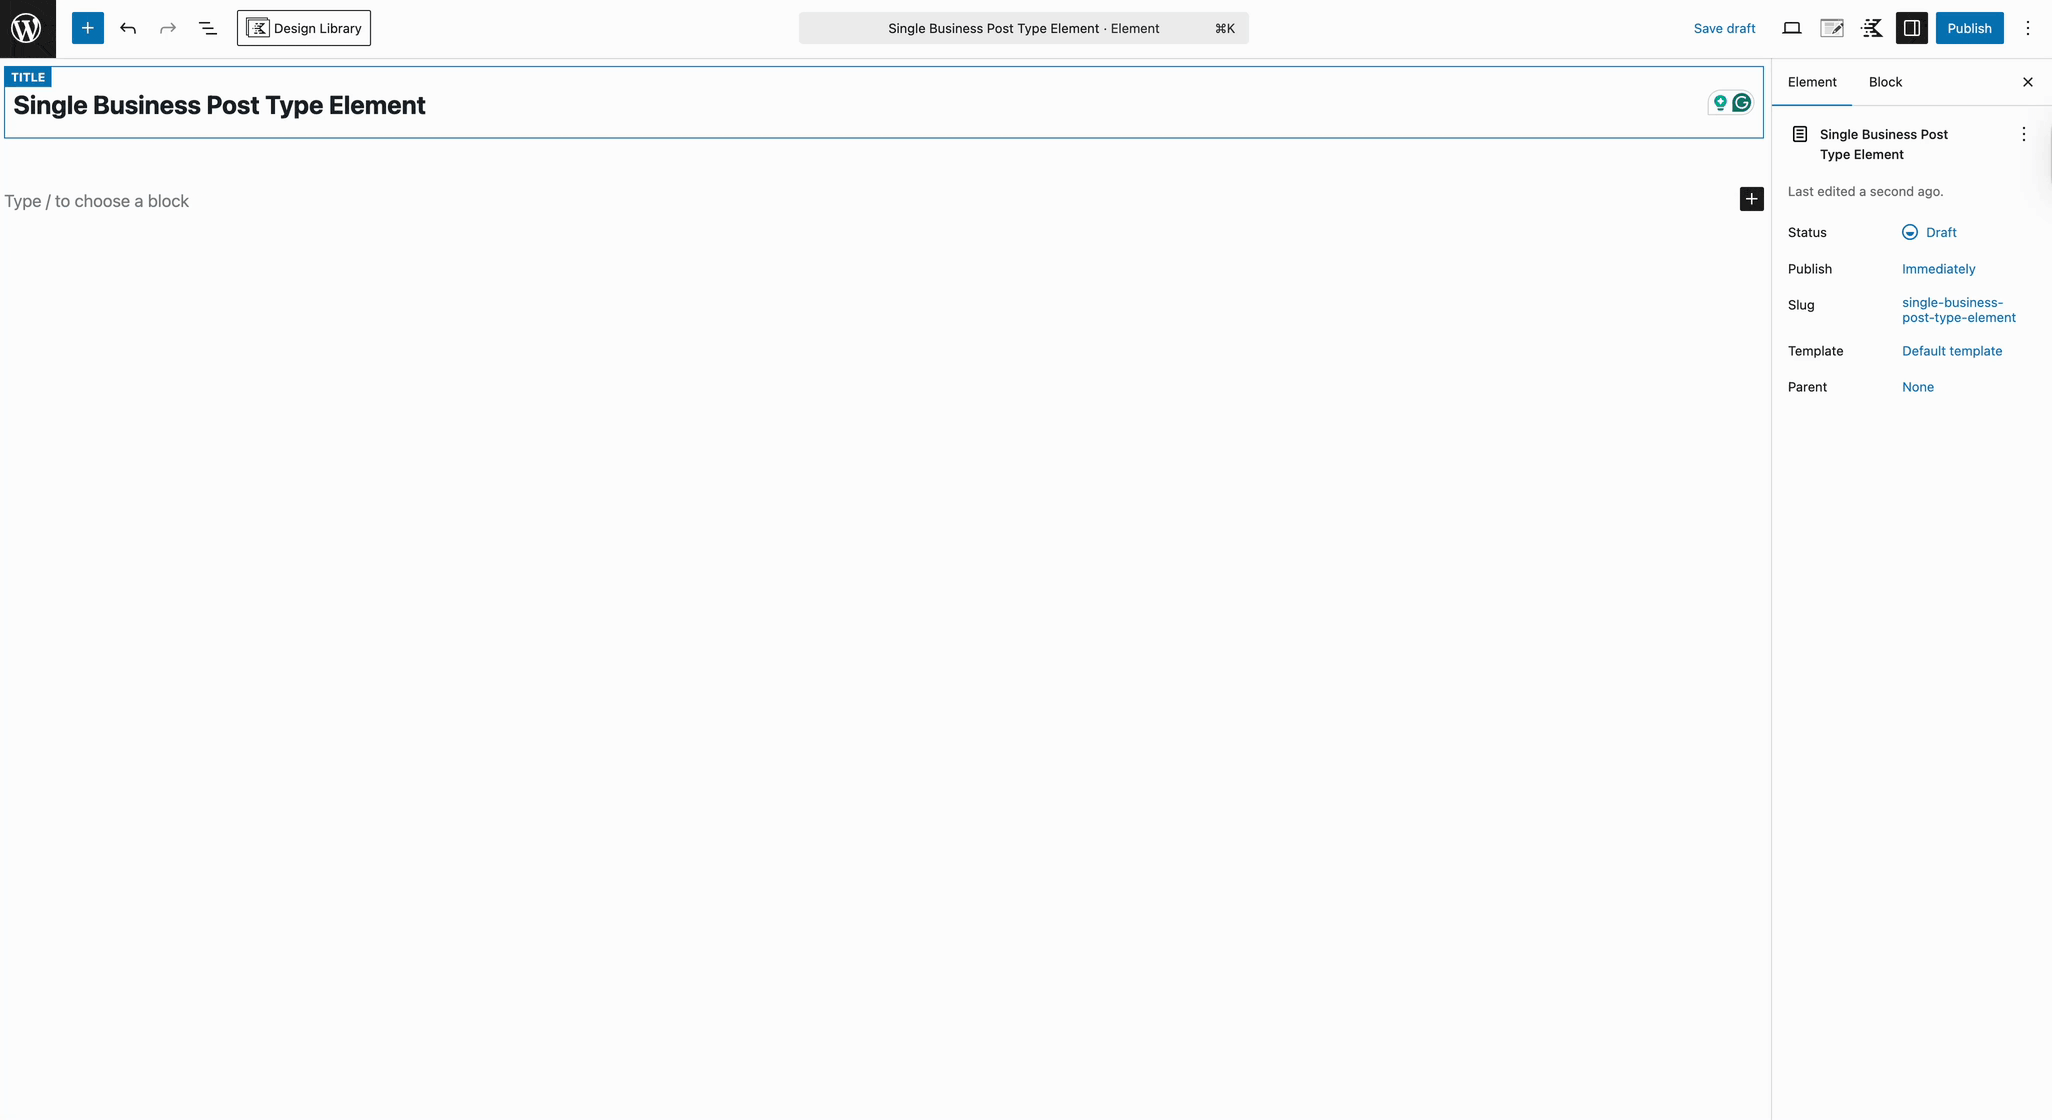
After enabling Hooked Elements, head to Dashboard → Appearance → Kadence → Elements to create a new one. You’ll notice several Element Types available. For this guide, we’ll focus on creating a Template Element specifically for Single Custom Post Types, which will let us control exactly how each post looks.
(You can learn more about each element type here.)
Next, you’ll want to set a Preview Post so your Template Element displays correctly while you design it. Click the Element Settings (the pen and pencil icon in the top-right corner of the editor), then select Preview Post. Choose your Custom Post Type and pick a specific post to preview. This lets you see exactly how your template will look with real content.
Applying Dynamic Content
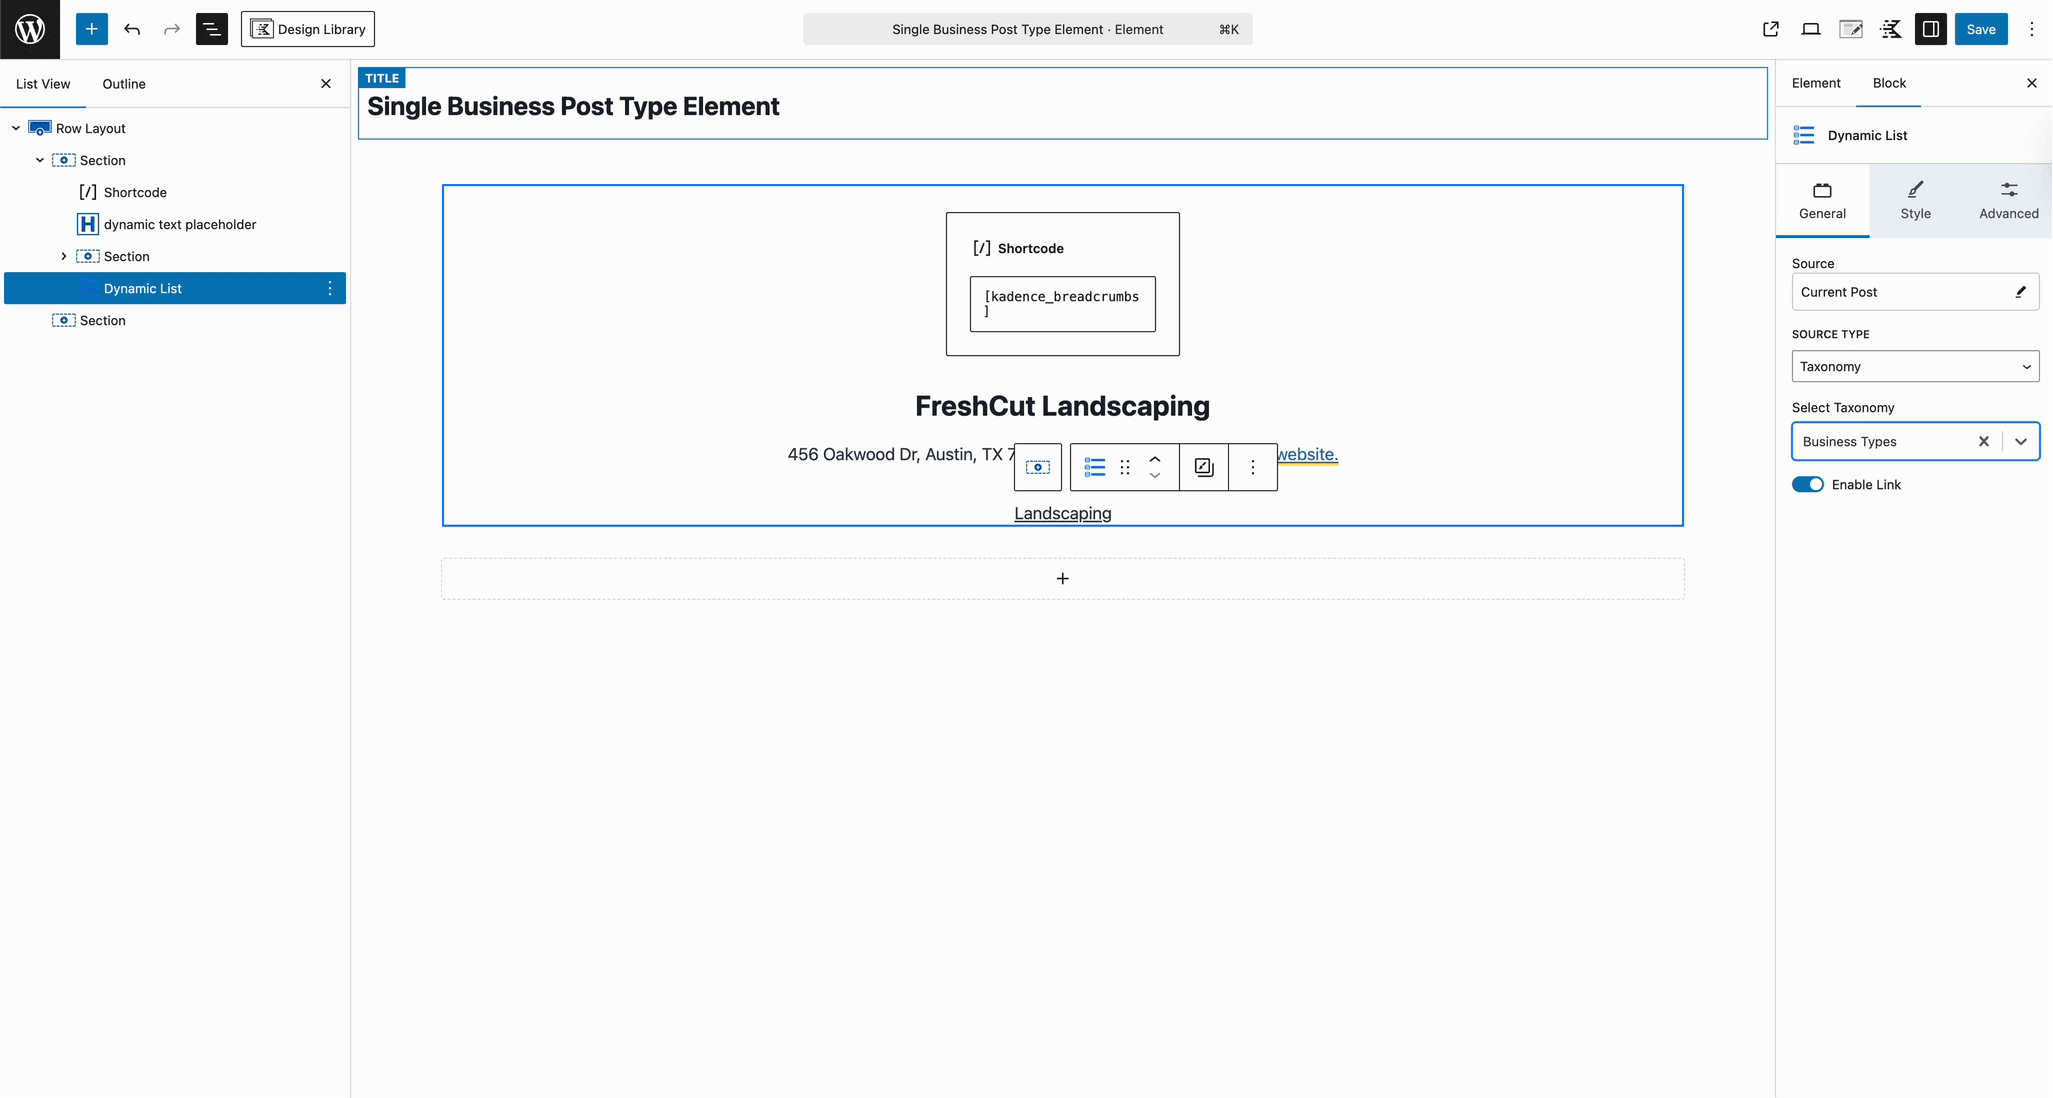
Kadence Blocks Pro gives you full access to Dynamic Content, a powerful feature that can pull data from your posts or custom fields and display it automatically. Many Kadence blocks support this, including the Advanced Text Block, Advanced Image Block, Dynamic List Block, Dynamic HTML Block, and more. With these blocks, you can build nearly any layout you need.
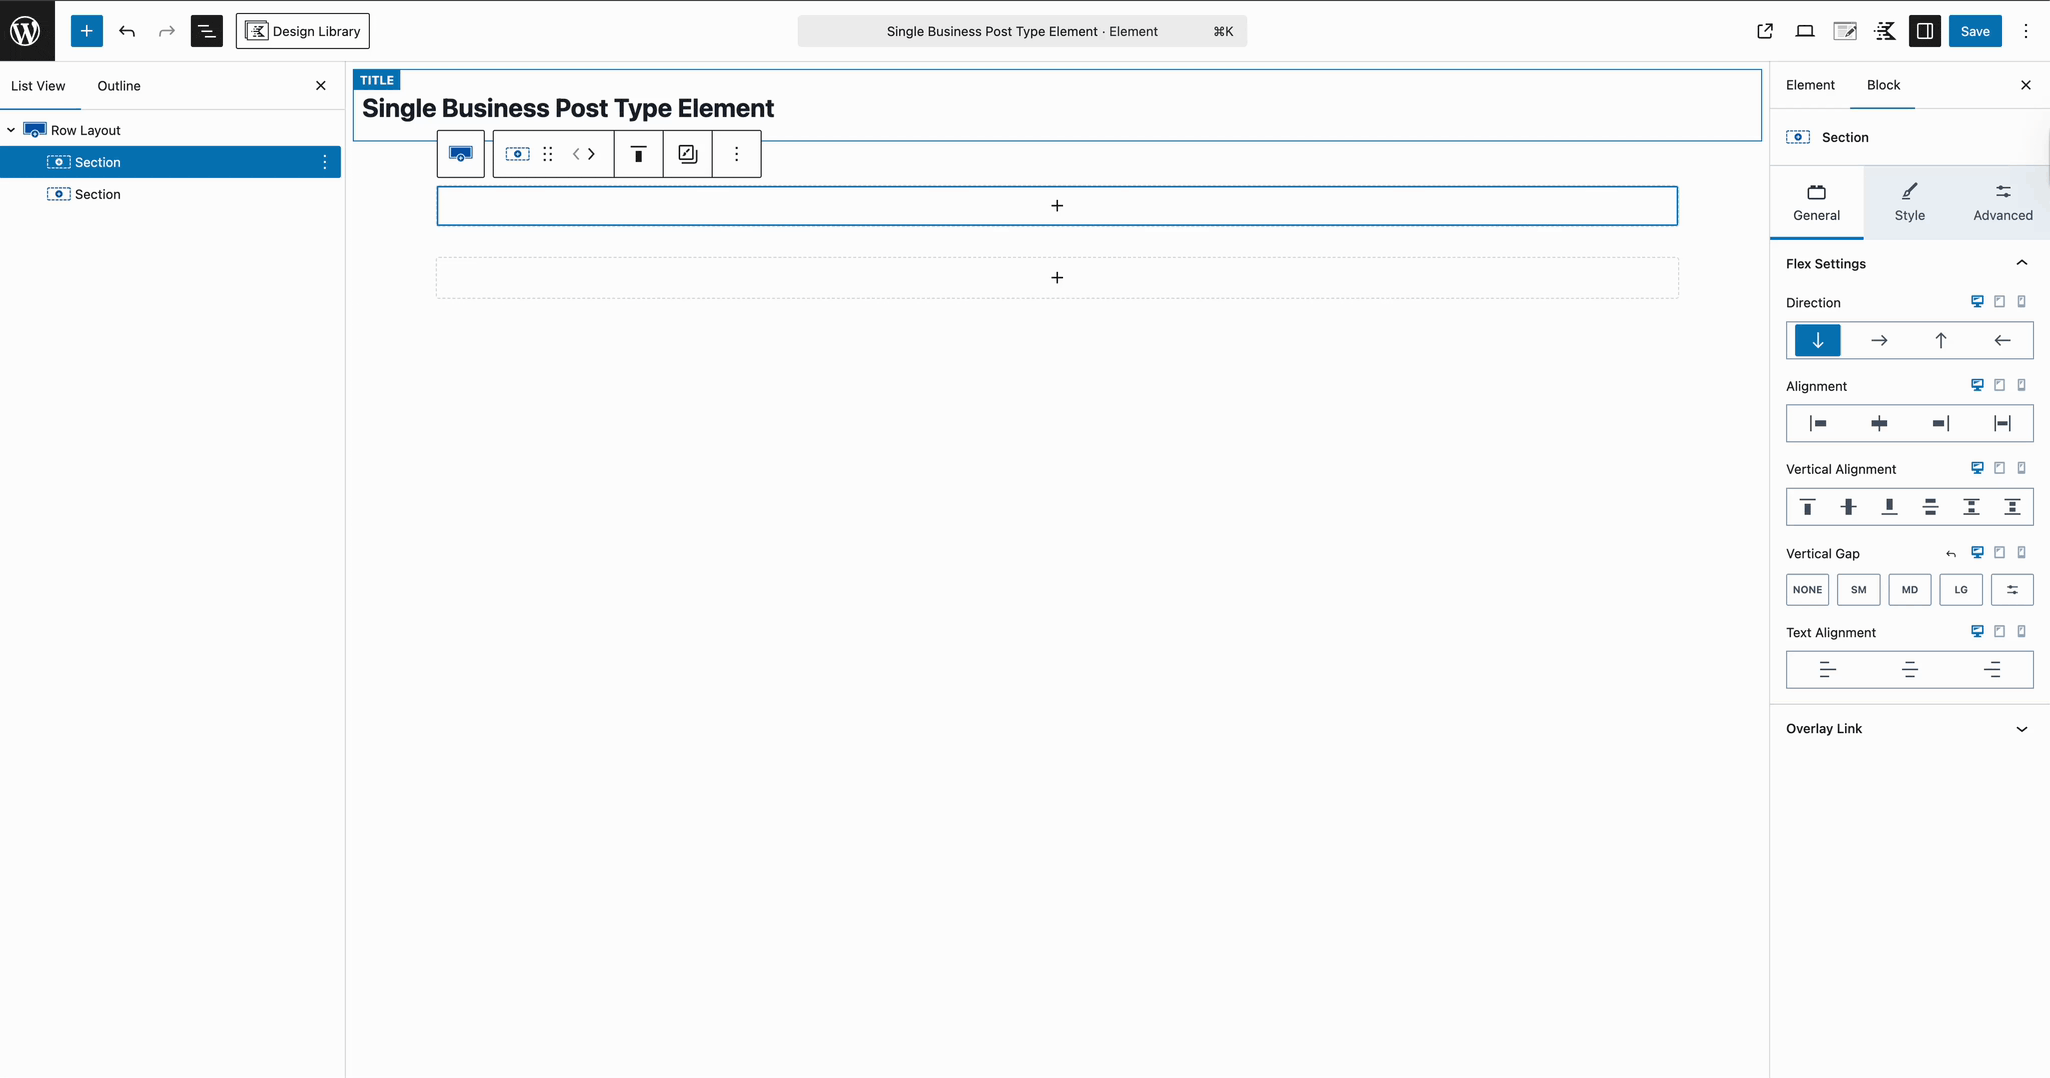
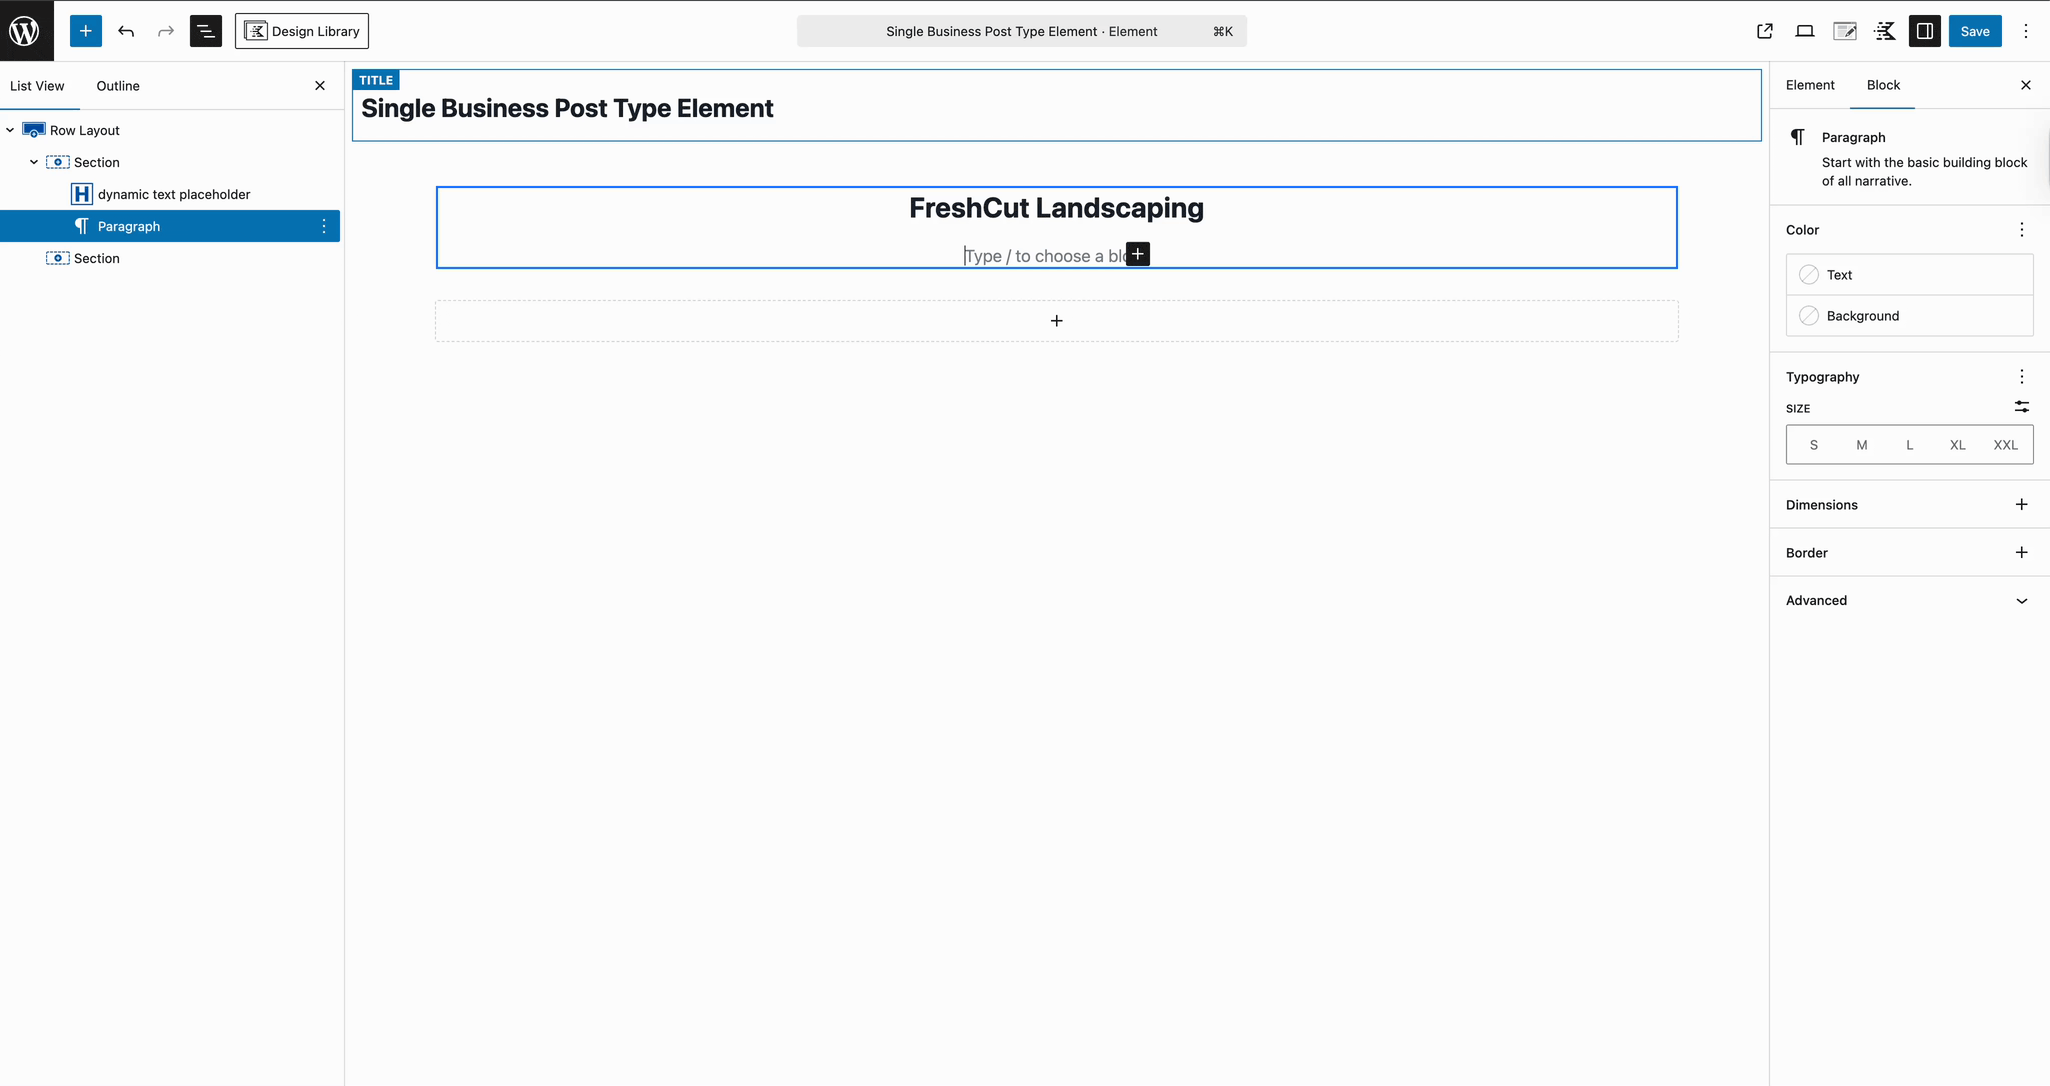
To get started, add a Row Layout Block (or any container block you prefer) to hold your content. Then, insert an Advanced Text Block. In the block toolbar, click the Dynamic Content Icon (The database icon) and select the type of content you want to display.
For example, you might start with the Post Title. This block will automatically pull the title from the current post, so your template always shows the correct title no matter which post is being viewed.
Once your post title is in place, you can also pull in your Custom Fields using Dynamic Content. For example, you might want to show a business’s phone number, address, or website.
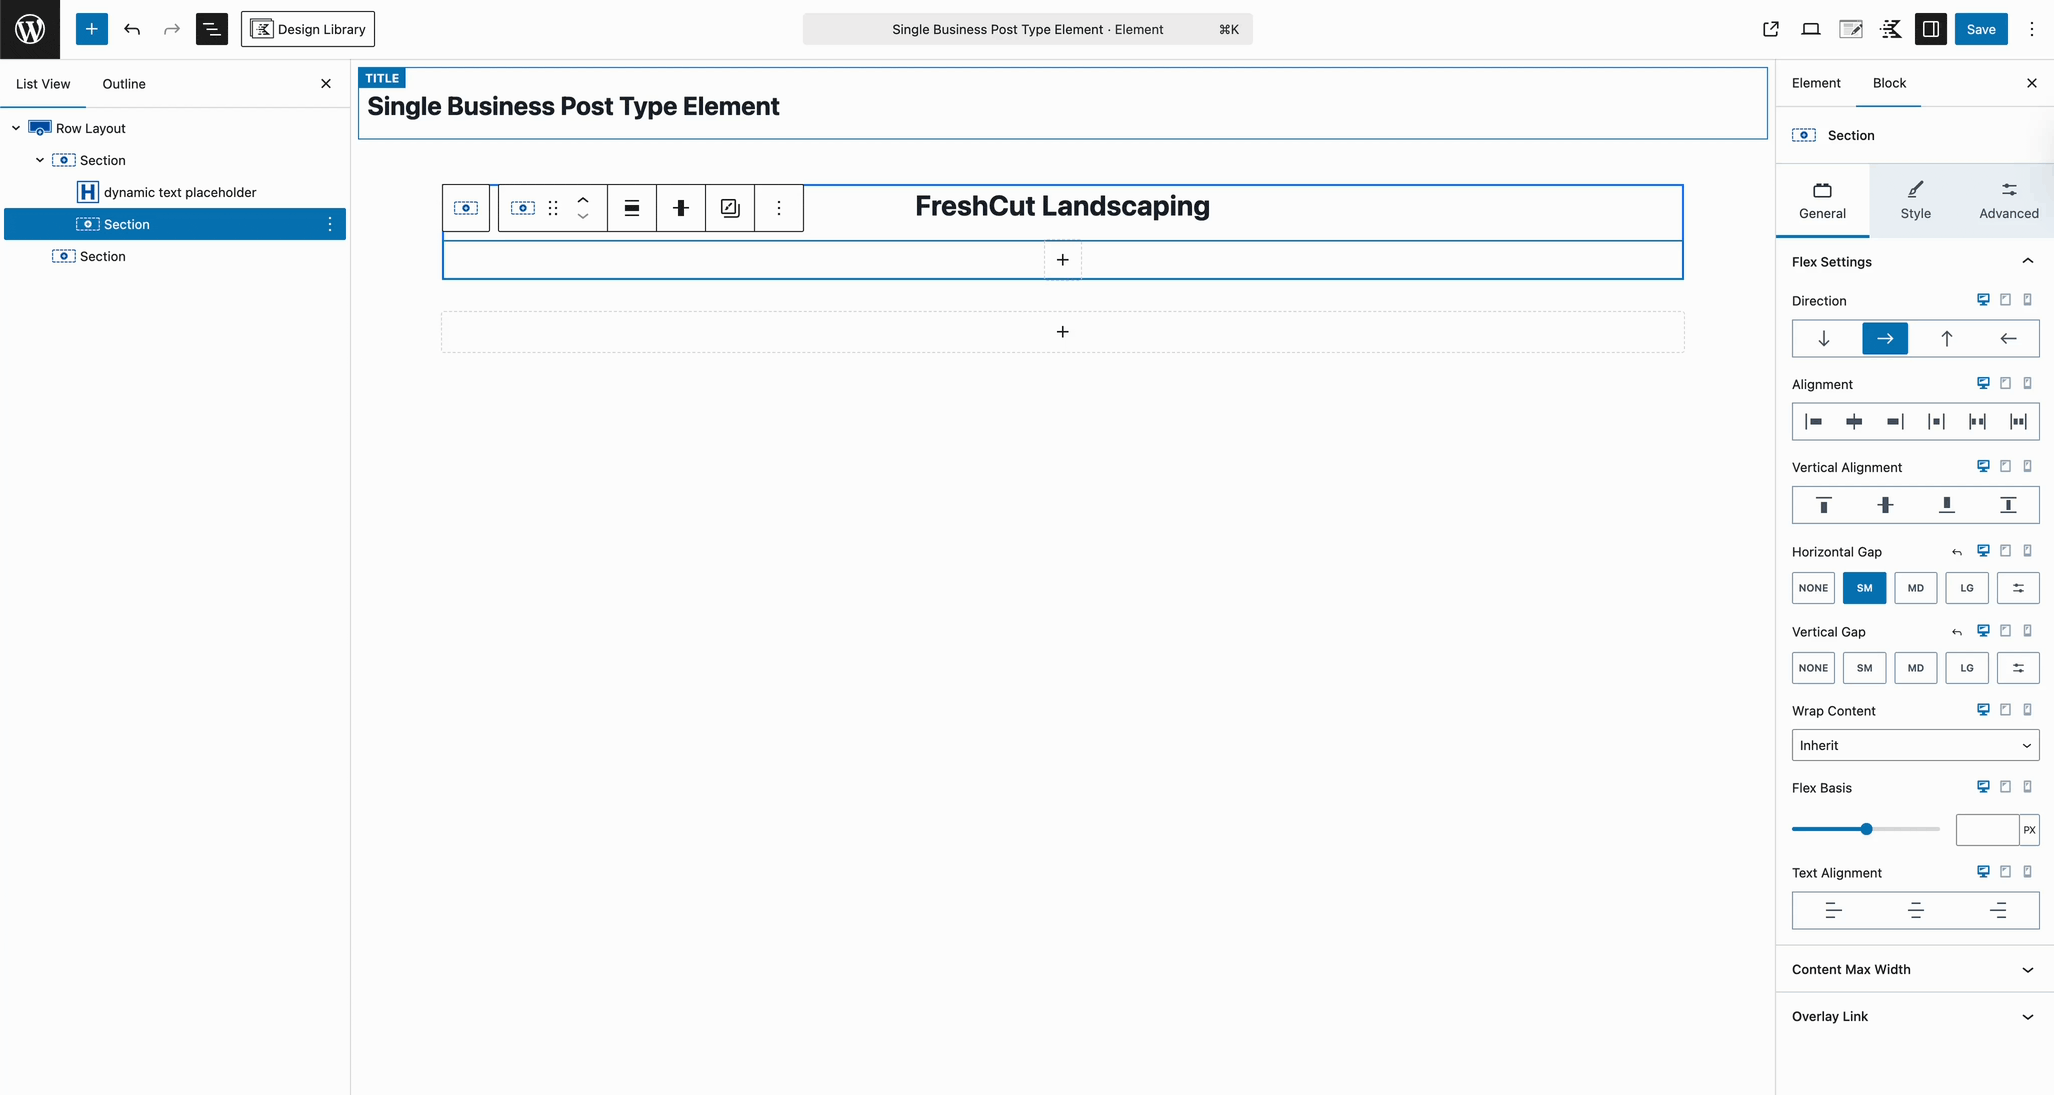
A good approach is to add a Section Block below your Advanced Text Block (where your post title is). Inside the Section Block Settings, set the Flex Direction to Horizontal. This way, your custom fields can sit side by side instead of stacking vertically, giving your layout a cleaner, more organized look.
Tip: The Section Block Flex Settings can help gain full control of the nested contents, such as setting the overall alignment and positioning.
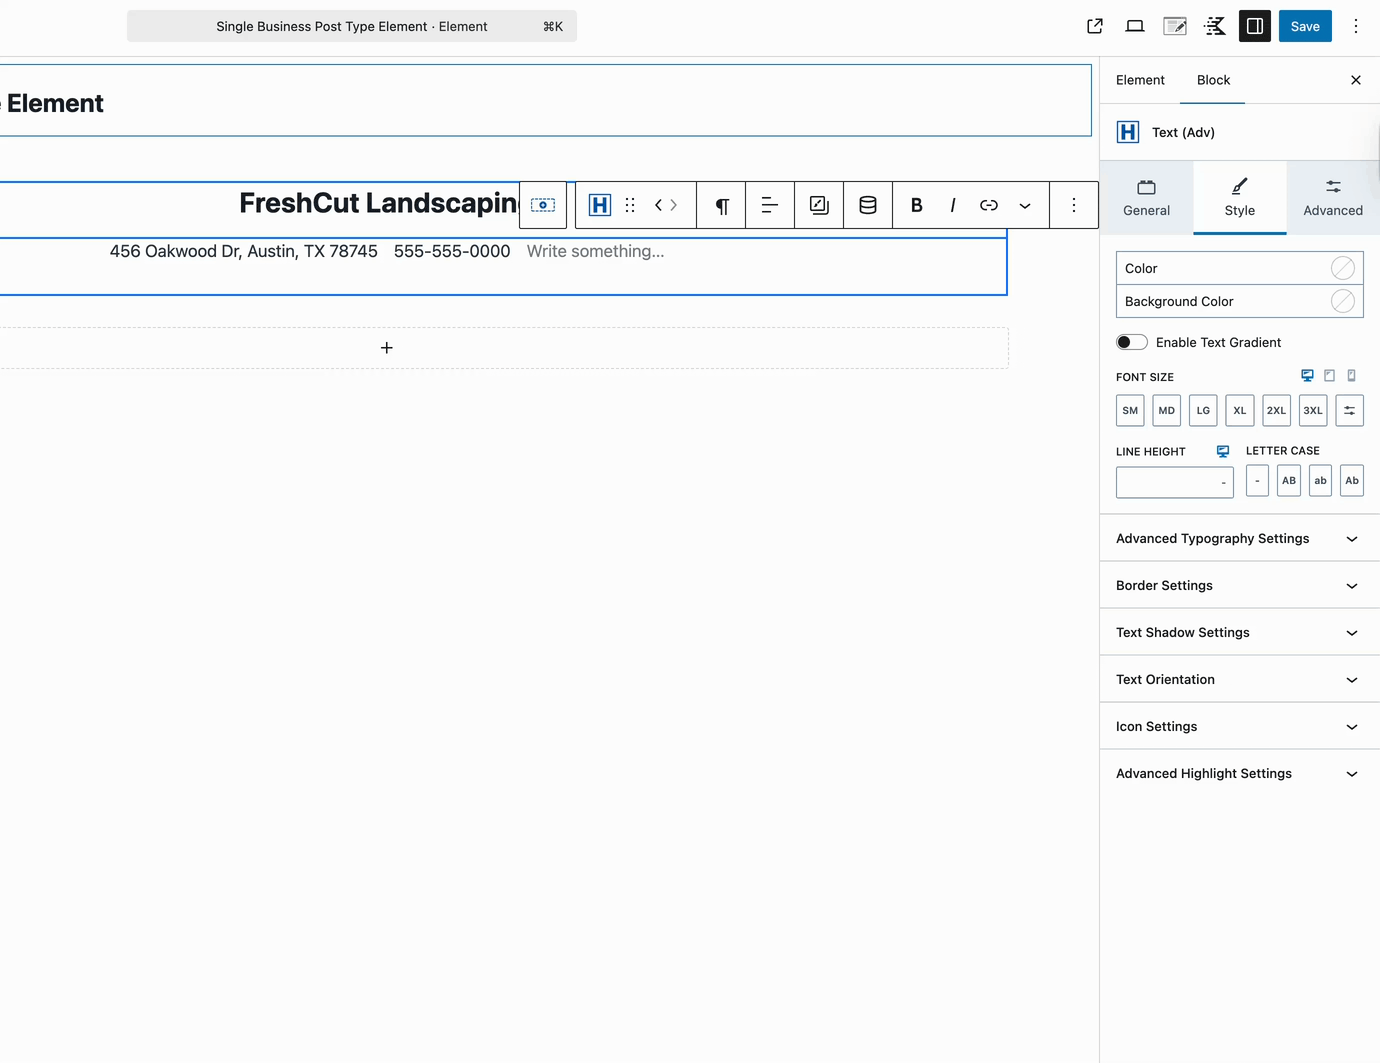
Then, inside the Section Block, add an Advanced Text Block, enable Dynamic Content, and choose Post Custom Field. From the list, select the specific custom field you want to display. Repeat this for each field you want to show.
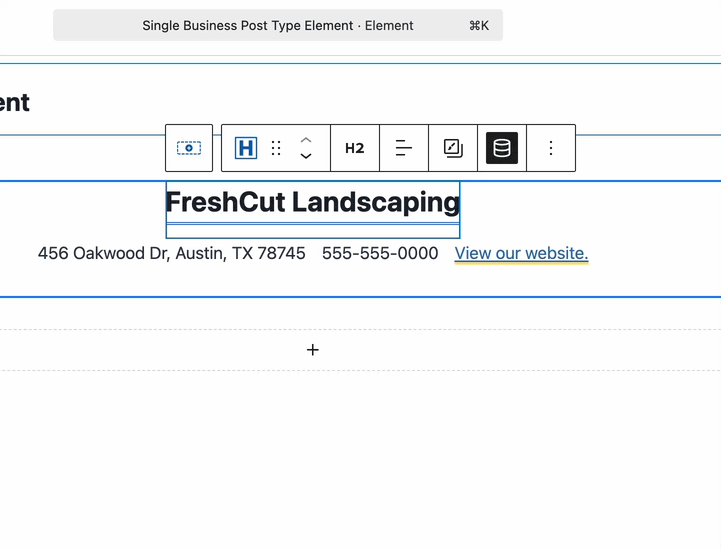
Advanced Text Blocks can also handle Dynamic Links. For example, to add a website link, insert an Advanced Text Block and type your link text, like “View our website.” Then, in the Advanced Text General Block Settings, expand the Link Settings section and click the Dynamic Content icon. Choose your custom field containing the website URL, and the link will automatically pull the correct URL for each post.
Pro Tip: If you’re building a title area, you can also include extra details like the author’s name, post date, or other relevant information. Using Dynamic Content, you can pull in these values and display them in Advanced Text Blocks, giving you full control over styling and layout. For a complete list of what dynamic content you can use, check out the Dynamic Content Document here.
You may also want to include additional information, like breadcrumbs or other post meta, such as categories. To display breadcrumbs, insert the Kadence Breadcrumbs shortcode "kadence_breadcrumbs" inside a Shortcode Block. For dynamic lists of categories, tags, or custom taxonomy terms, use the Dynamic List Block, which will automatically pull in the appropriate content and allow you to style it to match your layout.

Because this is a Template Element, it’s meant to take over the entire Custom Post page. That means we need to make sure the main post content still appears. To do this, add a Dynamic HTML Block, which will automatically pull in and display the post content for each Custom Post. This ensures your template fully replaces the default layout while keeping your content dynamic.
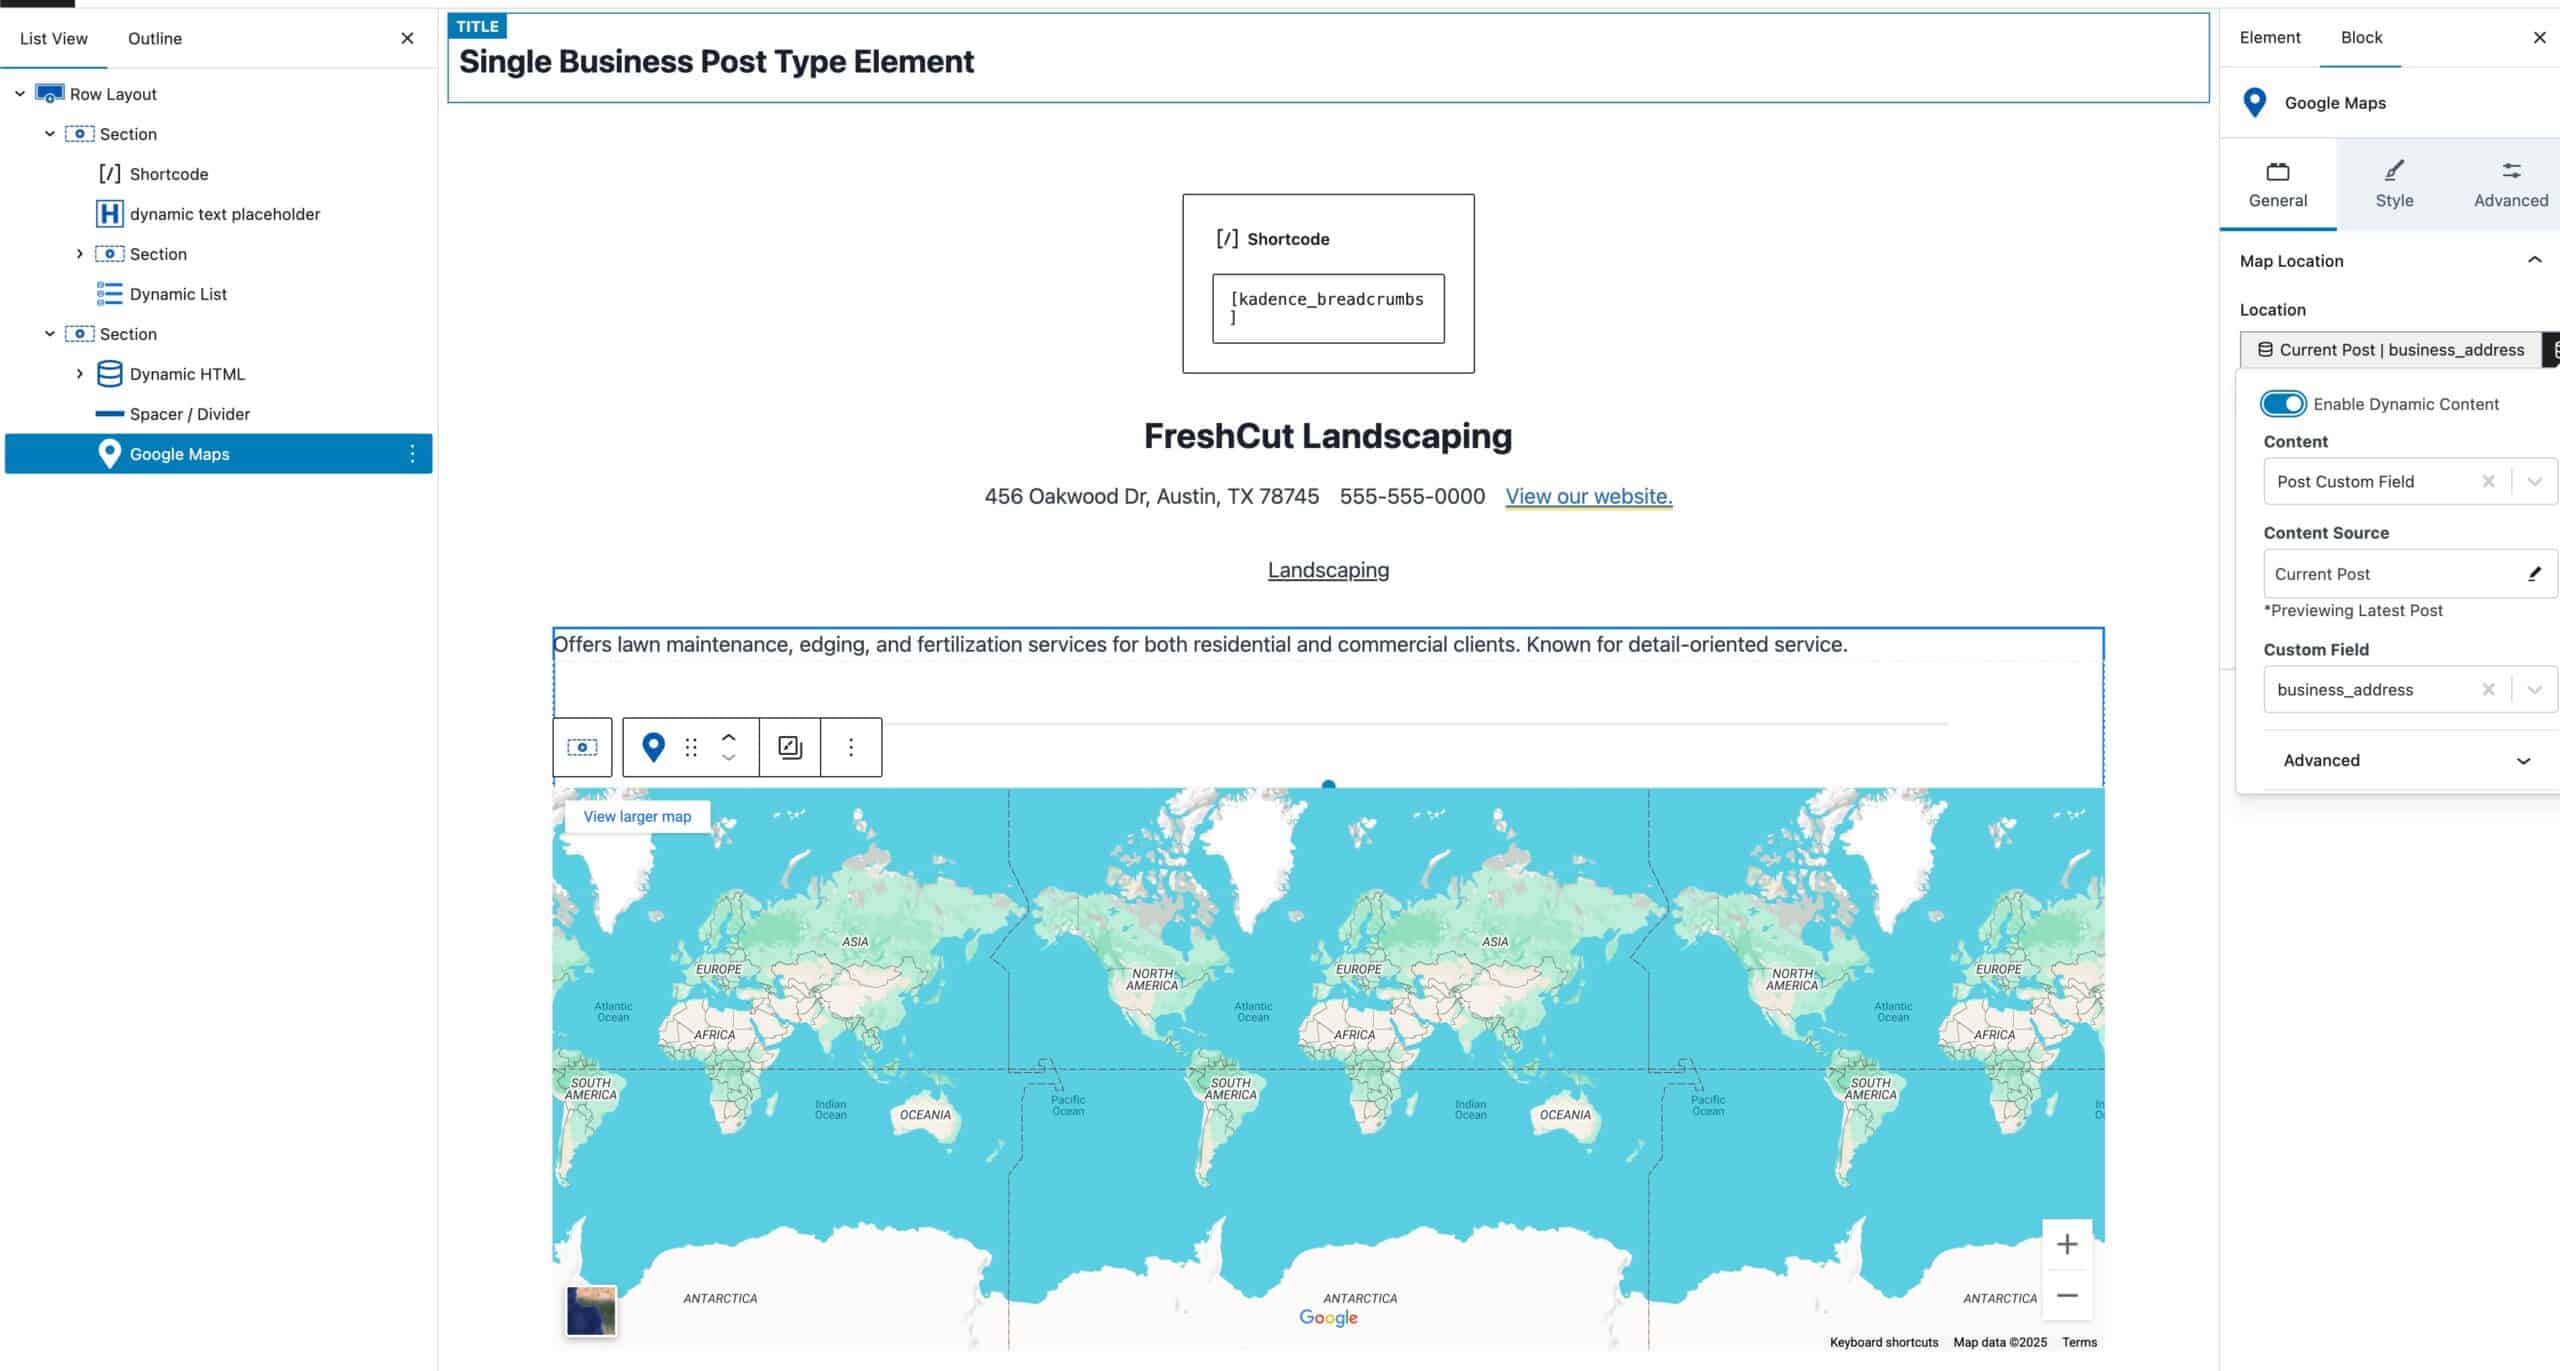
In this example, we’ve added an Address field. To make this really interactive, you can use the Google Maps Block to dynamically display the business’s location based on that custom field. This way, each post automatically shows the correct map for the address you’ve entered.
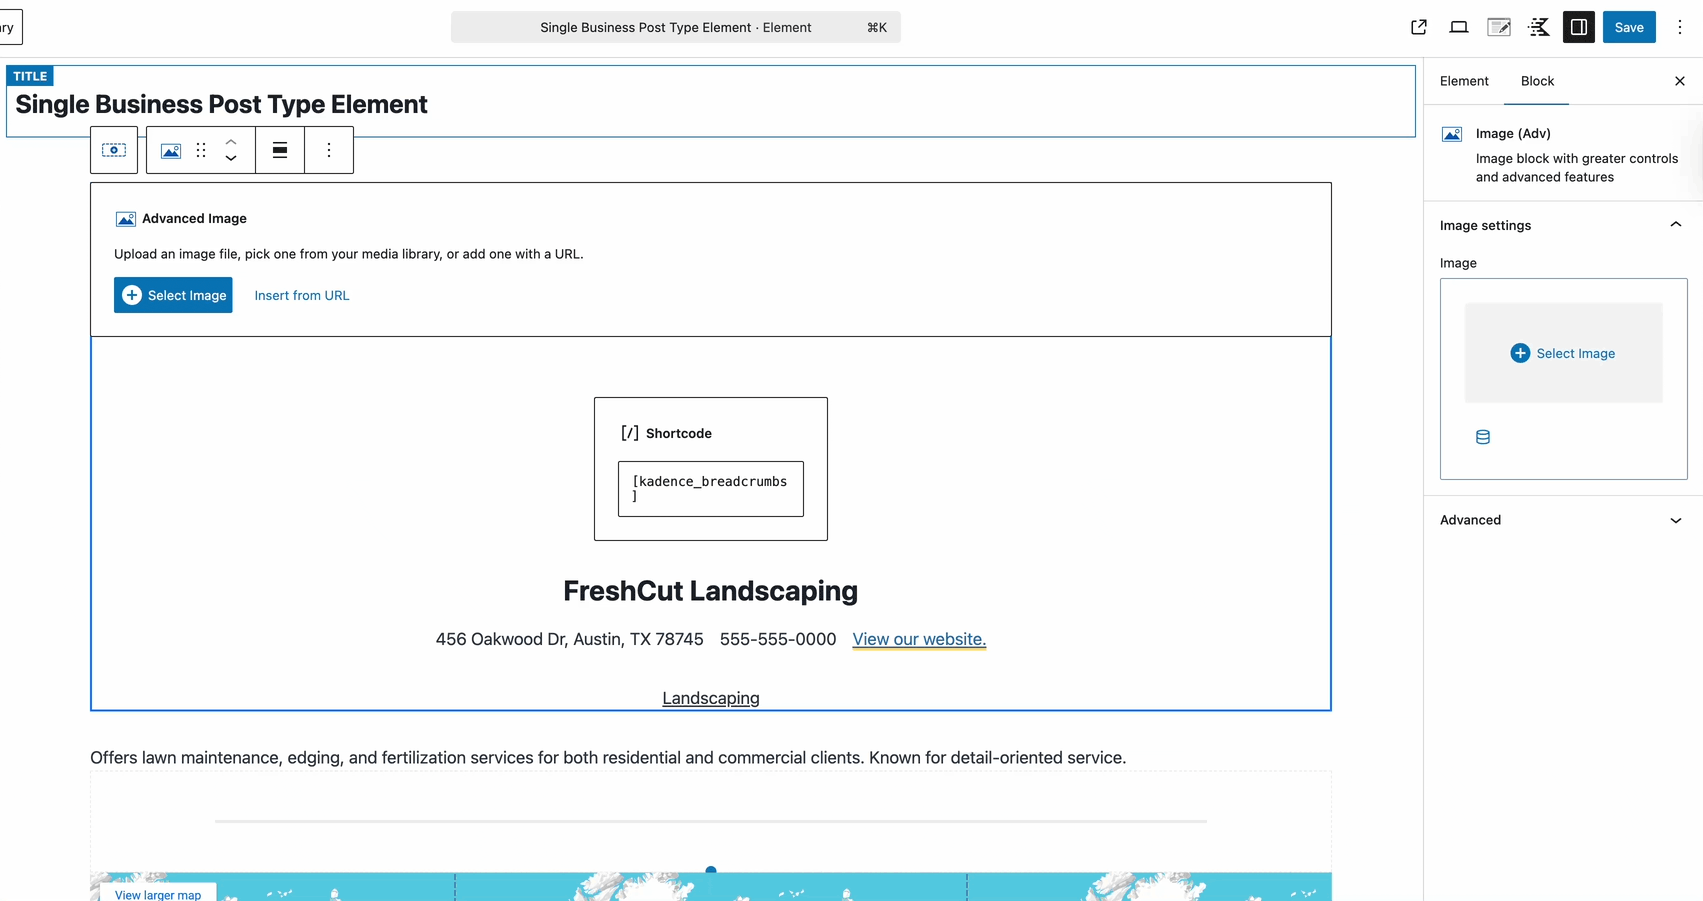
You can also use the Advanced Image Block to dynamically display the Featured Image for your post. This is especially useful if you want each post to automatically show its own image without manually adding it each time.
Once your CPT Template Element is complete, you’ll need to configure the Element Settings to make sure your design actually appears on the site. These settings control where and how your template is applied. We’ll walk through the specifics in the next section.
Setting the Element Settings
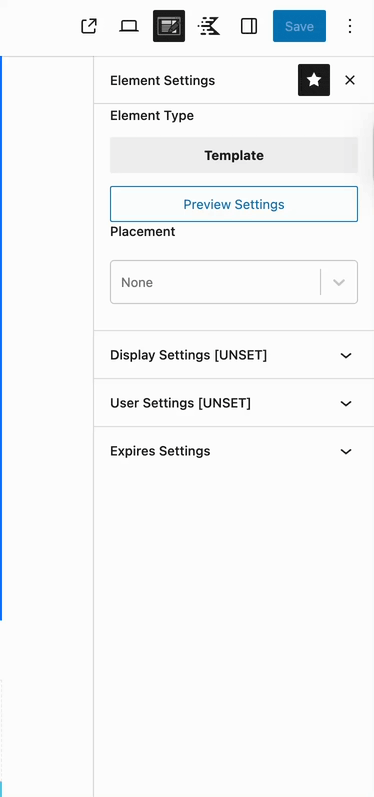
Once your element is designed, it’s time to tell WordPress where it should appear. You can access the Element Settings by clicking the pen and paper icon at the top right of the editor. These settings let you control exactly where and how your template is displayed on your site.
Set the Placement to replace the Single Post Content. This allows the Element to fully take over the Single Custom Post.
Then, expand the Display Settings and use the Show On dropdown to select your Custom Post Type. In this example, Single Businesses.
When configuring the Show On settings for your Hooked Element, you’ll see a dropdown labeled Select CPT By (where “CPT” will display the name of your Custom Post Type). This setting gives you three main options for controlling where the Element appears.
- All (default) – The Element will automatically apply to all posts within the selected post type.
- Individual – This lets you target specific posts one by one.
- Grouped – This allows you to apply the Element based on a custom taxonomy group. For example, you could show the Element on all posts tagged as “Landscaping”.
By default, the Show On setting is All, so you’ll need to switch to Individual or Grouped if you want more granular control over where the template appears
Once you’ve configured the settings, your Custom Template Hooked Element will automatically take over and display on the selected Custom Post Types as specified.
This guide is meant to provide a general understanding of how these features and functionalities work together, especially since they draw from multiple plugins simultaneously. The example design shown is intentionally minimal and basic. With proper design practices and thoughtful implementation, Kadence makes it possible to create virtually any layout or display you need for your Custom Post Types.
