
Use the Kadence Theme Archive Layout Settings to customize the Blog/Posts Page and other Archive-related pages, such as Taxonomy Archives. The Archive Layout Settings can be accessed from the Customizer -> Posts/Pages Layout -> Archive Layout settings.
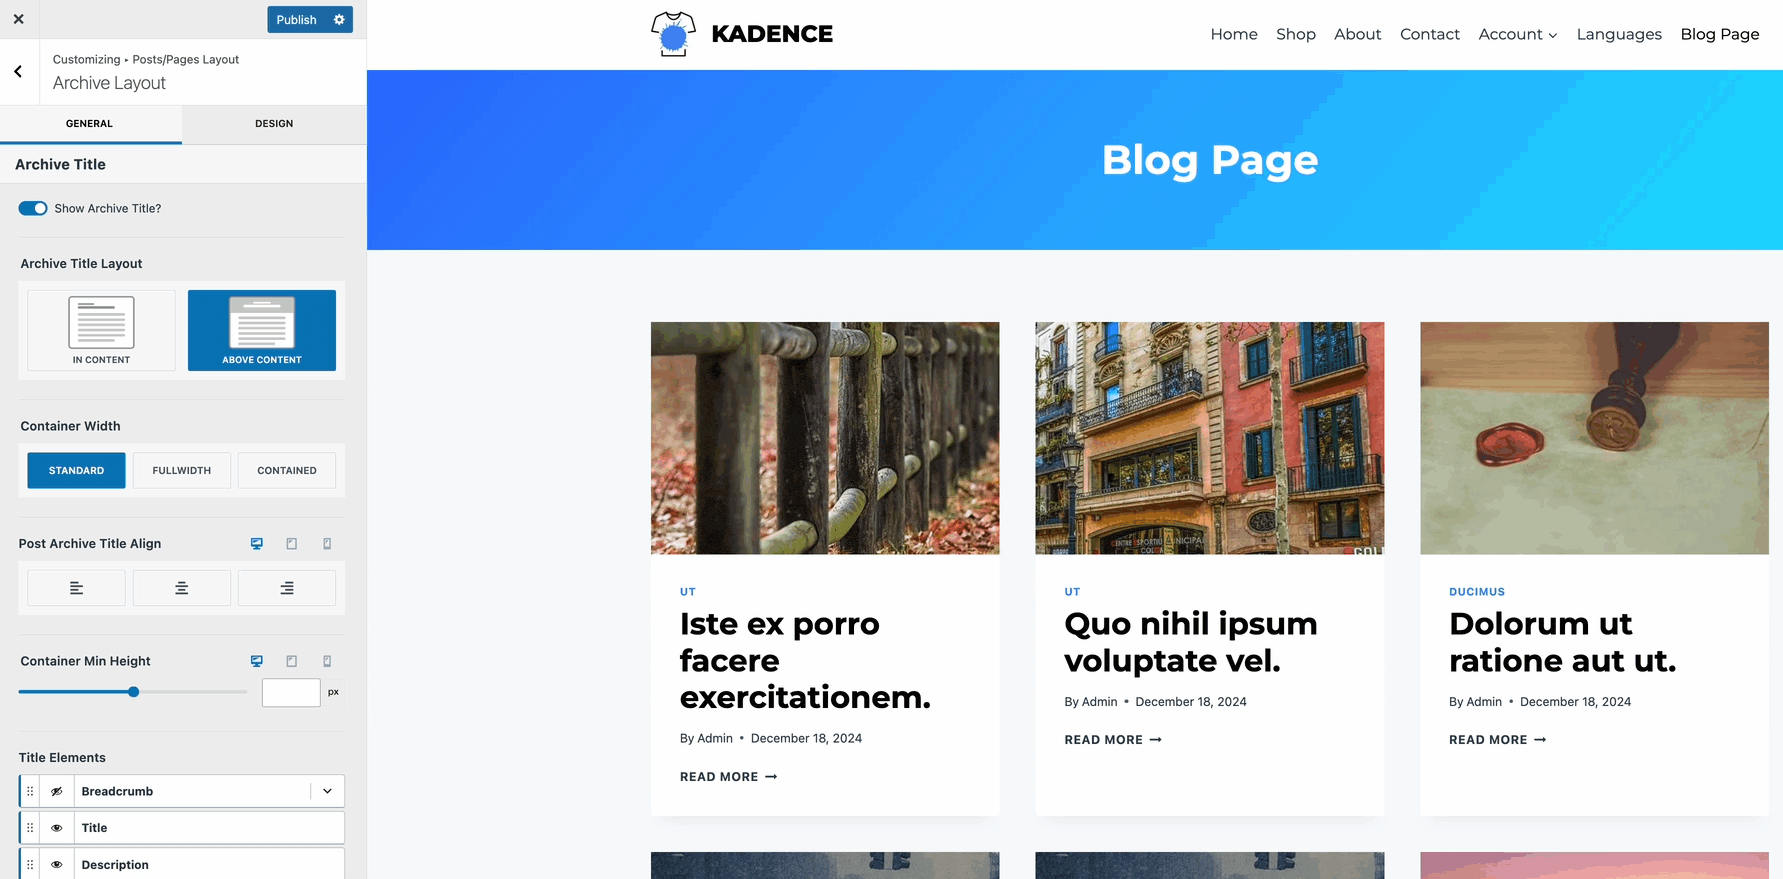
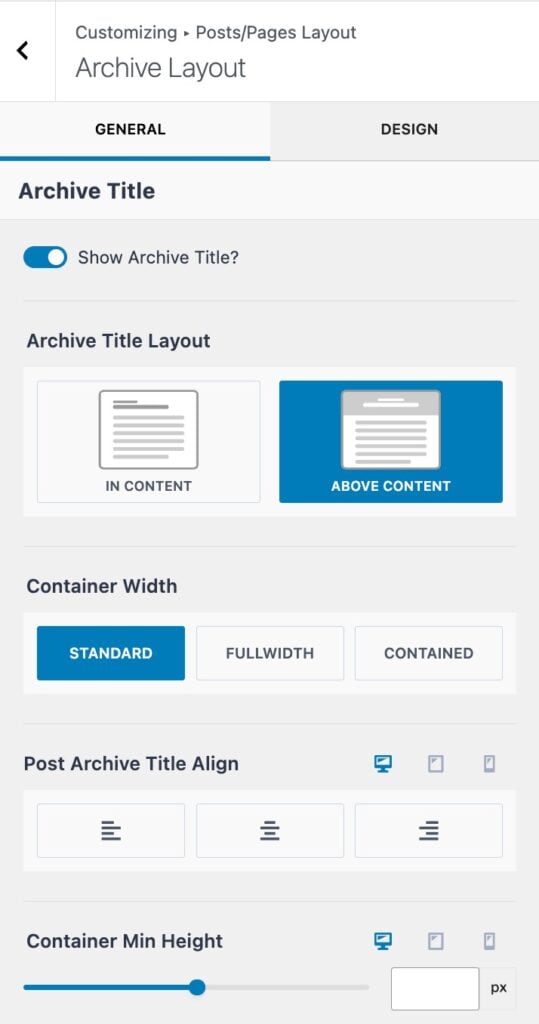
Title Settings
Show Archive Title: This setting enables or disables the default Archive Title.
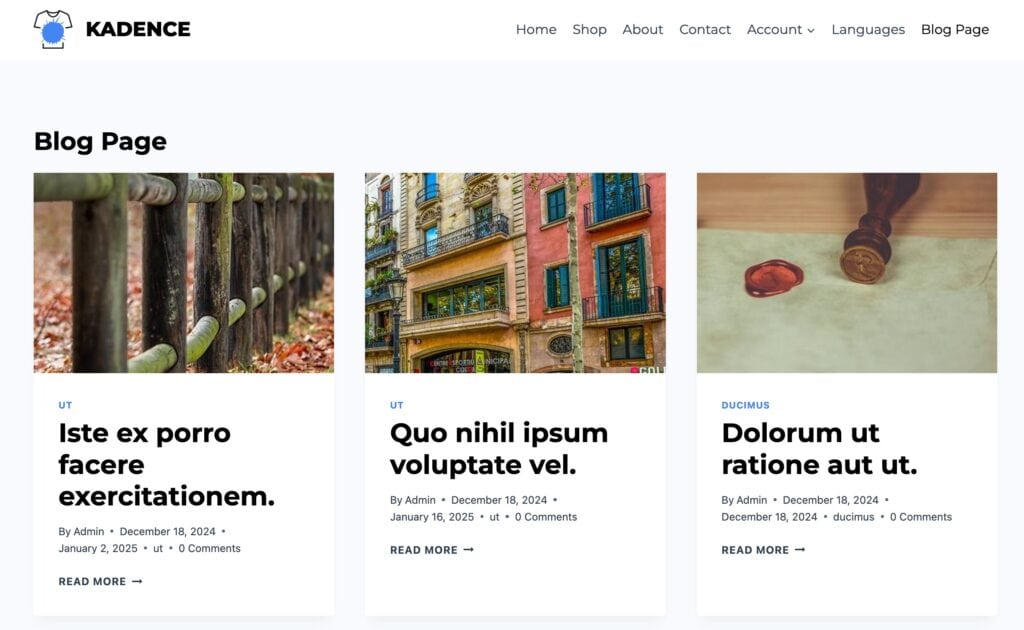
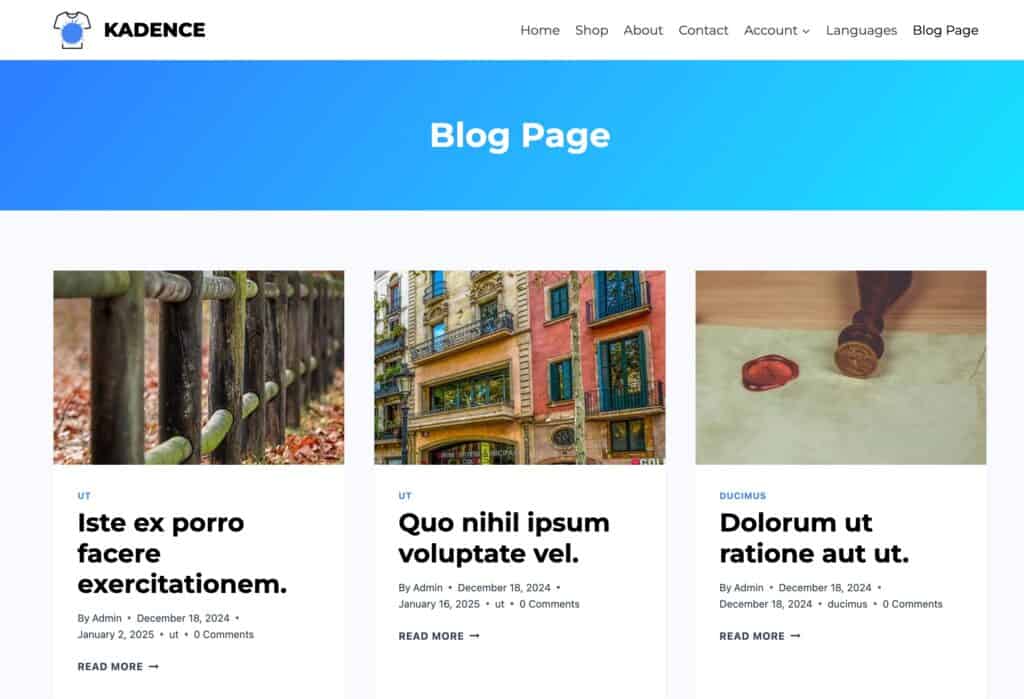
Archive Title Layout: Set the Archive Title Layout to In Content or Above Content. The In Content option places the title inside the top of the content, while the Above Content option adds an Archive Title Banner above the content. (View the examples below.)
Container Width: When using the Above Content Layout, set the container width to either Standard, Fullwidth, or Contained.
Post Archive Title Align: Set an alignment for the title. This can be set to Left, Center, or Right.
Container Min Height: Add a minimum height to an Above Content Archive Title container.
Example: In Content Archive Title Layout.
Example: Above Content Archive Title Layout.
Element Settings
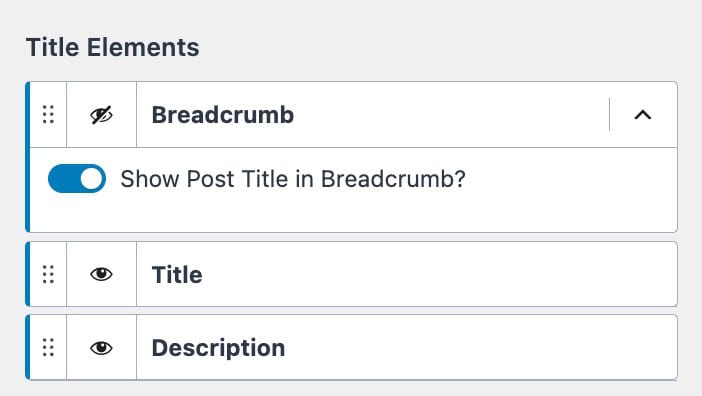
Title Elements: These elements appear along with the Archive Title, such as an archive description or breadcrumb trail. The eye icon on the far left can be used to show or hide different title elements.
Breadcrumb: Show or hide the breadcrumbs. You can also enable or disable the option to show the post title in the breadcrumbs (this represents the archive title).
Title: Show or hide the archive title.
Description: Show or hide the archive description.

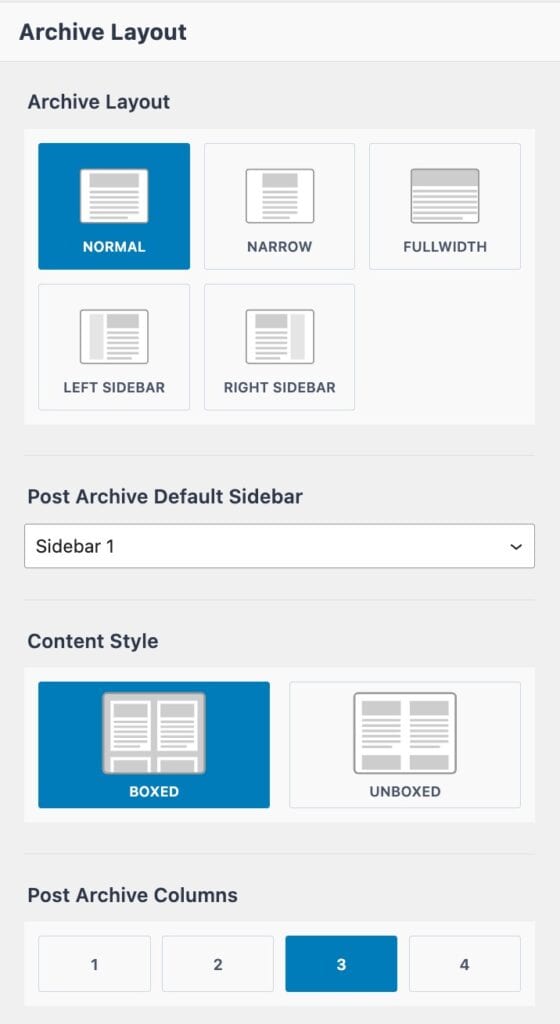
Archive Layout Settings
Archive Layout: Choose between Normal, Narrow, Fullwidth, or Left/Right Sidebar for the archive layout.
- Normal – Uses the theme’s Content Width.
- (The Content Max Width can be set from the Customizer -> General -> Layout settings.)
- (The Content Max Width can be set from the Customizer -> General -> Layout settings.)
- Narrow – Creates a layout narrower than the standard theme content width, ideal for more compact designs.
- (The Narrow Layout Content Max Width can be set from the Customizer -> General -> Layout settings.)
- (The Narrow Layout Content Max Width can be set from the Customizer -> General -> Layout settings.)
- Fullwidth – Extends content to the full width of the page.
- If using a Boxed Site Layout, this option may still respect the container width unless otherwise styled.
- (The Archive Grid Boxed Spacing can be adjusted from the Customizer -> General -> Layout settings.)
- (The Archive Grid Boxed Spacing can be adjusted from the Customizer -> General -> Layout settings.)
- If using a Boxed Site Layout, this option may still respect the container width unless otherwise styled.
- Left/Right Sidebar – Allows a sidebar to be added to the Archive. Choose between Sidebar 1 and Sidebar 2.
- (Sidebars can be designed from the Dashboard -> Appearance -> Widgets page.)
Post Archive Default Sidebar: Set a default sidebar layout for archive pages.
Content Style: Set the Archive Content Style to either Boxed or Unboxed. (View the examples below.)
Post Archive Columns: Adjust the number of columns for displaying posts on archive pages. This setting controls how many posts appear per row.
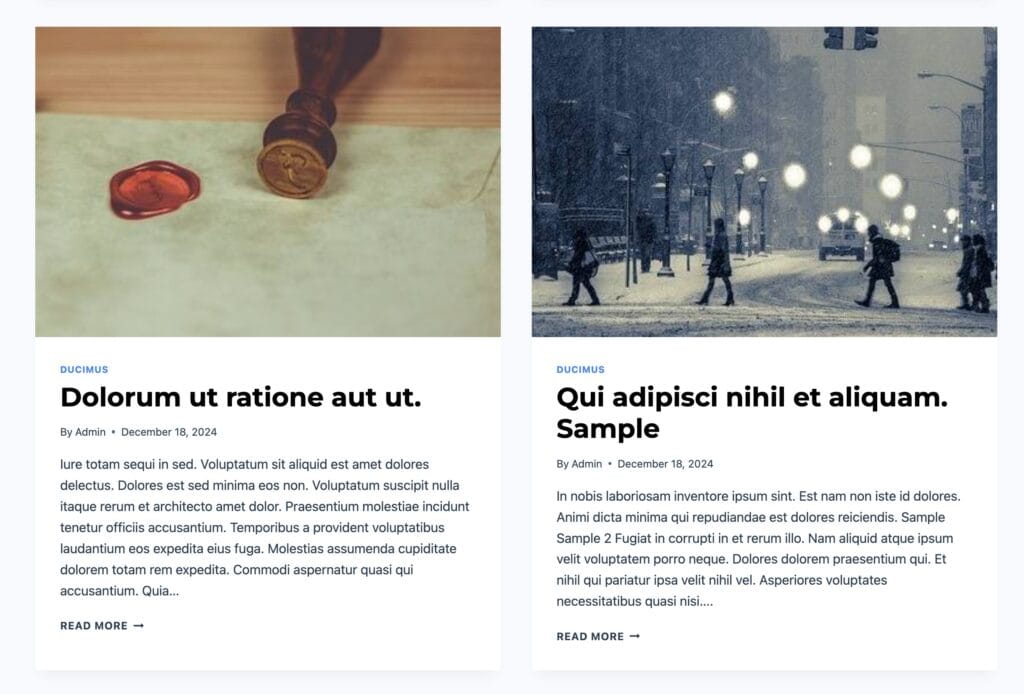
Example: Boxed Content Style.
Example: Unboxed Content Style.

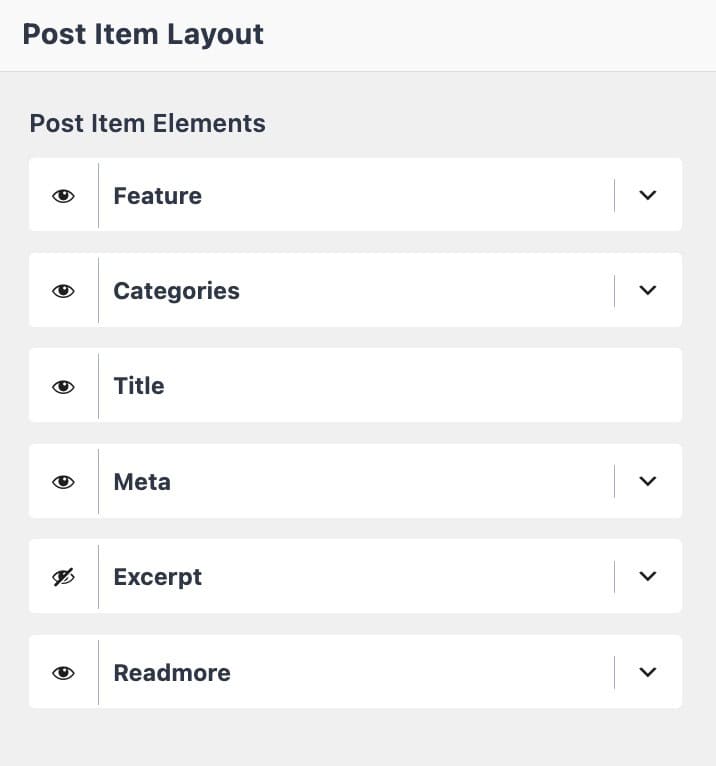
Post Item Elements
Post Item Elements: The Post Item Layout controls the Archive Loop items. For example, each post in an archive displays elements such as a featured image, title, and meta information. Each instance of this is a Post Item. Use the Post Item Elements option to control which elements appear on each Post Item, including the featured image, title, excerpt, meta, and more.
Below is an overview of each Post Item Element and the available options related to it.
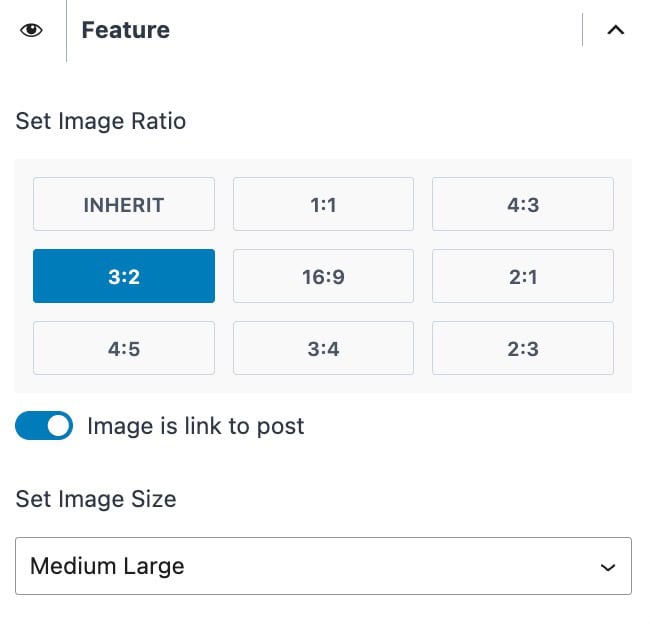
Feature (Image)
Set Image Ratio: Adjust the featured image ratio for post items. The available options are:
Image is Link to Post: Enable this option to make the featured image clickable, linking directly to the post.
Set Image Size: Set the featured image size for post items. Available options are:
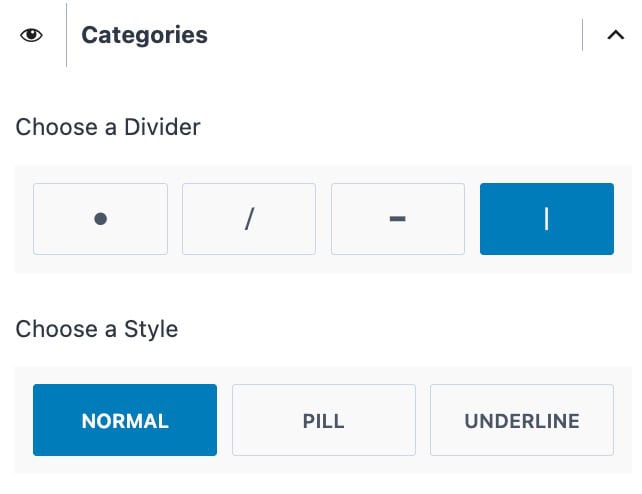
Categories
Choose a Divider: Choose from one of the various Divider Styles. The Divider will be placed in between categories whenever multiple exist.
Choose a Style: Choose a Category Style. This can be set to Normal, Pill, or Underline. See examples of these styles below.


Meta
Choose a Divider: Set a Divider to place between different META items.
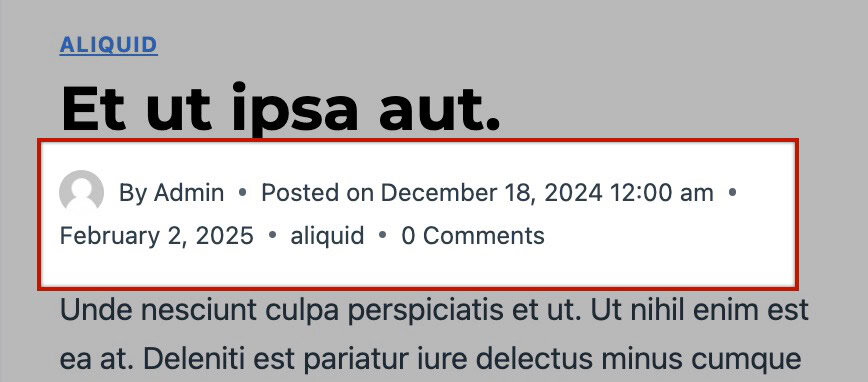
Show Author: Enable this to show the Post Author details.
Enable Author Link: Enable this to allow the Post Author Name to link to the Author Archive.
Show Author Image: Enable this to show the Author Profile Image. (When this setting is enabled, you will be able to set an Image Max Width.)

Author Label: Set the Author Label. (For example: By)
Show Date: Enable this to show the Post Date.
Show Time: Enable this to show the Post Time.
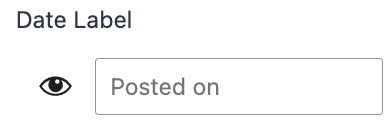
Upload Date Label: Click on the Eye Icon to show and use a Date Label. Then, you can set the Label as preferred.
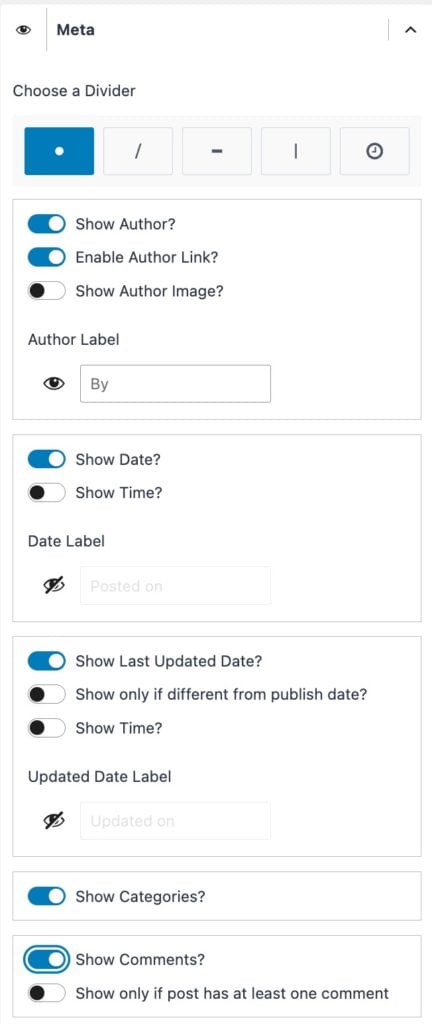
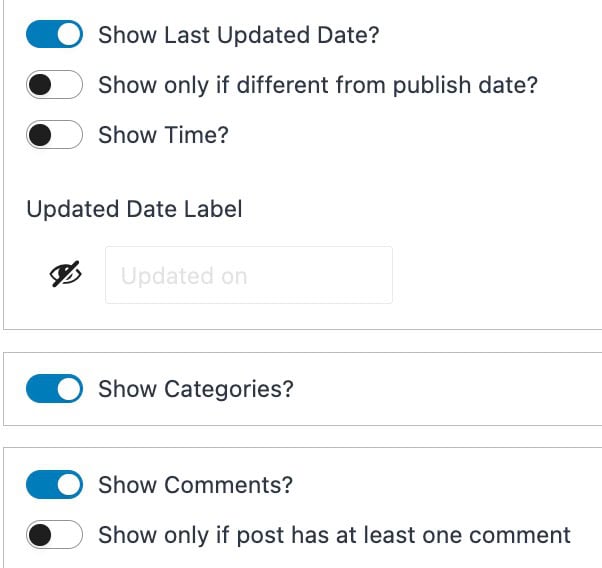
Show Last Updated Date: Enable this to show the Last Updated Date.
Show Only If Different From Publish Date: Enable this if you only want the Last Updated Date to show if the date differs from the original Published Date.
Show Time: Enable this option to also show the Post Last Updated Time along with the Date.
Show Categories: Enable this option to show the Post Categories inside the META information. (See the image below.)
Show Comments: Enable this option to show the Post Comments inside the META information. (See the image below.)
Show Only If Post Has At Least One Comment: Enable this option to hide the comment count from the META information if there is less than one comment on the post.
Excerpt
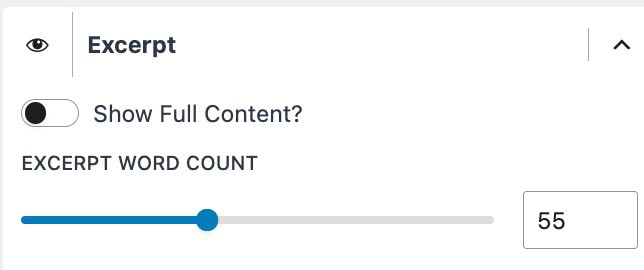
Show Full Content: Enable this option to not use the Excerpt Word Count and show the entire Post Content instead.
Excerpt Word Count: Set the Excerpt Word Count.
The Excerpt Word Count setting only works when you don’t manually add an excerpt to your posts. If you write a manual excerpt, WordPress will display the full text you entered, and the length setting will not apply. 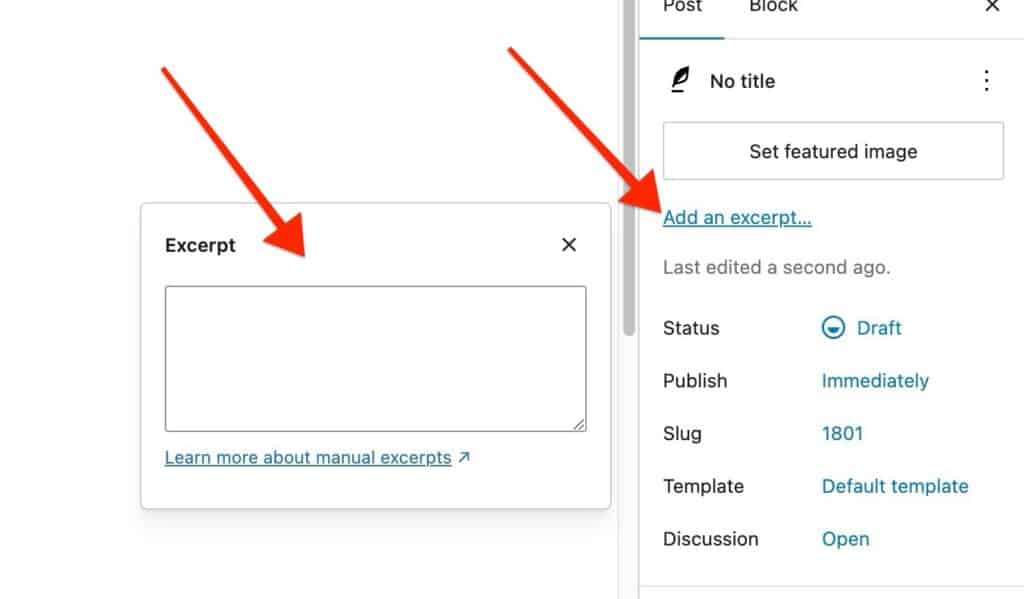
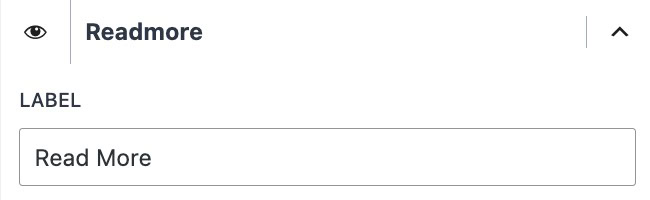
Readmore
Label: Set the Readmore Label Text.
Design Settings
Design Tab: At the top of the Customizer, go to the Design tab to adjust the styles of the archive page, including colors, fonts, and other visual settings.
Archive Title
Title Color: Set the Archive Title color.
Description Colors: Adjust the Description Text Color and the Description Link Hover Color.
Breadcrumbs Colors: Adjust the Breadcrumbs Color for the initial state and the hover state.
Archive Title Background: Set the Archive Title Background to either a Color, Gradient, or Image. (See the GIF to the right.)
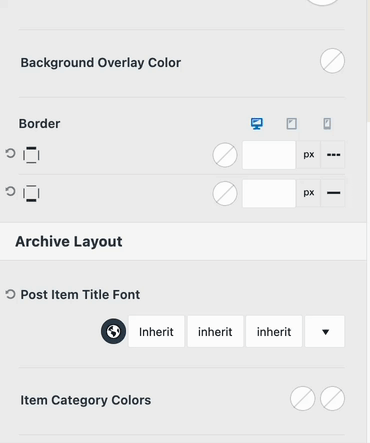
Background Overlay Color: Set an Archive Title Background Overlay. This can be set to a Color or Gradient.
Border: Select a Border for the Top and Bottom of the Archive Title and/or the Left and Right side. This initial icon will be an X. Click on the X to select a specific Border Style. You will also be able to select the Border Width (px) and Color once a Border Style is selected. (See the GIF below.)
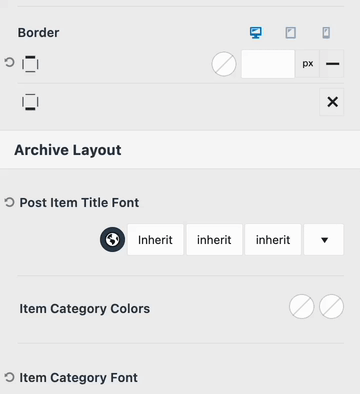


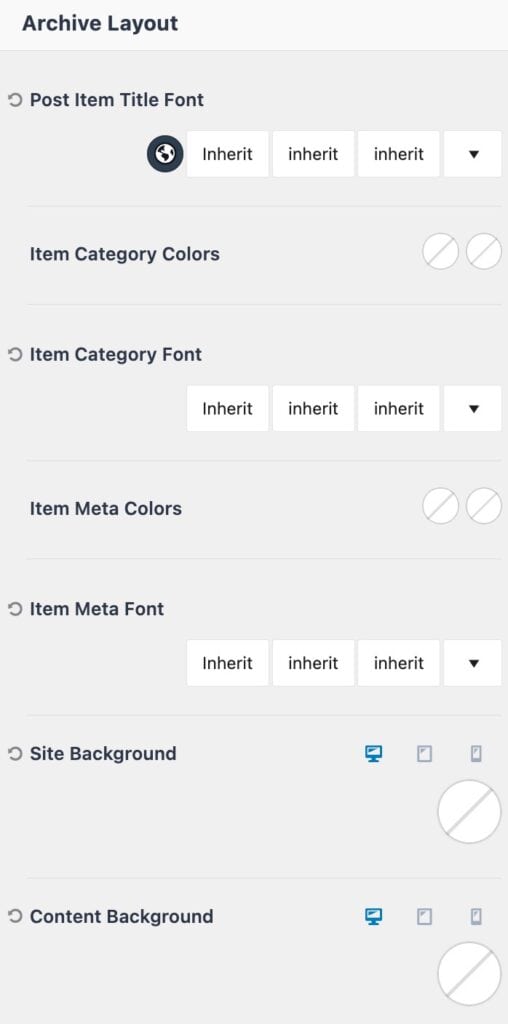
Archive Layout
Post Item Title Font: Adjust the Font Setting for the Post Item. This includes the Font Color, Font Family, Font Style, and other font settings, such as the Text Transform, Line Height, and Letter Spacing. (See the example GIF on the right.)
Item Category Colors: Set the Post Item Category Colors for the Initial and Hover States. (Learn more about setting specific Category Colors below.)
Item Category Font: Adjust the Font Settings for the Item Category Text. This includes the Font Family, Font Style, and other font settings, such as the Text Transform, Line Height, and Letter Spacing. (See the example GIF on the right.)
Item Meta Colors: Adjust the Meta Colors for the Initial and Hover State.
Item Meta Font: Adjust the Item Meta Font Settings. This includes the Font Family, Font Style, and other font settings, such as the Text Transform, Line Height, and Letter Spacing.
(See the example GIF on the right.)
Site Background: Set a Background Color for the Archive Pages. This applies to the entire Site Background.
Content Background: Set a Content Background color for the Archive Pages. This applies to the Background of the Main Content.
Setting Specific Category Colors
When using the Post Item Category Element, you can customize the category colors in the Design settings of the Customizer, as mentioned above.
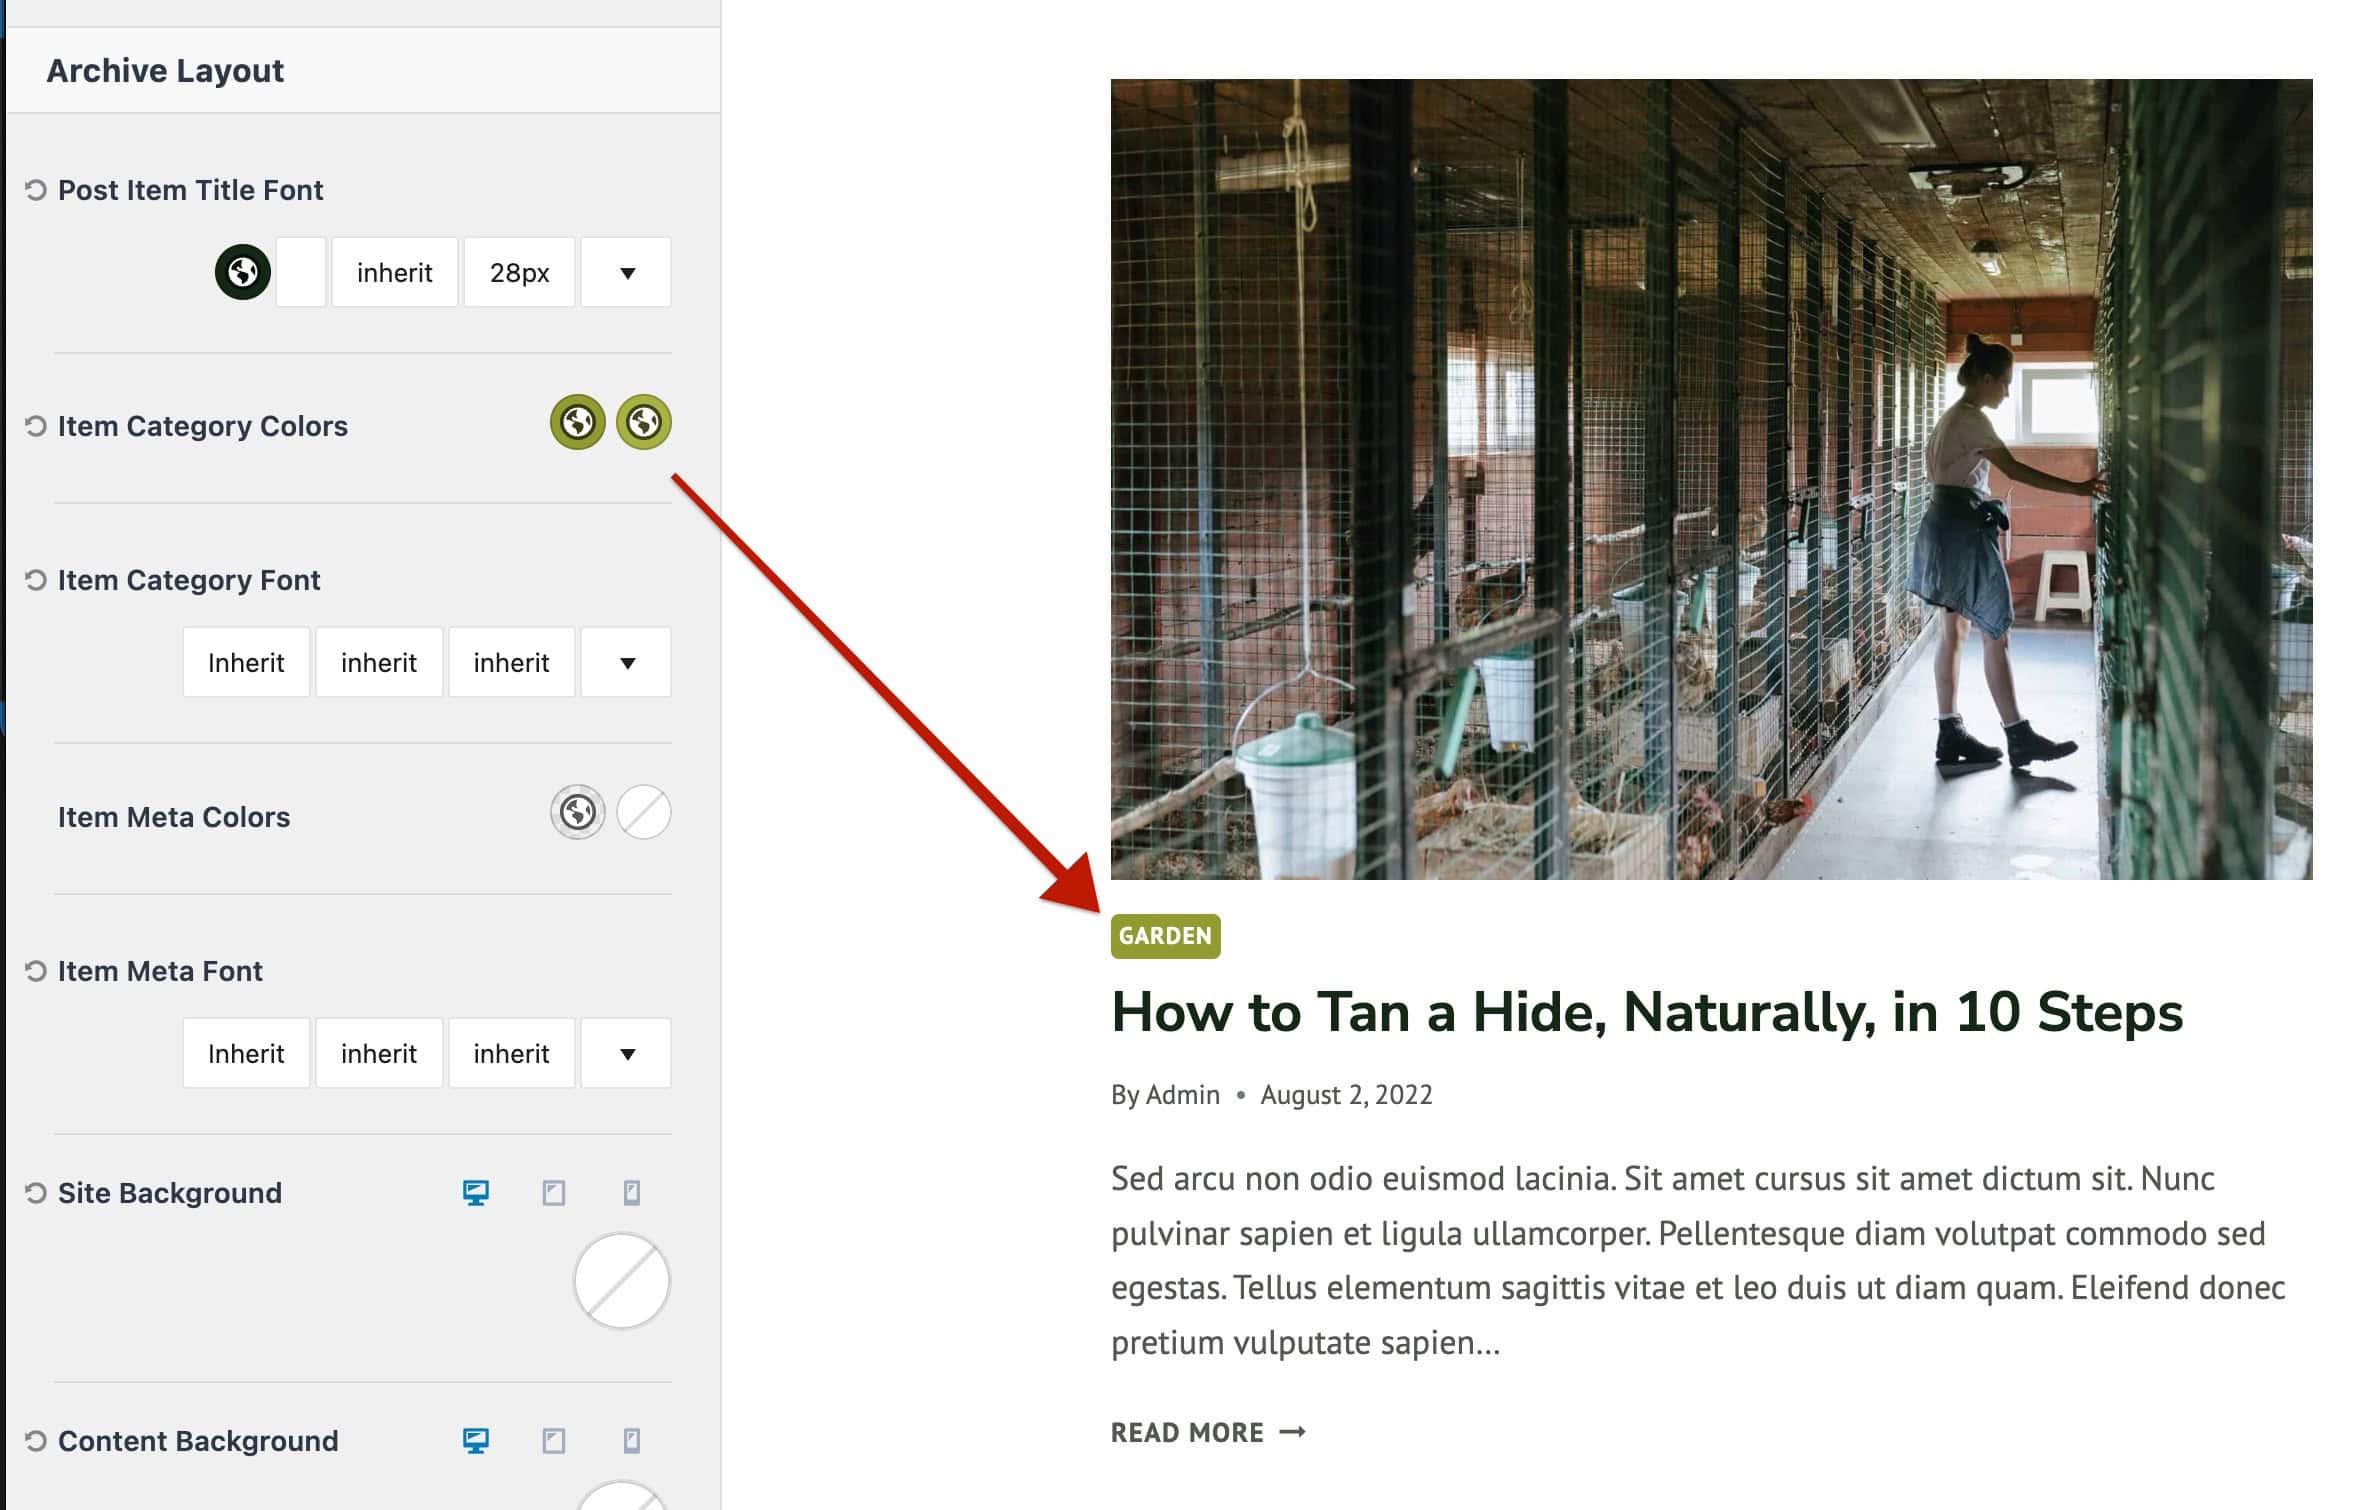
An additional feature included in the Kadence Theme allows you to set different colors for different categories.
To do so, navigate to the Dashboard -> Post -> Categories page and edit a specific category. Here, you will be able to set individual Category Colors for the current category. (See the GIF below)
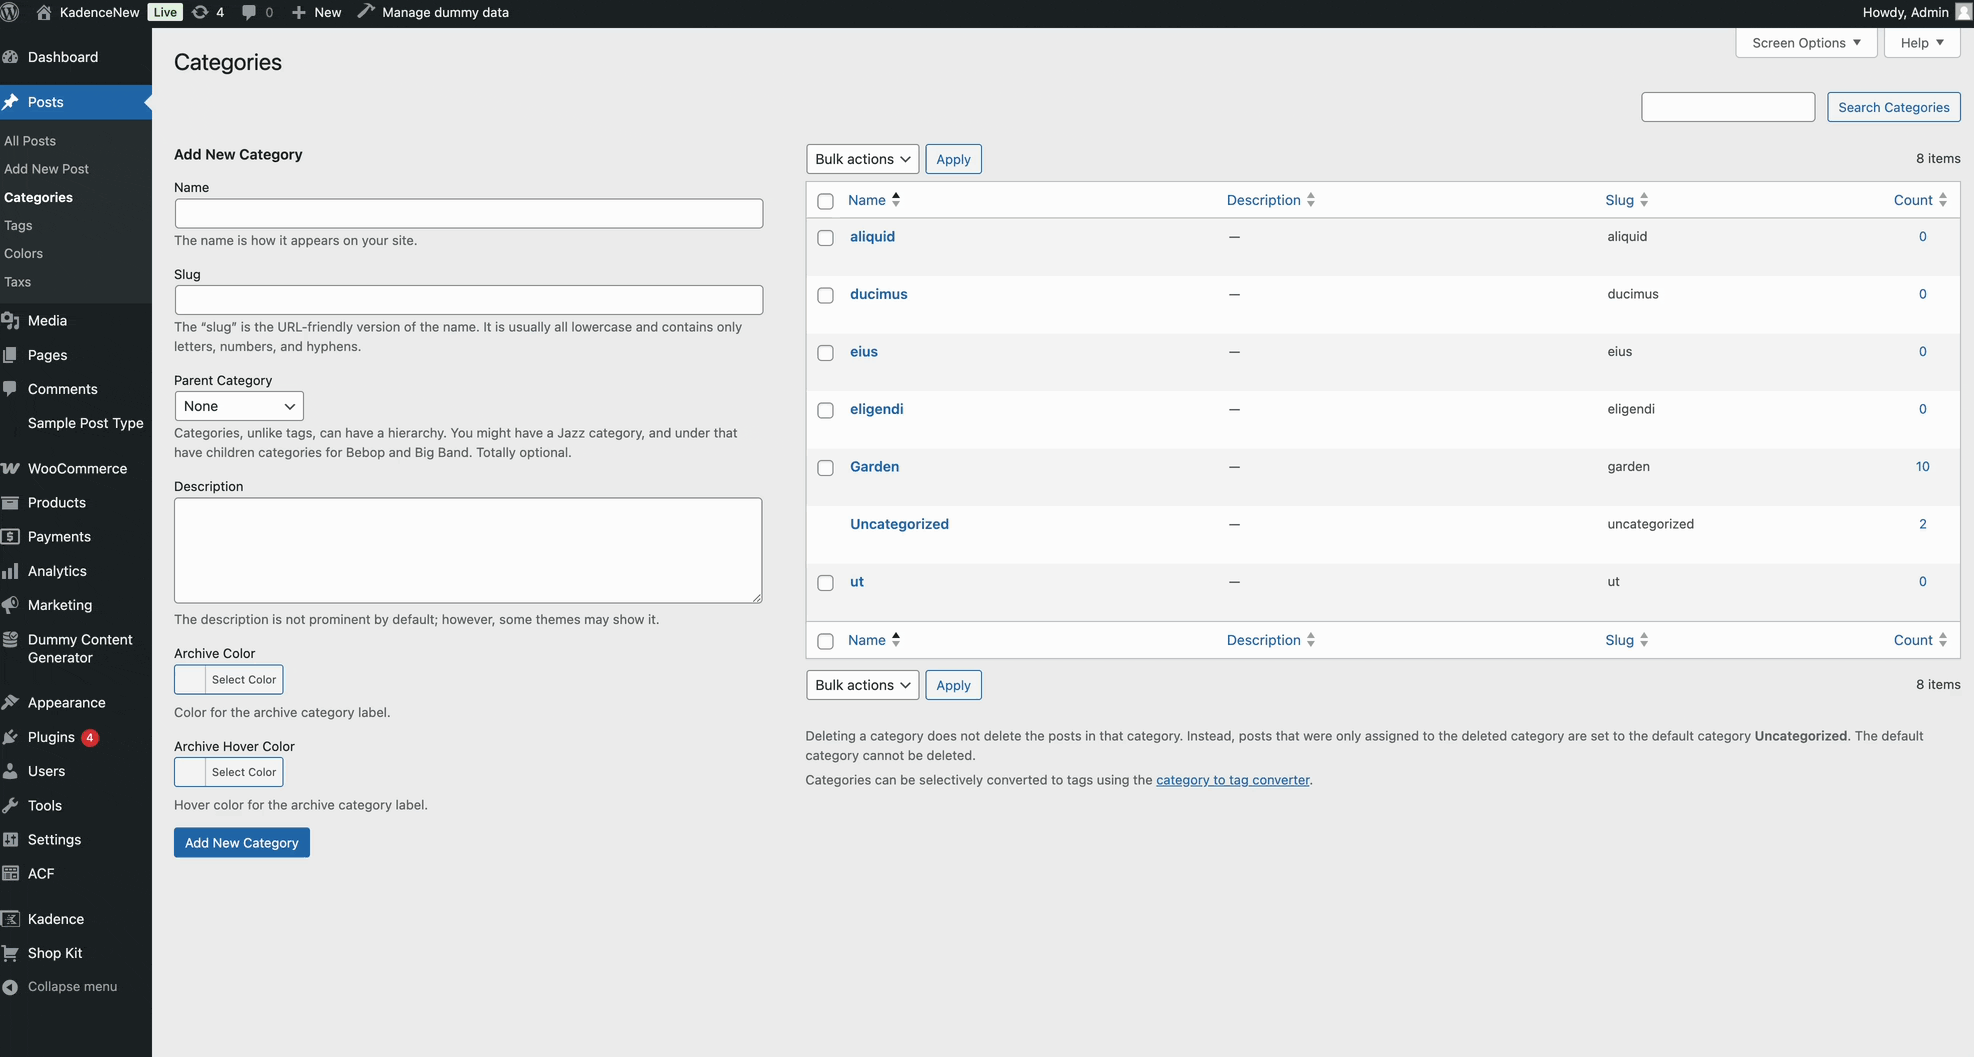
This setting applies specifically to the Post Item Category Element within the Archive Layout Settings. If a category does not have custom Archive Colors set, it will inherit the global Customizer color settings for Post Item Categories.
