
Megamenus can be built in Kadence using the Ultimate Menu addon available in Kadence Theme Kit Pro.
A child menu item’s content can hook any element, which means endless possibilities. Ultimate Menu allows you to build your menu content using the WordPress block editor you are familiar with and show it in one or more columns in different layouts.
Note: "Menu Item Settings" button for each menu item to configure the mega menu settings may not appear immediately when an item is added to your menu. Save the menu and check again.
Getting Started
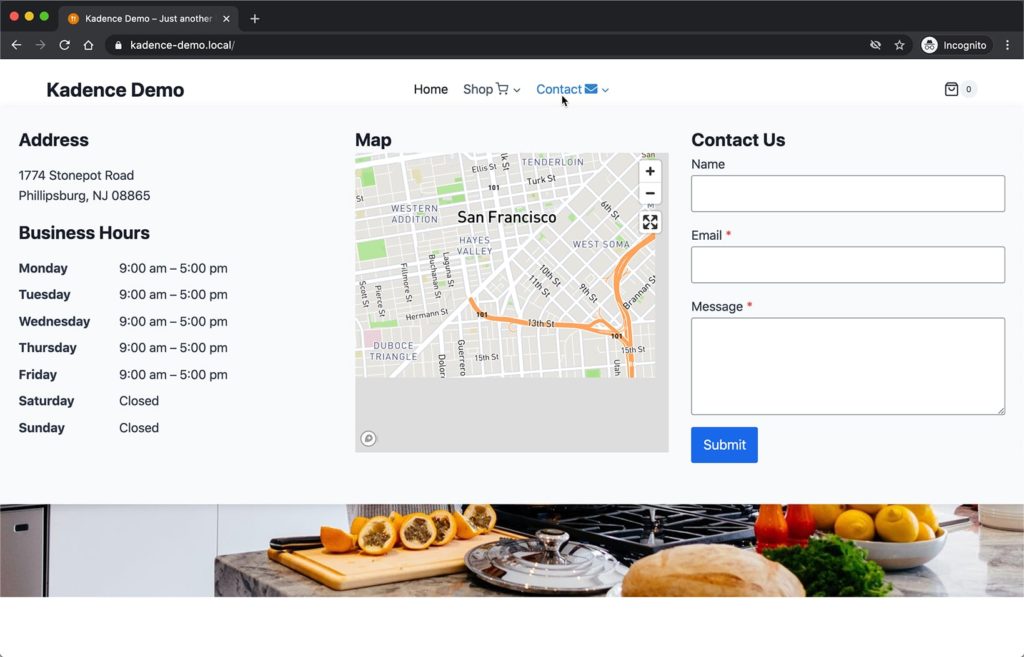
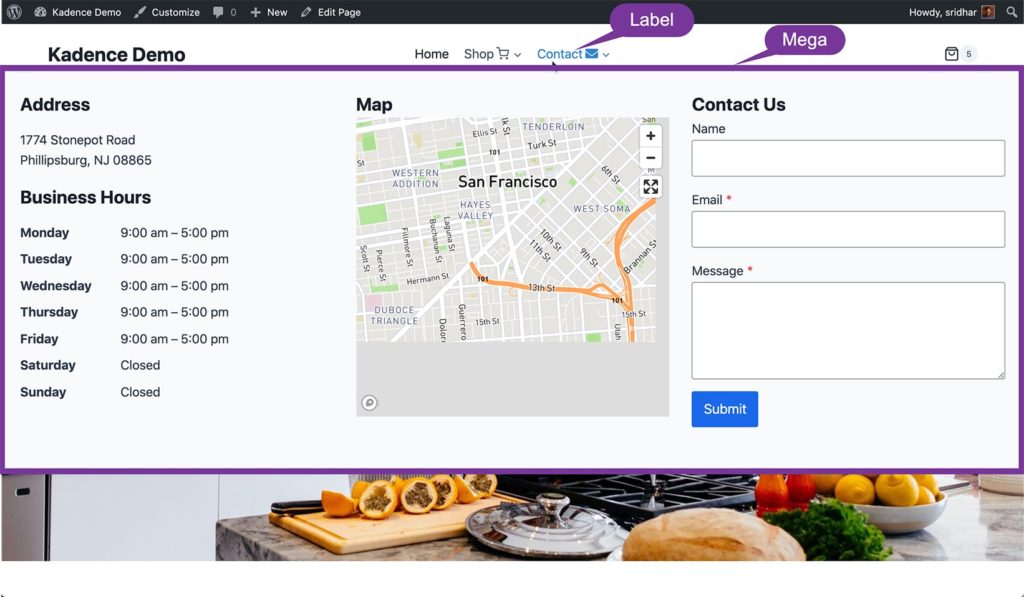
The steps below walk you through showing Address + Business Hours, a Map, and a Contact form in 3 columns when you hover over the “Contact” nav menu item.
At Appearance > Kadence, enable Hooked Elements.
Go to Kadence > Elements and add a new Element of the default type, CONTENT SECTION.
Note: You must set the Element's Display Settings to "Entire Site" in order for it to show.
Name it say, “Contact Menu Content”. For the content, use Gutenberg blocks.
In our test site, we used a “Row Layout” block added by Kadence Blocks set to use 3 columns. Business Hours and Map blocks were by Jetpack and the Contact Form is from Kadence Blocks. You might want to set a top and bottom padding of some 25px in addition to the left and right padding values so the content has some breathing room inside the menu.
Create or edit a menu and add a top-level “Contact” menu item.
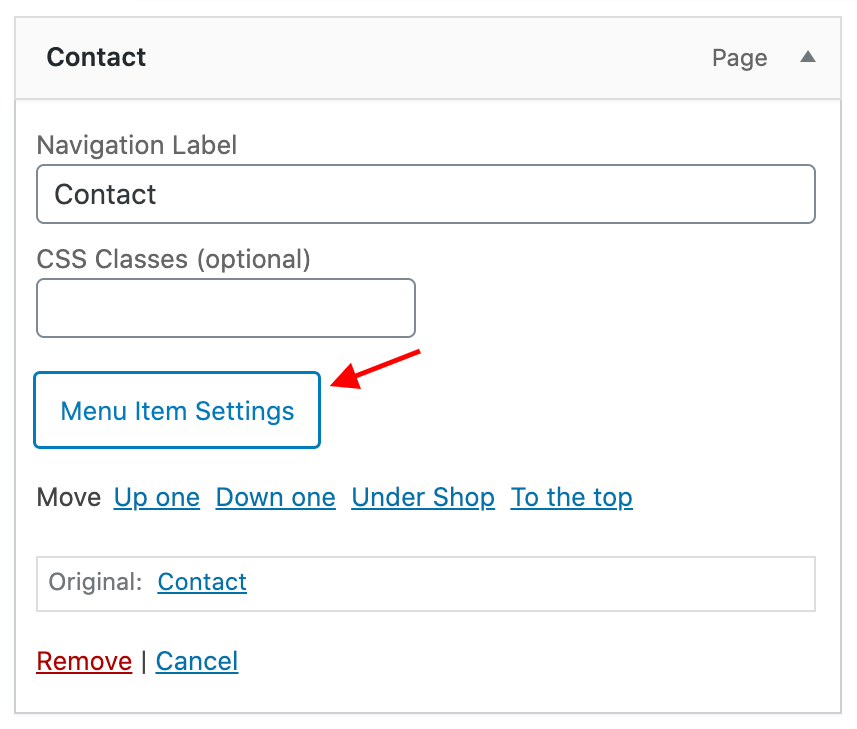
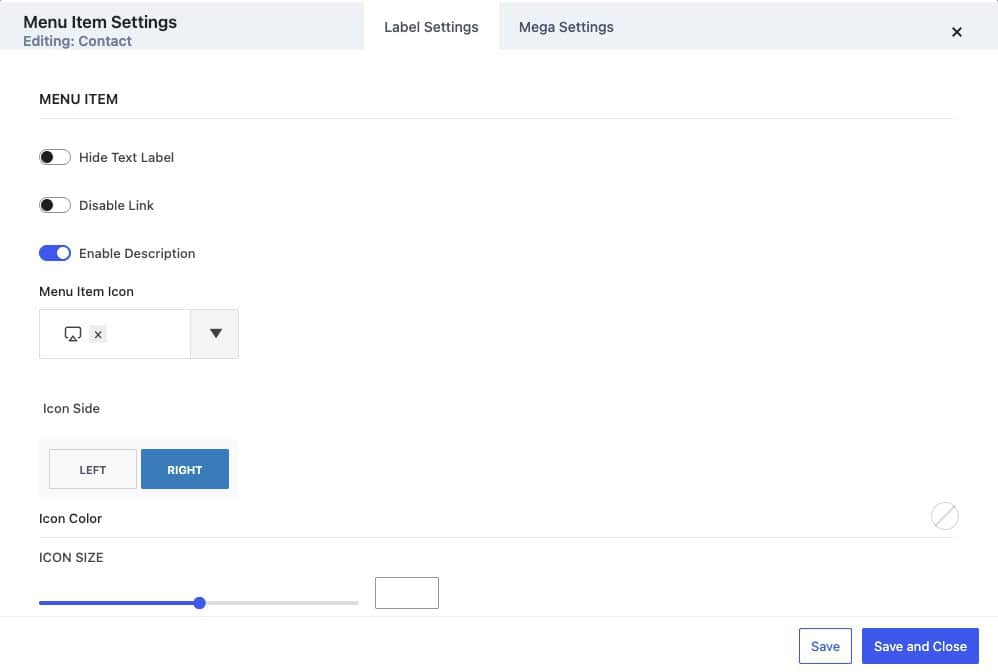
Click on the “Menu Item Settings” button, and in the Label Settings modal, you can find options to disable the link (learn more), add an icon, etc., for the menu label. You can also enable and use a description for navigation menu items.
Click on Mega Settings to configure the mega menu that appears on hover.

In the current example, since the hooked element’s content itself has 3 columns built using the row layout block, we select 1 mega menu column in the Mega Settings. Also, we changed the Dropdown Background to a light blue theme color (#F7FAFC).
Press Save.
Next, add a Custom Link under “Contact” as a sub-menu item.
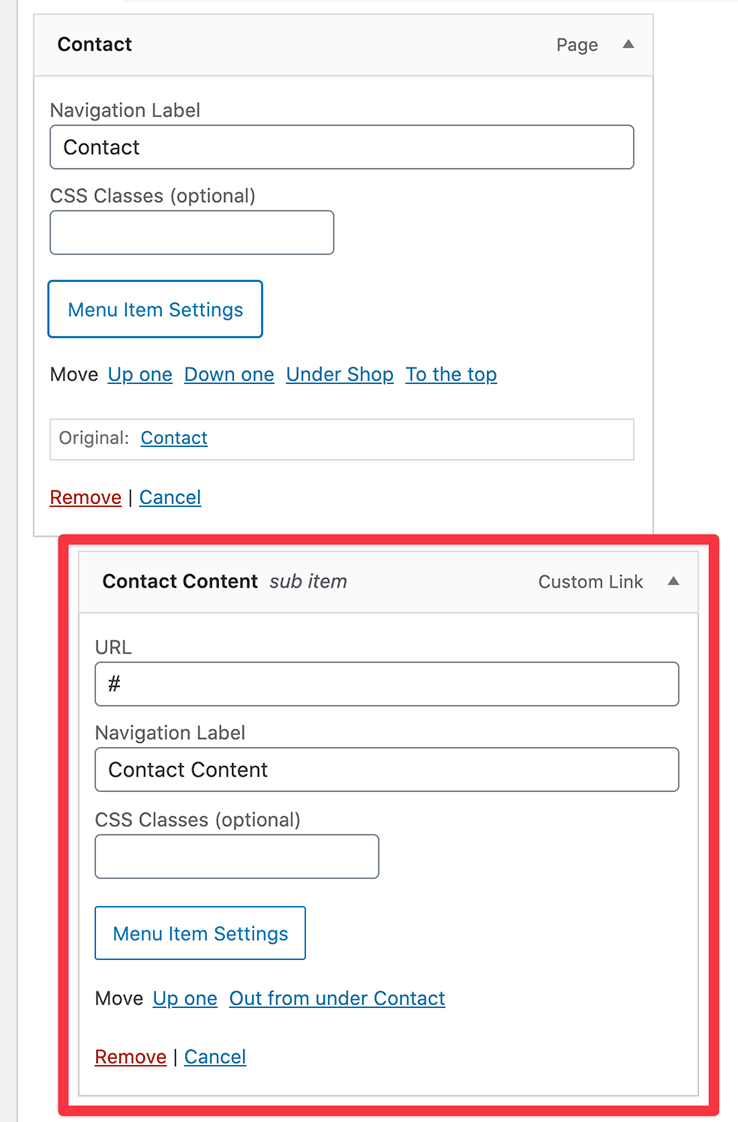
Click Menu Item Settings and then Mega Settings.
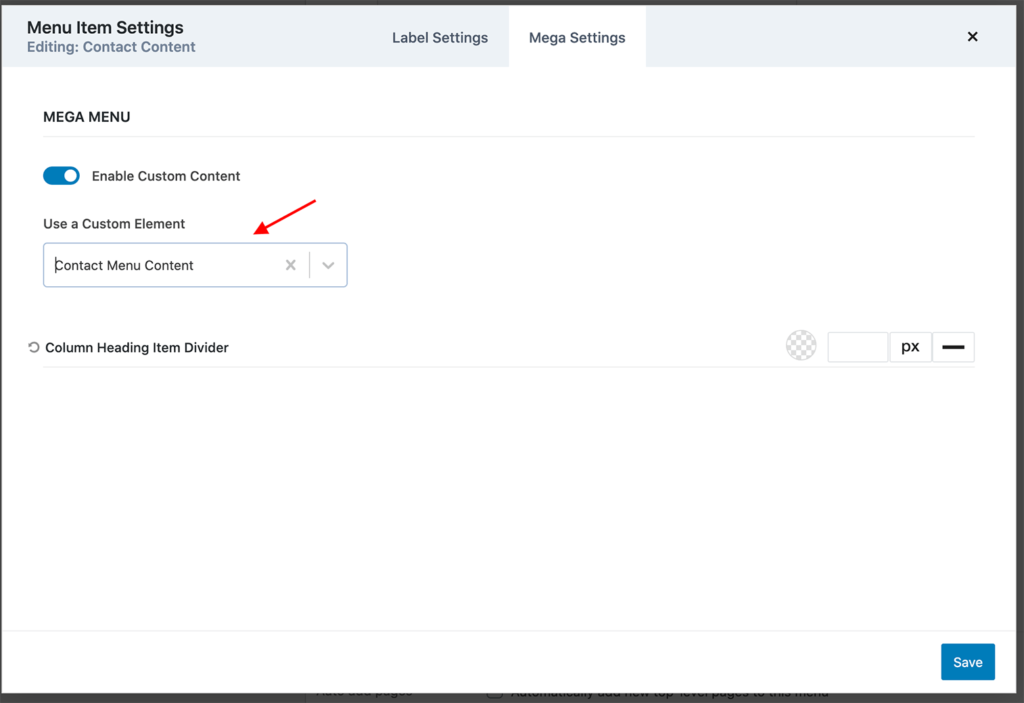
Enable Custom Content and select the element whose content should replace this item.
Press Save, then save your menu.
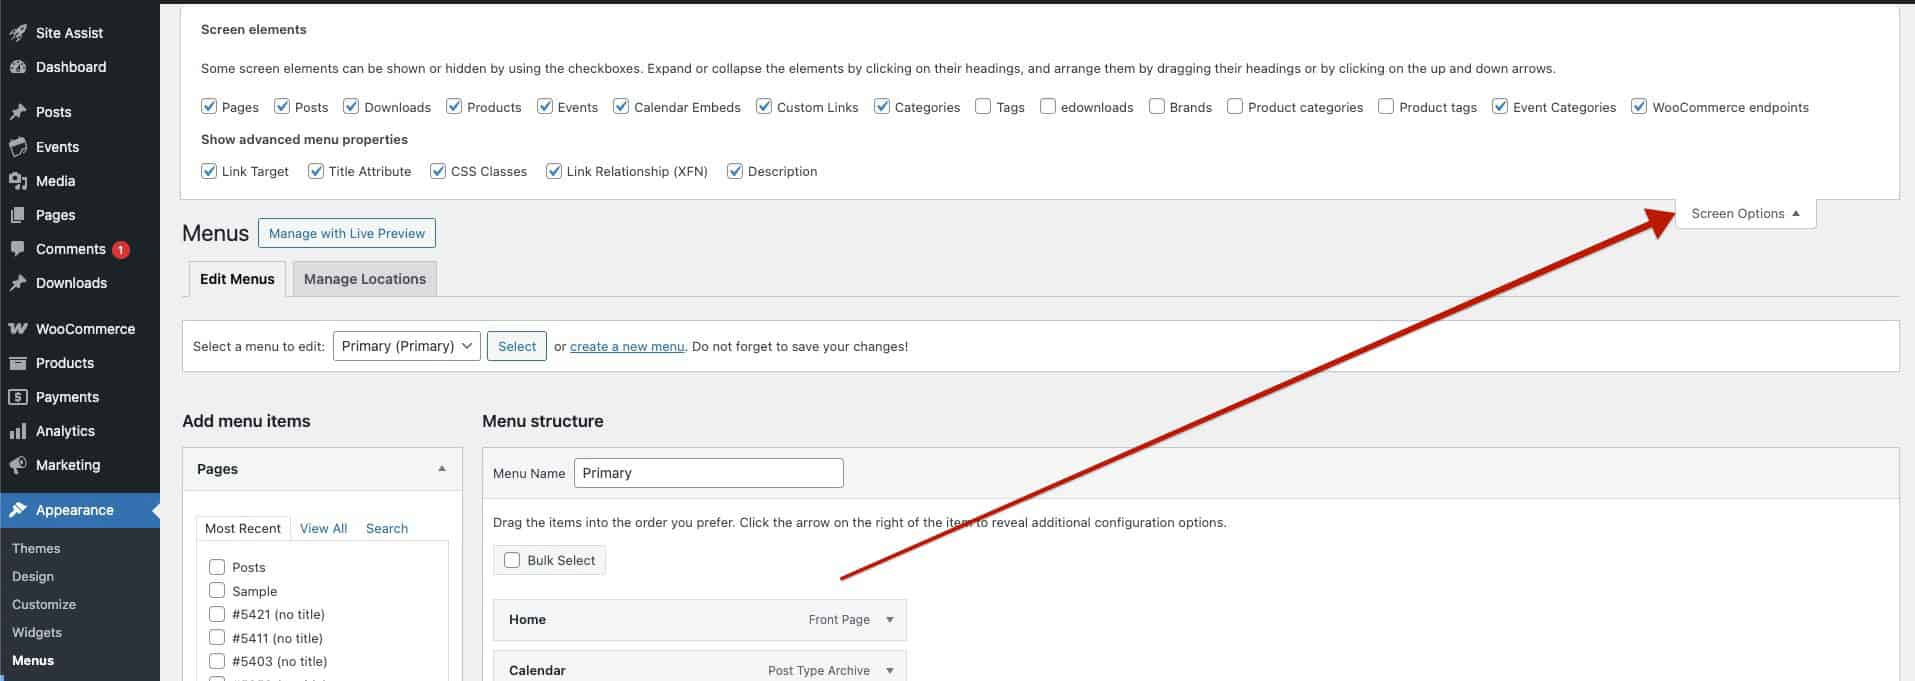
Screen Options
If you are looking for more navigation items or more mega menu-related settings, you may need to enable them using the Screen Options dropdown at the top of the Appearance -> Menus page.
For example, if you enable the Menu Item Description, to see the setting, it must be enabled from the Screen Options.
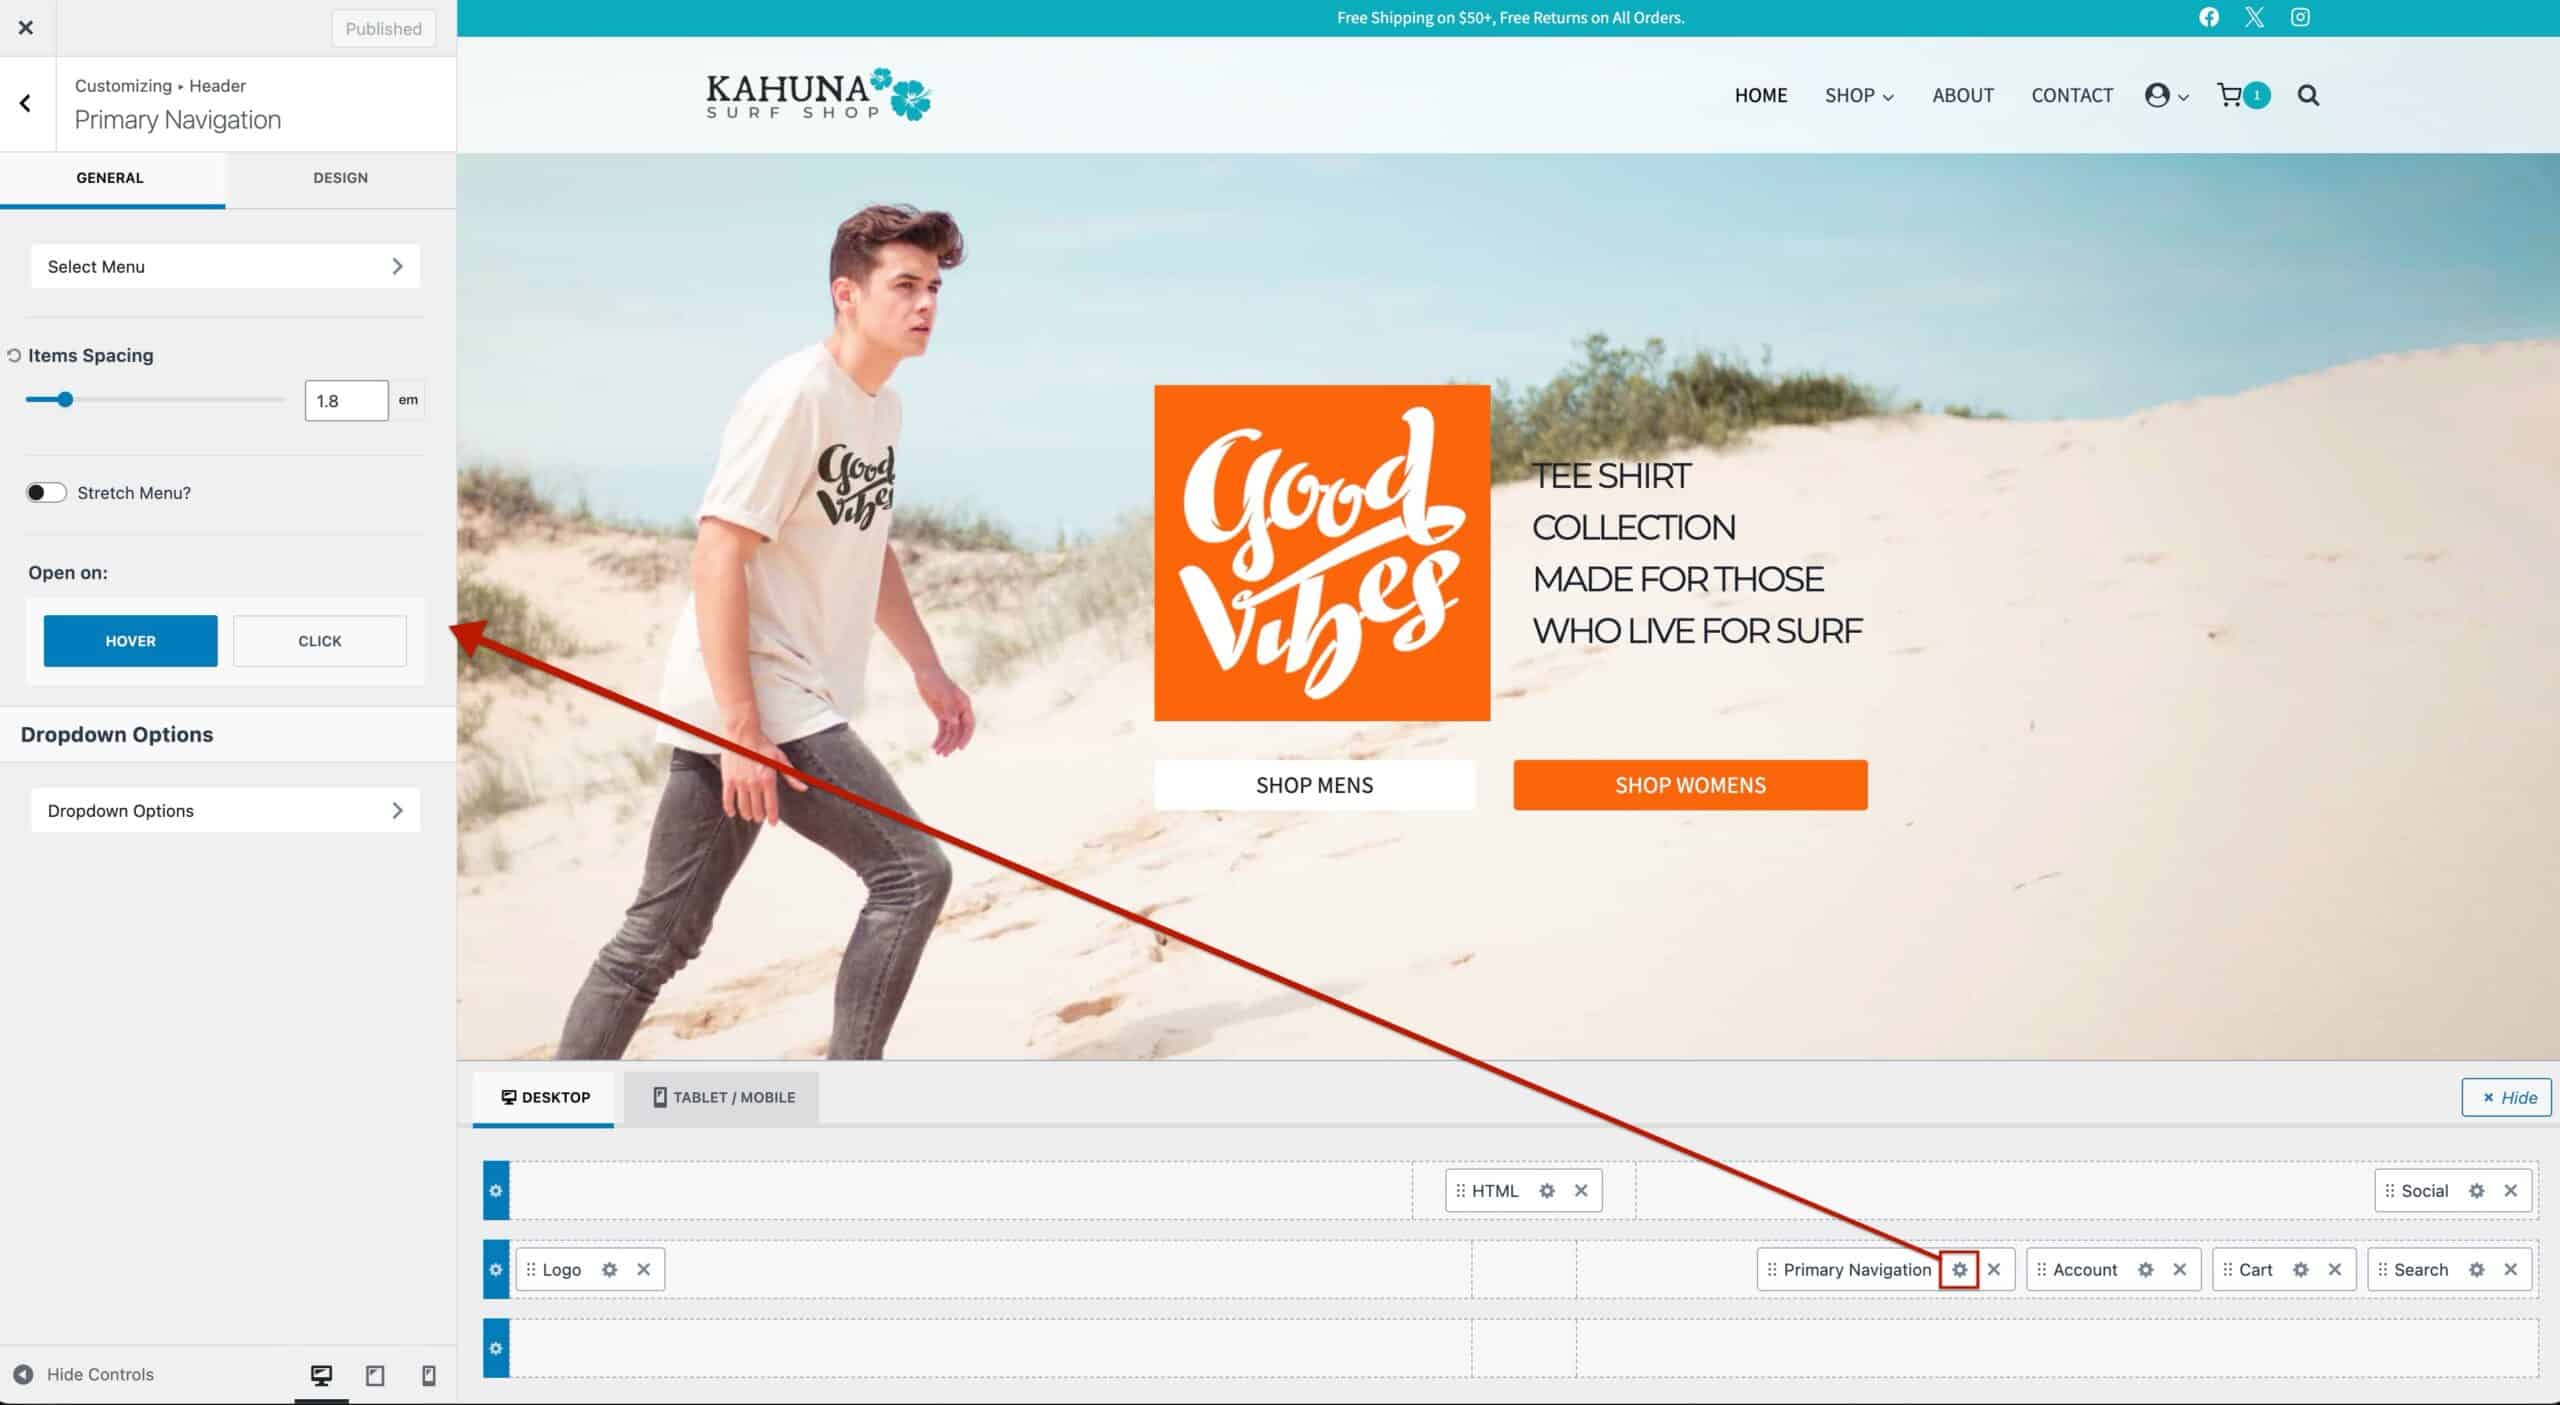
Setting the Mega Menu opening behavior. (hover/click)
You can set Mega Menus to open on by either clicking on or hovering over the menu item. To set the Mega Menu Open On setting, navigate to the Customizer -> Header -> Primary (or secondary) Navigation settings. You can locate and adjust the Open on setting to control this behavior.
Disabling Links
The Disable Link option in Kadence Mega Menus allows you to disable the link for specific menu items. For example, you may have a Parent-level navigation item that opens a mega menu. In this case, you may not want the Parent-level item itself to navigate anywhere, but instead use it strictly to open the menu. This is a practical use case where the Disable Link setting is particularly useful.
When this option is enabled, Kadence removes the href attribute from the menu item entirely. This ensures that the link cannot be navigated to, while maintaining the correct HTML structure and accessibility standards.
You may see a warning in PageSpeed Insights indicating that an <a> element does not have a valid href. This is expected behavior because PSI flags all <a> elements without an href attribute. Since the link is intentionally disabled and not meant to navigate anywhere, this warning can safely be ignored.
Technically, an <a> element without an href is perfectly valid and functions as expected; it simply isn’t meant to be crawlable. You can learn more here.
