The Conditional Display feature in Kadence Blocks Pro allows you to set dynamic visibility rules for specific blocks, such as Advanced Text, Row Layout, and Section blocks. When enabled, you can conditionally display content based on custom criteria, improving personalization and dynamics across your pages.
Conditional Display Settings
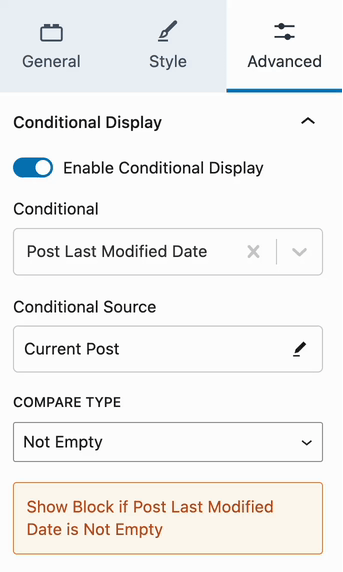
Conditional Display Settings can be found in available blocks by selecting the block and going to the Block Settings -> Advanced Tab. Here, you can expand and use the available Conditional Display Settings.
The Conditional Display Settings are available for the following blocks:
Learn more about each Conditional Display Setting below.
Conditionals
Conditionals allow you to grab content dynamically to base your Condition. There are many conditionals available, such as the Post Title, Author Display Name, Post Custom Field, etc. View all of the available Conditionals below.
Available Conditionals
User Conditionals:
Use the available User Conditionals to conditionally show blocks based on the current user.
Conditional Source
By default, the Conditional Source will use the Current Post. This is standard for Dynamic Content and will always grab from the Current Post/Page that is being viewed.
However, the Conditional Source can be changed to a specific Post or Page as well for specific use cases. This can be done by clicking on the Edit Pencil Icon within the Conditional Source Box.
Compare Type
Kadence Conditional Display provides a list of different selectable Compare Types. These are standard PHP Comparison Operators and can be used for comparing your Conditional Content. View the chart below to see each Comparison Type and a brief description of what each Operator means.
|
Compare Type |
Description |
|---|---|
|
Not Empty |
Displays the block if the condition is not empty. |
|
Empty |
Displays the block if the condition is empty. |
|
True |
Displays the block if the condition evaluates to |
|
False |
Displays the block if the condition evaluates to |
|
= |
Displays the block if the condition is equal to a specified value. |
|
!= |
Displays the block if the condition is not equal to a specified value. |
|
>= |
Displays the block if the condition is greater than or equal to a specified value. |
|
<= |
Displays the block if the condition is less than or equal to a specified value. |
|
> |
Displays the block if the condition is greater than a specified value. |
|
< |
Displays the block if the condition is less than a specified value. |
Using Conditional Display
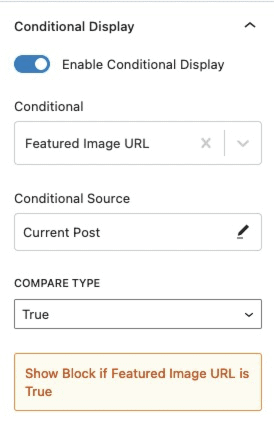
The Conditional Display setting in Kadence Blocks Pro enables you to control block visibility based on specific conditions. For instance, imagine a Single Post Template where a Dynamic Advanced Image block is set to display the post’s Featured Image.
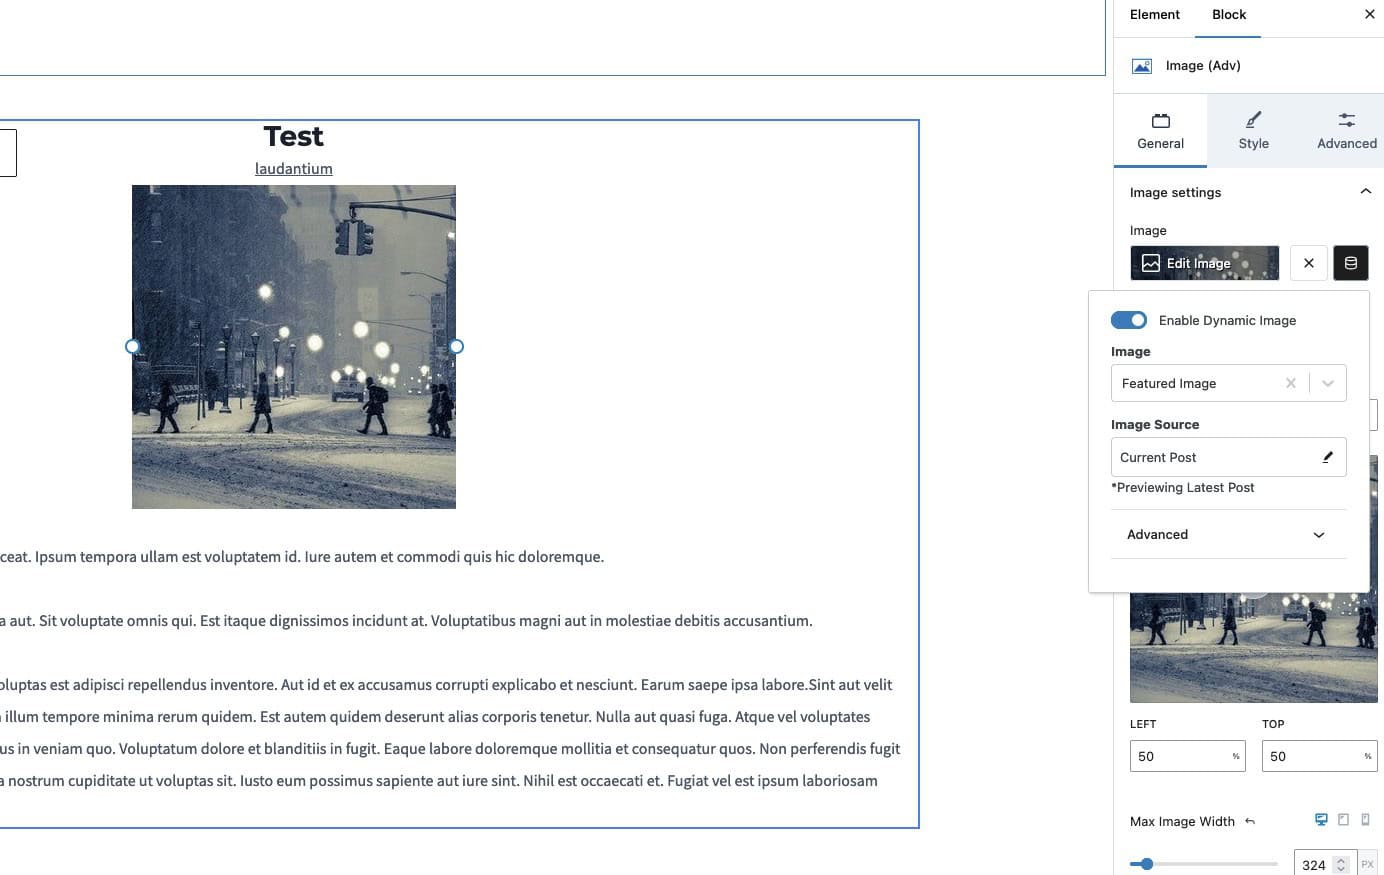
This setup allows the Featured Image to appear dynamically whenever a post includes one. However, if a post doesn’t have a Featured Image, it will leave extra blank space in the layout. In these cases, the Conditional Display setting can be used to hide the image block when no Featured Image is present, keeping the design clean and consistent.
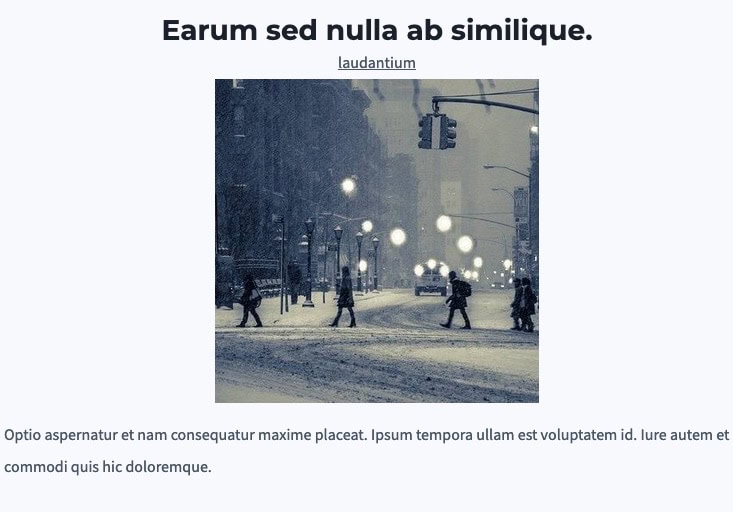
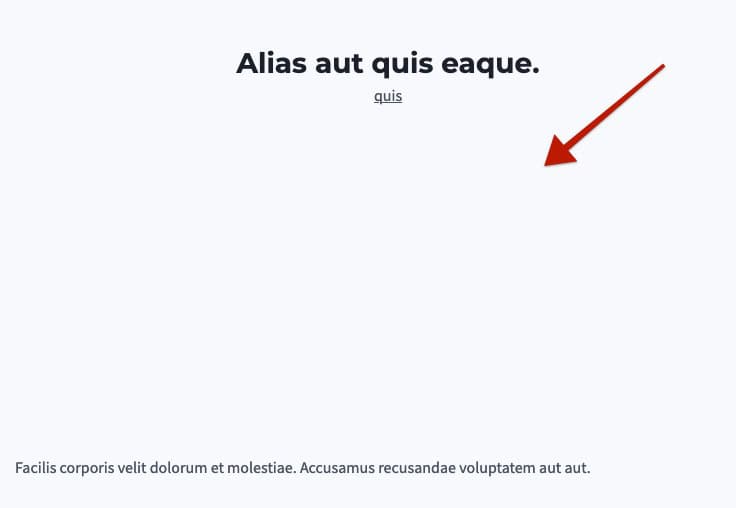
This is an example of what the front end would look like when a Post doesn’t have a Featured Image in this case.
With Conditional Display, you can ensure the block only appears if a Featured Image is available, eliminating empty spaces on posts that lack one. This feature allows for cleaner, more responsive layouts by adapting dynamically to the structure of your content.
To set this up, go to Advanced Image → Block Settings → Advanced Tab → Conditional Display.
For the condition, select Featured Image URL and leave the Conditional Source as Current Post.
Then, set the Compare Type to Not Empty.
This configuration will ensure the block displays only if the post has a Featured Image URL, which is present only when a Featured Image is set for the post. If there is no Featured Image, the block will remain hidden on the front end, maintaining a clean and consistent layout across all posts.

This is an example of what the front end would look like for a post that doesn’t use the Conditional Display feature.
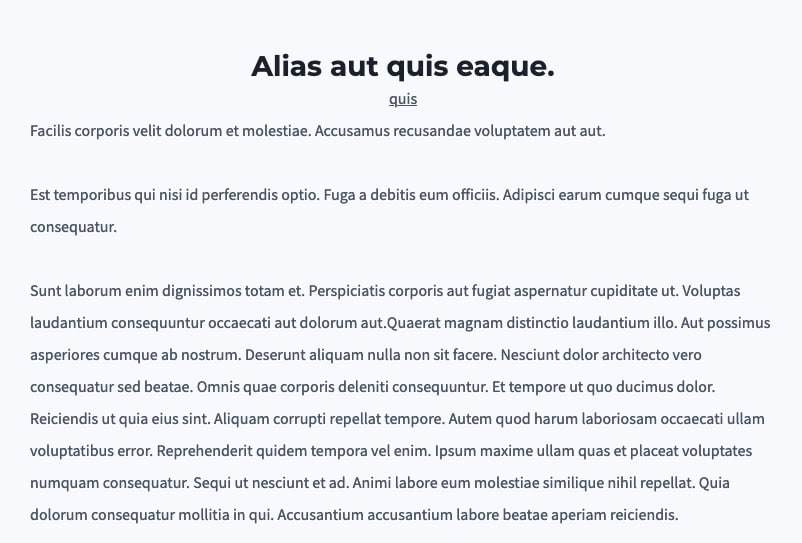
This is an example of what the front end would look like for a post that uses the Conditional Display feature. Notice the spacing where the Image would be is eliminated.
This is just one example of how you can leverage Conditional Display to create truly dynamic WordPress websites.
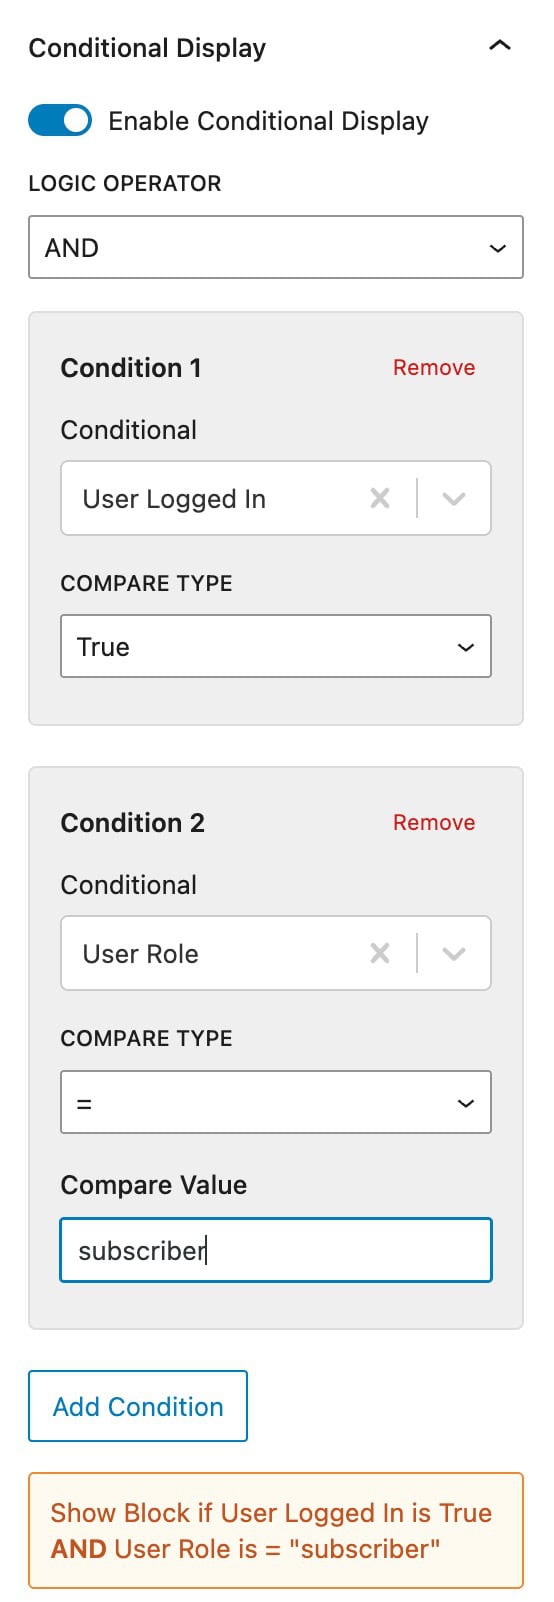
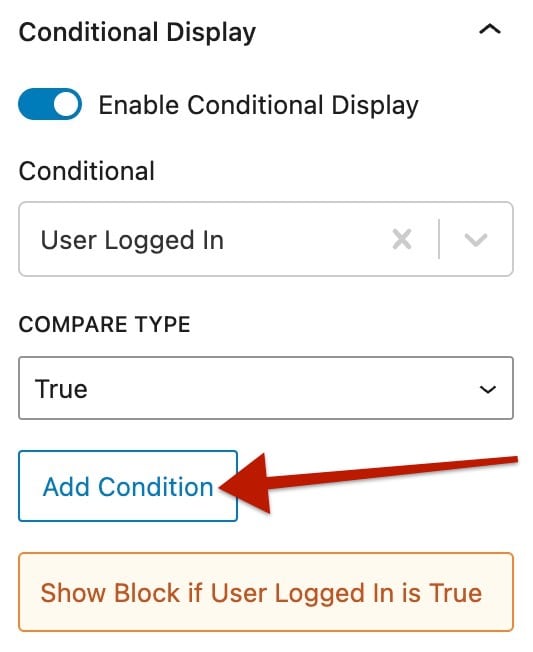
Adding Multiple Conditions
Once you enable and use Conditional Display, you can also add multiple conditions. This can be useful in specific cases where more than one condition needs to be met. Just click on the Add Condition button below the first conditional display set up. Then, you will have the same options to add a second condition accordingly.
An example could involve showing a block only for logged-in users who have a specific user role. You would first set a condition using “User Logged-In” to ensure only authenticated users see the block. Then, add a second condition using “User Role” and using the slug of a desired role, such as “Subscriber.” With these two conditions combined, the block will appear only when both the user is logged in and has the specified role, allowing you to personalize content dynamically for different audience segments.
You can use the Logic Operator to determine how multiple conditions are evaluated. For example, you might want a block to display only when a user is logged in and has the role of “Subscriber.” In this case, you would set the first condition to User Logged-In = True and the second condition to User Role = Subscriber, then choose the AND operator. The block will only appear when both conditions are met.
Alternatively, if you select the OR operator, the logic changes: the block will display if either the user is logged in or the user role is “Subscriber.” This gives you precise control over how multiple conditions interact to show or hide content dynamically.