
The free Kadence Blocks plugin includes the Google Maps Block, which allows you to display a single location on a Google Map. However, you may want to expand on this by adding additional markers.
This is an advanced guide that walks you through the process. Some technical skills are required, including the ability to modify JavaScript code.
Obtaining an API Key
Our block automatically includes an API key. However, to use the JavaScript API for this method, you must use a Custom API Key.
To get started, head over to the Google Cloud Console and create a New Project.
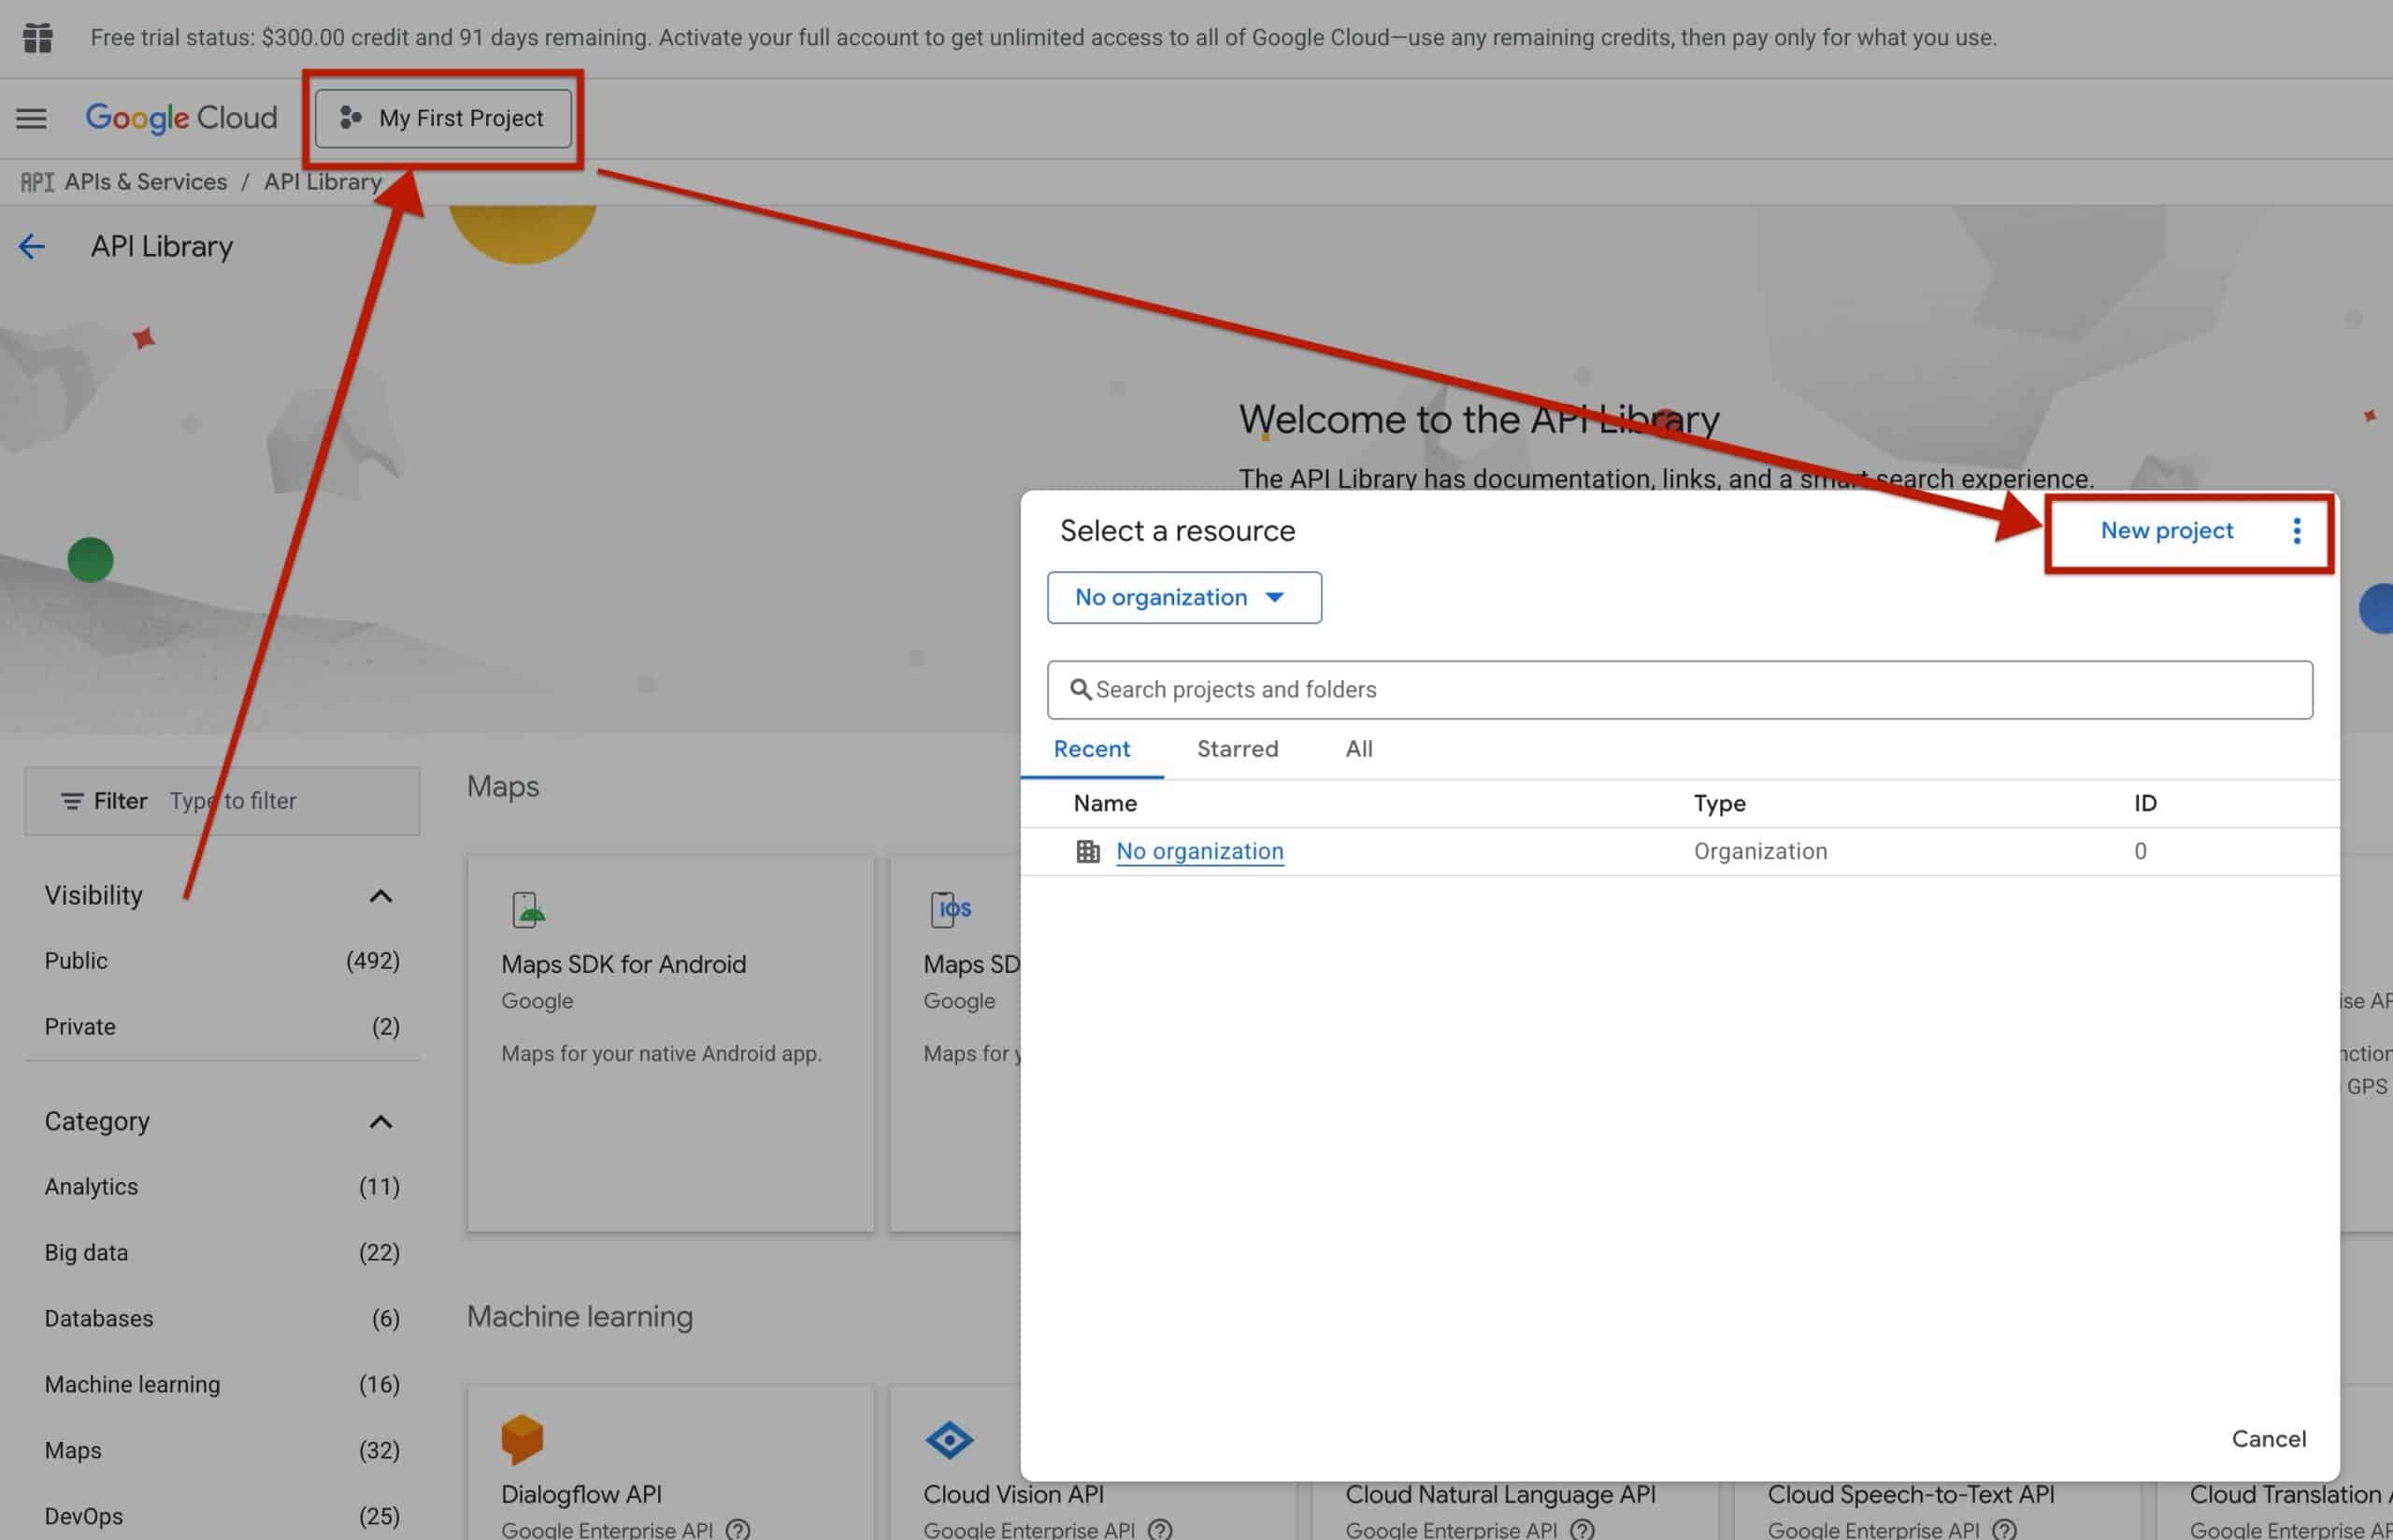
Afterward, head over to the APIs & Services / API Library page. This can be found from the API & Services -> Library page within the Google Cloud Console main navigation.
From here, you must enable the following API options:
- Maps JavaScript API
- Maps Embed API
Once the proper APIs are enabled, navigate to the Google Maps Platform -> Keys & Credentials page.
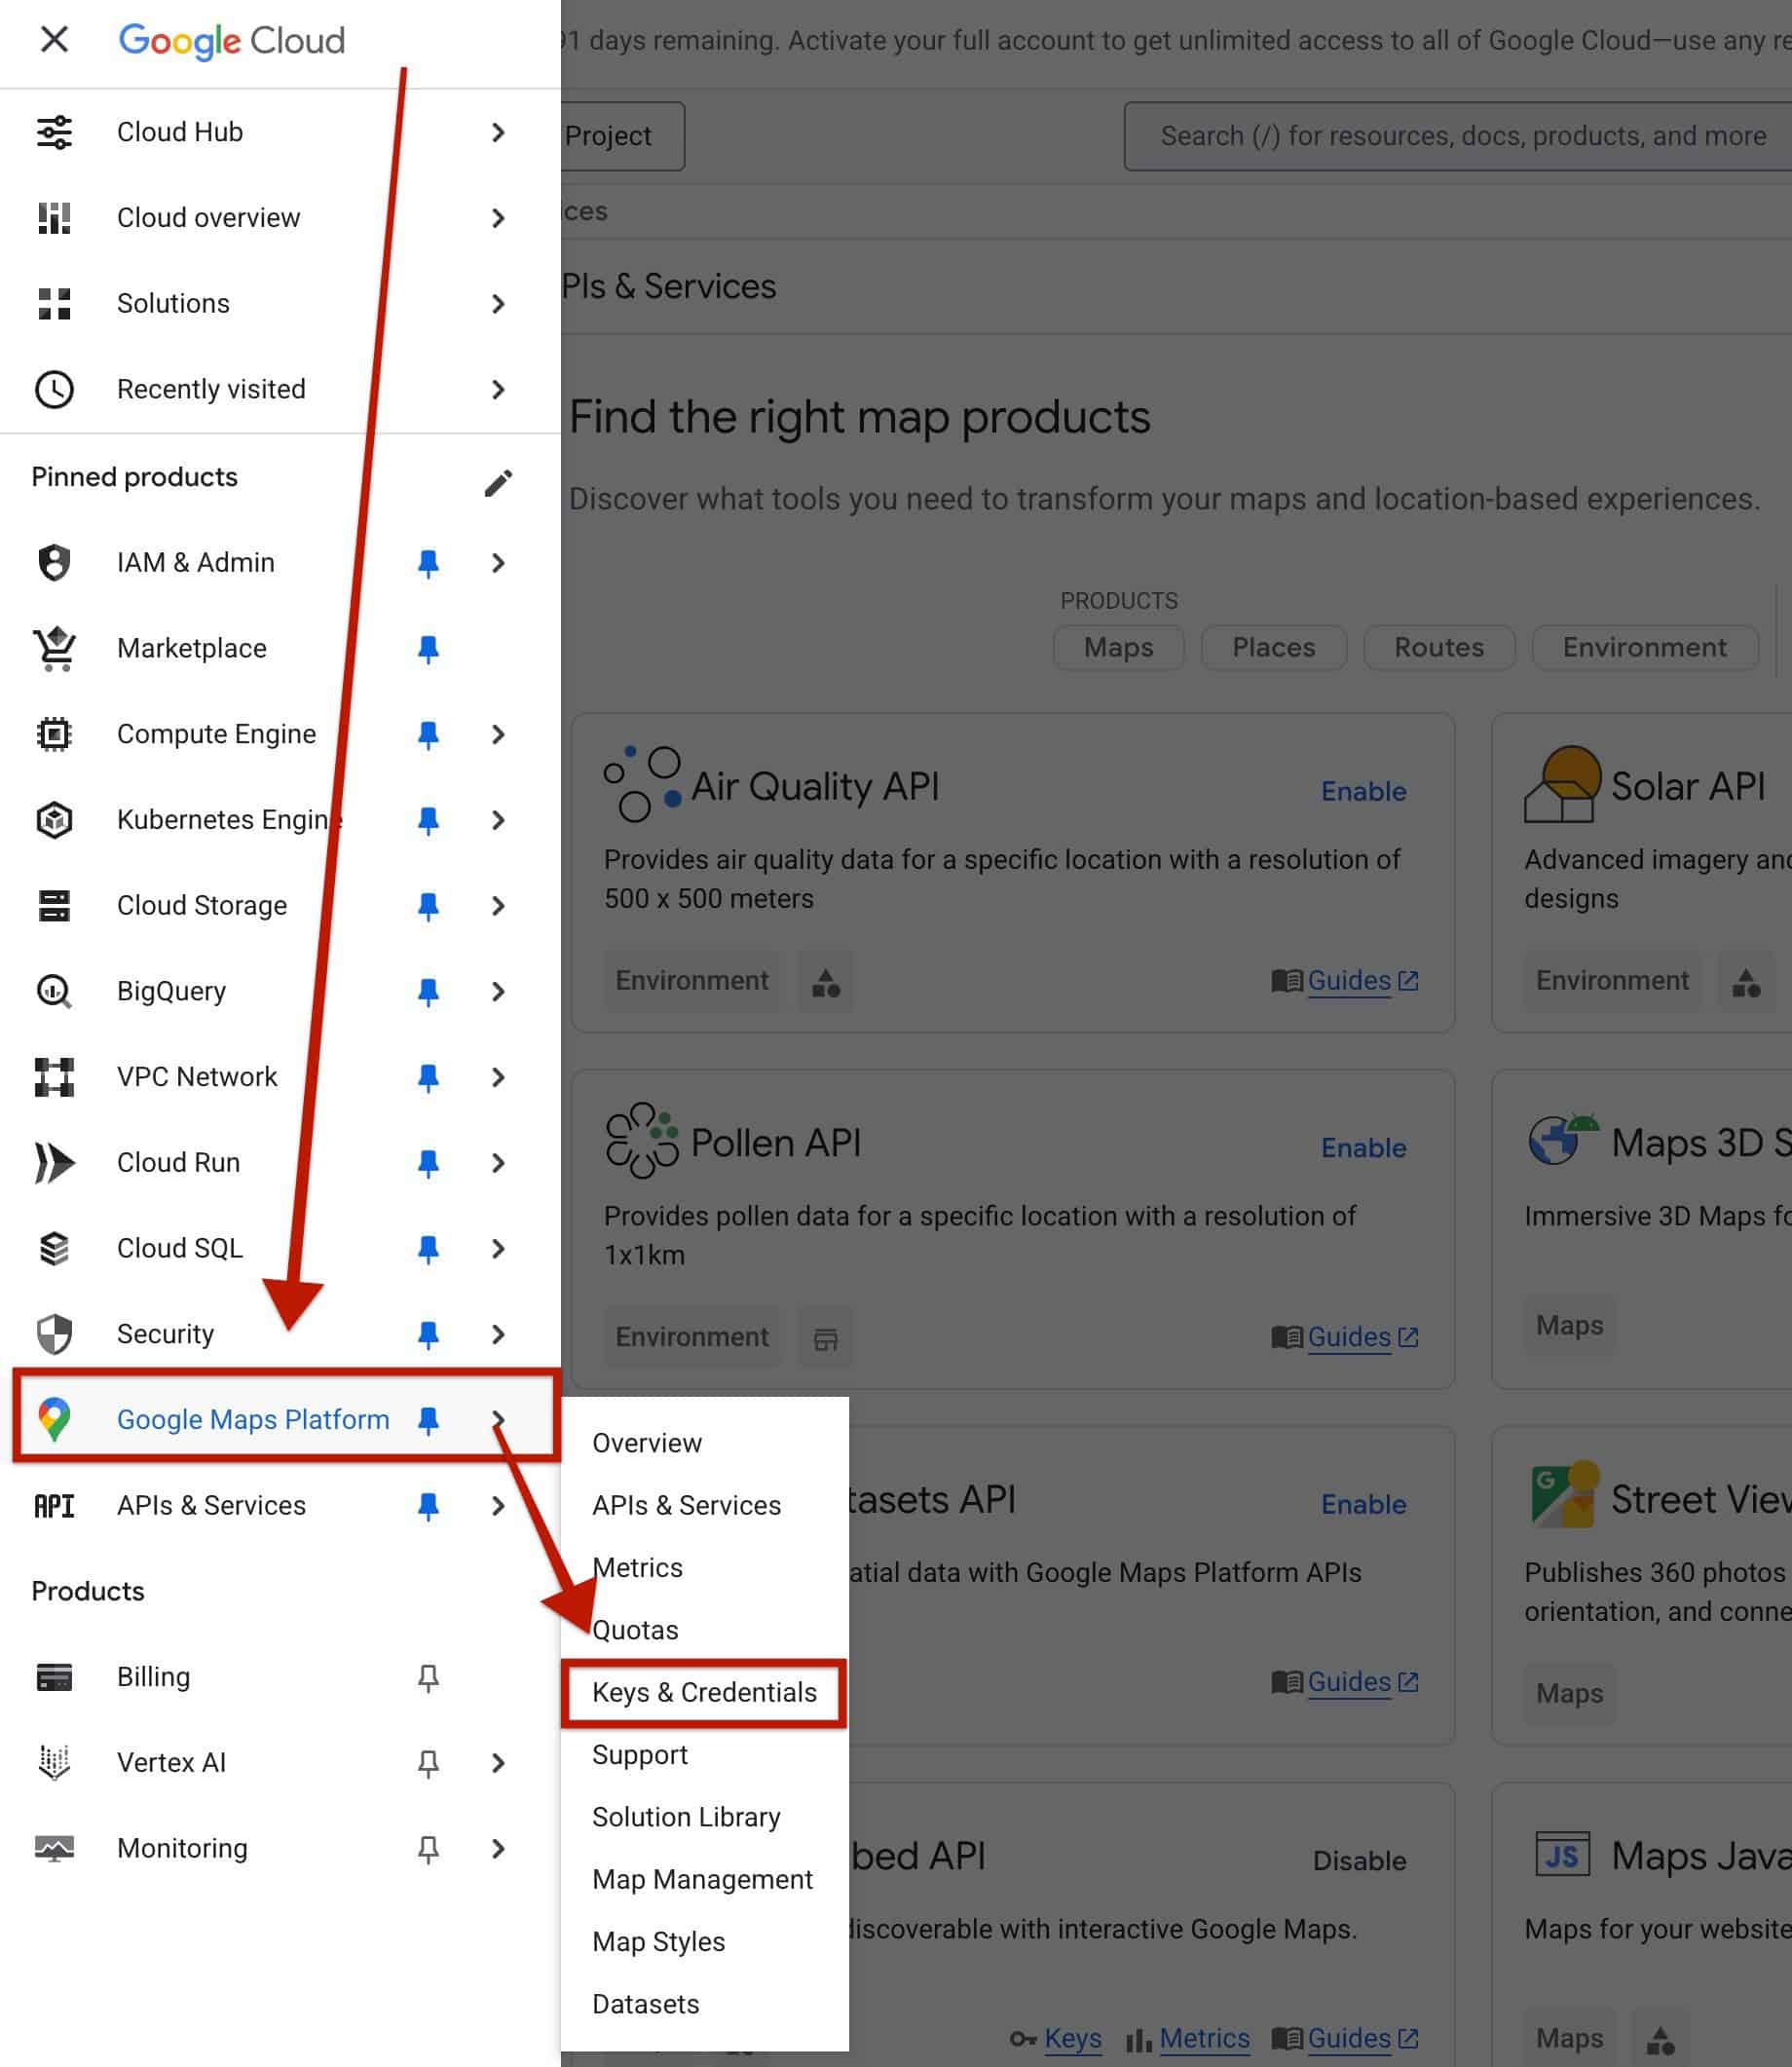
This will bring you to your Google Map API Keys. You can create one if you haven’t already. Then, you should save your API key for later use in this guide.
You can also refer to This Guide by Google on creating an API key.
The next step is to obtain a Google Map ID, which you can learn about in the next section of this guide.
Creating a Google Map in Google
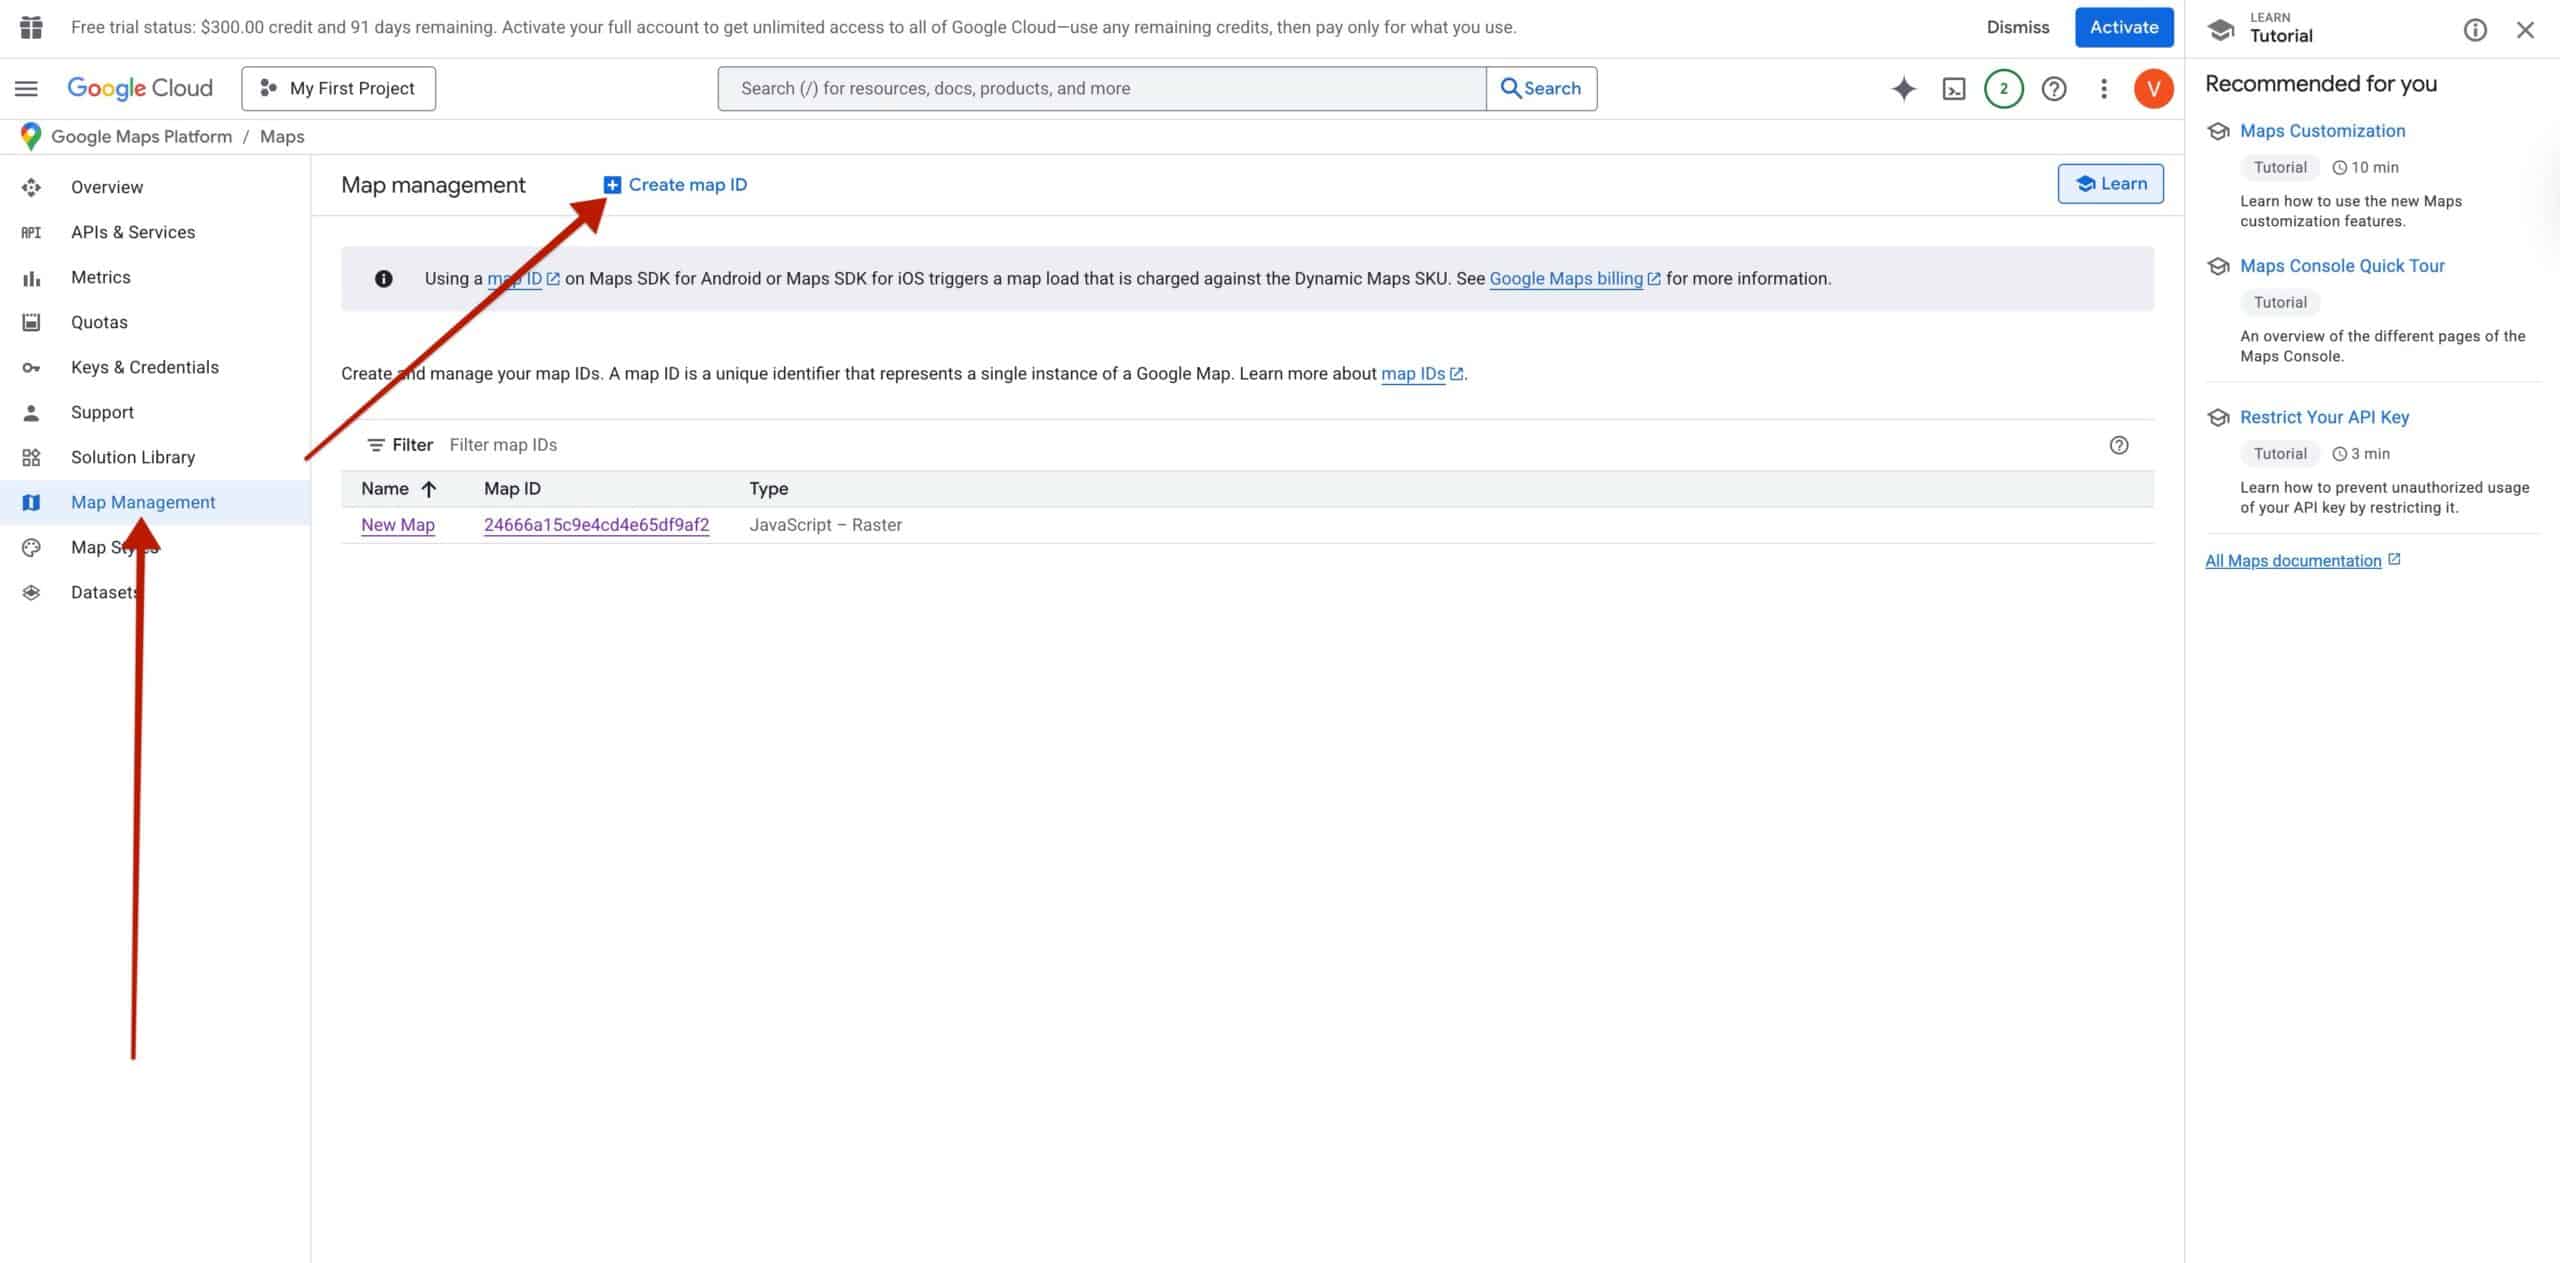
From the Google Cloud Console Maps API page, locate Map Management. Then, click on Create map. This will allow you to create a new map instance, where you will be given a unique Map ID. Create a new map and save the Map ID for the next step of this guide.
Customizing your Google Maps Block
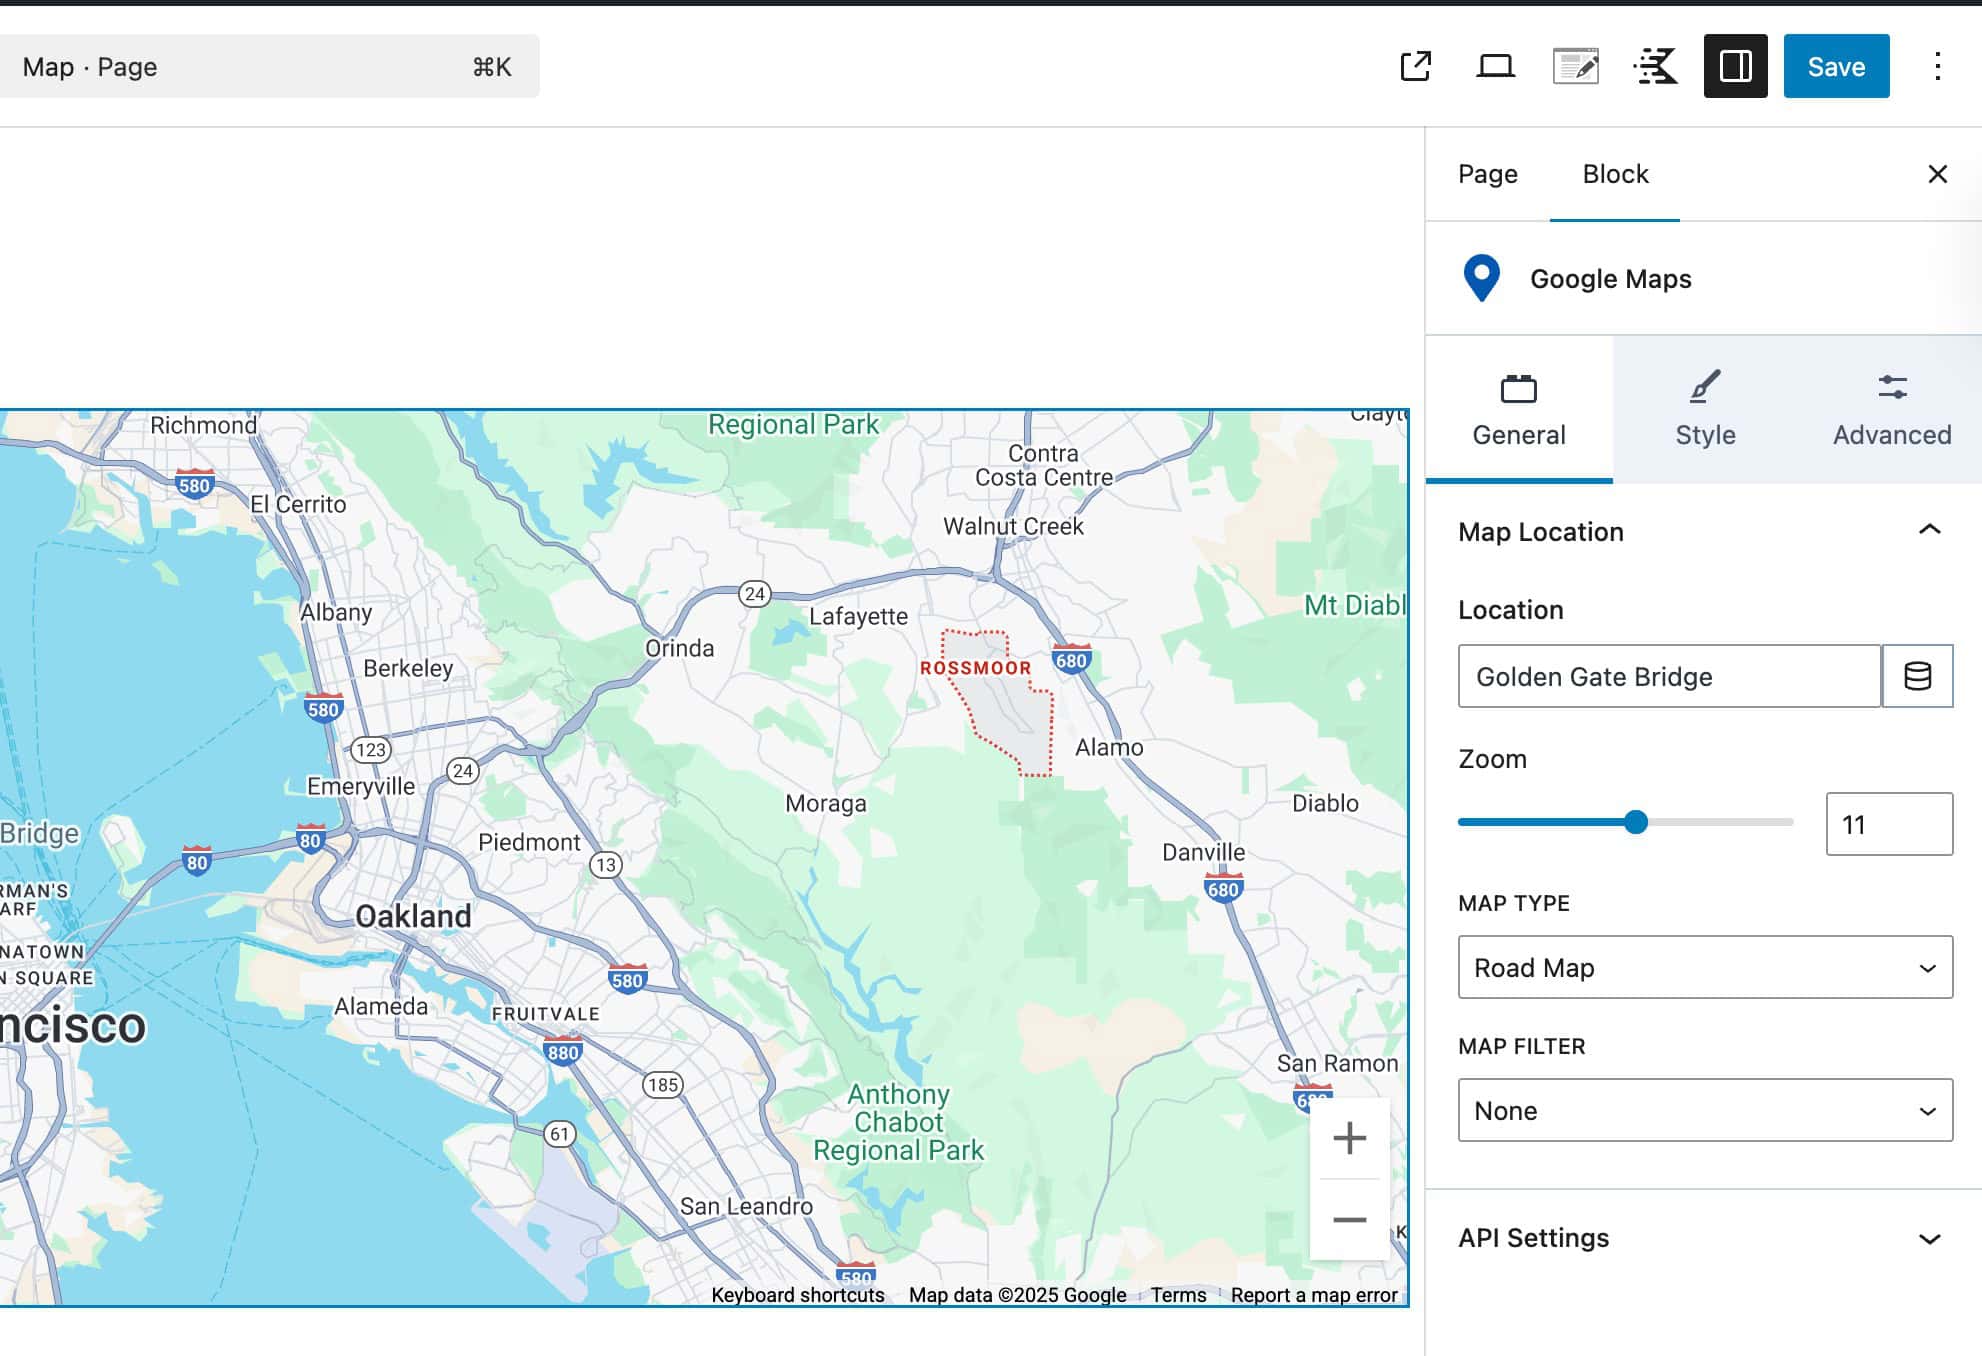
Begin by adding a Google Maps Block to the page. You must set an initial location through the Google Maps block. You also do not need to fill out the API settings when using this method of implementation.
Your Block Settings should look similar to the image below.
Custom Code Snippet
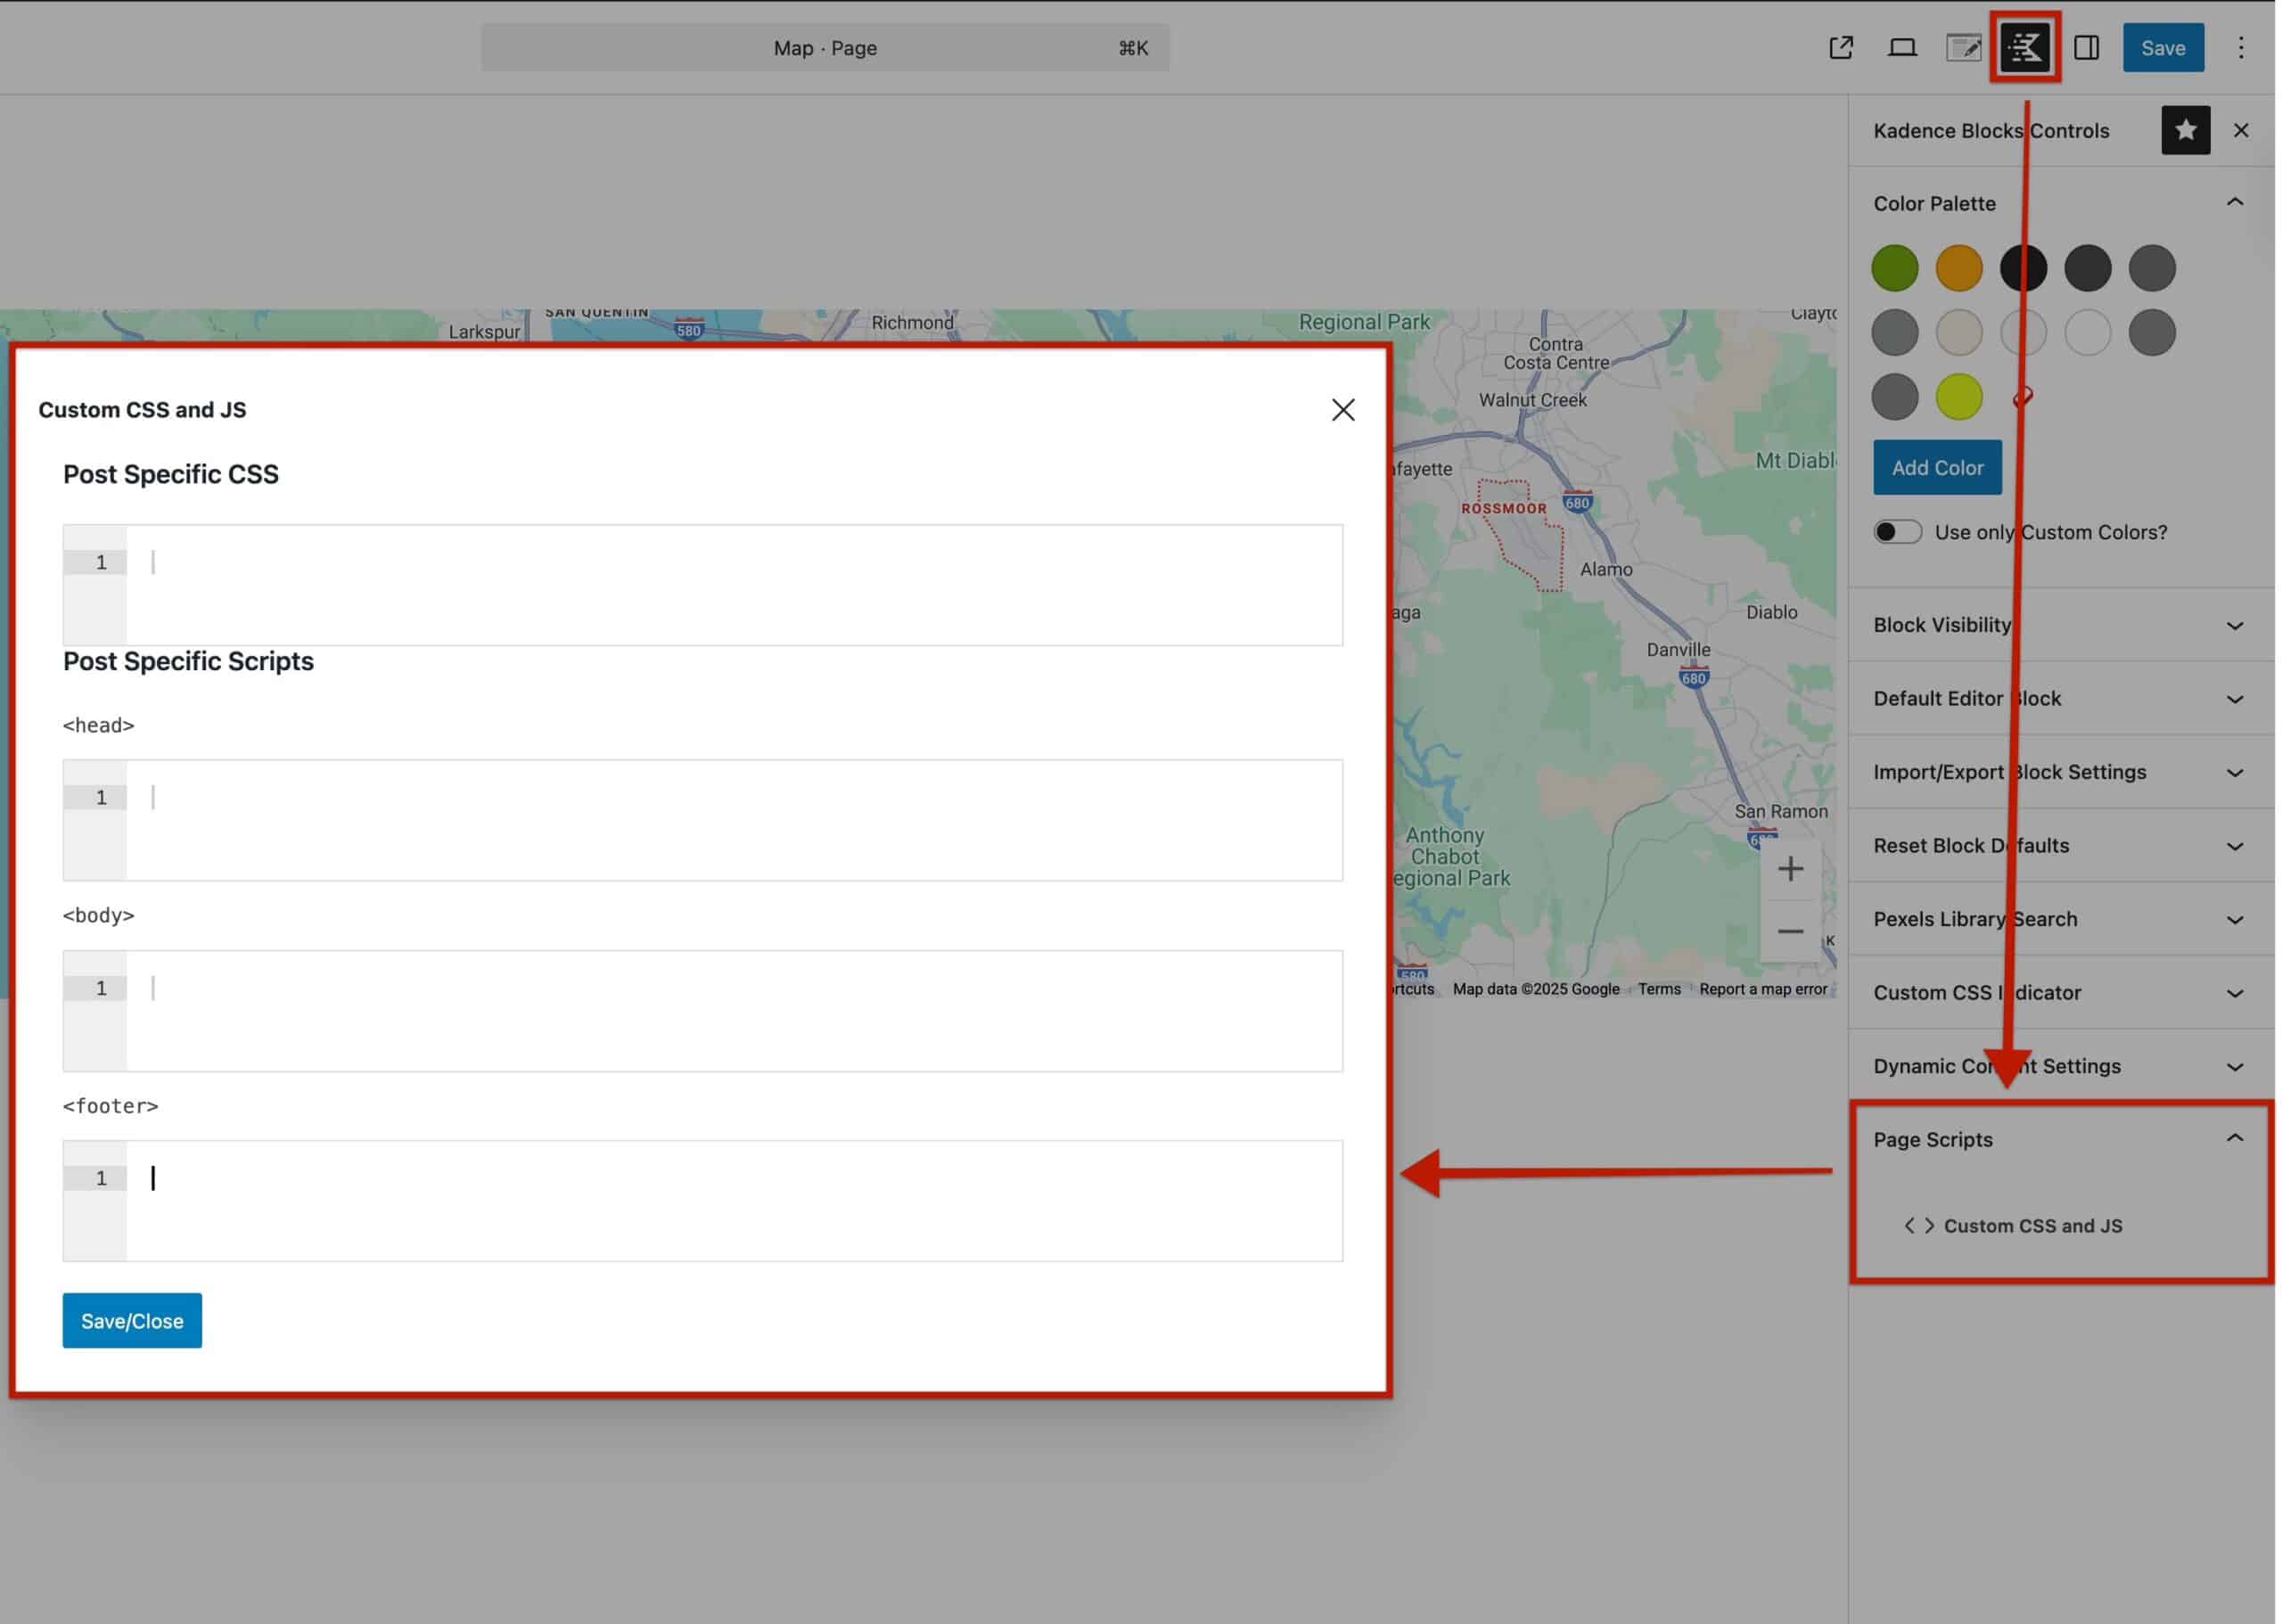
To add multiple markers, we will use Custom JavaScript. Kadence provides a few ways to add JavaScript, but for this guide, we will use Page Scripts, so the JavaScript only runs on the specific page. You can learn about how to add Custom JavaScript to Kadence here.
Earlier, you grabbed an API Key and a Google Map ID. This is where they become useful. Below is a Custom Code where you can implement both of these values.
- Replace
YOUR_API_KEYwith your Google Maps API Key - Replace
YOUR_MAP_IDwith your Google Map ID.
<script>
const API_KEY = "YOUR_API_KEY";
const MAP_ID = "YOUR_MAP_ID";

const markerLocations = [
  { lat: 37.8303, lng: -122.4851, title: "Golden Gate National Recreation Area" },
  { lat: 37.7936, lng: -122.4070, title: "Chinatown / Union Square" }
];

function loadGoogleMapsScript() {
  const script = document.createElement('script');
  script.src = `https://maps.googleapis.com/maps/api/js?key=${API_KEY}&callback=initMap&map_ids=${MAP_ID}&libraries=marker`;
  script.async = true;
  document.head.appendChild(script);
}

window.initMap = async () => {
  const { Map } = await google.maps.importLibrary("maps");
  const { AdvancedMarkerElement } = await google.maps.importLibrary("marker");

  const mapEl = document.querySelector('.wp-block-kadence-googlemaps');

  if (!mapEl) {
    console.error("Kadence map element not found.");
    return;
  }

  // Use a hardcoded position to avoid Geocoding errors
  const kadencePosition = { lat: 37.8199, lng: -122.4783 };

  const map = new Map(mapEl, {
    center: kadencePosition,
    zoom: 12,
    mapId: MAP_ID
  });

  const bounds = new google.maps.LatLngBounds();
  bounds.extend(kadencePosition);

  // Add the main marker
  new AdvancedMarkerElement({
    map: map,
    position: kadencePosition,
    title: "Golden Gate Bridge" // A hardcoded title
  });

  // Add the extra markers
  markerLocations.forEach(location => {
    new AdvancedMarkerElement({
      map: map,
      position: { lat: location.lat, lng: location.lng },
      title: location.title
    });
    bounds.extend({ lat: location.lat, lng: location.lng });
  });

  map.fitBounds(bounds);
};

document.addEventListener("DOMContentLoaded", loadGoogleMapsScript);
</script>
Within the Custom Code, notice the markerLocations array. This is where you can manually add custom, additional marker locations to the Google Map. This example provides two custom locations, which you can remove, modify, or add to. You must follow the same format already specified in the Custom Code.
const markerLocations = [
  { lat: 37.8303, lng: -122.4851, title: "Golden Gate National Recreation Area" },
  { lat: 37.7936, lng: -122.4070, title: "Chinatown / Union Square" }
];
Generally, you should keep the markerLocations small or lazy-load the script for pages with many markers to avoid performance issues.
Once you have coded in your locations, you can apply this code to the page where the Google Map runs.
Adding the Custom Code
Kadence offers the Page Scripts feature for adding code to specific pages. You can learn about adding Custom Code to Kadence here.
For Page Scripts, add the JavaScript in the Footer section so it loads after the Kadence Google Maps block. This ensures the map element exists before the script runs.
Additionally, if you do not have access to Kadence Blocks Pro or Kadence Theme Kit Pro to enable Custom Scripts, consider using a Custom HTML Block on the same page as the Google Maps block. This is a good workaround for free users.
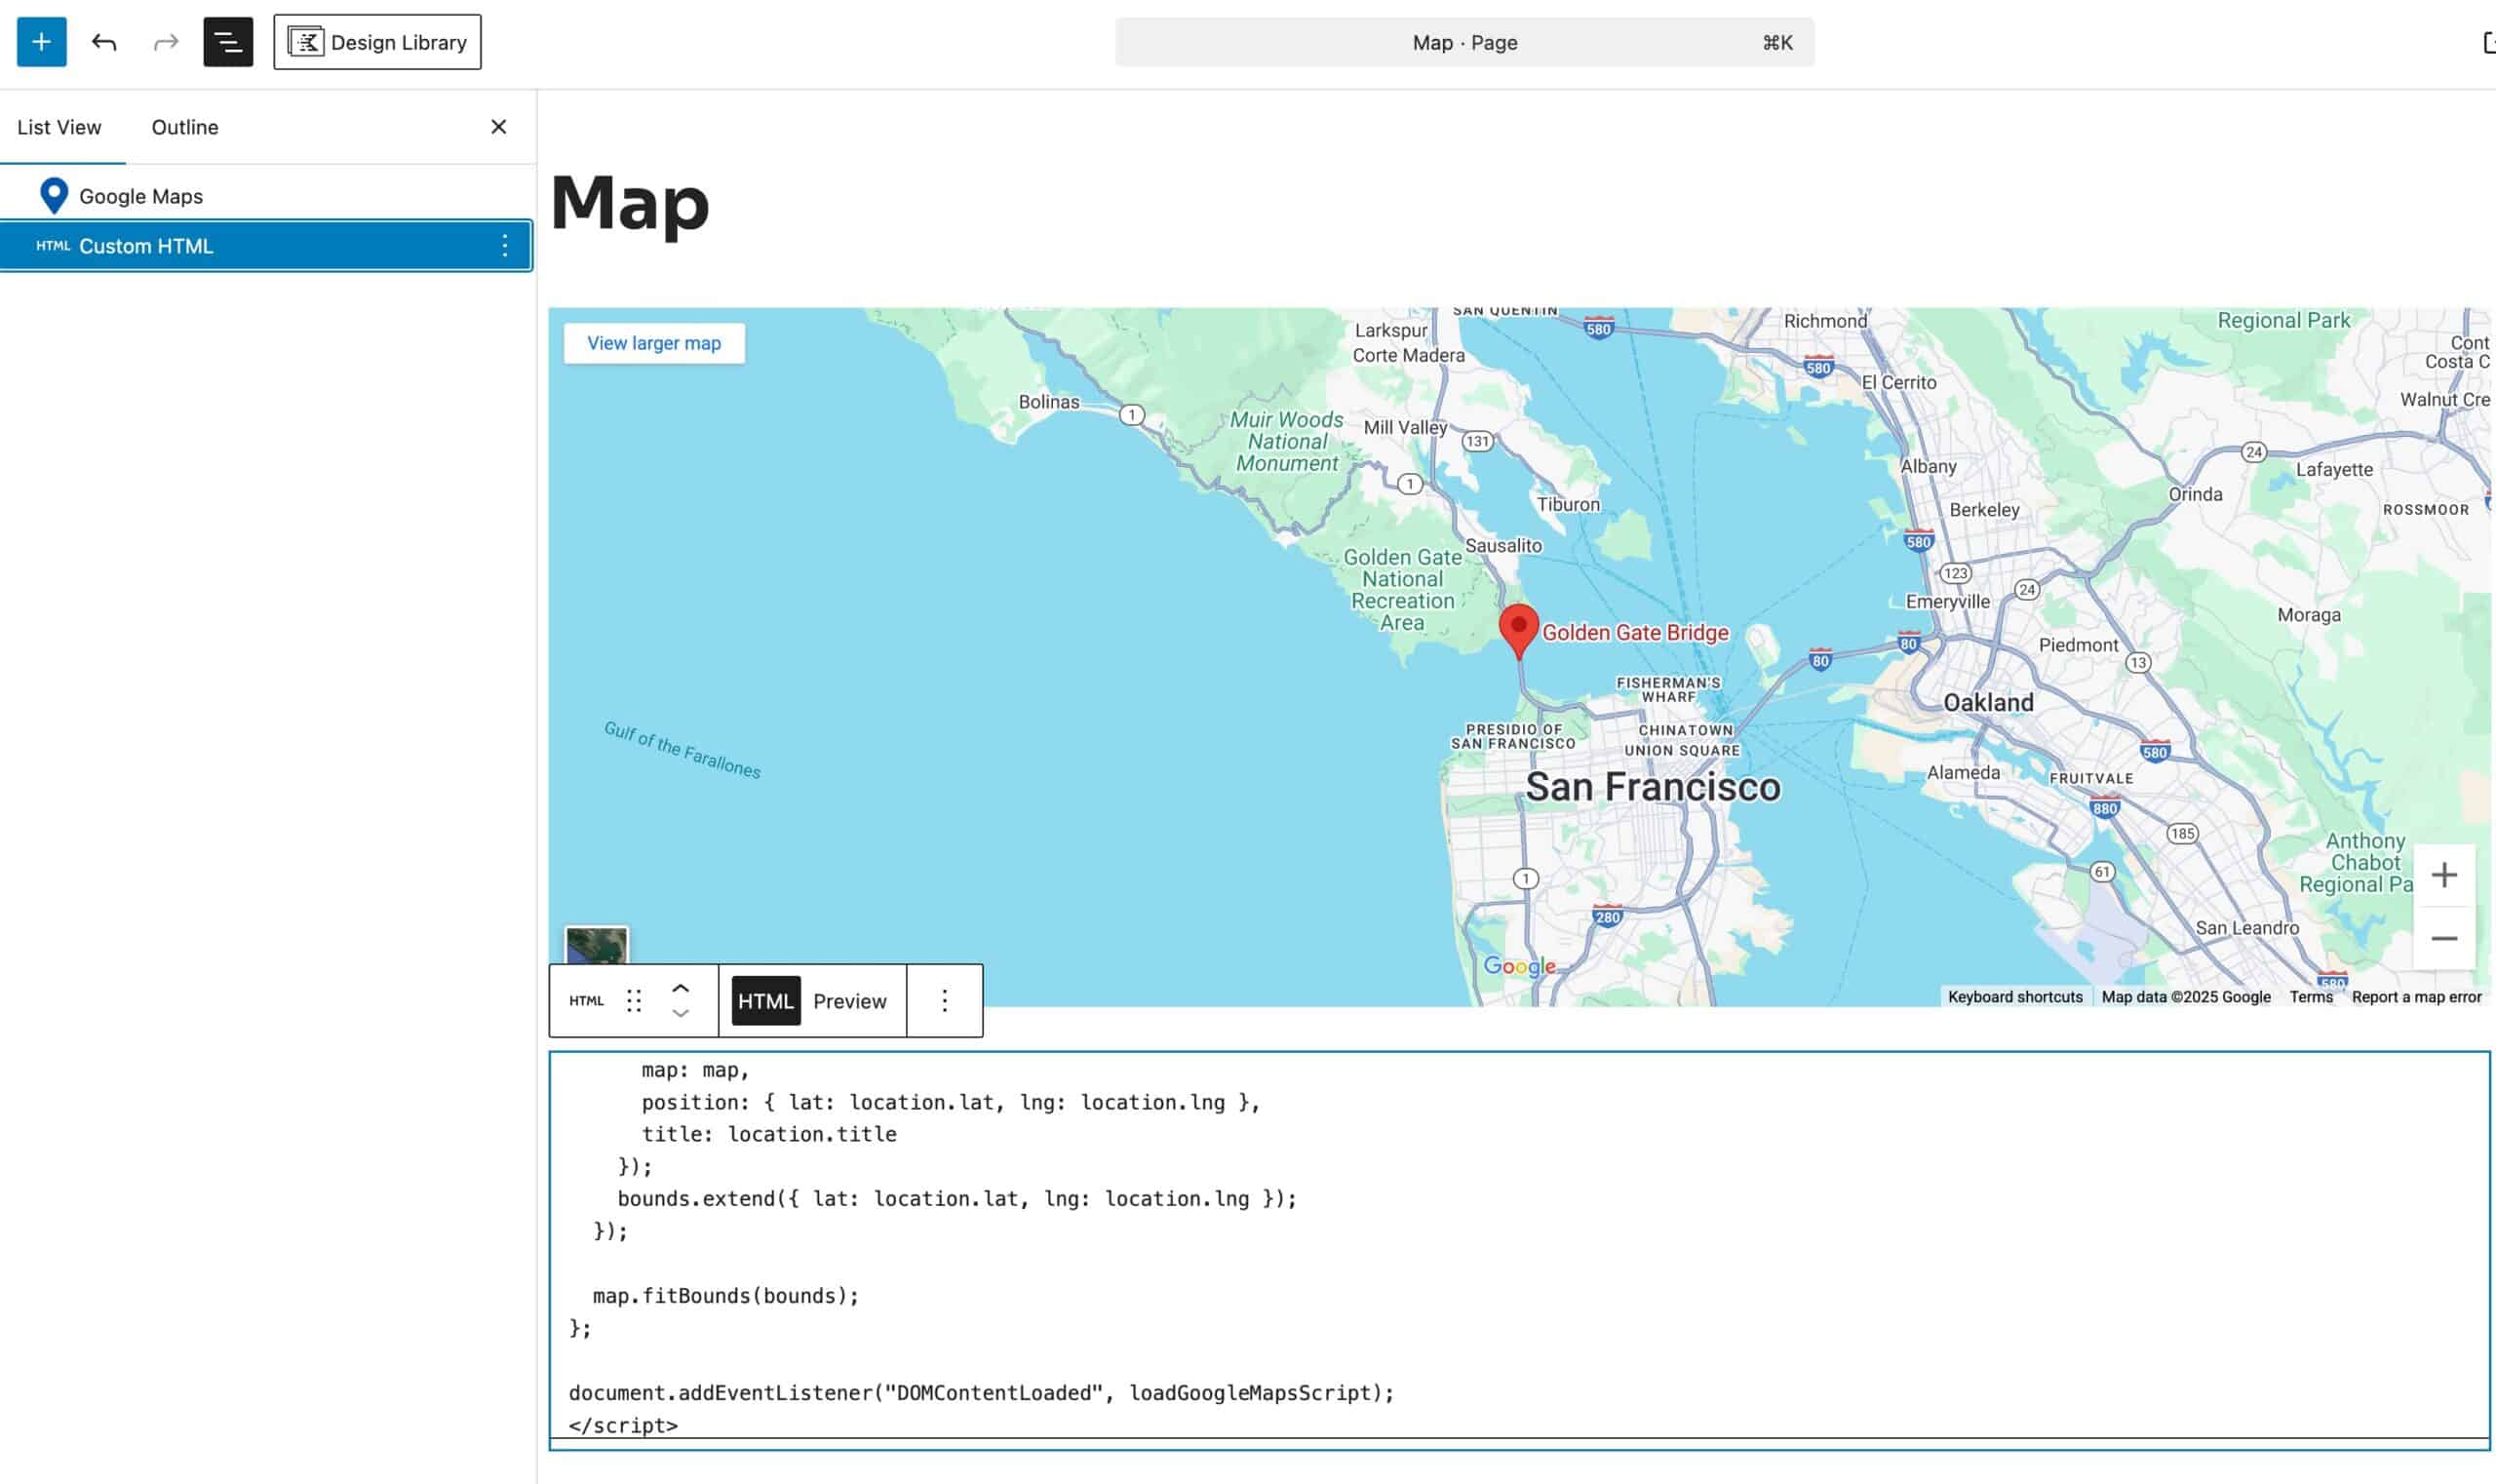
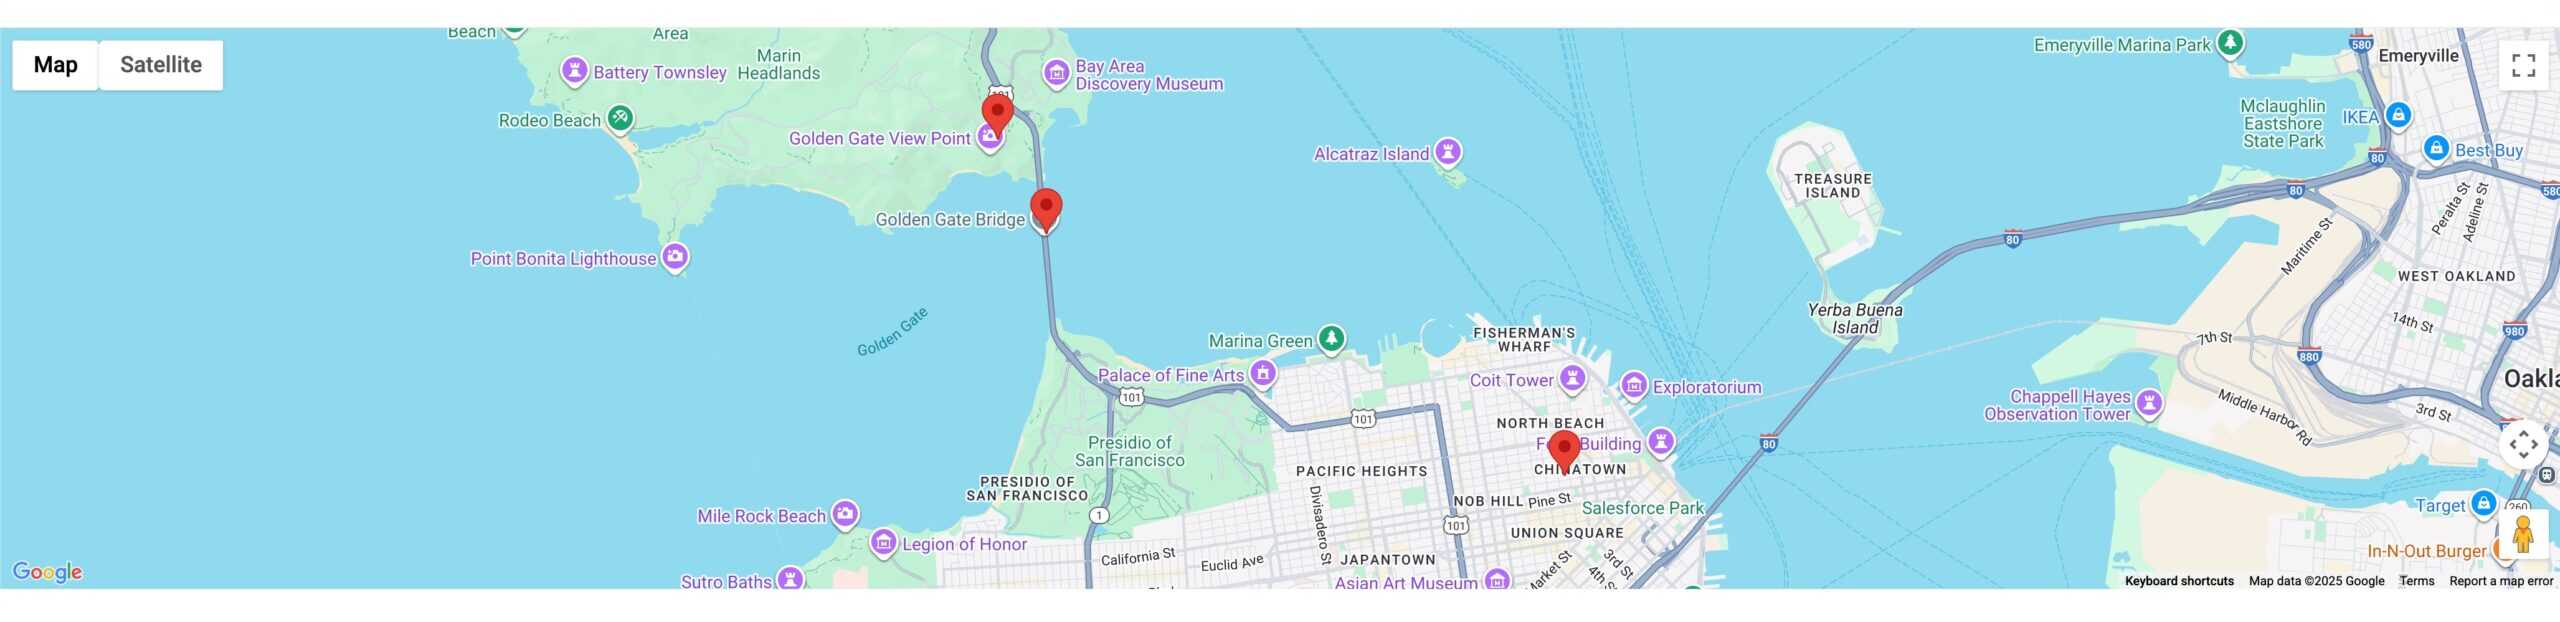
In return, if the code is modified properly, you should see multiple markers on the Google Maps block.
