When posting forms on your website, it is ideal to use some form of spam prevention to prevent malicious actors. A popular option is Google reCAPTCHA, an effective, trusted form of spam prevention. This guide will overview how to set up Google reCAPTCHA and use it with your Kadence Forms.
Want to add reCAPTCHA protection to other forms on your website, such as the login form? Check out the premium Kadence CAPTCHA plugin here.
Setting up Google reCAPTCHA
To use Google reCAPTCHA, a Google Account must be created, and the website using the Kadence Form must be connected to it. Once an account is set up, use the Google Admin Panel to Add a New Site.
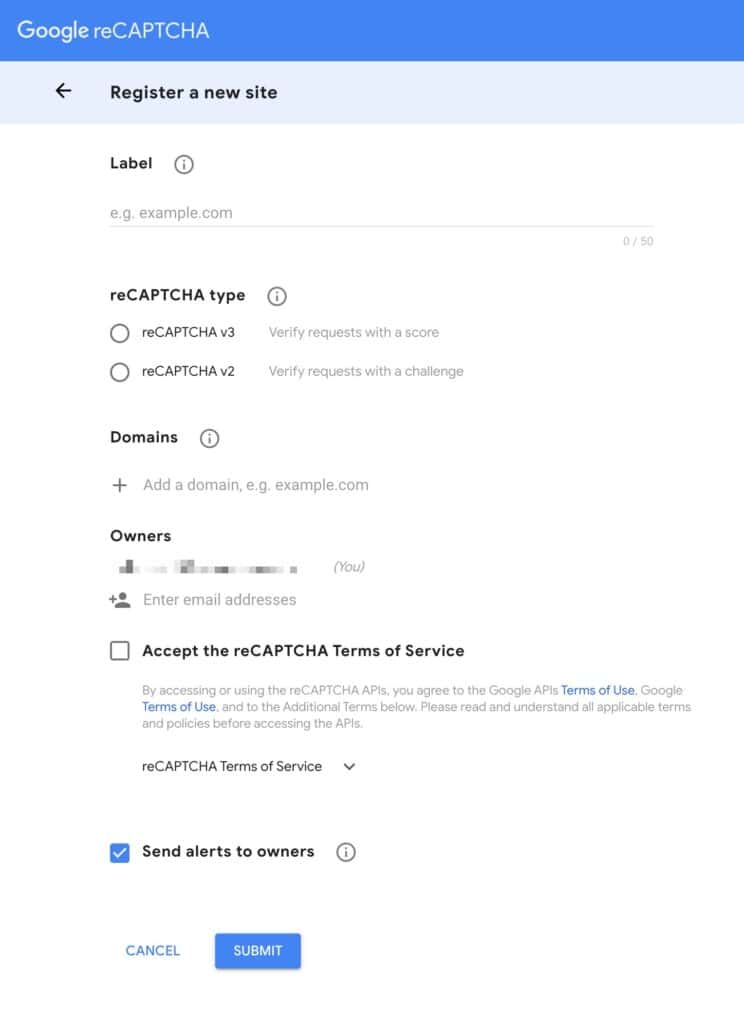
Once on the page to register a new site, fill out the details accordingly.
Set the Label to the preferred label for the website. The label is a unique identifier for the reCAPTCHA configuration.
The reCAPTCHA type can be set to either v2 or v3. The primary difference between reCAPTCHA v2 and v3 is their approach to detecting bots.
- reCAPTCHA v2 relies on challenge-response tests, such as clicking on images or selecting checkboxes. This requires direct user interaction to verify non-bot status.
- reCAPTCHA v3 uses a scoring system that assesses user interactions without user involvement. This runs in the background to analyze behavior and assign a score. This makes v3 less intrusive and offers a smoother user experience, though it raises privacy concerns due to the data collection involved.
Next, add the domain. This should match the website domain using the reCAPTCHA spam prevention feature.
Owners can be added to the website by entering and adding their email addresses. Adding owners allows multiple people to manage and monitor the reCAPTCHA settings for the current site.
Once finished, accept the Terms of Service and submit the new site.
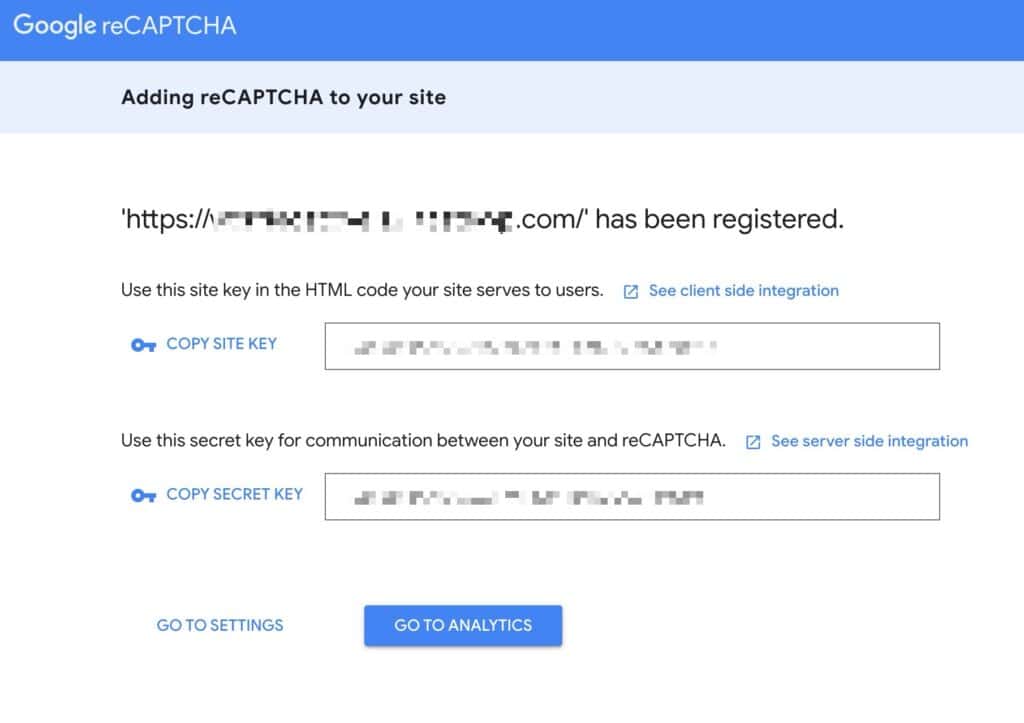
Once site registration is complete, a page displaying the Site Key and Secret Key will appear. These two keys are required for Kadence Forms to use the reCAPTCHA integration. It is important to save this page and key details for future reference. (These keys can also be accessed later using the Google Admin Panel)
Adding reCAPTCHA keys to Form (Adv) Blocks
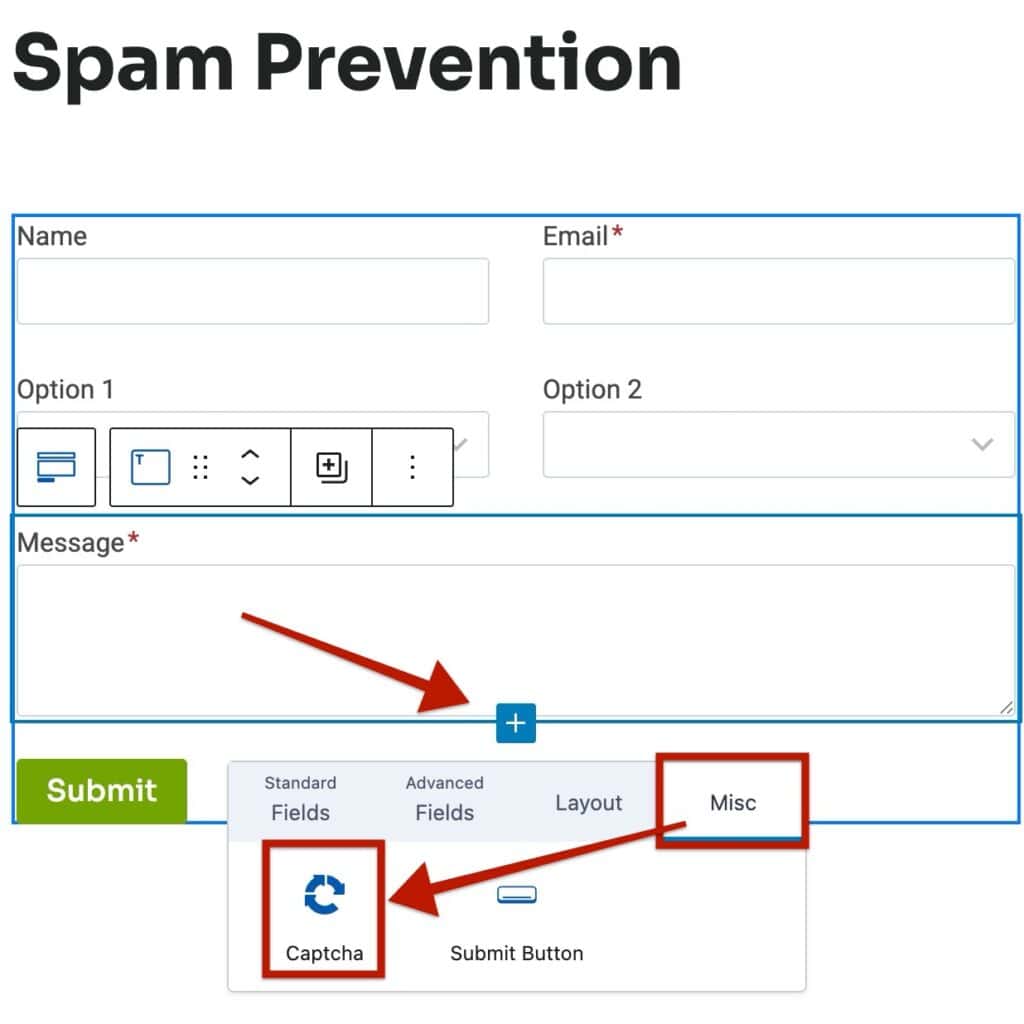
The Form (Adv) Block supports the use of Google reCAPTCHA. This is done by clicking on the blue plus icon to add a new block inside the Form (Adv) Block. Then, navigate to the Misc tab and add the CAPTCHA block to the form.
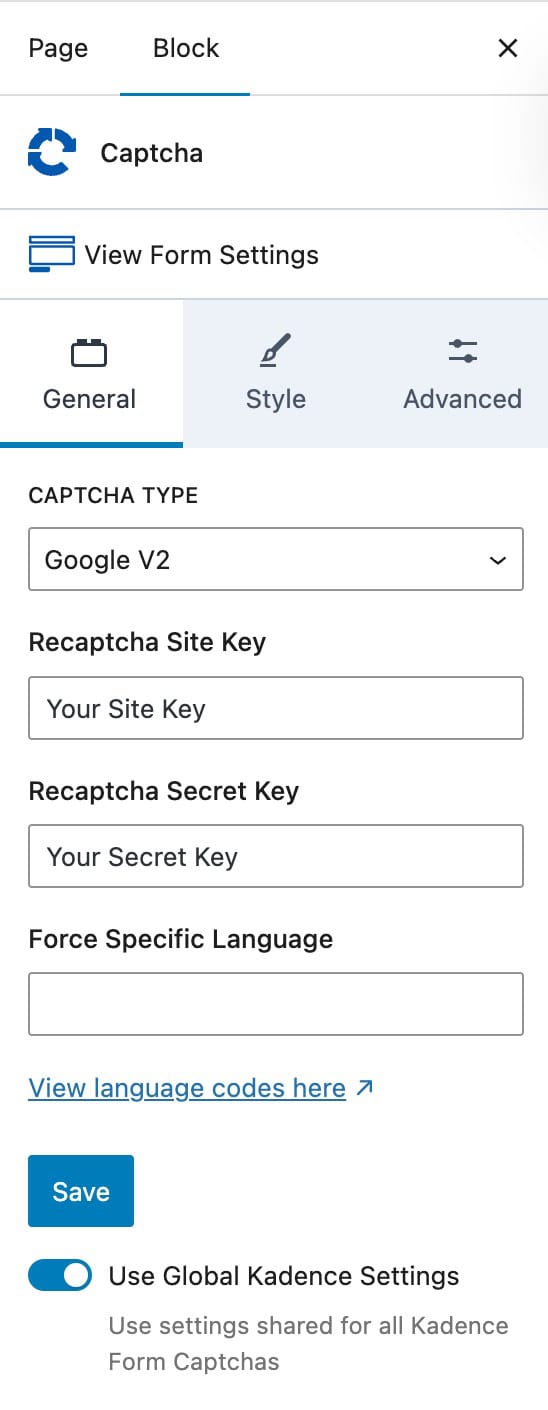
Afterward, select the CAPTCHA block and use the General Block Settings to set up Google reCAPTCHA
Under CAPTCHA TYPE, specify the proper version of Google reCAPTCHA (v2 or v3). Then, you can fill out your Site Key and Secret Keys accordingly.
(Don’t forget to press Save after entering your keys)
You can Force a Specific Language if preferred.
(Click here for a list of language codes.)
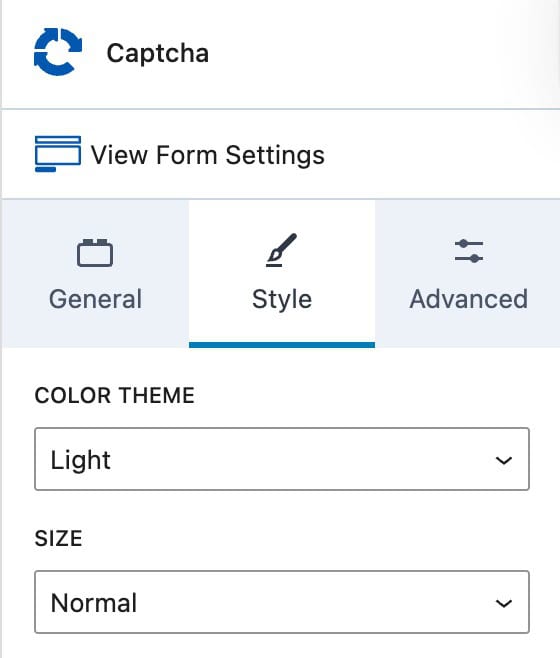
You can also use the Style Block Settings to specify a Color Theme of Light or Dark and a Size of Normal or Compact.
Once everything is set up, the Form (Adv) Block will validate users through Google reCAPTCHA.
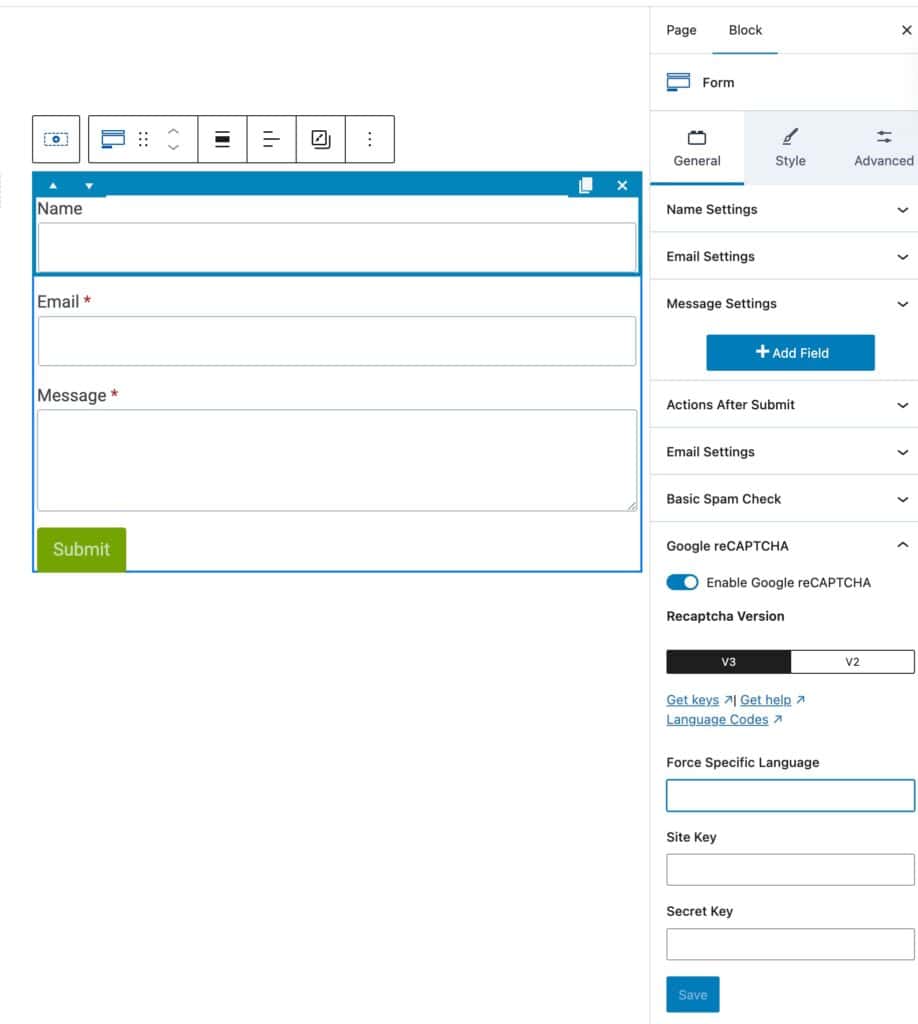
Adding reCAPTCHA Keys to Form Blocks
The classic Form Block also supports using reCAPTCHA v2 and v3. To get started, select a Form Block and access the General Block Settings. Find and expand the Google reCAPTCHA accordion.
Set the reCAPTCHA Version to v2 or v3.
You have the option to Force a Specific Language.
(Click here for a list of language codes.)
Then, enter your Site Key and Secret Key and Save the changes.