Skip to content
Help Center
  • Pricing
  • ProductsExpand
    • Premium PlansGet all the tools you need in one plan
    • Kadence ThemeLightning-fast performance theme for modern websites
    • Kadence BlocksDrop in ready designs with advanced controls for pixel perfect websites
    • Kadence Shop KitCreate a more effective WooCommerce shopping experience
    • Kadence ConversionsBoost sales and build engaged audiences with popups and banners
    • Kadence InsightsEasily create A/B tests. Optimize your pages to drive higher conversions.
    • View All Products
    • Get Kadence + Hosting
      In One Place

      Enjoy faster setup, top-tier performance, and worry-free WordPress hosting – Kadence Theme, Kadence Blocks, and Solid Security all pre-installed.

      Learn More

  • Kadence AI
  • Starter Templates
  • Blog
  • SupportExpand
    • Resource HubStart here for guides, Product docs, FAQs, and Troubleshooting tips, all in one place.
    • Contact SupportStuck on something? We’re here to help! Open a ticket for top-notch support.
    • Contact Our TeamGot pre-sales questions or need help choosing a plan? Open a ticket and our team will guide you.
    • About usCrafted with love in Missoula, Montana. Meet the team behind the mission.
Account Account
Get Kadence
Kadence Blocks
  • Features
  • Pro
  • Blocks
  • HelpExpand
    • Documentation
    • Submit a Ticket
    • Facebook Group
    • Feature Requests
    • Roadmap
    • Changelog
Help Center
Kadence Blocks

Kadence Blocks

  • Row Layout Block
  • Text (Adv) Block
  • Buttons (Adv) Block
  • Image (Adv) Block
  • Gallery (Adv) Block
  • Section Block
  • Testimonial Block
  • Table of Contents Block
  • Form Block
  • Form (Adv) Block
  • Table (Adv) Block
  • Accordion Block
  • Tabs Block
  • Info Box Block
  • Google Maps Block
  • Show More Block
  • Icon Block
  • Icon List Block
  • Progress Bar Block
  • Posts Block
  • Count Up Block
  • Countdown Block
  • Vector Graphic Block
  • Lottie Animations Block
  • Repeater Block
  • Spacer/Divider Block
  • The Kadence Header (Adv) Block
  • The Kadence Navigation (Adv) Block
  • The Kadence Navigation Link Block
  • Search (Adv) Block
  • Site Identity Block
  • Kadence Blocks Default Icon Selections

Getting Started

  • Installing Kadence Blocks
  • Getting Started with Kadence Performance
  • Kadence AI-Powered Design Library
  • Setting custom widths in multi-column Row Layout Blocks
  • How to define a color Palette with Kadence Blocks
  • How to delete/remove a Block
  • How to Duplicate and Copy/Paste Block Styles
  • Setting Block Defaults
  • Kadence Blocks Pexels Integration

Block Tutorials

  • How to Import and Export Blocks or Sections Between Websites
  • How to Use Flexbox Layouts with Section Blocks
  • How to Make a Top Section Sticky with Kadence Blocks
  • Using Padding and Margin in Kadence Blocks
  • Responsive Breakpoints in Kadence
  • Using GIFS and Lottie Animations with Kadence Blocks
  • Adding a Fullwidth Row
  • Modal Block Quick Start Guide
  • Image Overlay Quick Start Guide
  • How to hide Kadence blocks via WordPress Gutenberg Preferences
  • How To Add Animate on Scroll Effects To Your Page
  • How to add Custom CSS Classes and HTML IDs to Kadence Blocks
  • How to Show Events Using the Kadence Post Grid/Carousel Block
  • How to use Popup Modal Filters with Advanced Query Loops
  • Create a Full Screen Landing Page
  • Displaying Shortcodes in the WordPress Editor
  • Advanced Navigation Sub Menus and Mega Menus
  • Creating Sticky and Transparent Advanced Headers
  • Getting started with Advanced Header/Navigations
  • Building Headers and Footers in Full Site Editing with Kadence Blocks
  • Split Content Quick Start Guide
  • Applying Block-Level Custom CSS in Kadence Blocks
  • How to Access the Kadence Design Library
  • Adding Video Backgrounds to Row Layout
  • Pexels Picker
  • Adding Classic Wireframes, Starter Packs, and Sections to the New Design Library
  • How to customize the design library color palette
  • Adding Privacy Policy link to Kadence Form
  • Set Equal Column Heights with the Row Layout Block
  • How to Control the Hero or Title Section Sitewide and Per Page in Kadence
  • How to Change the Query Loop (Adv) “All” Button Text

Kadence Blocks Pro

  • Kadence Blocks Pro Plugin
  • Product Carousel Block
  • User Info Block
  • Portfolio Grid/Carousel Block
  • Query Loop (Adv) Block
  • Post Grid/Carousel Block
  • The Kadence Block Controls
  • Dynamic Content
  • Display Blocks Conditionally (Conditional Display)
  • Advanced Slider
  • Video Popup Block
  • Image Overlay Block
  • Split Content Block
  • Modal Block
  • Using a Dynamic List Block
  • Dynamic Content: Custom Input and Showing Fields from all Post Types
  • Dynamic HTML Block
  • Using Custom SVG Icons with Kadence Blocks Pro
  • Kadence Custom Fonts
  • Post Grid/Carousel Block – Configure a Blog List

Troubleshooting Blocks

  • Troubleshooting the “Error, Unable to access library database, please try re-syncing” error on the Kadence Blocks Design Library
  • Troubleshooting Query Loop (Adv) Blocks, Filters, and Search issues
  • Kadence Blocks Errors when SCRIPT_DEBUG is Enabled
  • Troubleshooting White/Blank Screens in the Editor or Customizer
  • How to Force Reindex Advanced Queries
  • How to Download Previous Versions of the Kadence Theme and Plugins
  • Resolving Autoplay Problems in Advanced Slider/Gallery Blocks
  • Recommended Server Resources
  • Troubleshooting Kadence Form (Adv) Email Delivery
  • How to Recover a Broken Block

Advanced

  • How to Modify SVG Dividers in Kadence Row Layout Blocks
  • How to Override the Kadence Forms Email Template
  • Prebuilt Layouts
  • How To Set Your Own Conditions for Successful Form (Adv) Submissions
  • How to Block Form (Adv) Spam Using WordPress Disallowed Comment Keys
  • Custom Queries for the Portfolio Grid/Carousel Block (Filter)
  • Customizing the Kadence Blocks Pro Post Grid/Carousel block’s Query to show multiple post types
  • Custom Queries for the Posts Block (Filter)
  • How to Set a Gradient Border for the Section block
  • Run JavaScript when Query Loop (Adv) Updates
  • Custom Upload Directory in Kadence Form (Adv) Block
  • Populate Select, Checkbox, and Radio field option values programmatically in Form (Adv)
  • Query Loop (Adv) Block: Split Character Filter
  • How to add Multiple Markers in the Kadence Google Maps Block
  • Custom Queries for the Post Grid/Carousel Block (Filter)
  • How to Run JavaScript After a Kadence Form is Successfully Submitted (On Event)
  • Dynamically Displaying ACF or Metabox Relationships in Query Loop (Adv) blocks
  • How to Customize the Kadence Blocks Variable Font Sizes (SM, MD, LG, XL, 2XL, and 3XL)
  • Using Tooltips with Kadence Blocks
  • Custom Queries for the Advanced Query Loop Block (Filter)
  • Adding a Custom Font to Kadence Blocks

Advanced Headers

  • How to use Advanced Headers Globally and Conditionally in Kadence
  • The Kadence Header (Adv) Block
  • Using Advanced Header / Navigation Blocks vs Kadence Theme Header Builder
  • Advanced Header Best Practices
  • Getting the most out of Navigation Link Blocks
  • Creating Sticky and Transparent Advanced Headers
  • Advanced Navigation Sub Menus and Mega Menus
  • The Kadence Navigation Builder
  • The Kadence Visual Builder & Off Canvas Settings
  • Importing & Exporting Advanced Headers & Navigations

Kadence Form Integrations

  • How to Modify the Form (Adv) Submit Actions using a Filter
  • How to integrate hCaptcha with Kadence Form (Adv) Blocks
  • How to Integrate Kadence Forms with Cloudflare Turnstile
  • How to Integrate Google reCAPTCHA with Kadence Forms
  • How to Integrate Google Analytics with Kadence Forms
  • Integrating Kadence Forms with FluentCRM
  • Integrating Kadence Forms with Kit (ConvertKit)
  • Kadence Forms and Database Entries
  • Kadence Forms and Auto Respond Emails
  • Integrating Kadence Forms with Webhooks
  • Integrating Kadence Forms with Mailchimp
  • Integrating Kadence Forms with Brevo
  • Integrating Kadence Forms with ActiveCampaign
  • Integrating Kadence Forms with Mailerlite
  • Home
  • Knowledge Base
  • Kadence Blocks
  • Kadence Blocks
  • Kadence Form Integrations

Integrating Kadence Forms with Mailchimp

The Kadence Blocks Pro plugin adds Mailchimp integration to both the Kadence Form and Form (Adv) Blocks. Below, you will learn how you can start using Kadence Blocks Pro with MailChimp.

Table of Contents
  • Mailchimp Set Up
    • Managing Audiences
    • Managing Audience Fields
    • Creating an API Token
  • Using Mailchimp with the Kadence Form Block
  • Using Mailchimp with the Kadence Advanced Form Block
  • Viewing Contacts

Mailchimp Set Up

You must set up an account with Mailchimp, and connect a Mailchimp API Key to your Kadence Form to fully integrate Mailchimp with Kadence.

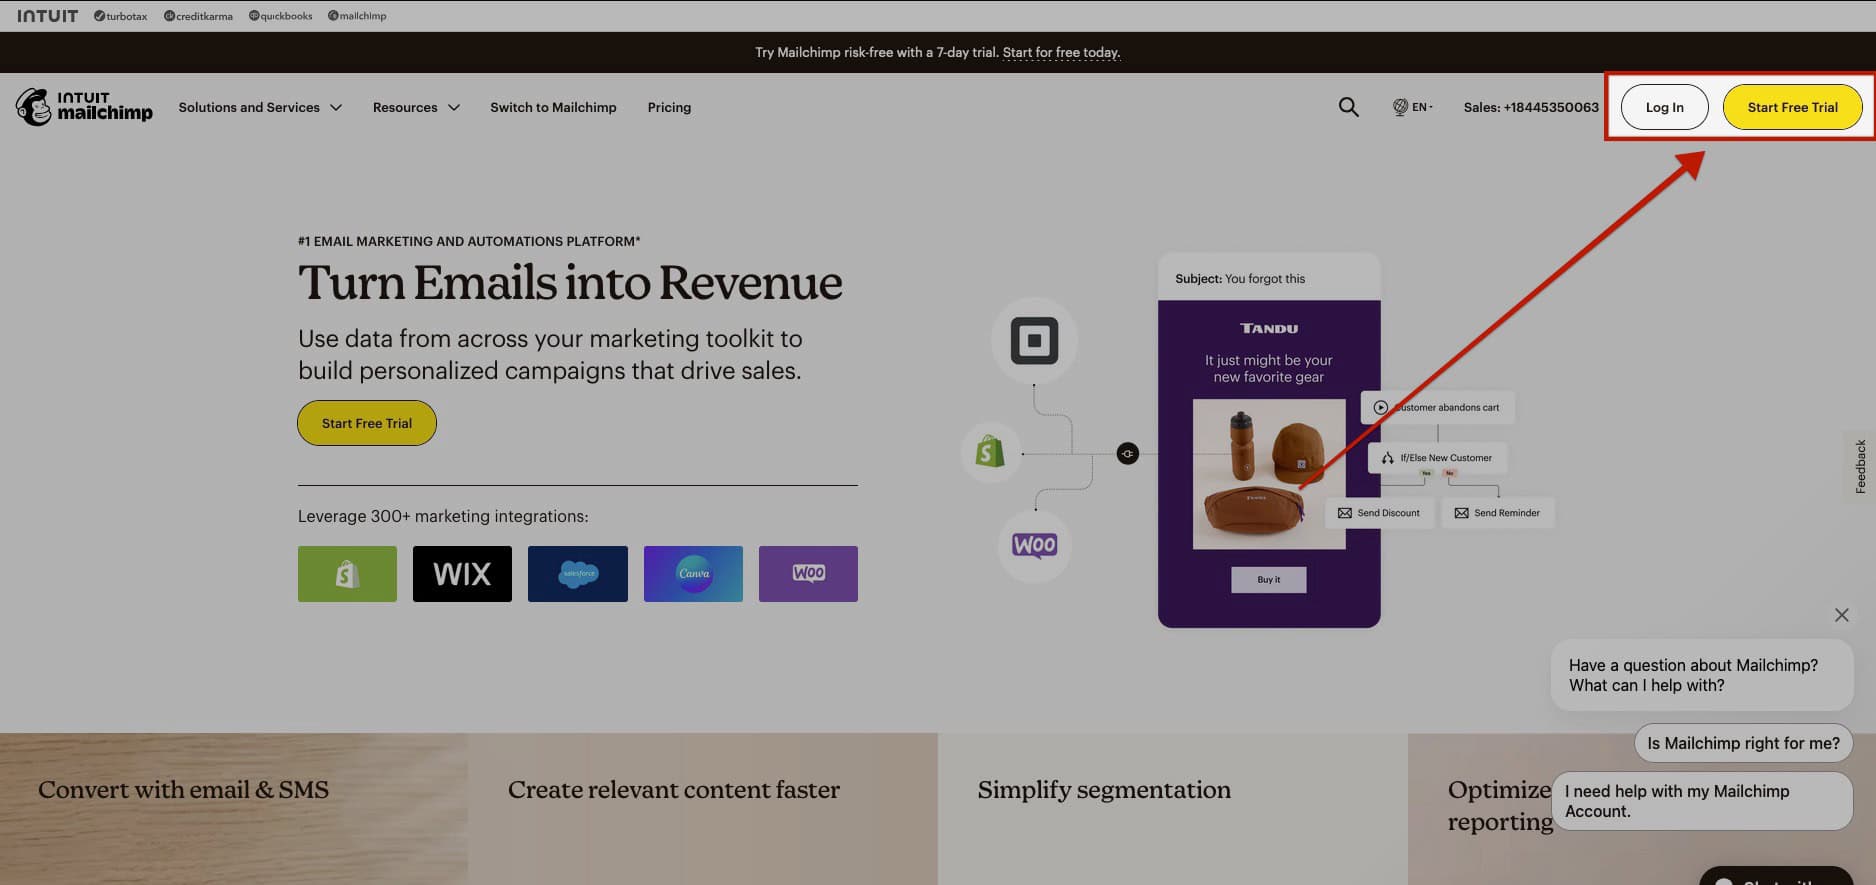
Get started by heading over to the Mailchimp Website. You can create a new account or log in to an existing one.

Mailchimp Login

Managing Audiences

When using Mailchimp, all Contacts are typically added to your main Audience. While Mailchimp does offer the ability to create multiple audiences, it’s recommended to maintain a single primary audience to avoid issues like duplicate contacts and higher costs. Instead, you can use Tags, Groups, or Segments to organize your contacts within one audience.

For example, if you have a subscription form for a general newsletter and another for a specialized newsletter on the same website, Tags allow you to categorize these contacts efficiently. This way, you can ensure the right emails reach the right users without needing multiple audiences.

In addition to Tags, Mailchimp also offers Groups and Segments to further refine your audience:

  • Tags are flexible labels you can apply to contacts for easy organization.
  • Groups allow subscribers to self-select categories (like interests or preferences) during signup, which helps further organize contacts.
  • Segments allow you to create targeted lists within your audience based on specific criteria (like locations, engagements, or tags), enabling more personalized campaigns.

By using Tags, Groups, and Segments together, you can manage all your contacts under one audience while still delivering tailored content.

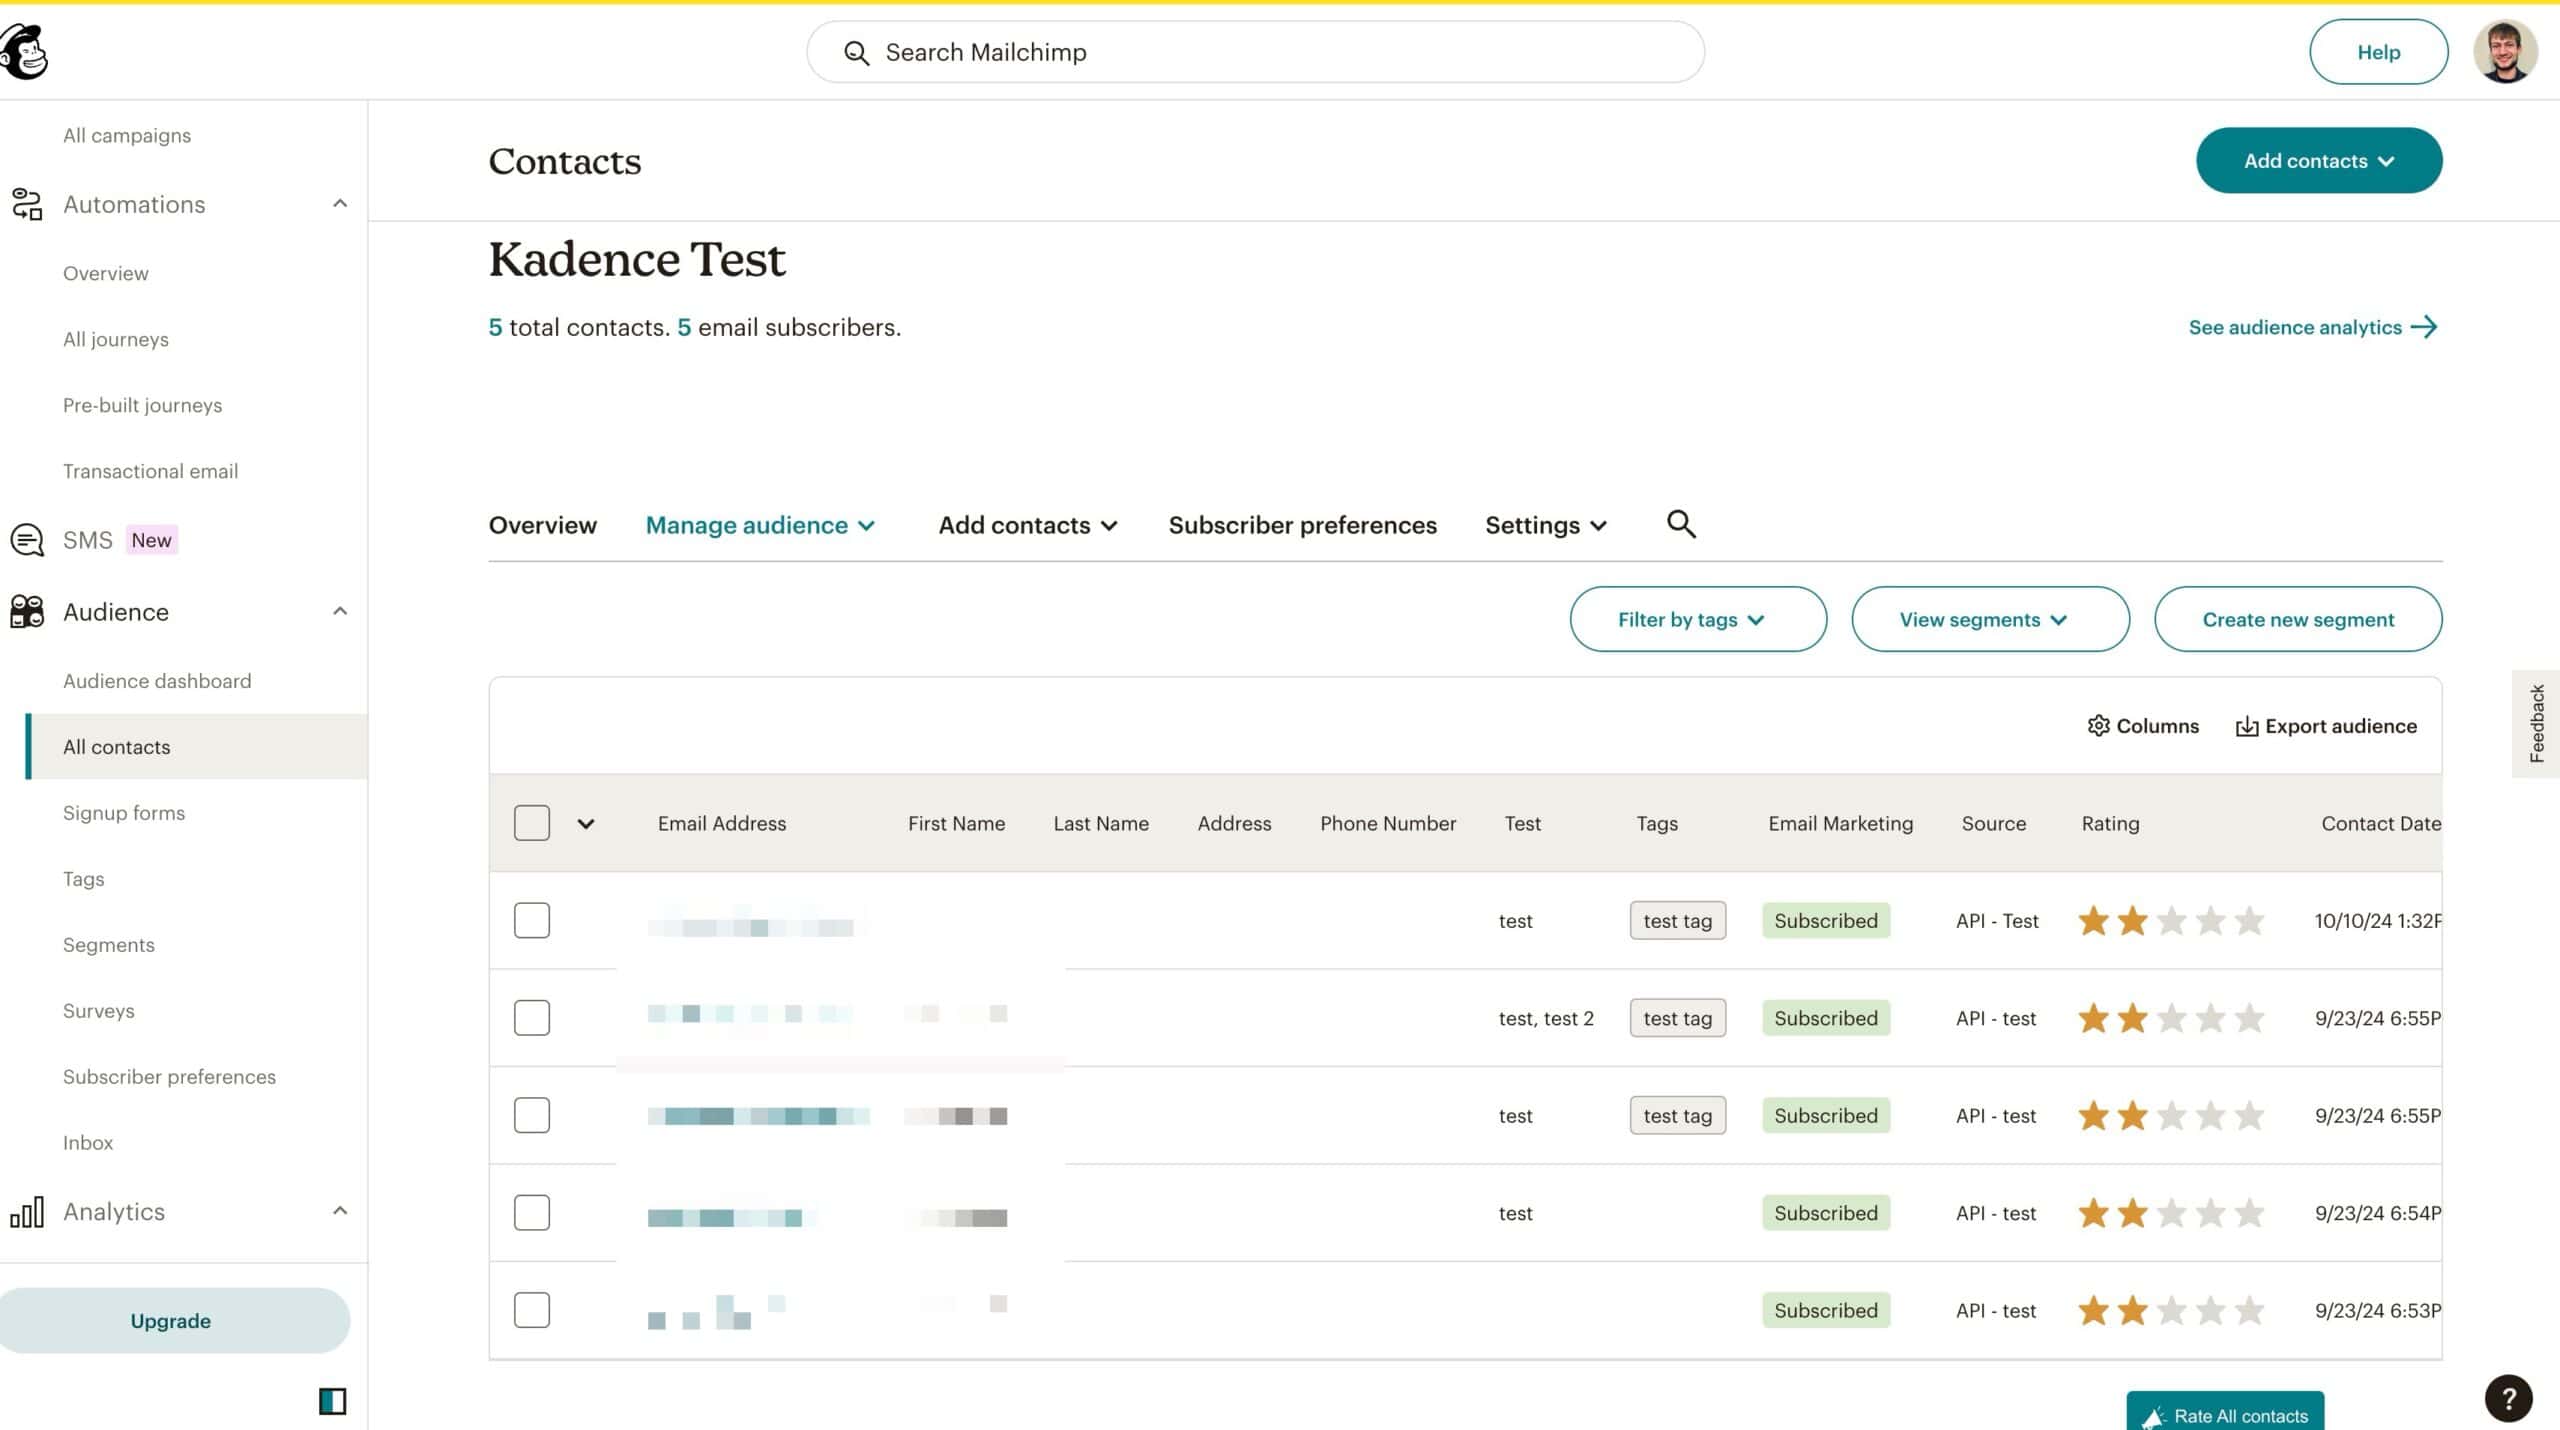
These things can be managed by navigating to the Mailchimp Dashboard, expanding the Audience tab, and selecting All Contacts. From there, you can expand the Manage Audience dropdown, where you can manage Tags, Groups, Segments, and other Audience-related features for better organization and targeting.

Manage Audiences

In some cases, having multiple audiences may be viable. For example, if you are managing two completely separate businesses or brands with distinct messaging and subscriber bases, using multiple audiences might be more appropriate to keep the data and communication strategies separated. For more detailed and precise information on how to use Tags, Groups, and Segments, please refer to the official Mailchimp Help Center.

Managing Audience Fields

When connecting MailChimp to a Kadence Form, you can link the fields from your Kadence Form to the corresponding fields in your MailChimp audience. This ensures that data transfers correctly from your Kadence Forms to MailChimp.

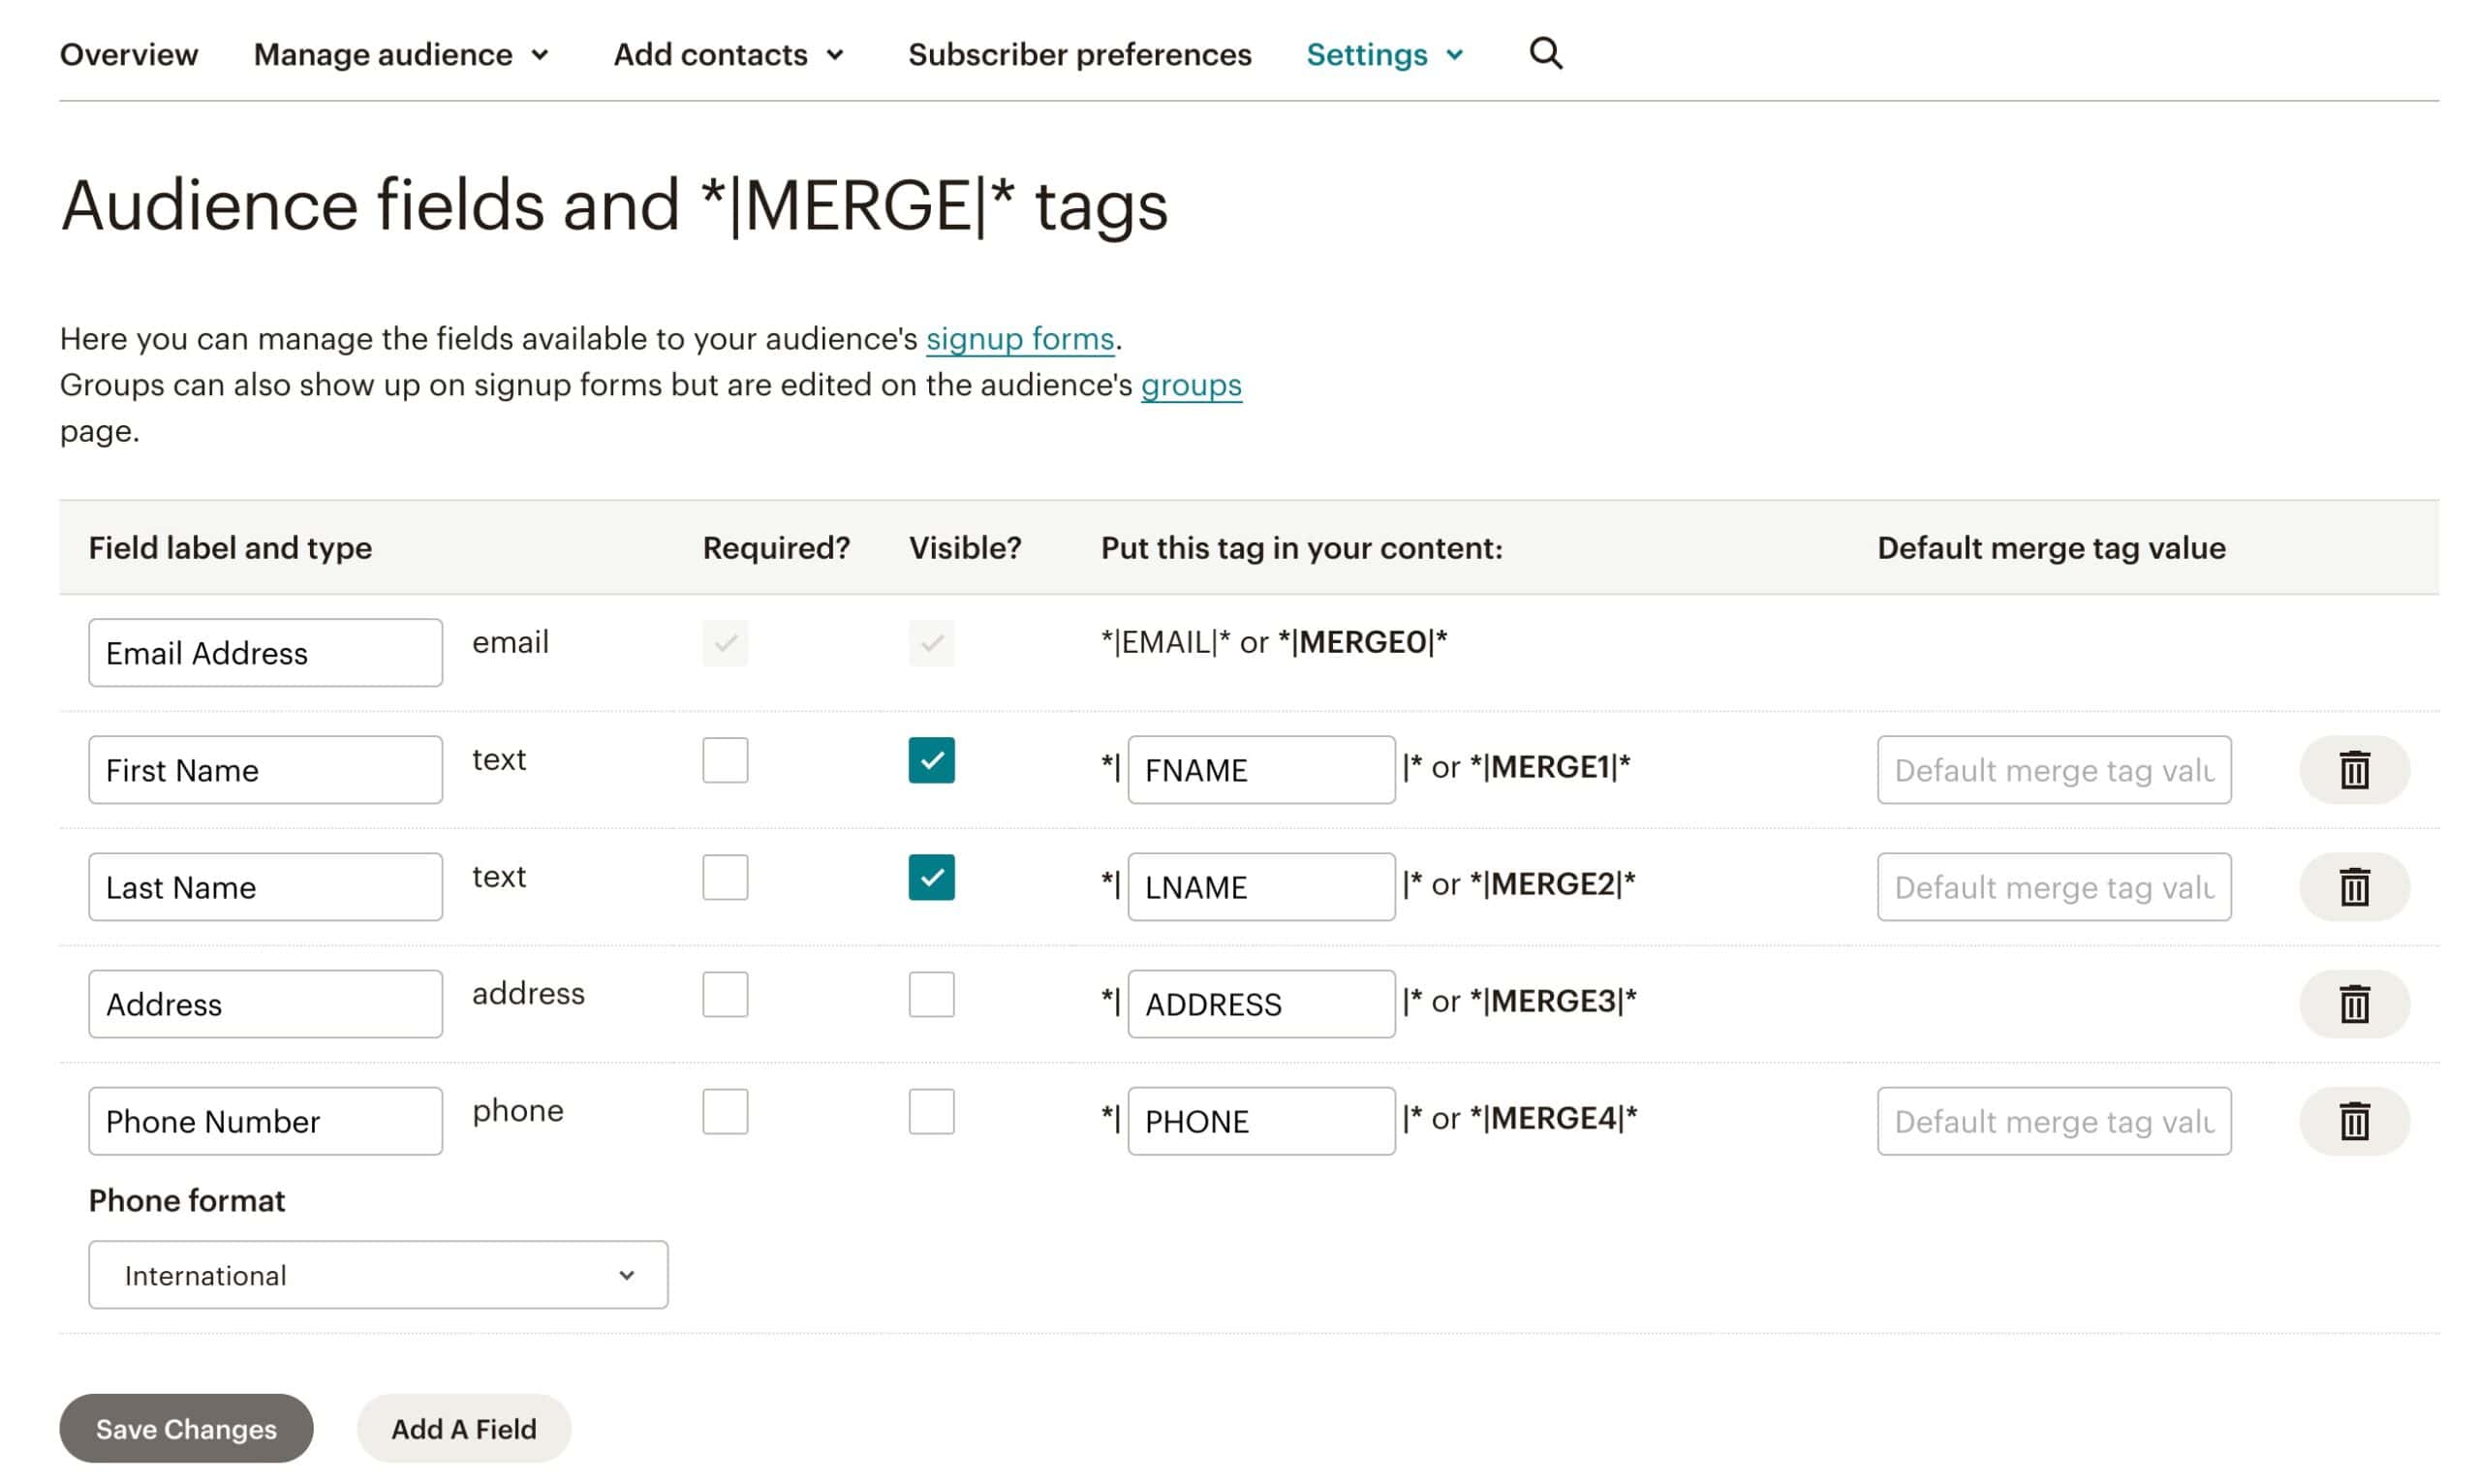
To manage your audience fields in MailChimp, first navigate to the MailChimp Dashboard and expand the Audience tab. From there, select All Contacts to view your contact list. On the contact page, click on the Settings dropdown menu and choose Audience fields & |MERGE| tags. This section allows you to add or modify audience fields, such as name, email, or custom fields, and adjust |MERGE| tags for your audience. By doing so, you can ensure that all data collected from your Kadence Form fields is properly mapped to the corresponding fields in MailChimp, ensuring an efficient data transfer from your Kadence Forms to your MailChimp audience(s).

Audience Fields

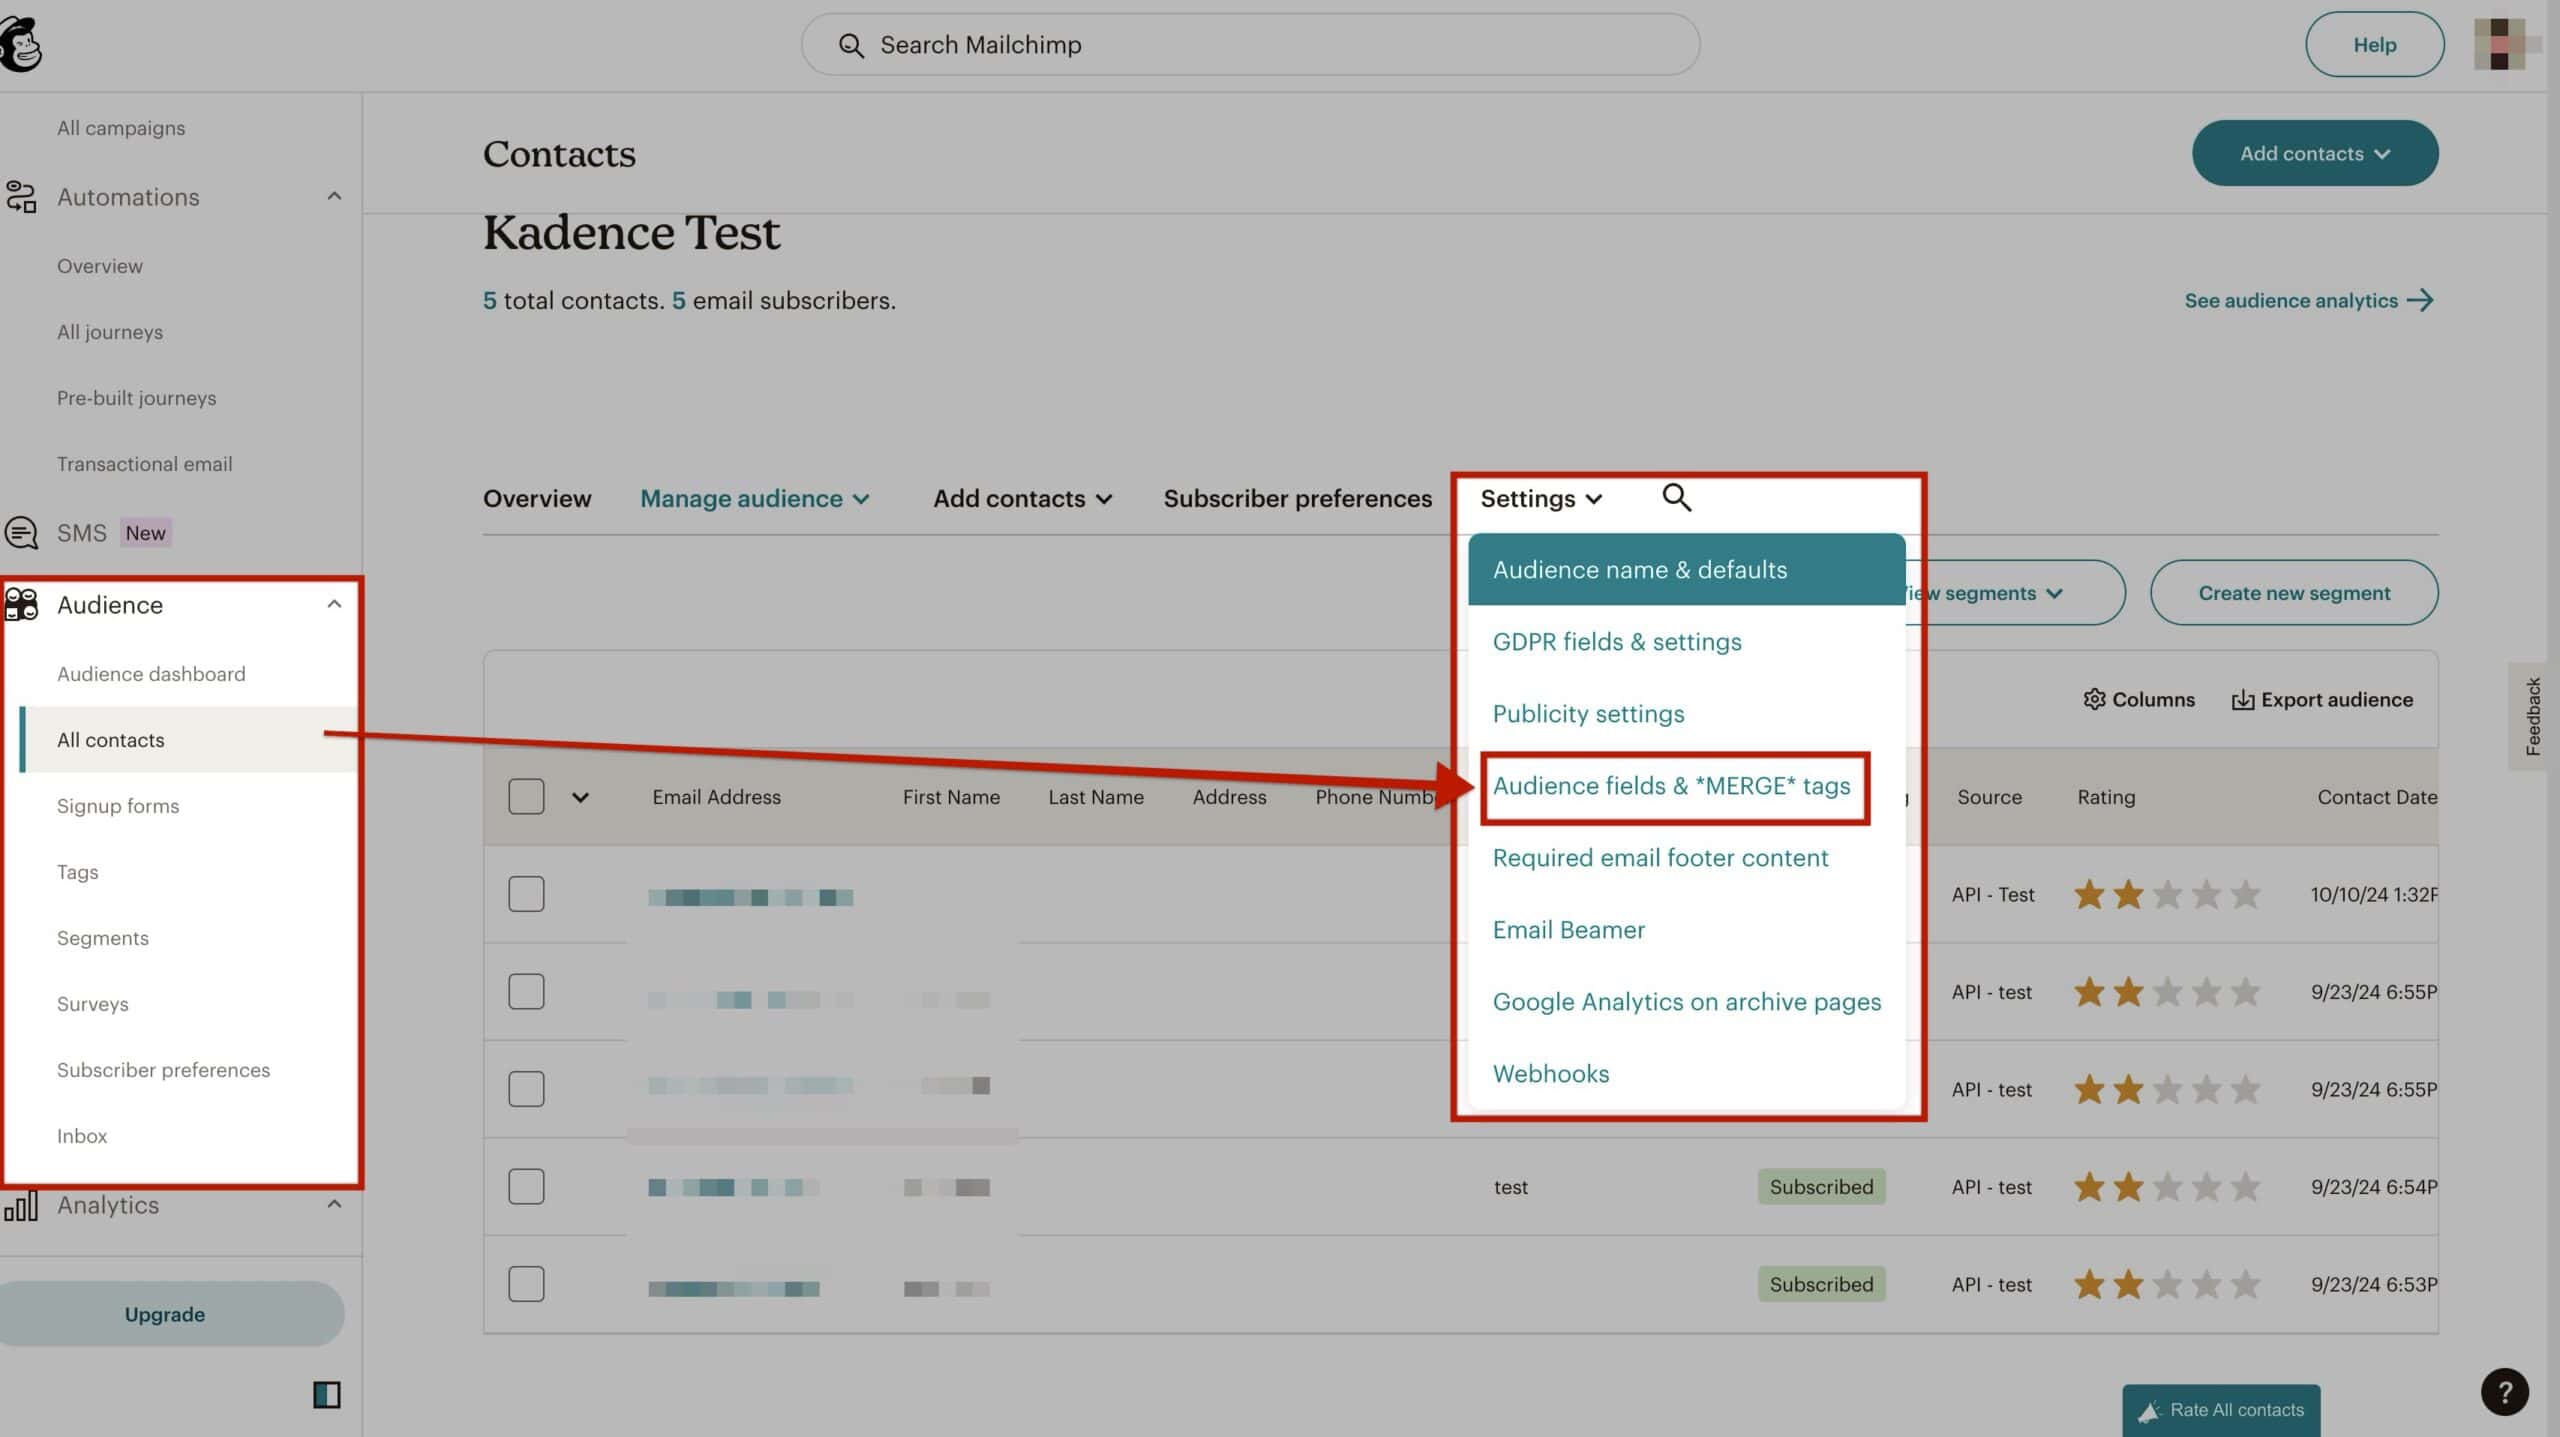
This will take you to a page where you can edit, delete, or add audience fields. These fields are important because they will be linked to your Kadence Form or Advanced Form fields, ensuring that the data collected from your website is accurately mapped to your MailChimp audience. Properly managing these fields ensures smooth data transfer and allows you to collect and organize information effectively.

Edit Fields

Creating an API Token

To get started with an API Token, go to your MailChimp Dashboard and click on your Profile Picture. Then, select the Profile option from the dropdown.

Mailchimp Step 2

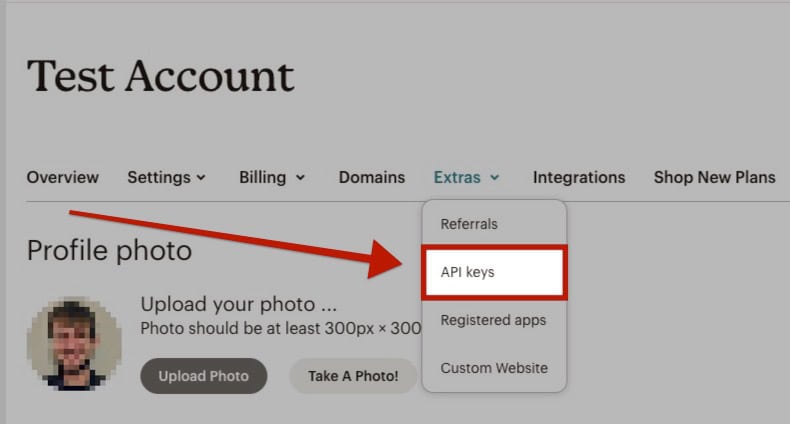
Under your Profile, navigate to the Extras tab and select the API Keys option.

Mailchimp Step 4

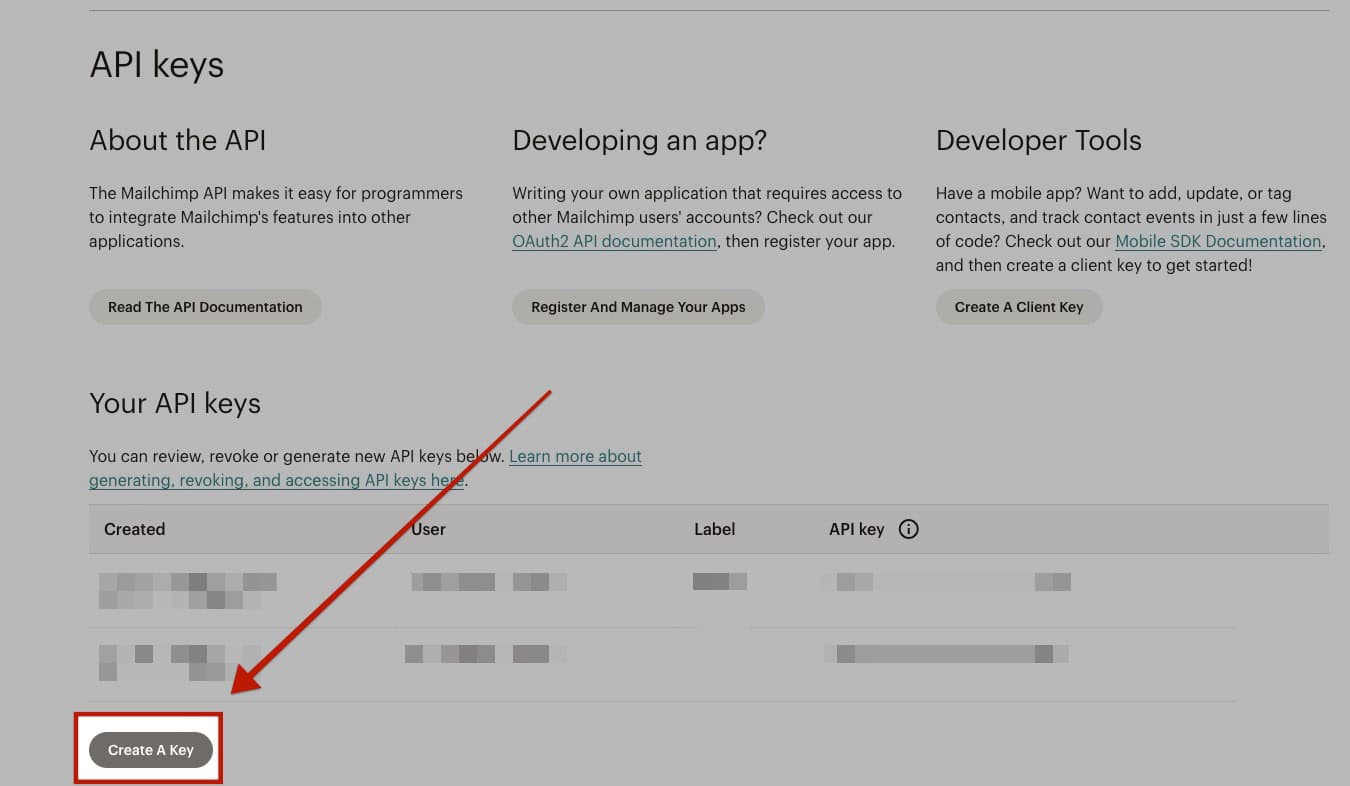
On this page, click the Create A Key button to generate a new API key.

Mailchimp Step 5

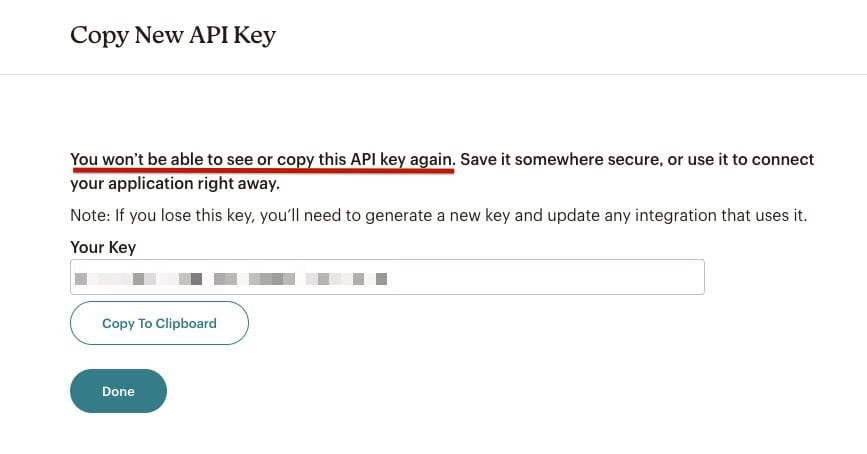
Once the key is generated, you will not be able to view it again. Be sure to save it in a secure location for future use.

Mailchimp Step 7

Now that you have your API key, you can use it to connect the Kadence Form Block to your MailChimp Audiences.

Using Mailchimp with the Kadence Form Block

First, enable the MailChimp option in the Kadence Form Actions After Submit block settings. This will add a new tab in the Kadence Form General block settings labeled MailChimp Settings.

Mailchimp Action on Forms

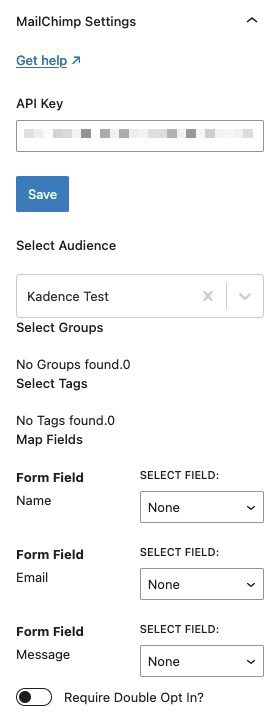
Next, expand the MailChimp Settings and enter your MailChimp API Key in the API Key field. Then press Save. This will unlock the options to select your Audience and any applicable Tags and Groups where you want the form submissions added.

You can then assign each form field in the Kadence Form to the corresponding Contact Fields in MailChimp.


Mail Chimp API Connection on Forms

Using Mailchimp with the Kadence Advanced Form Block

First, enable the MailChimp option in the Kadence Form (Adv) Submit Actions block settings. This will add a new tab in the Kadence Form General block settings labeled MailChimp Settings.

Mailchimp Action on Advanced Forms

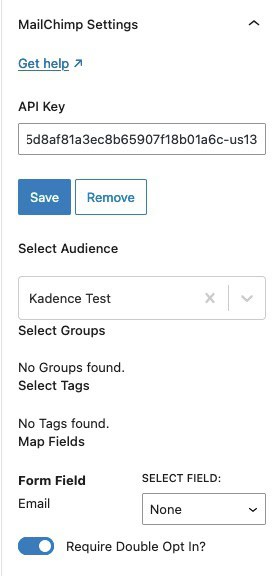
Next, expand the MailChimp Settings section and input your MailChimp API Key in the API Key field. Afterward, click Save. This will enable the options to select your Audience, along with any applicable Tags and Groups for adding the form submissions.

You can then map each field in the Advanced Form to the corresponding Contact Fields in MailChimp.

Mail Chimp API Connection on Advanced Forms

Viewing Contacts

Once a user fills out the form, the next step is to navigate to your MailChimp Audience Dashboard. Here, you can view your contacts, including new subscribers, and track key statistics.

To view your contacts, click the View Contacts button.

Audience Dashboard

This will take you to the MailChimp Contacts page, where you can manage and view all your contacts.

View Audience
Do you feel this document was helpful?
Integrating Kadence Forms with WebhooksIntegrating Kadence Forms with Brevo
The Kadence WP Logo
Crafted in Missoula, Montana
  • Follow Kadence on Facebook
  • Follow Kadence on Youtube
  • X
  • Follow Kadence on Instagram
Trustpilot
Products
  • Kadence Plans
  • Kadence Theme
  • Kadence Blocks
  • Kadence AI
  • Kadence Starter Templates
  • Kadence Shop Kit
  • Kadence Conversions
  • Kadence Pattern Hub
  • View All
Resources
  • Blog
  • Podcast
  • Knowledgebase
  • Support ticket
  • Feature Requests
  • FAQ
  • WordPress Hosting Services
About Us
  • About Kadence
  • Become an affiliate
  • Contact us
  • Terms
  • Privacy Policy
  • Security
Our Partner Brands
  • SolidWP
  • LearnDash
  • The Events Calendar
  • GiveWP
  • MemberDash
Kadence Community
  • Kadence Marketplace
  • Join the Facebook Group
  • Subscribe to our YouTube Channel
© 2024 Kadence WP | All prices are in USD
Logo for StellarWP an umbrella brand of Premium WordPress plugins
  • Pricing
  • Products
    • Premium PlansGet all the tools you need in one plan
    • Kadence ThemeLightning-fast performance theme for modern websites
    • Kadence BlocksDrop in ready designs with advanced controls for pixel perfect websites
    • Kadence Shop KitCreate a more effective WooCommerce shopping experience
    • Kadence ConversionsBoost sales and build engaged audiences with popups and banners
    • Kadence InsightsEasily create A/B tests. Optimize your pages to drive higher conversions.
    • View All Products
    • Get Kadence + Hosting
      In One Place

      Enjoy faster setup, top-tier performance, and worry-free WordPress hosting – Kadence Theme, Kadence Blocks, and Solid Security all pre-installed.

      Learn More

  • Kadence AI
  • Starter Templates
  • Blog
  • Support
    • Resource HubStart here for guides, Product docs, FAQs, and Troubleshooting tips, all in one place.
    • Contact SupportStuck on something? We’re here to help! Open a ticket for top-notch support.
    • Contact Our TeamGot pre-sales questions or need help choosing a plan? Open a ticket and our team will guide you.
    • About usCrafted with love in Missoula, Montana. Meet the team behind the mission.
Account Login
  • Features
  • Pro
  • Blocks
  • HelpExpand
    • Documentation
    • Submit a Ticket
    • Facebook Group
    • Feature Requests
    • Roadmap
    • Changelog