
The Hero Section (also called a Title Section) is the top part of your page that usually includes the page title, subtitle, background image or color, and layout styling. With the Kadence Theme, you have full flexibility to control this section globally across your site or customize it for individual pages and posts. You can even create completely custom designs using Kadence Blocks or Kadence Hooked Elements (Pro).
This guide walks you through the different ways to control and design your Hero/Title Sections depending on your needs.
1. Controlling Sitewide Hero/Title Sections
If you want to control the appearance of Hero/Title Sections for all posts, pages, or archives across your site, the Customizer is the best place to start.
Using the Customizer
Go to Appearance → Customize → Posts/Pages Layout. Here, you’ll find settings to enable or disable the built-in Title Section and adjust its appearance.
You can:
- Show or hide the title section globally for posts, pages, and archives
- Set layout options such as alignment, spacing, and background color or image
- Customize typography and section padding
- Toggle the “Use Featured Image for Background?” option ON so the background image of the “Above Content” title sections will show different background images for each page.
These changes apply globally, so all pages or posts of that type will follow the same styling.
Helpful guides:
2. Controlling Hero/Title Sections for Individual Pages or Posts
If you want to create unique Hero Sections for specific pages or posts, you can do that directly from the editor.
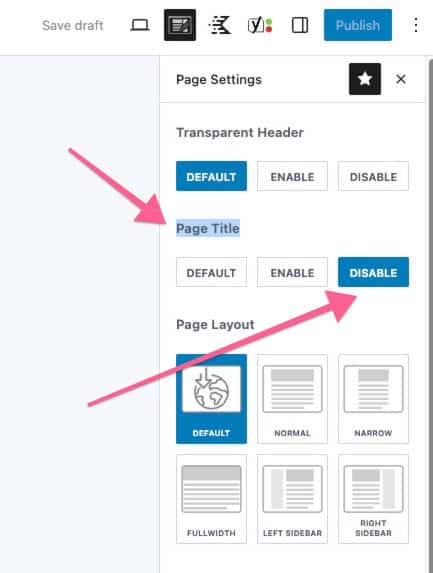
Step 1: Disable the Built-In Title Section
In the WordPress editor, open the Page Settings or Post Settings panel (usually on the right side).
Then set “Show Page Title” or “Show Post Title” to Disable.
This removes the default title section so you can design your own.
Step 2: Create Your Custom Hero Section
Use Kadence Blocks directly in the content editor to build your section.
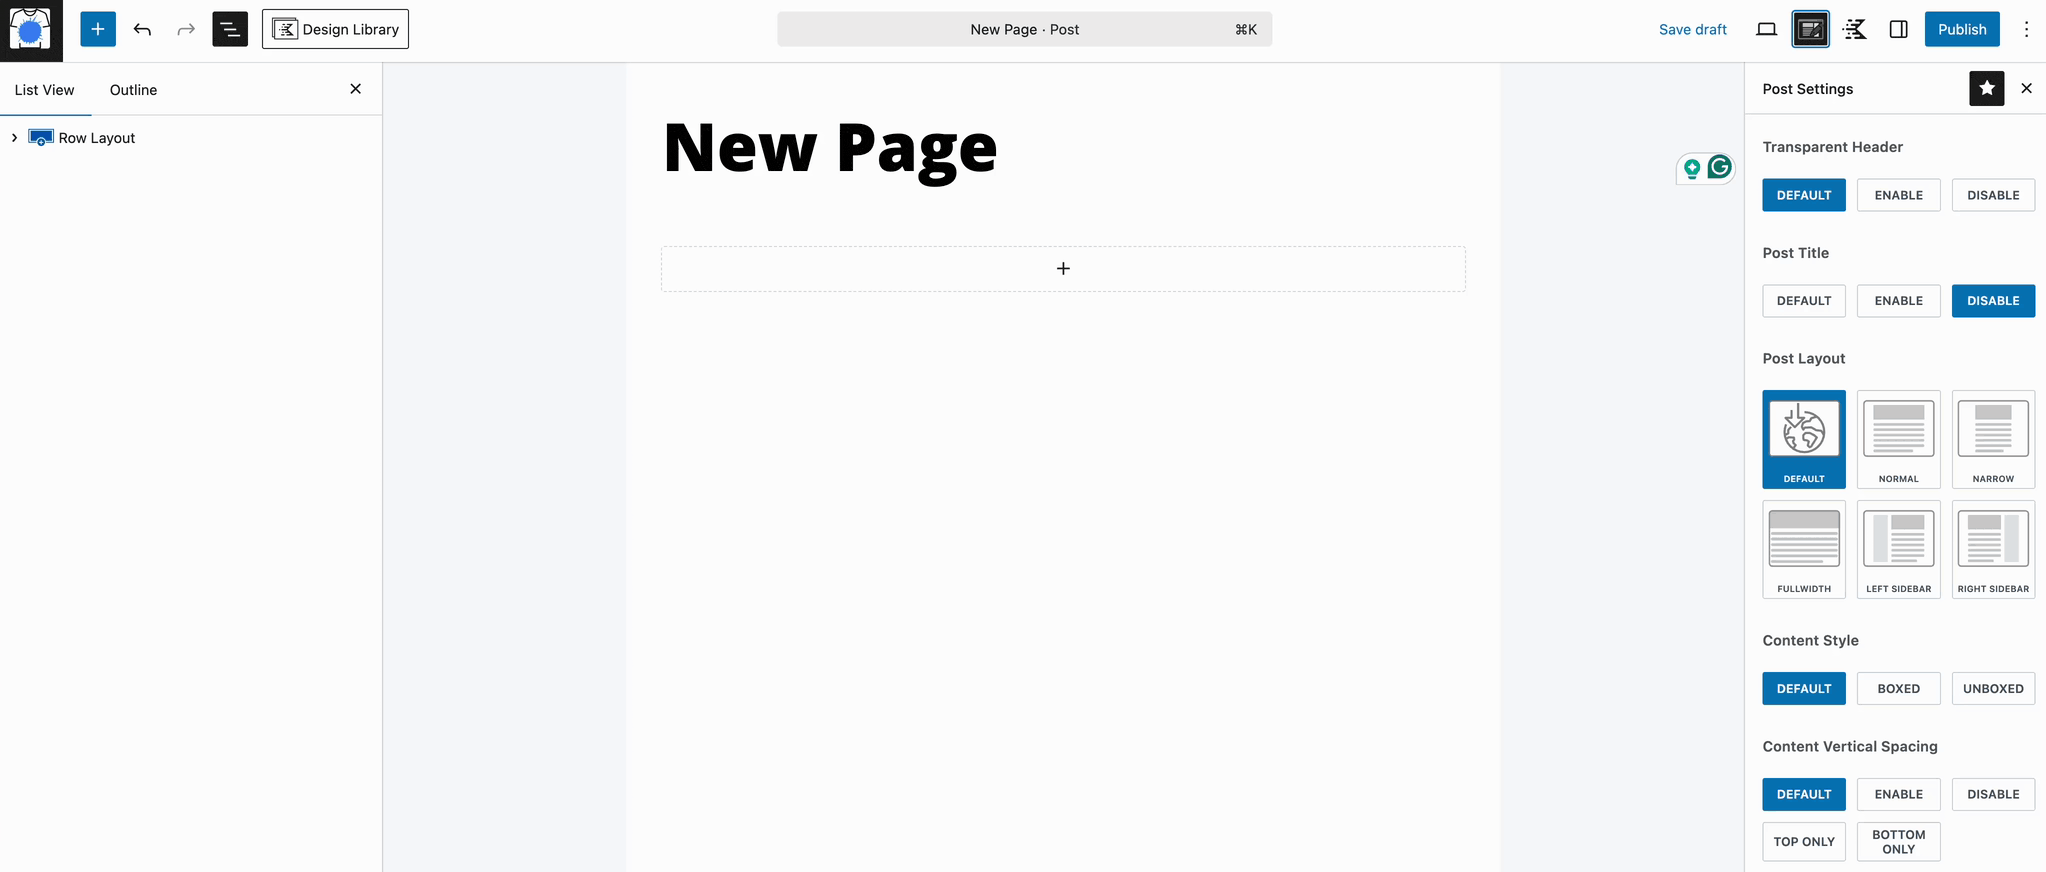
Recommended blocks:
- Row Layout – for flexible layouts and background options (images, colors, overlays)
- Advanced Text – for styled titles, subtitles, and headings
You can customize:
- Layout structure (columns, width, spacing)
- Background (image, color, overlay)
- Typography and alignment
- Visibility per device
This method gives you complete control over the look and feel of the section on a page-by-page basis.
⚠️ Note: This method only works for individual posts, pages, or custom post types. It does not apply to archive pages like categories or blog listings.
3. Creating Dynamic or Sitewide Hero Sections with Hooked Elements (Kadence Pro)
For more advanced control, especially on archive pages or for inserting dynamic content, you can use Kadence Hooked Elements, available with the Kadence Theme Pro addon.
What Are Hooked Elements?
Hooked Elements let you insert custom content in specific areas of your site by hooking into predefined positions in the theme layout. This works for:
- Pages
- Posts
- Archive pages (categories, tags, blog feed, etc.)
Use Cases
- Replace the default Title Section with your own custom design
- Add additional content (like a subtitle or banner) above or below the default title
- Use dynamic content like post titles or featured images
How to Create a Hooked Element
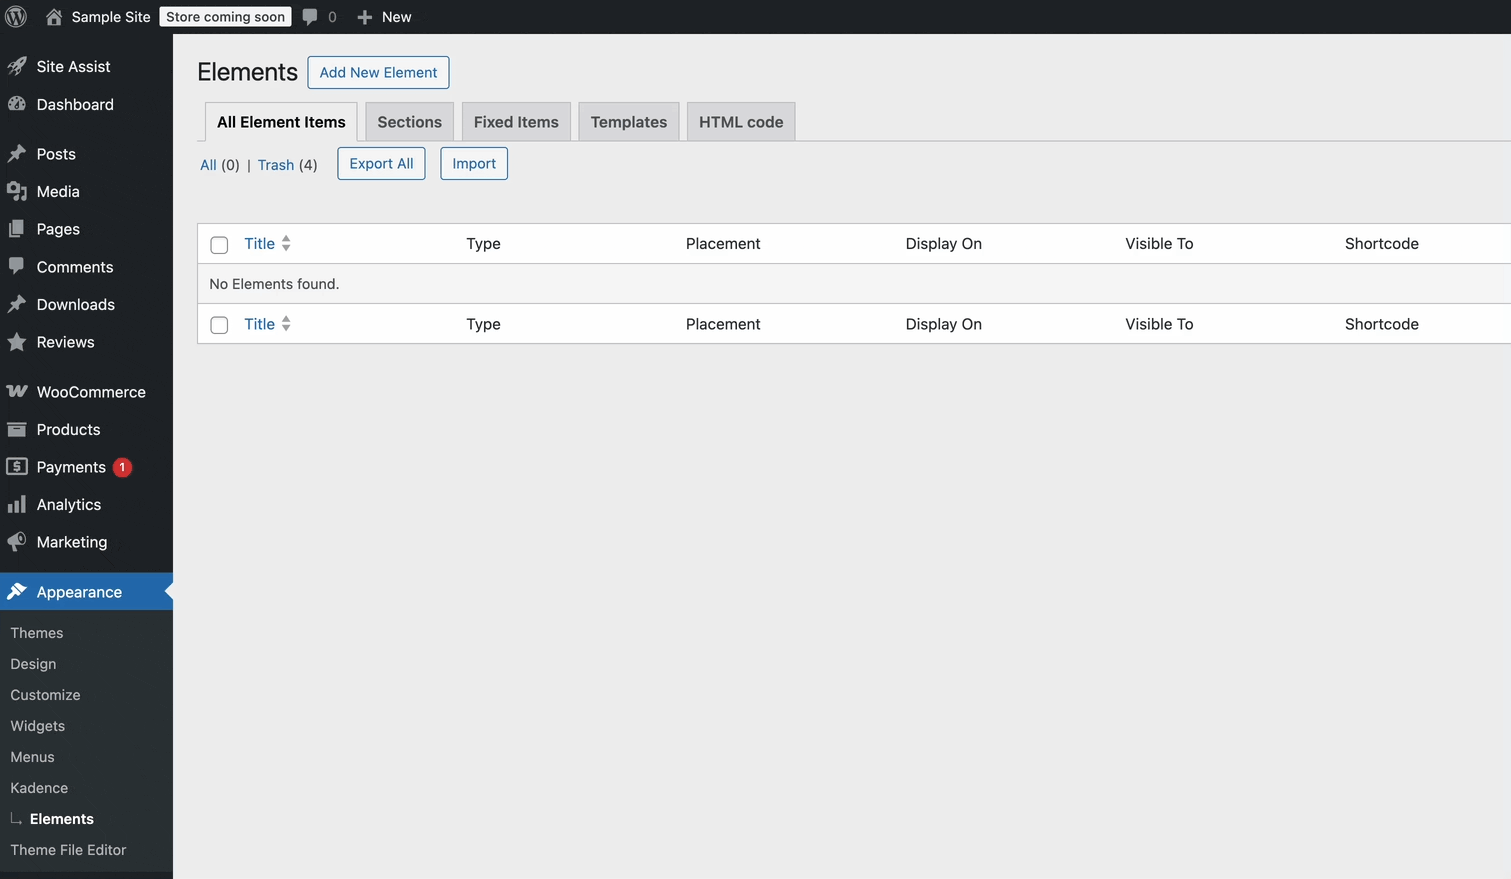
- Go to: Appearance → Kadence → Elements → Add New
- Choose Content Section
- Add your design using Kadence Blocks
- Under Placement, choose where it should appear:
- Use “Replace Above Content Hero” to fully replace the default title section
- Or use insert options to place content above/below the existing title
- Set Display Settings:
- Choose where it shows (e.g., single post, all pages, archive)
- Optionally limit by device or user role
If you’re using Kadence Blocks Pro, you can also pull in Dynamic Content, such as:
- Post or page title
- Featured image
- Custom fields
This method is ideal for consistent and dynamic layouts across your site.
References:
