Kadence Hooked Elements includes a powerful element type called Template Elements, which lets you take dynamic control over key areas of your website. With Template Elements, you can replace default sections such as the Header, Above Content Hero, Single Post Content, Archive Content, and more.
This gives you the freedom to customize more than just single posts; you can also design unique layouts for pages, custom post types, and archive pages. You can also replace other key parts of your site, like the header, footer, hero section, and sidebars, on specific pages.
Build your layouts using Kadence Blocks, and bring in dynamic content like post titles, featured images, and custom field values with ease. To make full use of Template Elements, you’ll need access to Kadence Blocks Pro for Dynamic Content functionality. Both Kadence Theme Pro and Kadence Blocks Pro are included in the Kadence Plus Plan.
Note: Template Hooked Elements are intended for regular Posts and Custom Post Types that are not WooCommerce products. Hooked Elements will not work for overriding WooCommerce Loop Items, Single Product pages, or Archive pages. If you want to take control over these WooCommerce pages, you’ll need Kadence Shop Kit ⧉. You can learn more about Woo Templates and how to customize your WooCommerce pages here ⧉.
Getting Started
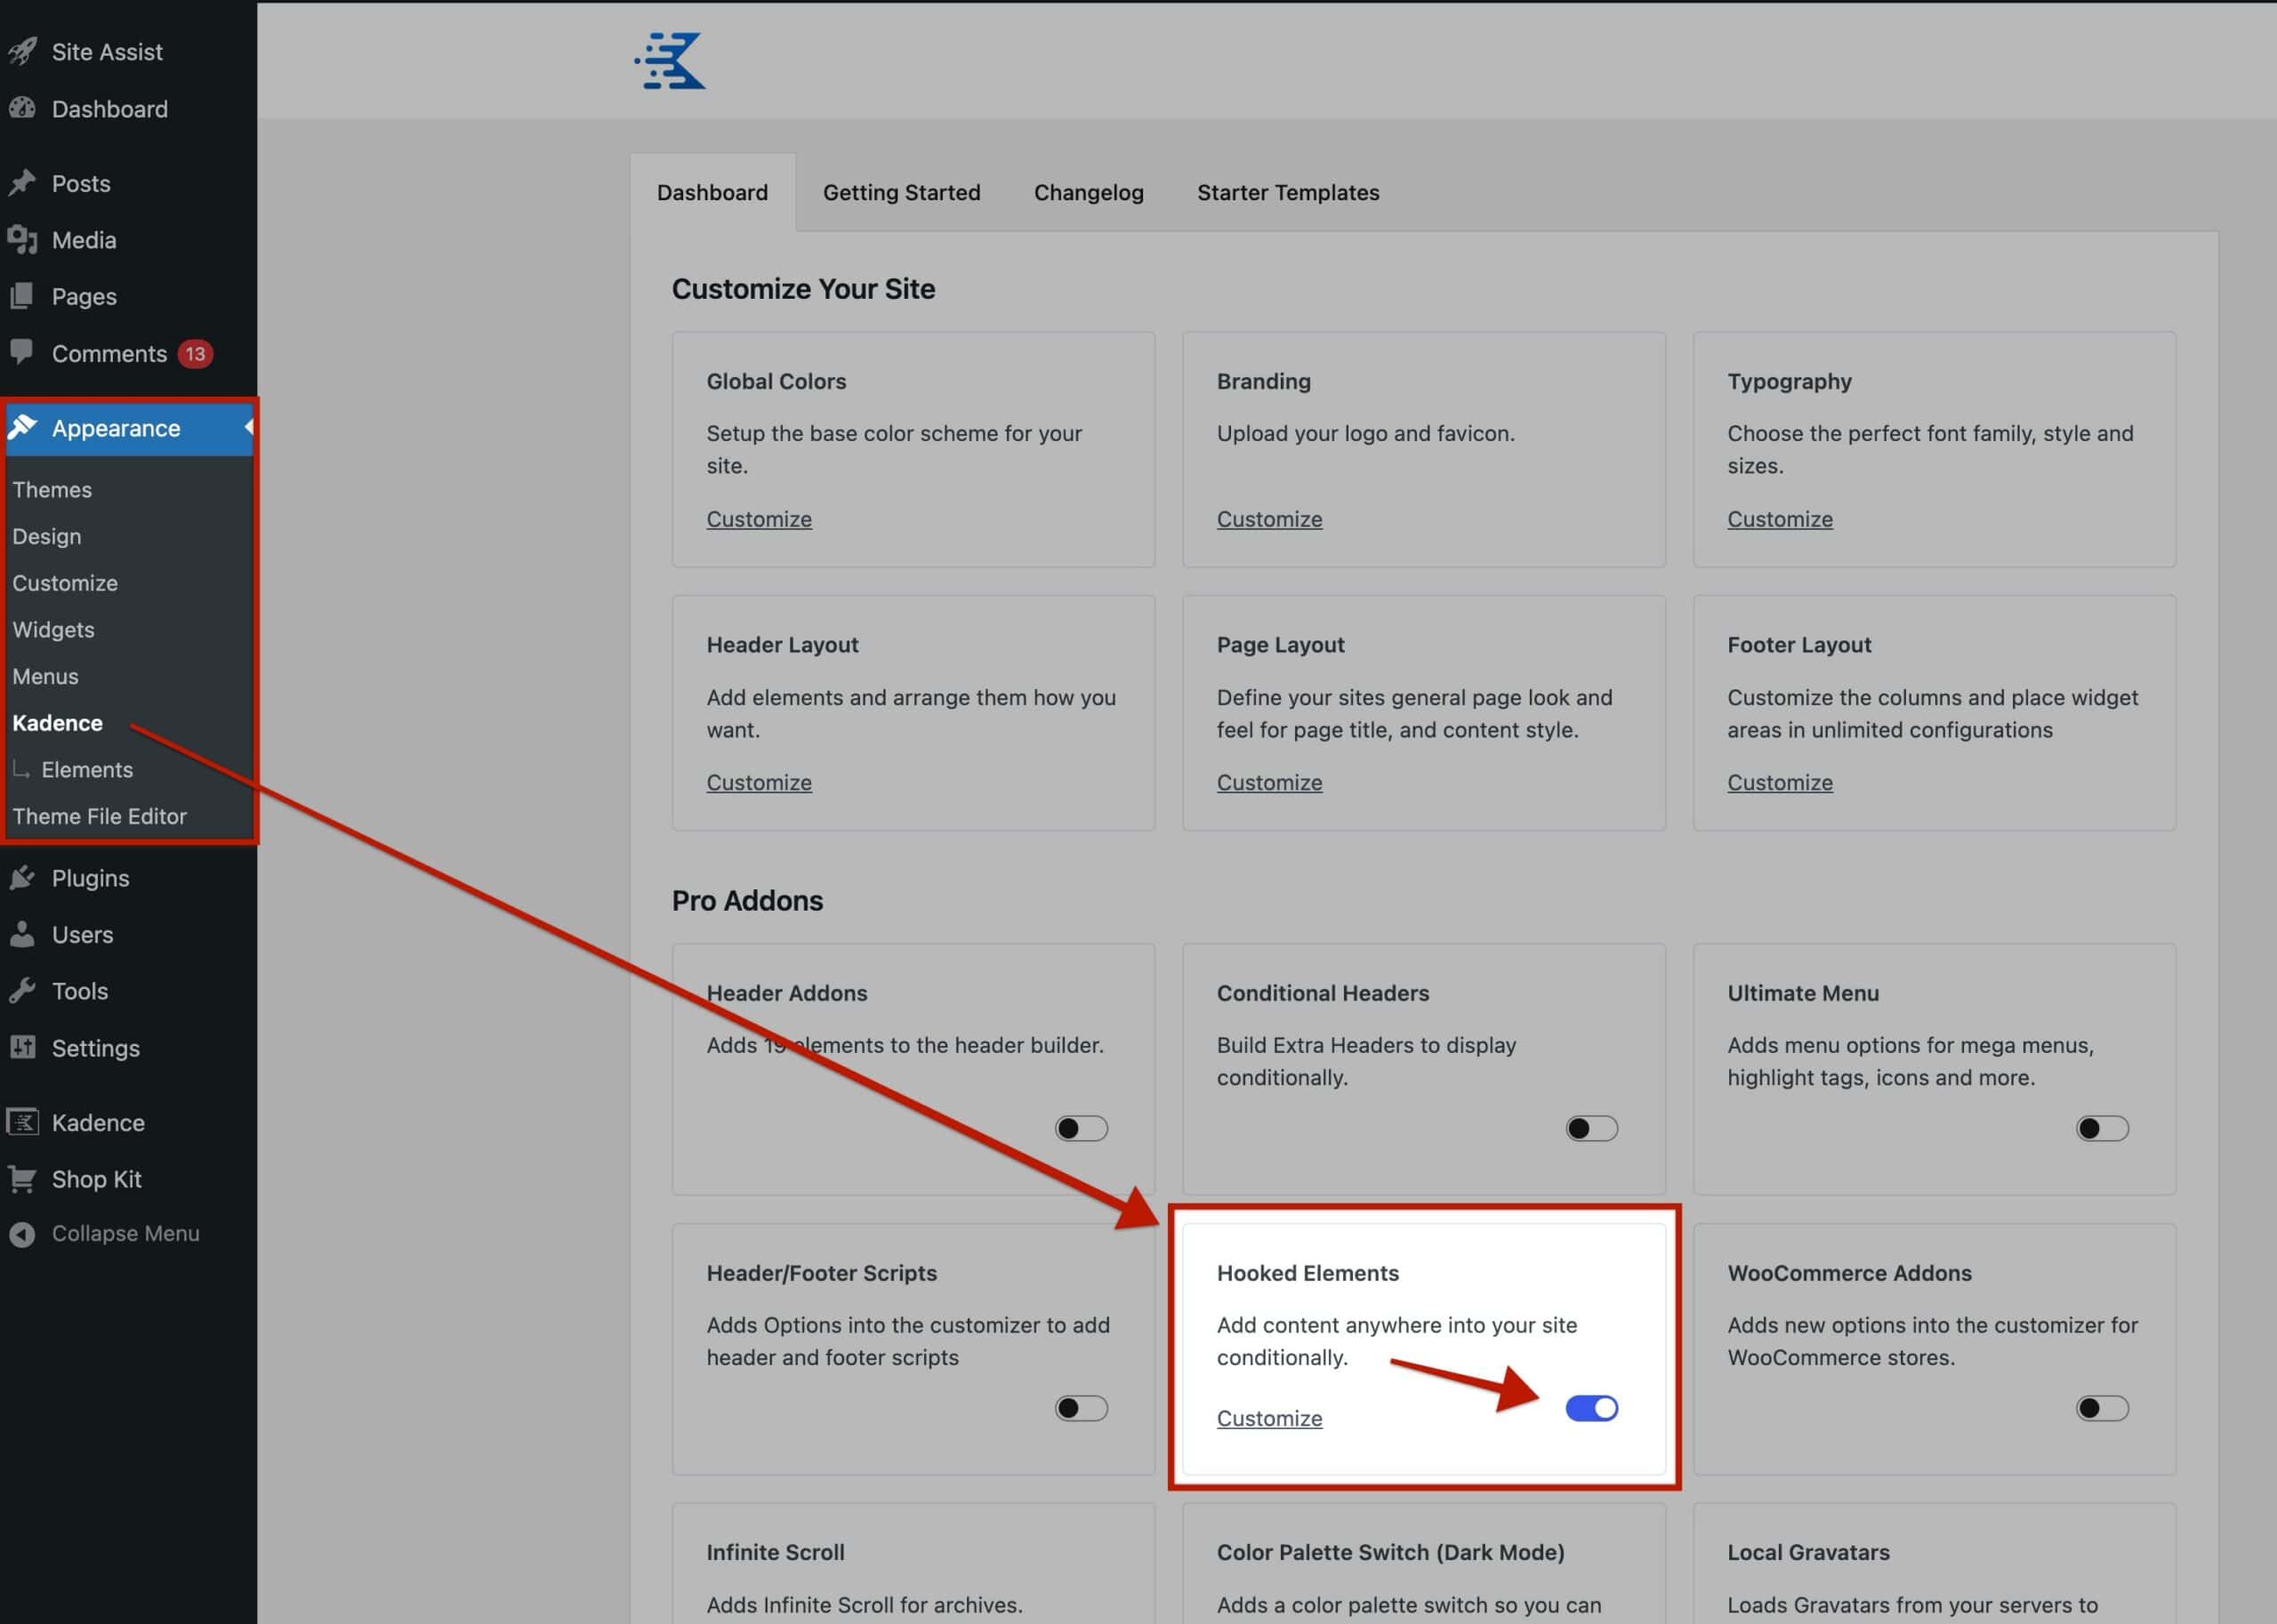
You must have the Kadence Theme Kit Pro plugin installed, activated, and licensed on your website. (Click here to learn more.) Once Theme Kit Pro is active on the website, enable Hooked Elements from the Dashboard -> Appearance -> Kadence page.
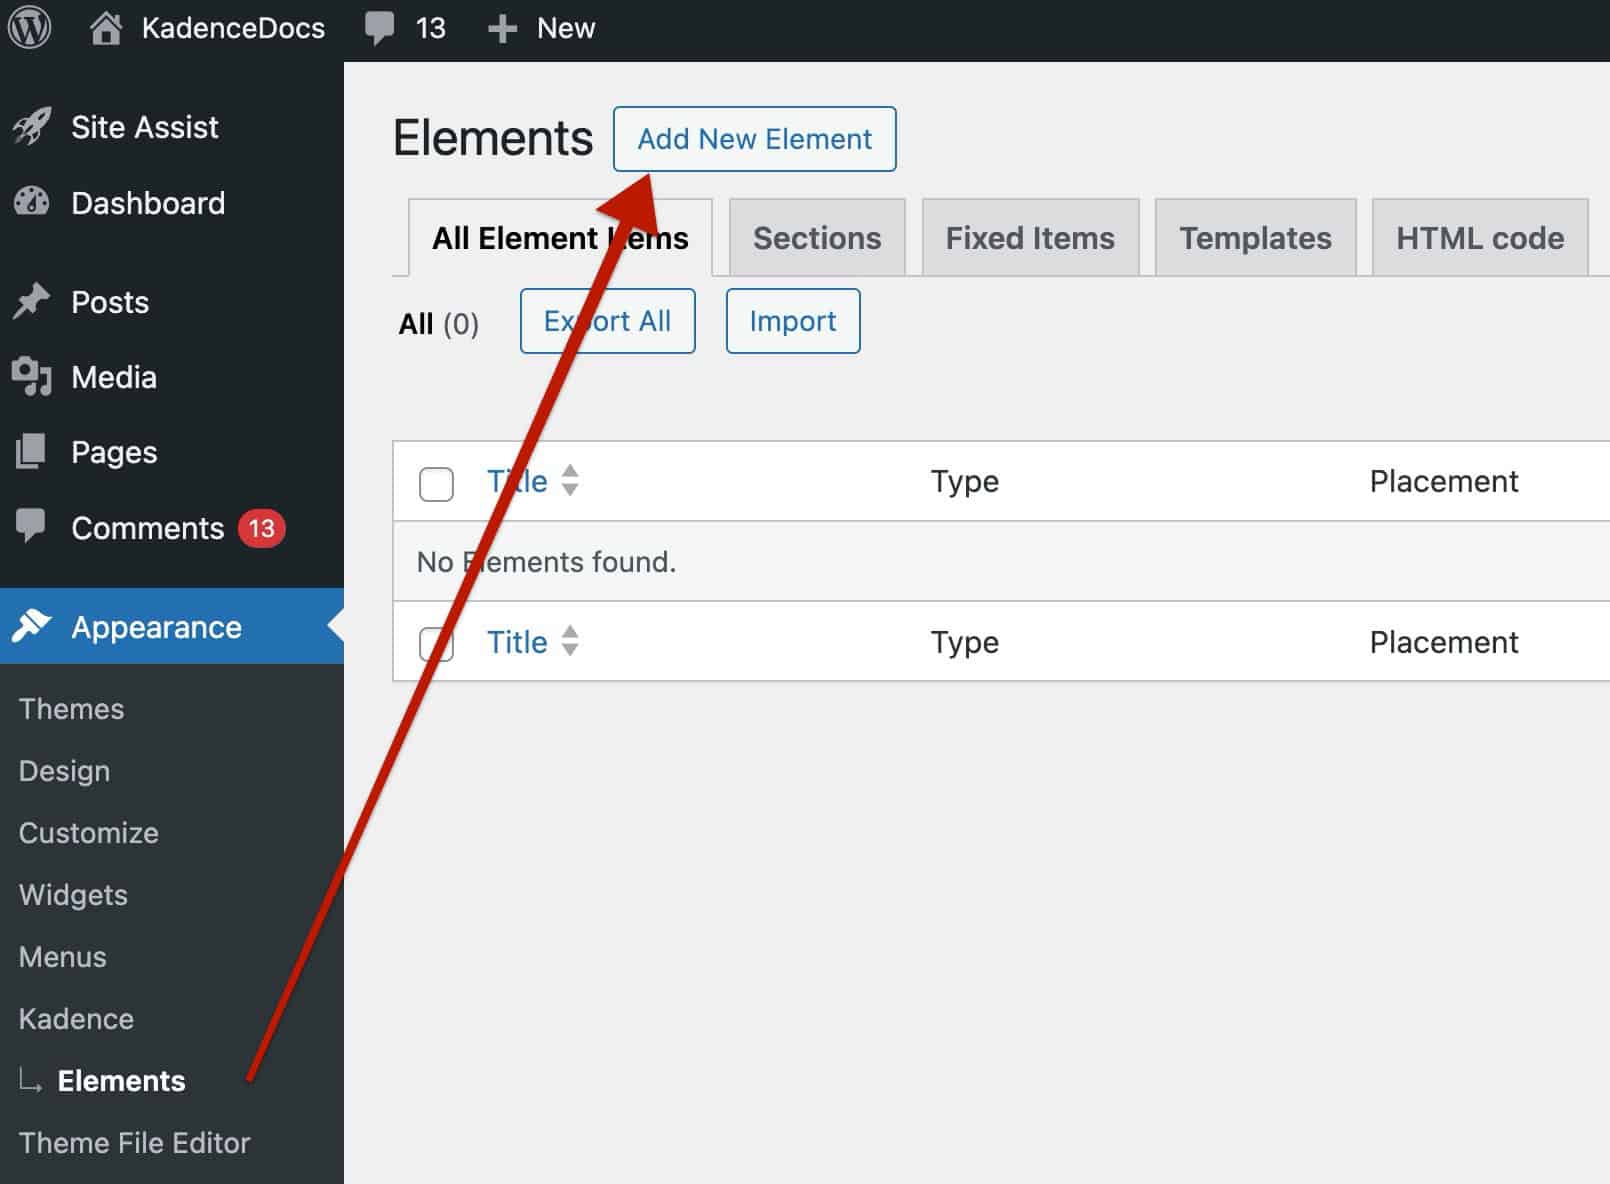
Once Hooked Elements are enabled, navigate to the Dashboard -> Appearance -> Kadence -> Elements page and create a new element by clicking the Add New Element button.
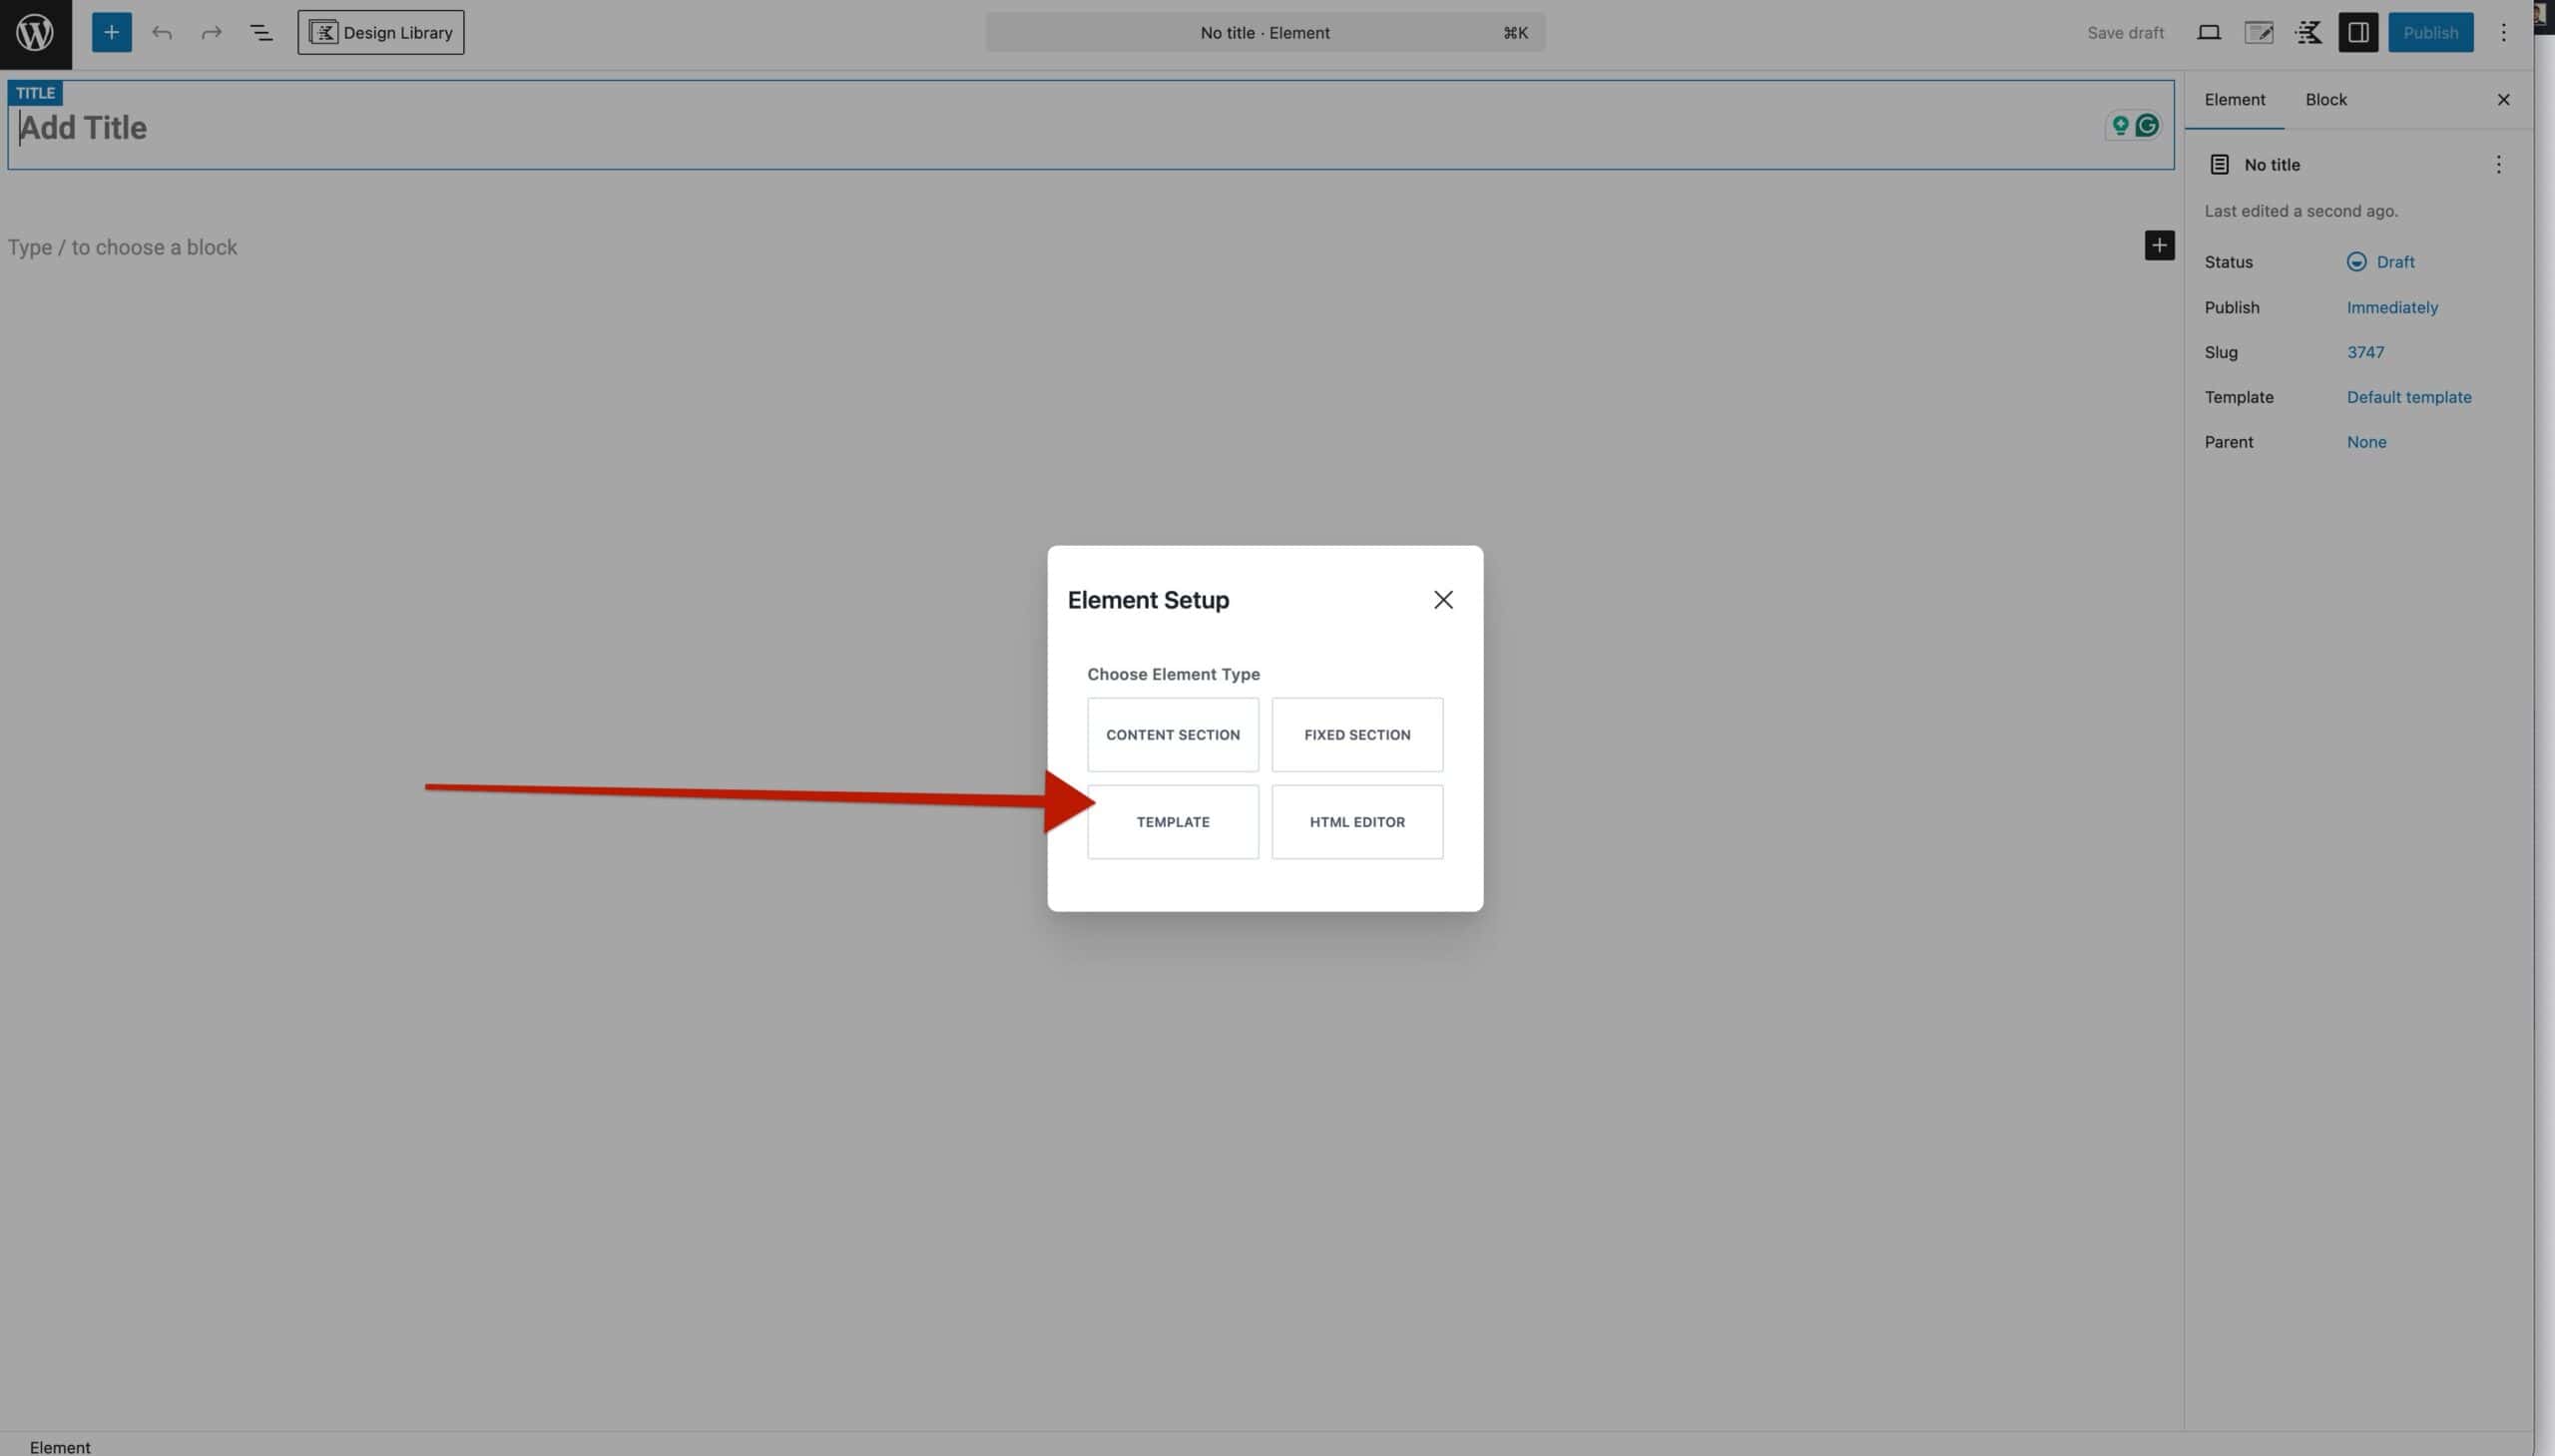
Then, select the Template Element type to begin creating a new Template Element.
Depending on your goal, you may need to use different blocks or content to add to the Template Element. Use the Element Settings to control the Placement and Display Settings of the element.
Placement Settings are important because they determine where the Template Element applies, whether it’s on Single Posts, replacing the header, changing archive content, and so on. Click here to learn about each placement option and see some helpful blocks to get you started.
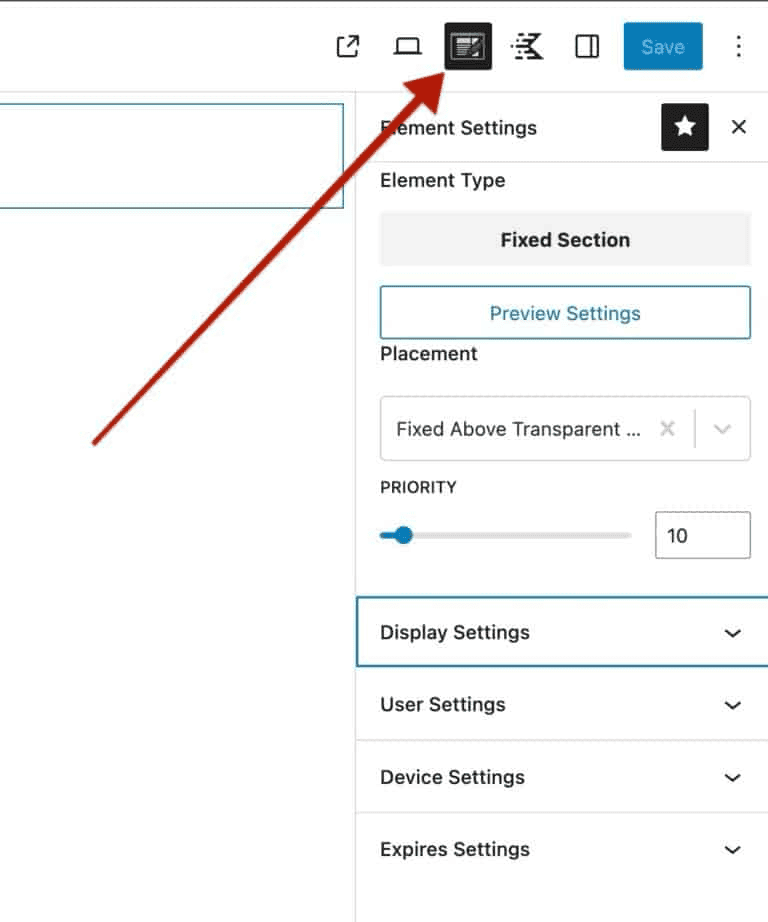
Element Settings
Use the Element Settings to control the placement, along with various display settings to determine where and who sees the element.
The Element Settings can be found at the top right corner of the element editor. Look for an icon with a paper and pencil.
Preview Settings
The Preview settings allow you to set the context and display size for the Element preview. The preview settings are helpful when designing an Element and will only affect what is seen in the editor.
EDITOR WIDTH (PX): Setting the editor width can be helpful if you are creating an Element that is targeting an area which is limited in width such as the Sidebar.
SELECT PREVIEW POSTS TYPE: Select Posts, Pages, or a Custom Post Type.
Select Preview Post: Choose a post to use as an example while creating your Element.

Placement Settings
The Placement Settings can be used to determine what type of content the Template Element will take effect on. For example, this can be set to replace the header, single post content, etc. Each placement option will allow you to use the Template Element differently. Learn about each placement option below, along with learning about key details to get started with that placement type.
Use the Display Settings to determine which posts/pages/archives the Template Element will appear on. (For example, single posts, single pages, or category archives, etc.)
Replace Header
The Replace Header placement lets you swap out your site’s default header with a custom one. This is especially useful if you want to show a unique header on certain pages, like landing pages or a special part of your site. You can build your custom header using the Advanced Header block, then use Display Settings to control exactly where it appears. This gives you full control to show different headers based on the needs of each page.
Result:
Replace Above Content Hero
The Replace Above Content Hero placement setting allows you to replace the default Kadence page/post/archive titles sections. These title sections can be enabled from various Kadence Layout Settings.
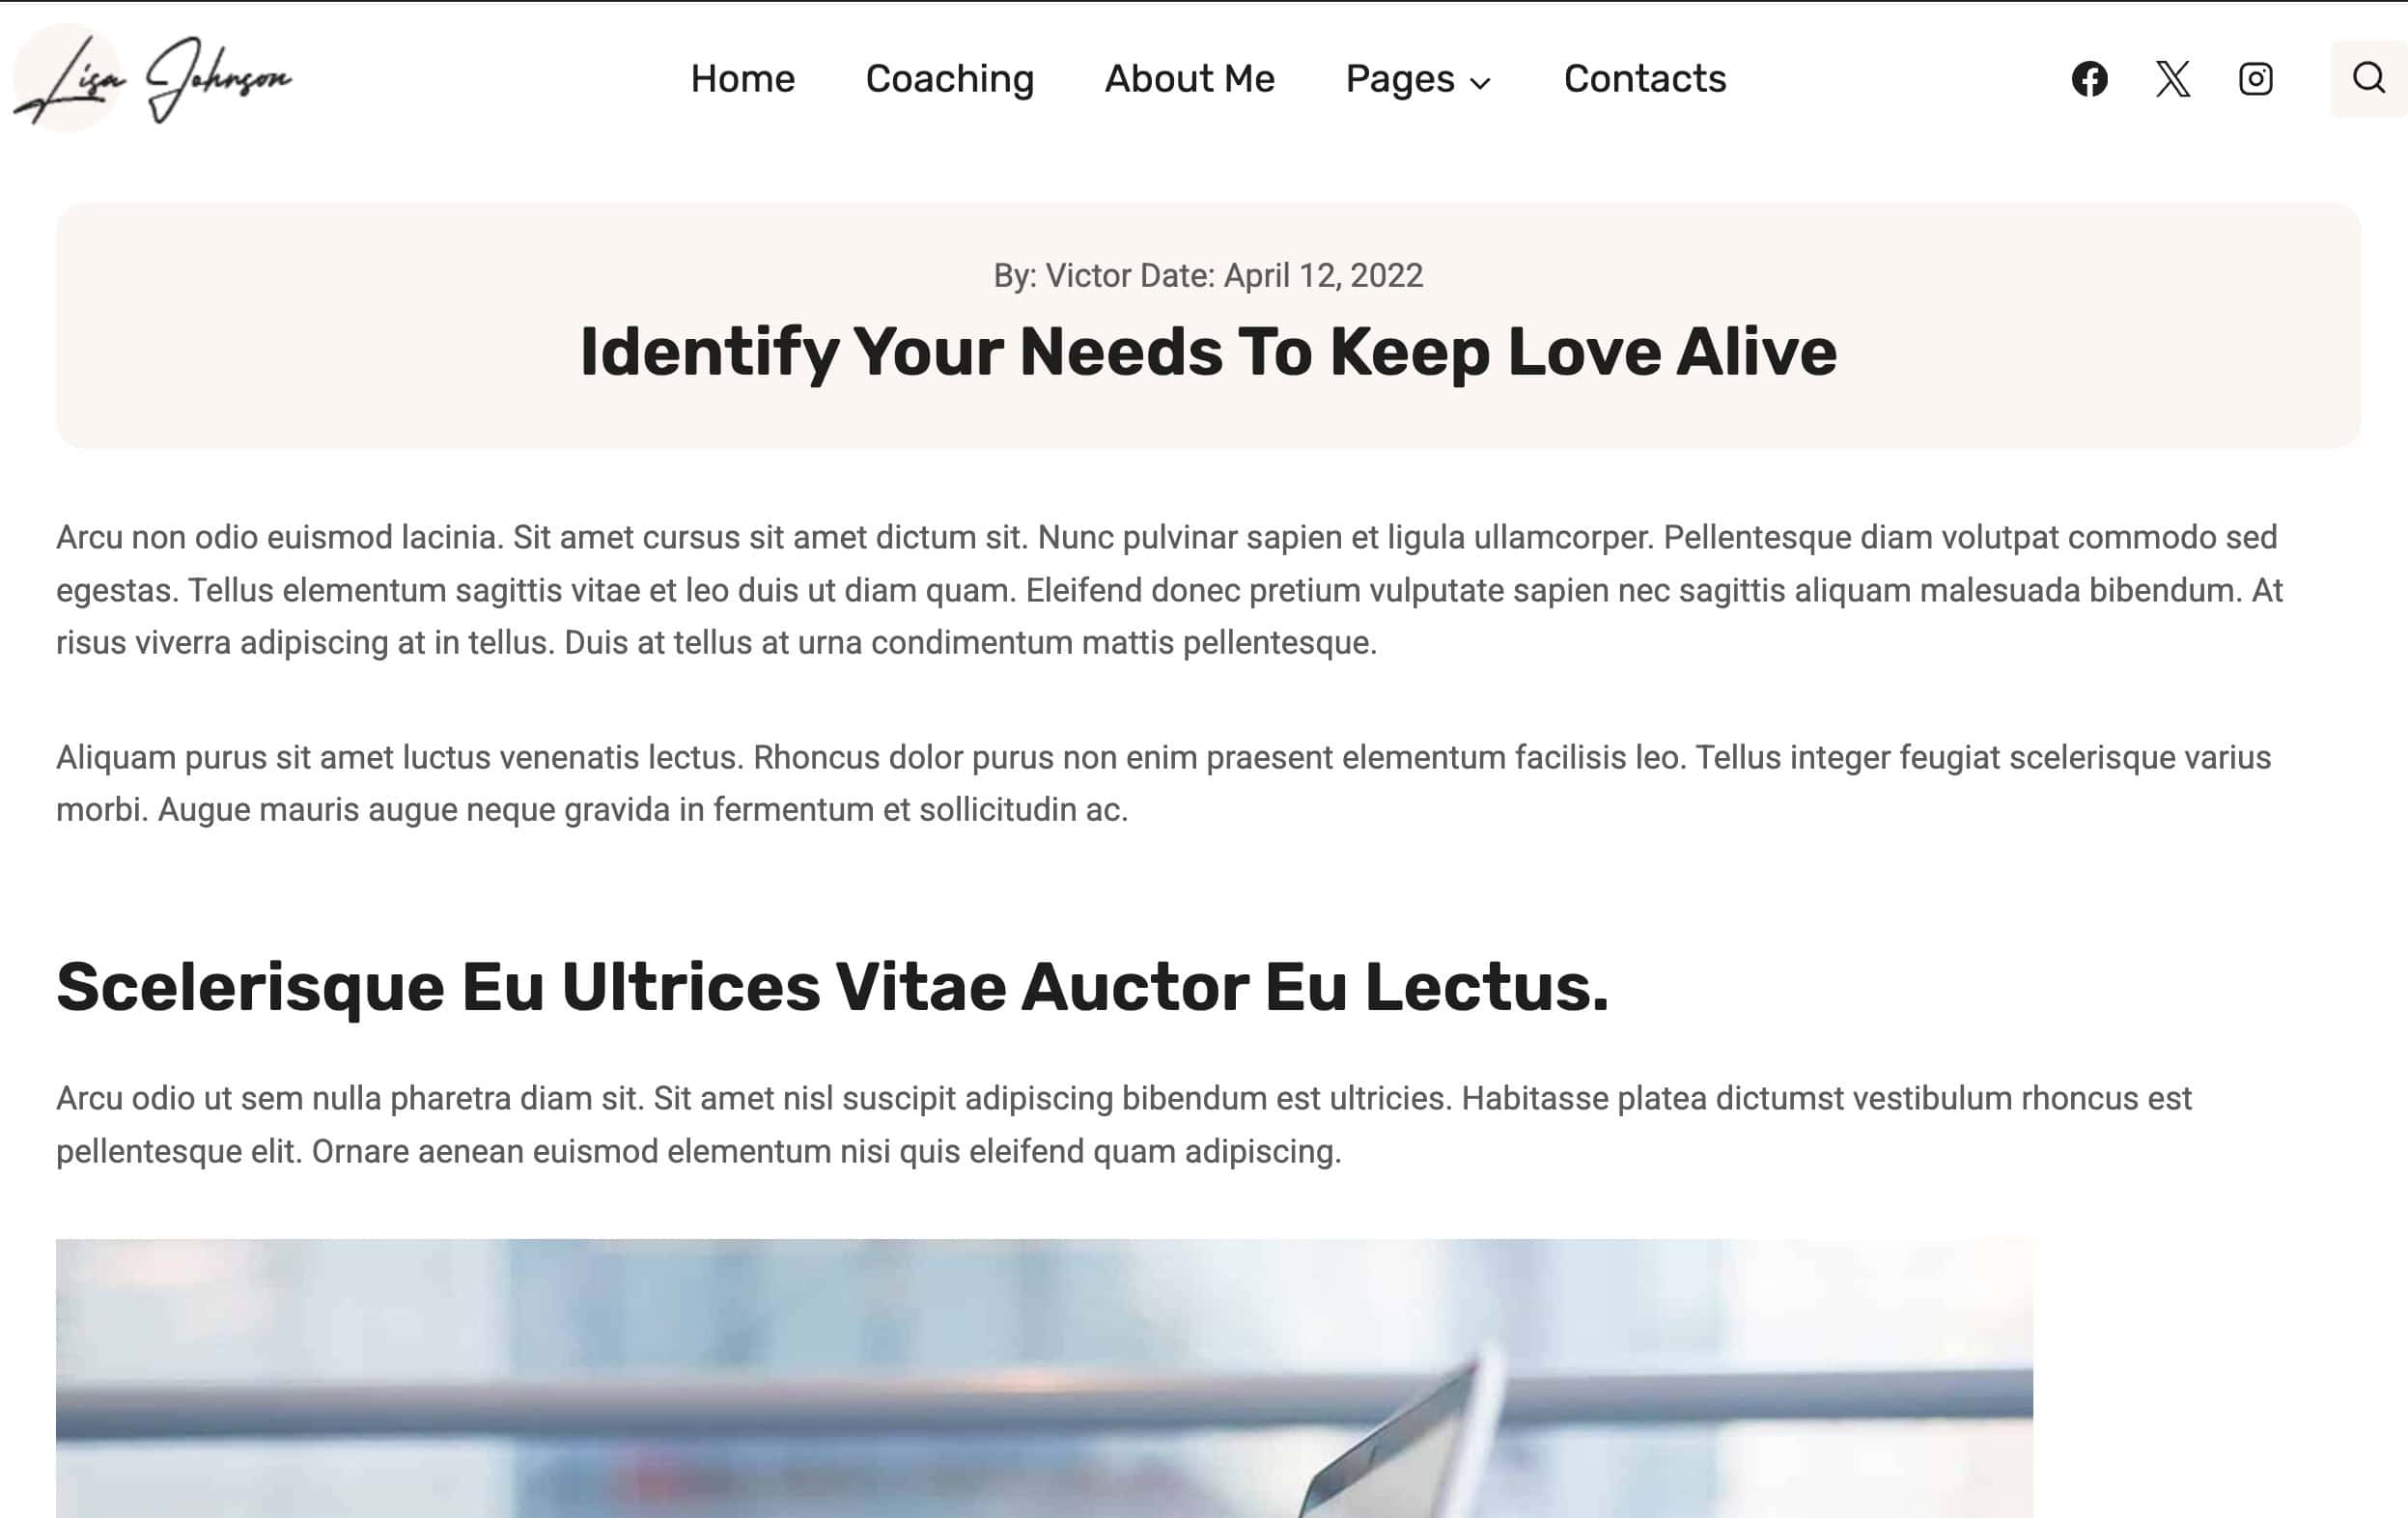
For example, take a look at the image below. This shows the default Kadence Theme Title/Hero area. When you use the Replace Above Content Hero placement, it will override this section with your custom content.
You can use blocks like the Dynamic List Block to display the current taxonomies of the current post. You can use the Advanced Text Block and Dynamic Content to display the post title, date, author information, and other dynamic content. Additionally, you can use the '[kadence_breadcrumbs]' shortcode to display the current page/post breadcrumbs.
Result:

Replace Single Post Content
The Replace Single Post Content placement setting allows you to take full control over the layout of single posts across your website. This can apply to single posts, single pages, and single custom post types.
In order to use this placement option properly, you need access to Kadence Blocks Pro. View our pricing here.
Use blocks, such as the Row Layout Block and Section Blocks, to create an initial design. Then, use premium Kadence Blocks and Dynamic Content to display your post/page content accordingly. Here is a list of some commonly used blocks and their purpose.
Result:
You can use Query Loop (Adv) Blocks to display related posts. Just add a new Query Loop (Adv) Block to the element. Then, select the main Query Loop (Adv) Block and ensure the Show Related Posts option is enabled.
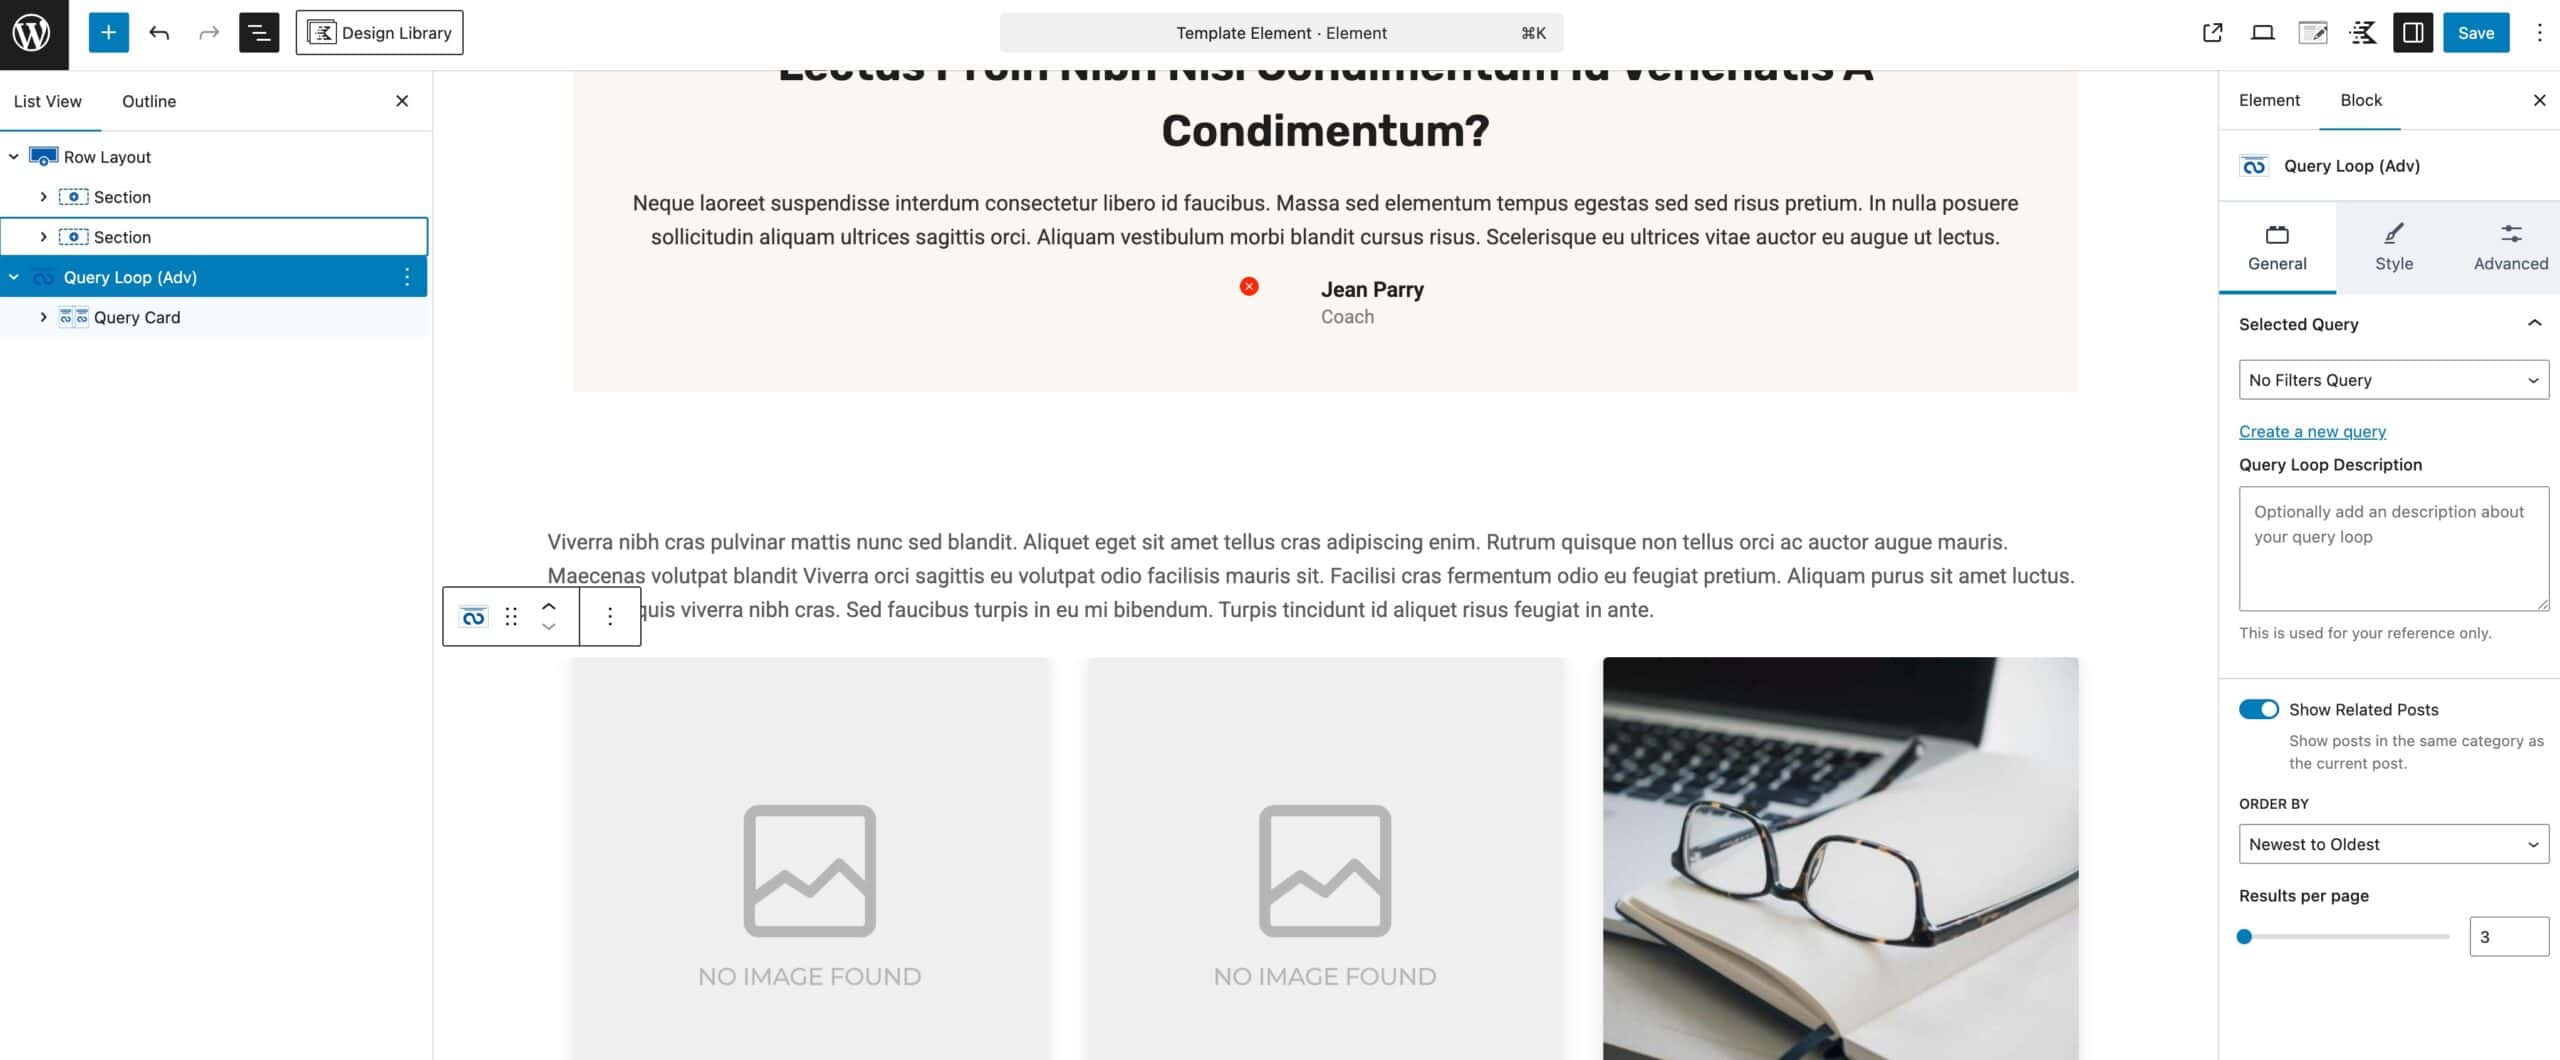
The Show Related Posts feature only works out of the box with the default WordPress Posts post type and its built-in taxonomies (categories and tags).
If you’re using a custom post type or a custom taxonomy, this feature won’t automatically apply. However, you can click here for a sample code for how to customize the query and display related posts based on any taxonomy you choose.
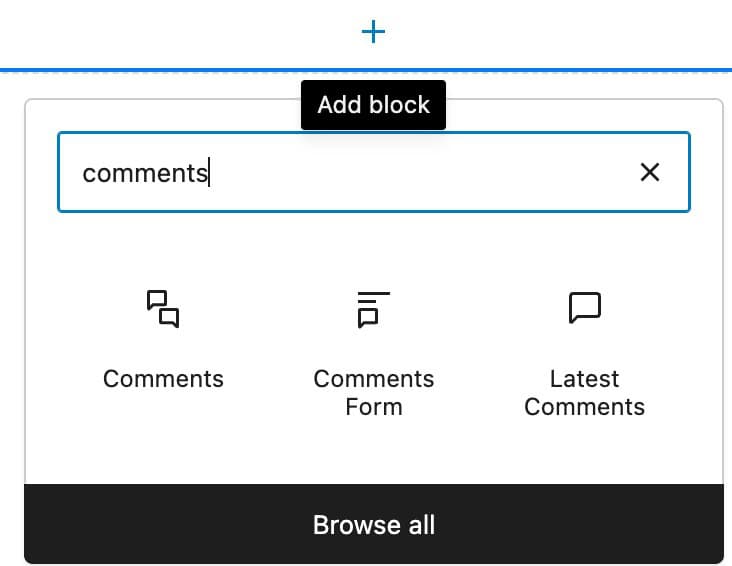
For additional features, such as comments, you can use the Core WordPress Comments Blocks.
Replace Archive Content
The Replace Archive Content allows you to dynamically replace entire archive pages, such as the blog page, category pages, and other archive page types. The Replace Archive Content placement will completely override the entire archive page. This includes the title section and the loop content. This means you must manually create a loop to display the items of the archive.
This can be done by using the Query Loop (Adv) Block. The Query Loop (Adv) Block allows you to take complete control over the archive loop. From customizing the Query Card to designing loop items to using Filter blocks to add filtering options to the query.
When using a Query Loop (Adv) Block to take over an archive page, you must ensure the Inherit Query From Template option is enabled from the Query Loop (Adv) Block Settings -> General Tab.
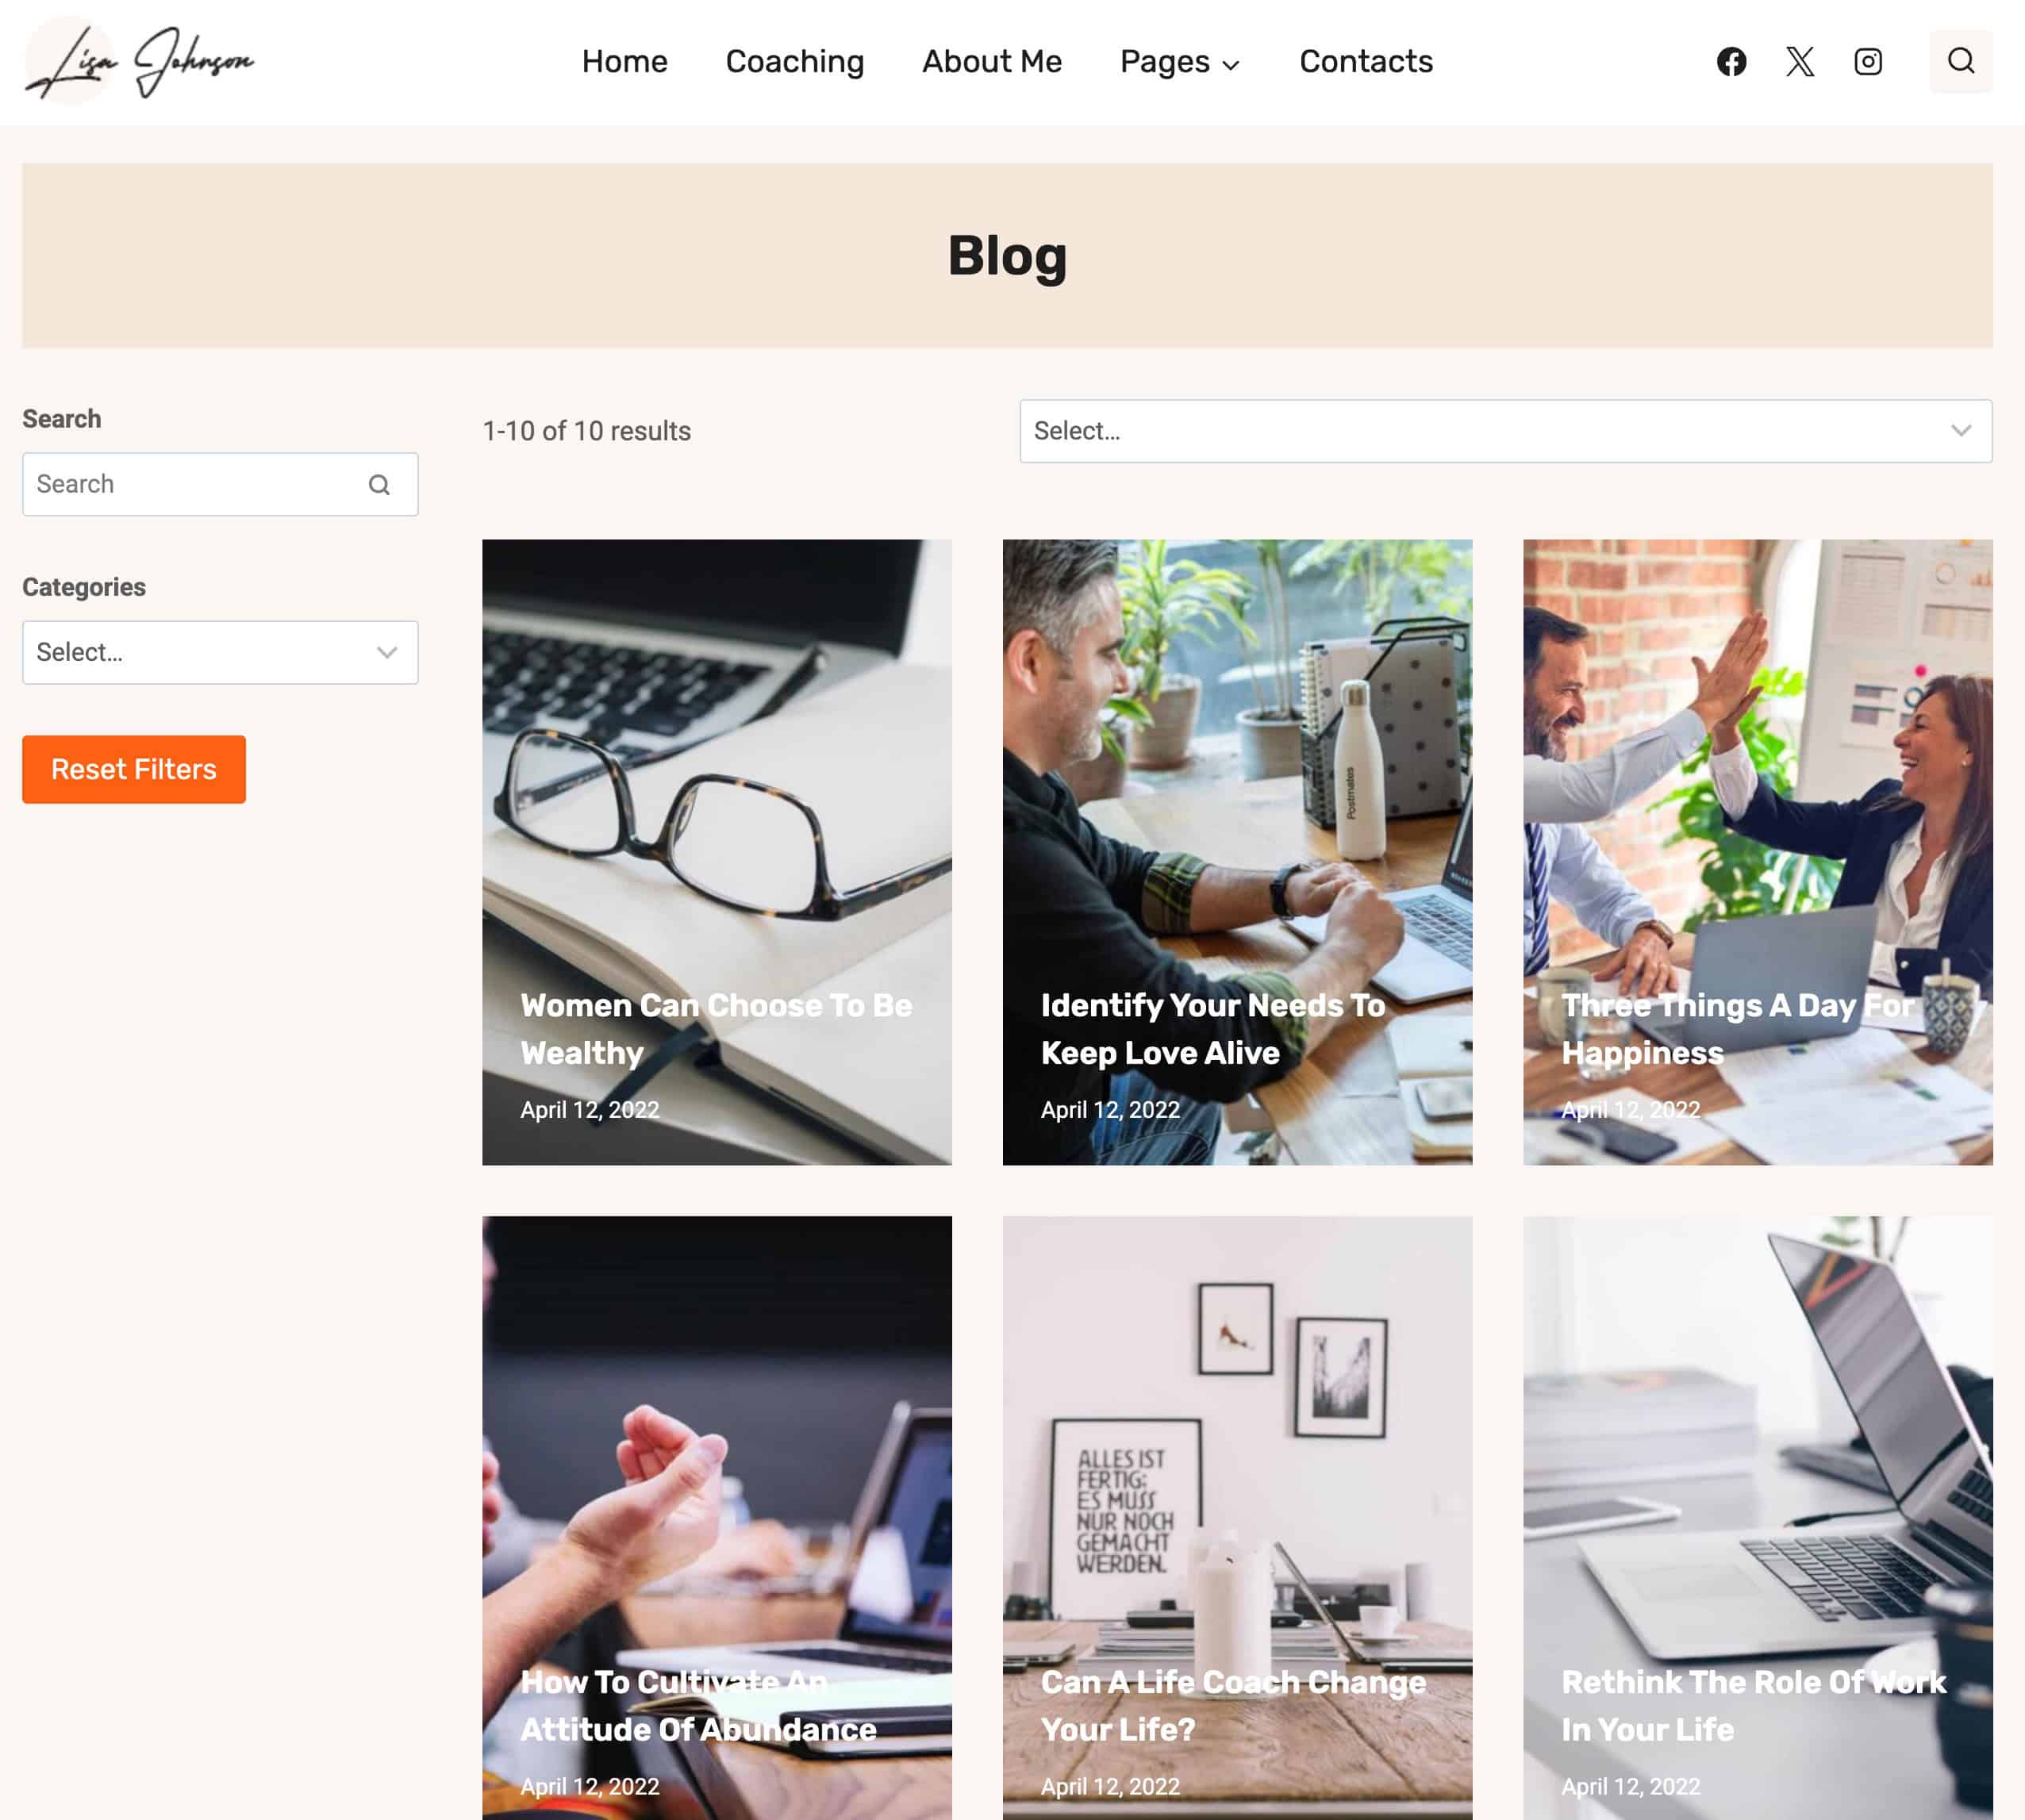
For example, below is a default archive page that was created using the Kadence Theme Archive Layout settings: (Using a Template Element will override the majority of Kadence Theme Archive Settings)

Now, here is a Template Element, using a Query Loop (Adv) Block with filtering options, to display a query that inherits the template.
Here is the final result on the front-end archive page.
Replace Archive Loop Content
The Replace Archive Loop Content placement option allows you to take control over archive loops across your site. The Replace Archive Content placement replaces the entire archive page. While the Replace Archive Loop Content only overwrites archive loop items. This means things like the title area will remain unchanged.
When replacing an Archive Loop Item, you can use Dynamic Content and Kadence Blocks to dynamically display loop items.
Here is an example of an Archive Loop Element being created:
Result:
This can be a great feature if you want to take complete control over your Single Loop Items on Archive Pages. For example, you can completely design the loop item from scratch, allowing you to insert custom content, such as short codes and custom fields, and much more!
Replace Sidebar
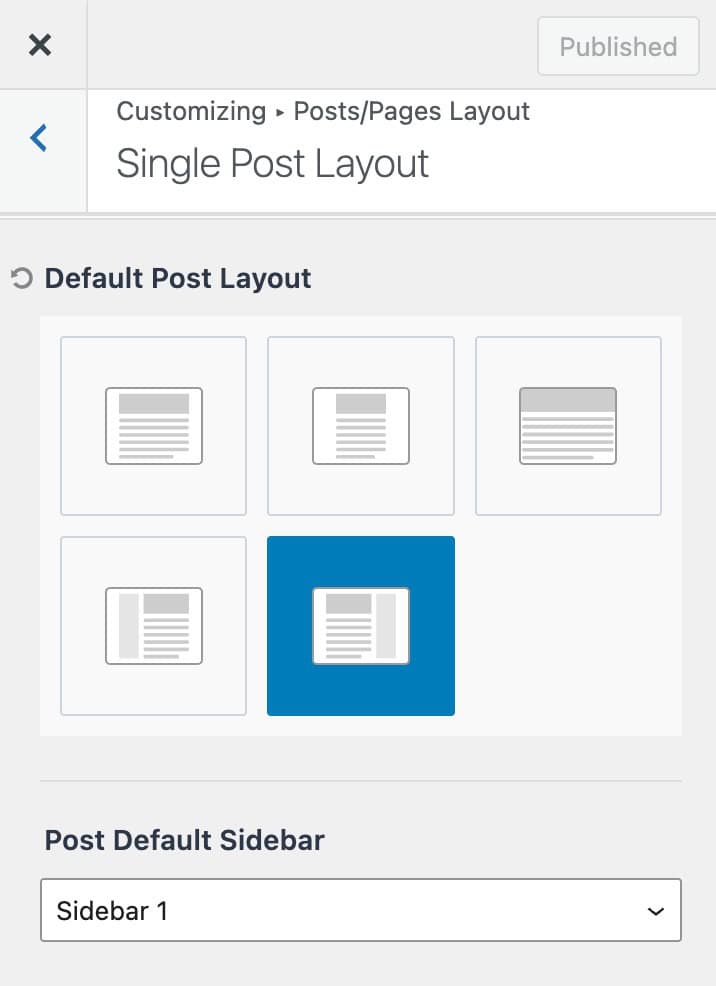
The Replace Sidebar placement option allows you to replace existing sidebars with custom ones. For example, you may use a sidebar layout in the Single Post Layout Settings. In this case, you may want to use a custom or a special sidebar on one or multiple specific single posts. This is where the Replace Sidebar placement comes into play.
Use the Replace Sidebar placement in combination with custom Display Settings to take complete control over sidebars across your website.
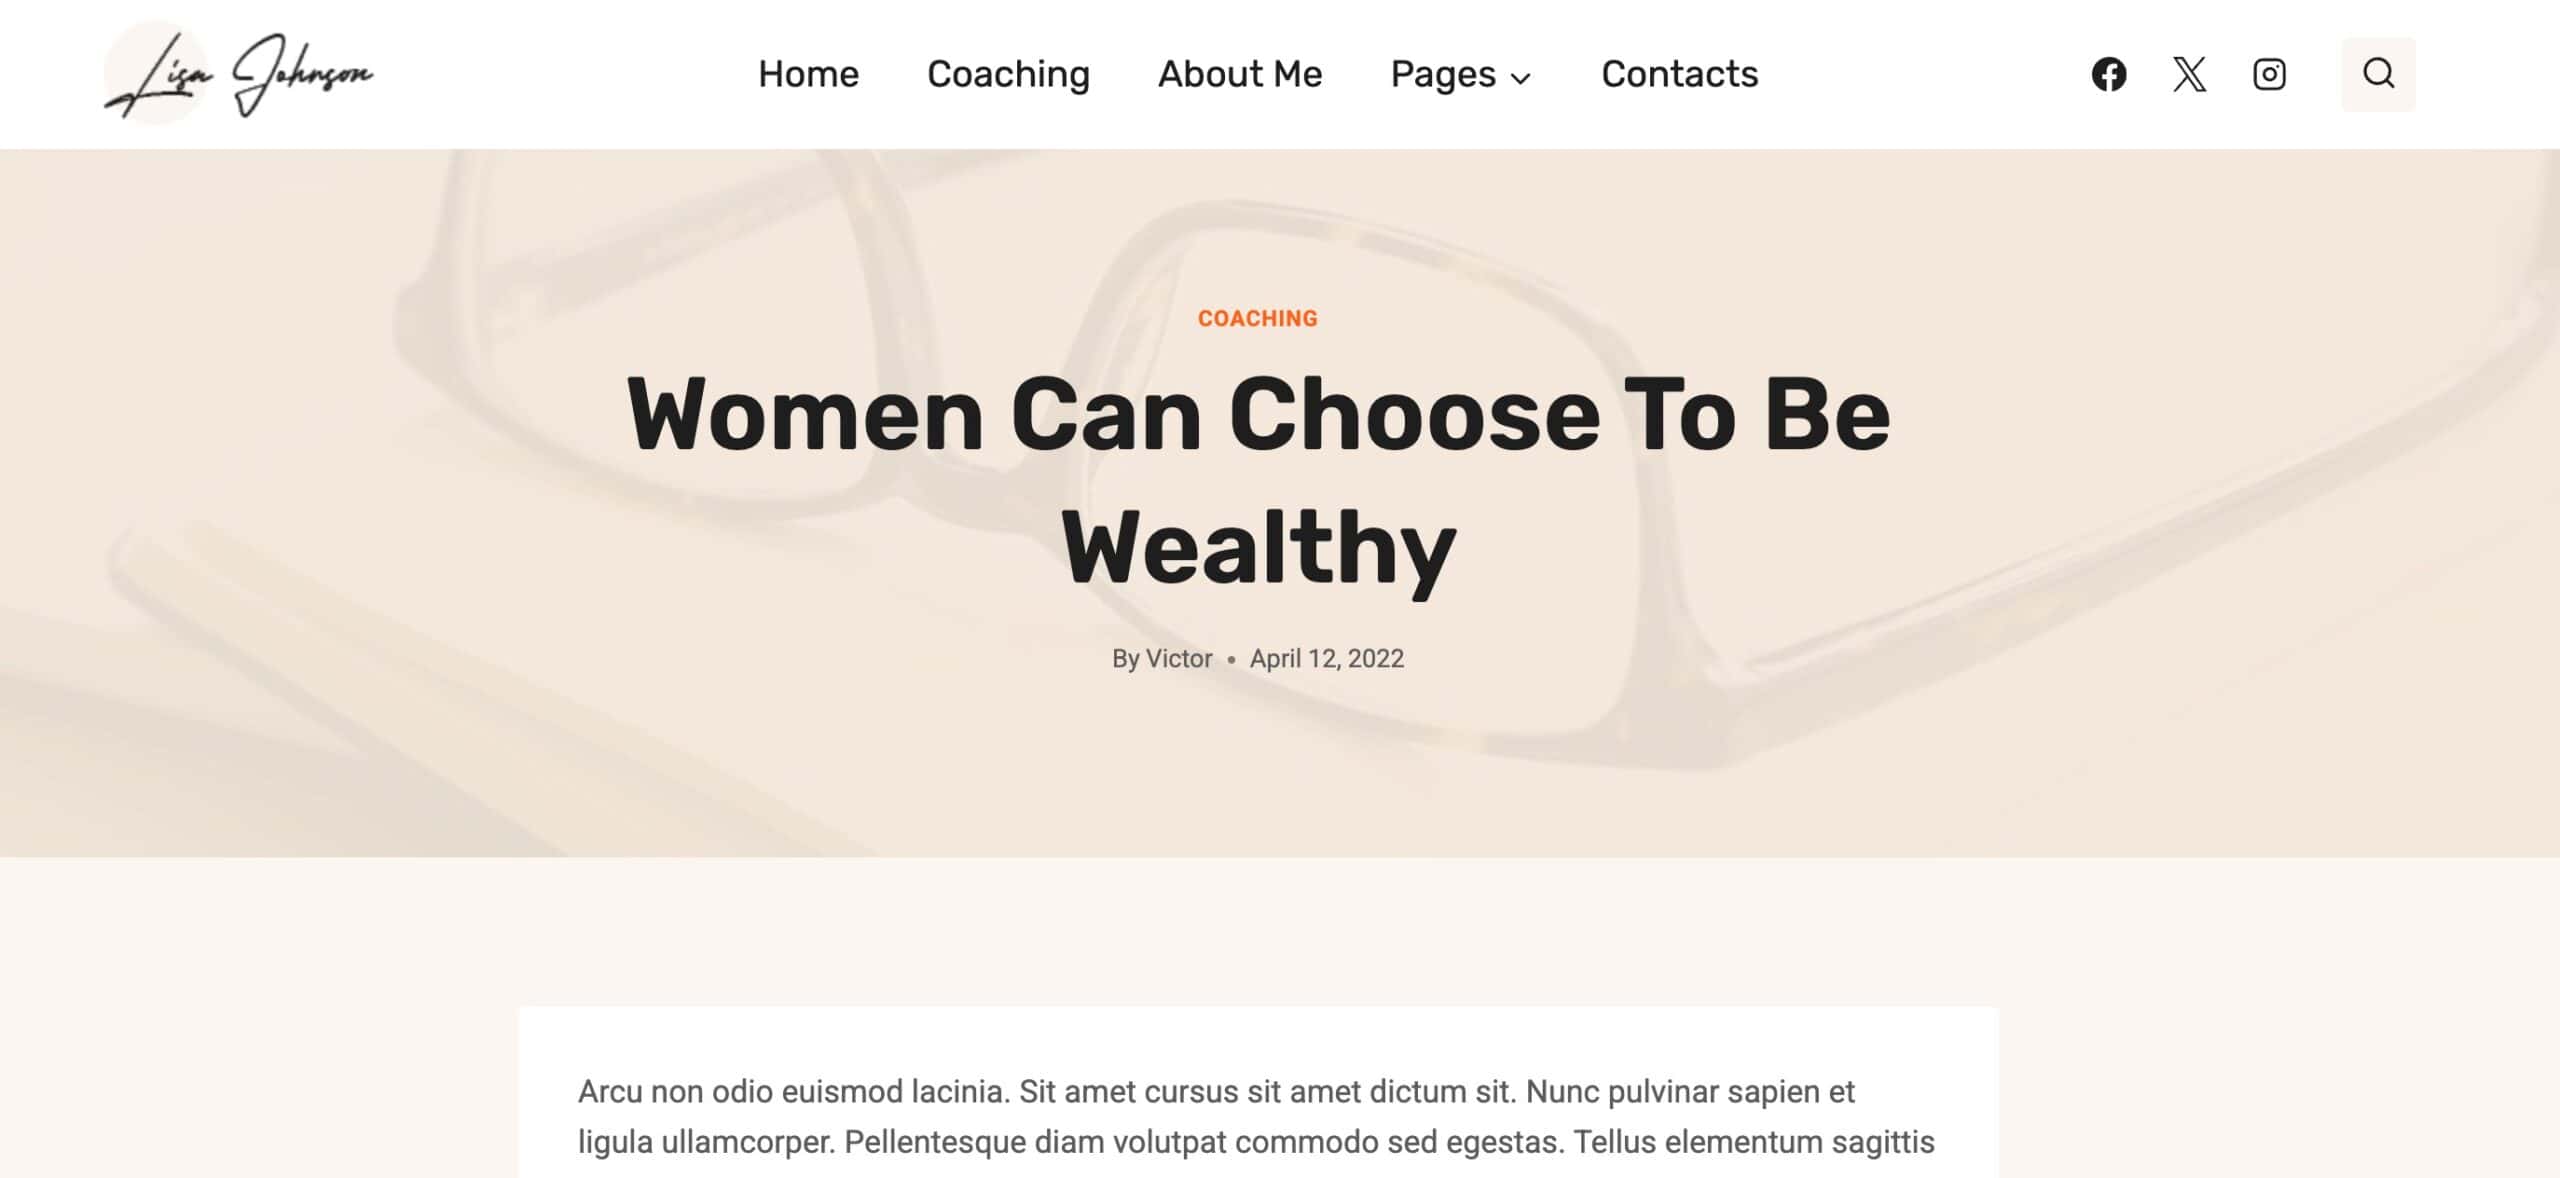
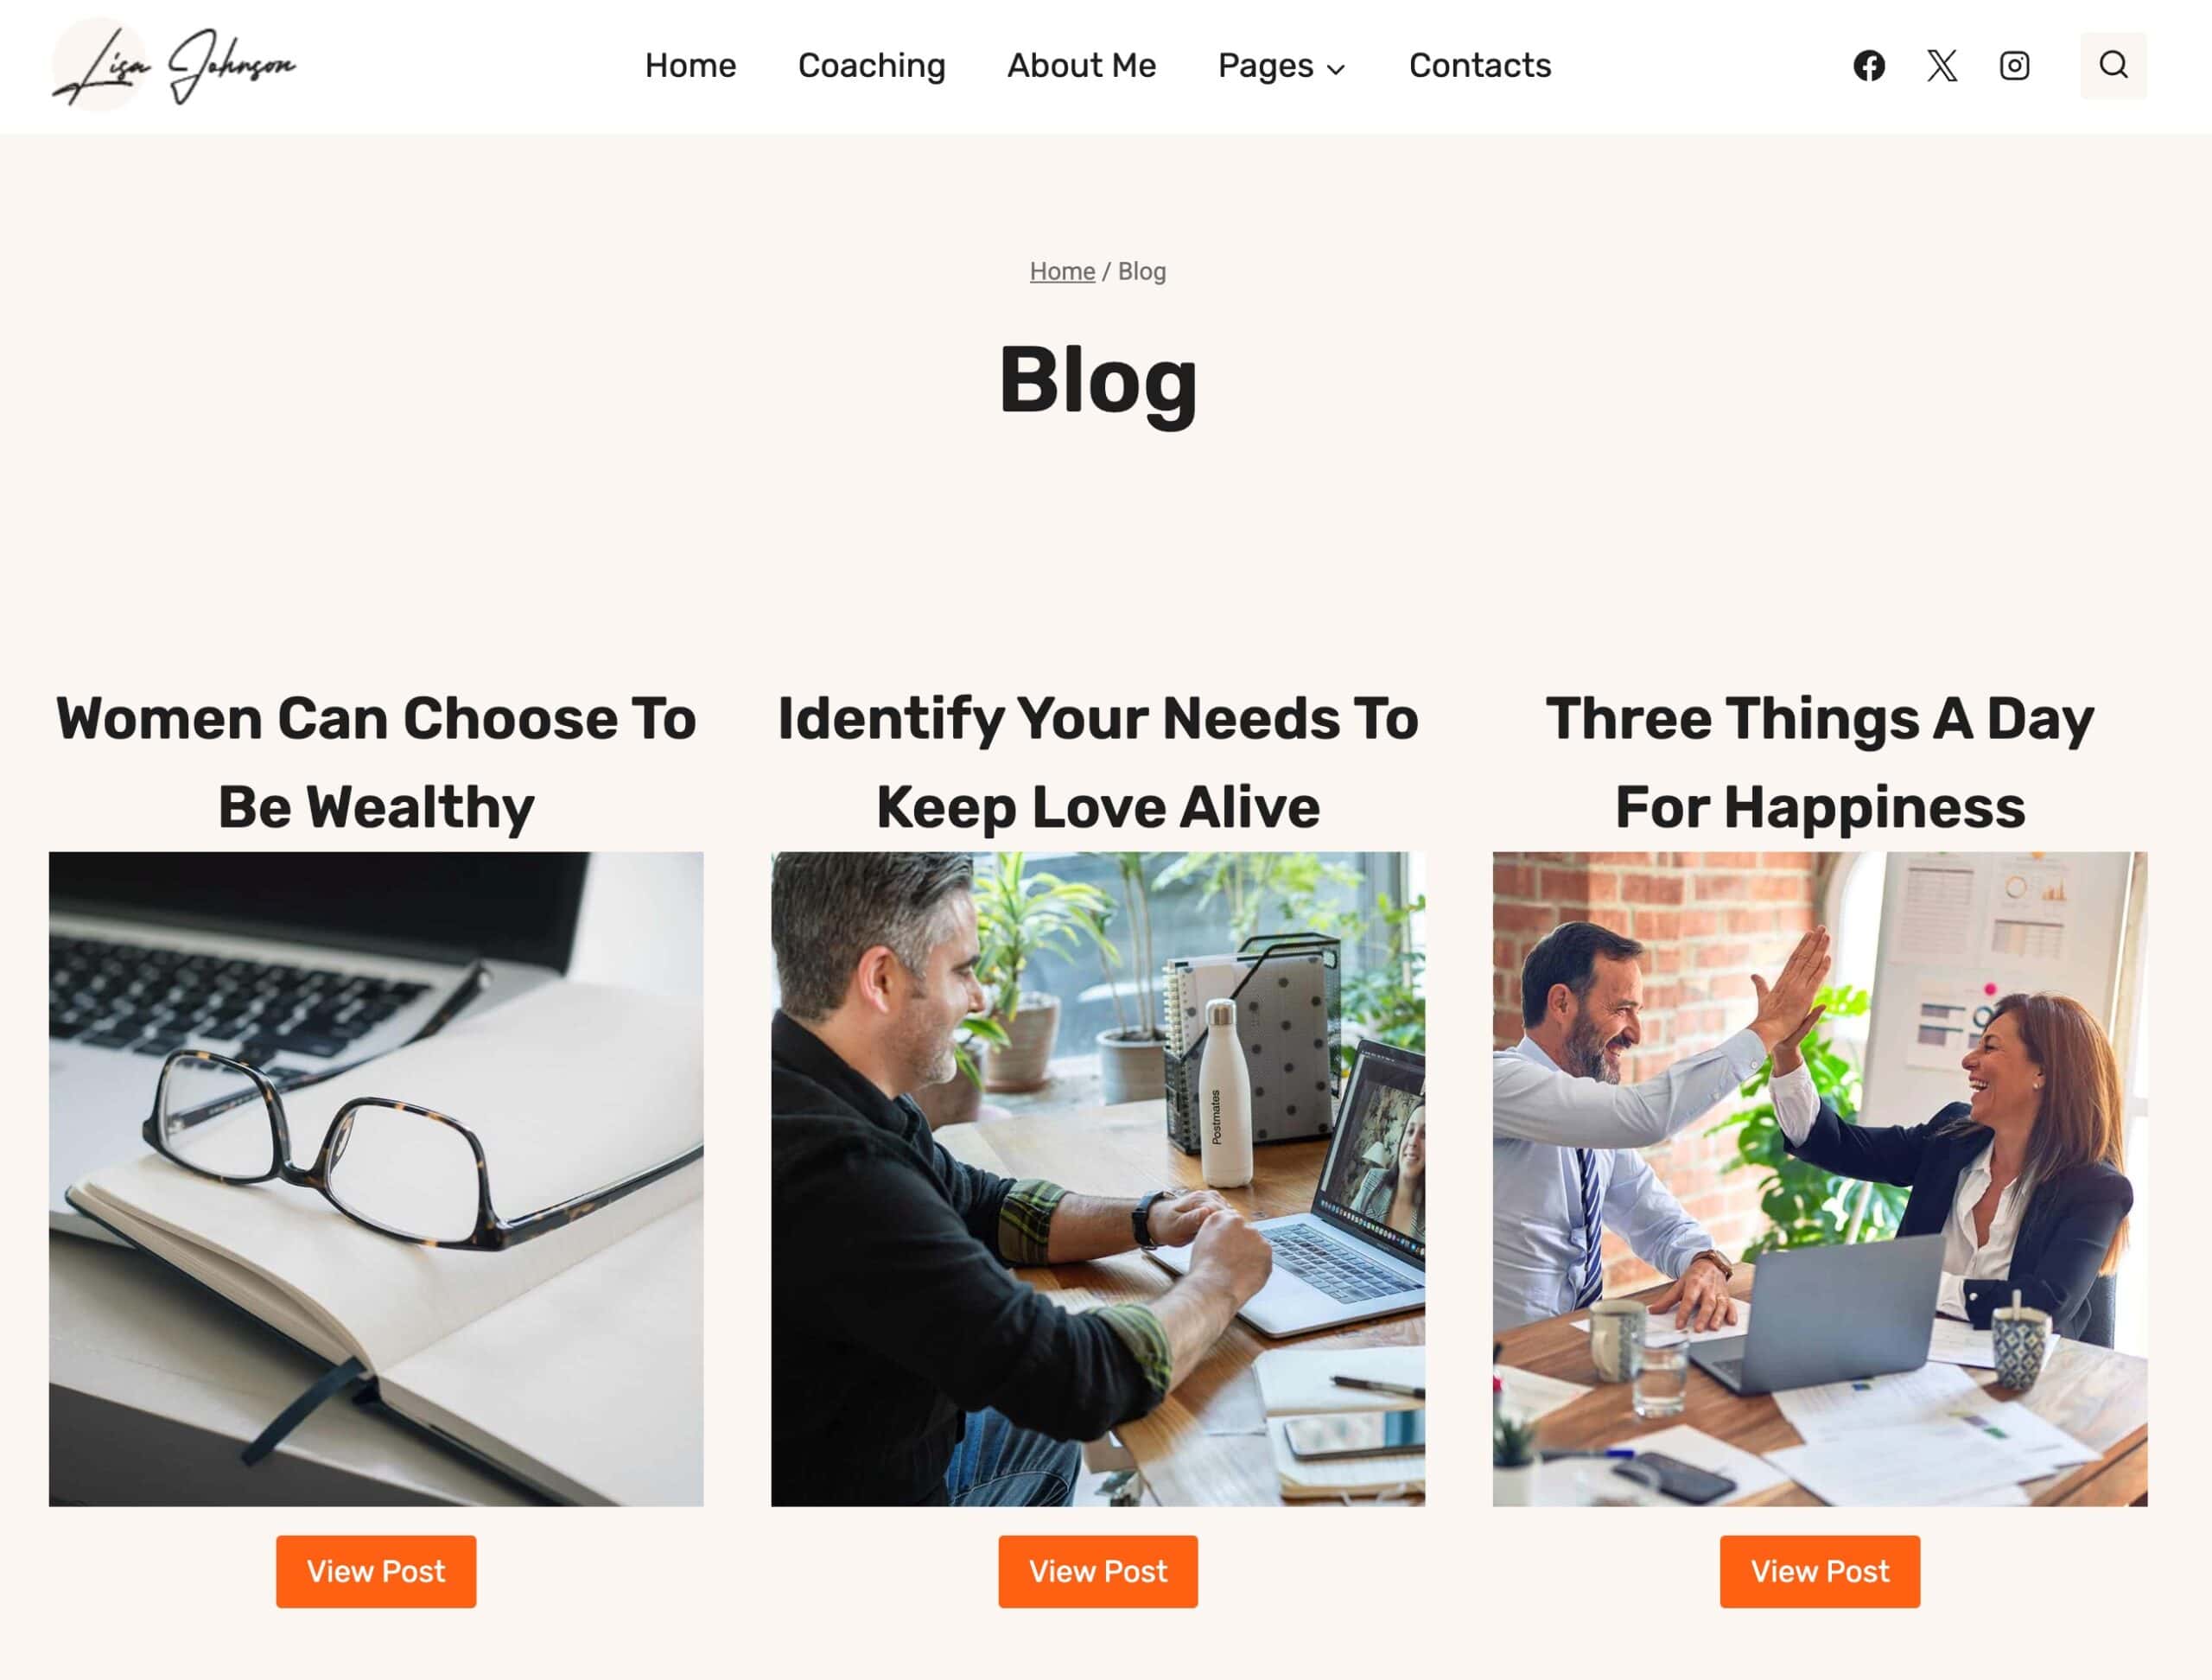
For example, imagine your site uses a Kadence Theme sidebar that appears on all single blog posts by default.

Now, let’s say you’ve created a custom sidebar element and assigned it specifically to a post titled Women Can Choose to be Wealthy.
When you visit that post, you’ll see that the custom sidebar replaces the default one, while all your other posts continue to display the standard sidebar as usual.
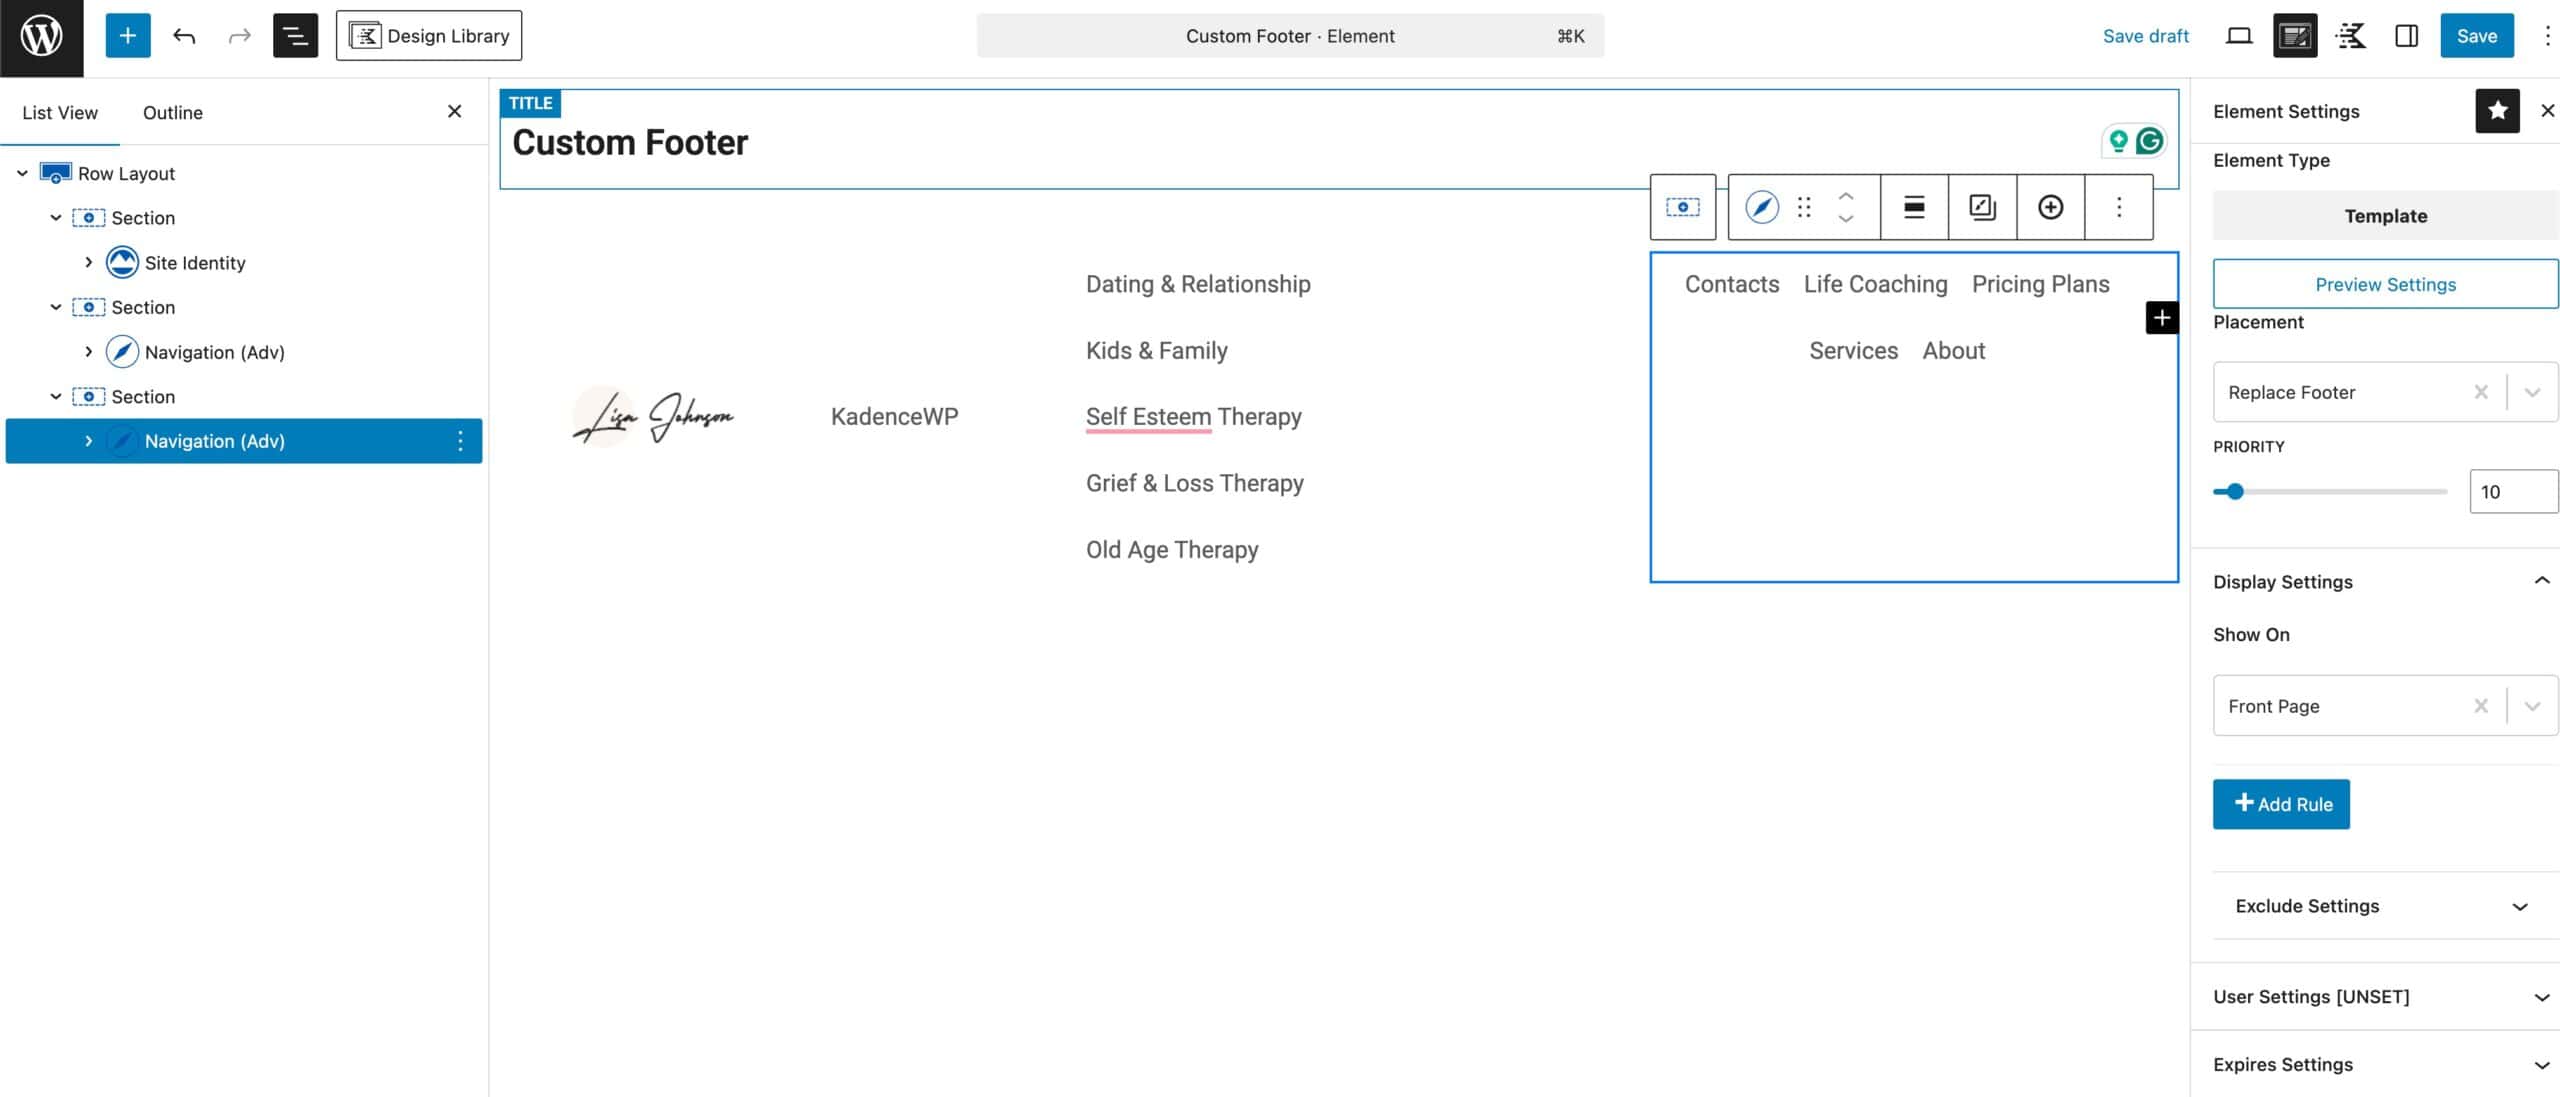
Replace Footer
The Replace Footer placement allows you to replace the website footer across your website. This setting works similarly to the Replace Header placement, but for the footer instead.
When replacing the footer, it is recommended to use blocks like the following:
- Row Layout Block: When using a Row Layout block, you can use the Advanced Block Settings -> Structure Settings to set the HTML tag as a <footer>.
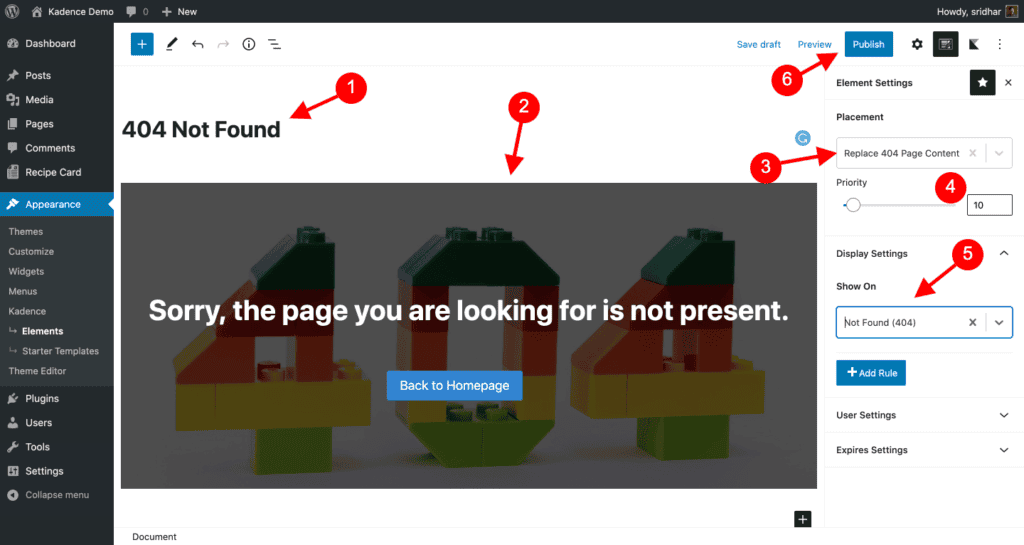
Replace 404 Page Content
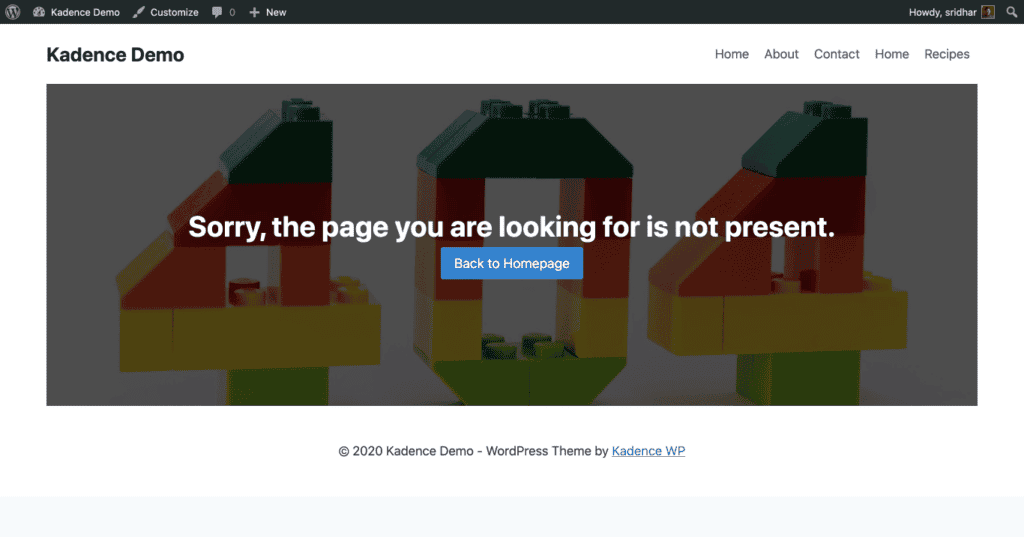
The last placement option is called Replace 404 Page Content. This placement allows you to take complete control over 404 pages on your website.
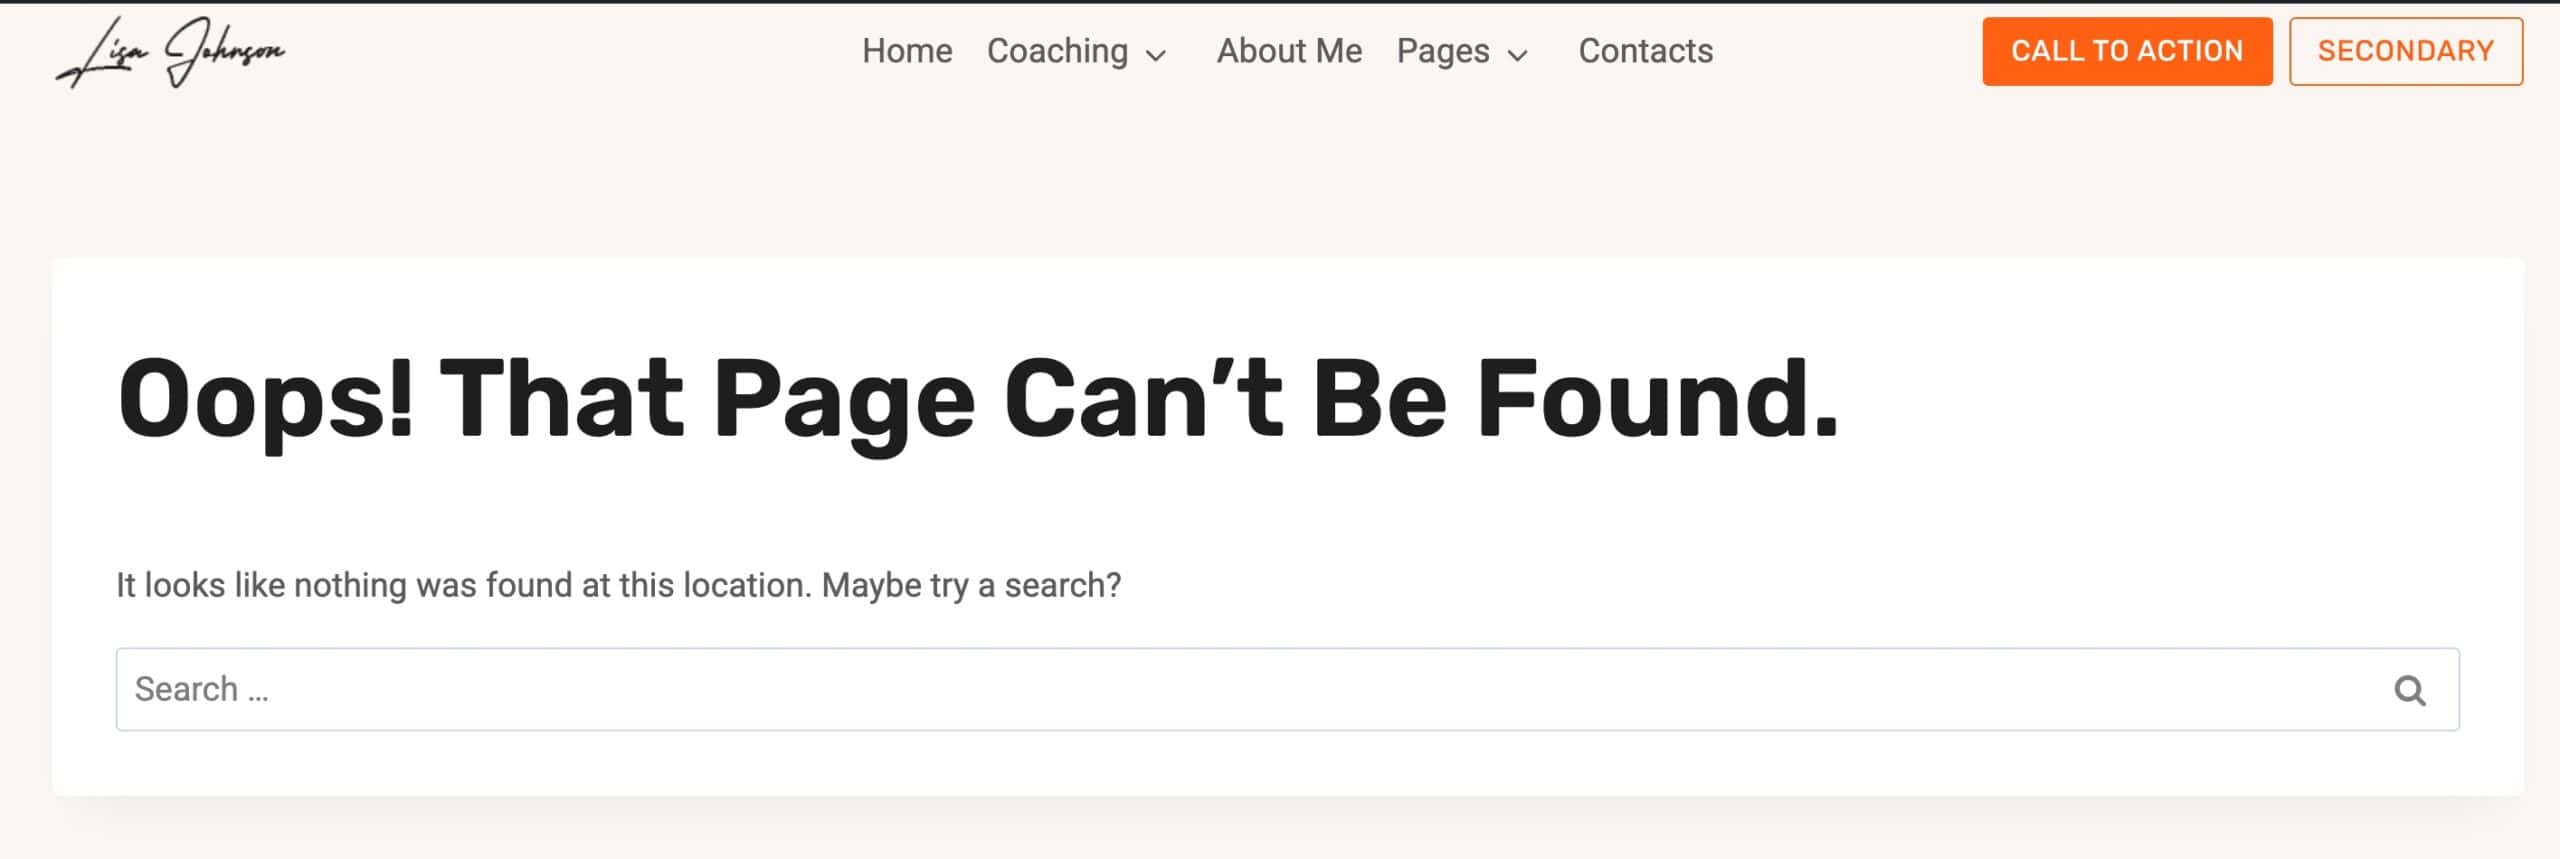
What is a 404 page?
Whenever a page doesn’t exist, you may notice a page that indicates the page is non-existent. The default 404 page often says, Oops! That page can’t be found.
When replacing the 404 page, you should ensure you set the Display Settings to show on Not Found (404) pages.
You can test the 404 page by going to a page that doesn’t exist. For example, https://yoursite.com/notfound.
Learn more here.
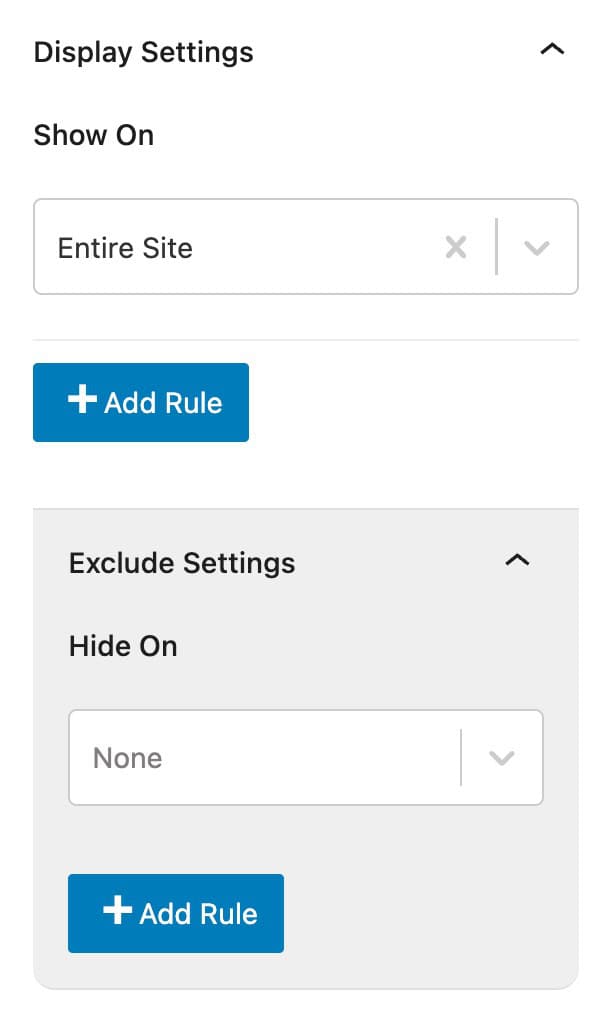
Display Settings
Use the Display Settings to determine where the element will take effect. Use the Add Rule button to include additional options.
- Available options: Entire Site, Front Page, Blog Page, Search Results, Not Found (404), All Singular, All Archives, Author Archives, Date Archives, Paged, Single Post, Category Archives, Tag Archives, Single Pages, Single Products, Brand Archive, Product Category Archives, Product Tag Archives, Product Brand Archives (Shop Kit), Products Archives, and Products Search.
Use the Exclude settings to add an exclusion. For example, if you wanted to show an element on all pages of a website, except one, you can use the exclude feature to prevent the element from showing on that specific page.
User Settings
Determine which user role(s) will be able to see the element in effect.
- Options include: All Users (Default), Logged Out Users, Logged In Users, or based on the available current website roles.
- Use the Add Rule button to add more visibility options.
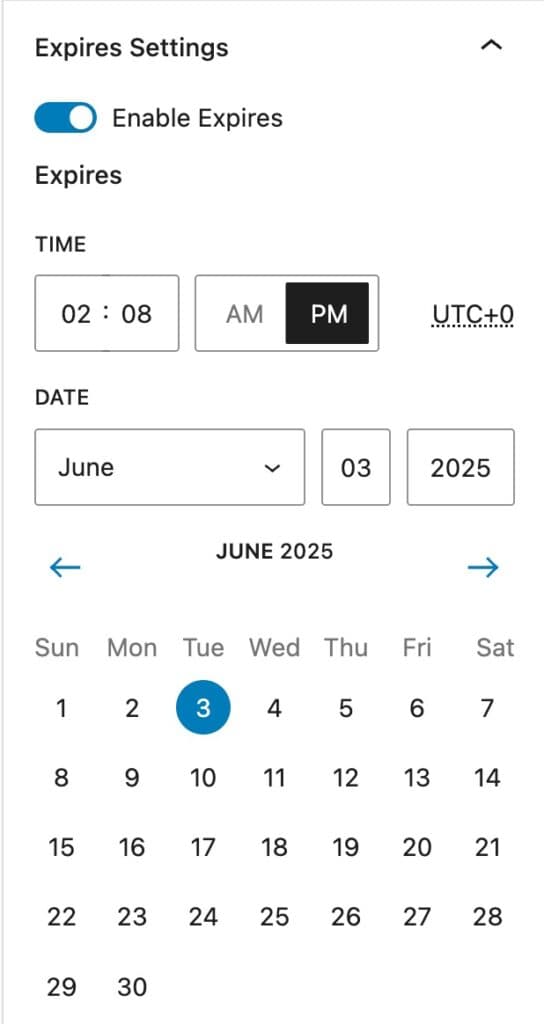
Expires Settings
Enable this option to add an expiration to the element. Once the expiration is met, the element will no longer take effect.